|
|
PBP Commentary |
Coming up we have a lightweight MMA rules bout between Saint Trigga (ranked 0 p4p, 0 weight class) and Aaron Brown (ranked 0 p4p, 0 weight class). Buckle up people - heeeeeeeeeere we go!
 |
|
 |
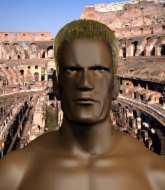
| 182 cm
21
165 lbs
0 - 0 - 0 |
|
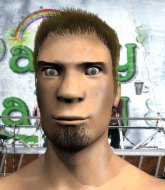
178 cm
19
161 lbs
3 - 4 - 0 |
BJJ Blue Belt
Counter fighter
Good chin |
|
BJJ Blue Belt
Basic striking
Determined |
|
| |
|
Ladies and gentlemen. This fight is 3 rounds, in the lightweight division.
Introducing the fighter to my left, fighting out of the red corner.
With a record of
0 - 0 - 0, fighting out of Amsterdam, Saint Trigga!
And introducing the fighter to my right, fighting out of the blue corner.
With a record of
3 - 4 - 0, fighting out of Amsterdam, Aaron Brown!
The judges for this bout are Paul Aken, Aafke Stam and Saam Ante.

The bell rings for round one and we are underway!

Trigga changes levels and drives through with a really nice takedown into side control. Brown looks really pissed at himself for not defending that better.
Trigga creates a bit of distance and throws down some hard shots.
Trigga remains in side control and seems content to stay there. It's a versatile position from which he can work both strikes and submissions, whilst maintaining that control, so maybe he'll sit here for a while.
Brown is looking to regain half guard here but Trigga keeps moving and retains side control.
Trigga is moving around in side control but his primary objective seems to be to maintain the position.
Brown striking from the bottom but nothing landed.
Trigga is chipping away with strikes.
We've had a slow start to the round here - hopefully the action picks up.
Trigga is chipping away with strikes.
Brown is trying to strike from the bottom but Trigga has passed into full mount.
Brown throwing hammer fists to the chest of Trigga. What's that going to do exactly?
Brown is trying to escape but when you're mounted that's not too easy.

That's one minute gone in the round.
Brown can't escape the position.
Trigga takes a little breather and maintains the position. The referee will be looking for him to stay active from such a dominant position though.
Trigga landing shots from mount.

Trigga has control of Brown's right arm, working for a kimura. It's a bit of a token attempt though and Brown regains control of the situation pretty easily.
Brown is flailing around like a fish out of water, trying to land strikes.
Trigga blocks Brown's feeble attempts to strike from the bottom.
The ref warns both fighters not to hold the cage as they work up against the meshing.
Trigga controlling from the full mount.

That's two minutes gone in the round.
The fighters are starting to perspire pretty heavily.
Trigga blocks Brown's feeble attempts to strike from the bottom.
You get the feeling that Brown really doesn't like being in this position too much.
The fighters are pressed up against the cage, both looking to find a bit of space to work.
Trigga content just to control the position here.
Trigga tries to control but Brown wriggling away.
Brown is flailing around like a fish out of water, trying to land strikes.
Brown is flailing around like a fish out of water, trying to land strikes.
Trigga controlling the pace for now.
Brown is working to get back to half guard.
Brown punching to the body and holding on for dear life.

That's three minutes gone in the round.
Brown throwing hammer fists to the chest of Trigga. What's that going to do exactly?
Trigga controlling the pace for now.
Brown has the superior BJJ but he's also working some ground strikes into his gameplan.
Brown throwing punches from his back but nothing is landing.
Brown tries to get back to half guard but can't.
Brown is flailing around like a fish out of water, trying to land strikes.
Brown is not a happy chappy
he wants out of there.
Trigga scores with a couple of good head shots there.
Trigga controlling the position easily from mount.
Brown throwing punches from his back but nothing is landing.

That's four minutes gone in the round.
Trigga trying to control but he's not successful this time.
Brown flailing away with punches but nothing is landing.
Brown tries to buck Trigga off but he can't manage it.
Brown tries to get back to half guard but can't.
Trigga is in the full mount, landing strikes.
Trigga trying to control but he's not successful this time.
Brown bucks up and manages to get a nice reversal! He's in guard on the top - nicely done!
Brown with a flurry of punches that miss.
The crowd thankful this round is nearly over.

The fighters are working up against the cage. Trigga manages to wriggle his way back to his feet, so the fighters are now clinched against the cage.
Wooooo! Give it up for these two warriors! They are putting on a show!
A battle for position here, against the cage.

Trigga breaks the clinch.
And thats the end of the round the fighters go back to their corners.
Saint Trigga dominated that round.
The referee calls time. The cornermen exit stage left and we're back to business.

No luck for Brown with that takedown attempt.
Saint Trigga is looking to throw some combinations by the looks of things.
Trigga keeps the fight standing with a nice sprawl.
Brown has a takedown stuffed.
Saint Trigga has stuffed three takedown attempts in the round now. That's going to take a lot out of Aaron Brown.
Trigga displays good takedown defense there as he swats away a double leg from Brown.
Brown avoids the head kick by Trigga.
No joy there for Trigga, who threw a few shots but didn't land.
Trigga is really dominating this fight. Is there anything that Brown can do to turn this around?
Brown tries to drive through with a takedown attempt but Trigga defends well and Brown ends up having to push Trigga into the cage where they will battle it out in the clinch.
A telegraphed takedown attempt from Brown is defended easily by Trigga.
Trigga is looking to counter punch.
We've had a slow start to the round here - hopefully the action picks up.
Trigga is looking to clinch but Brown is avoiding it.
Brown shoots in looking for a takedown but Trigga manages to keep the fight standing, pushing Brown's face into the canvas for good measure before circling away.
Trigga appears to be looking for a counter punch to the body.
Brown slips a jab and a cross from Trigga.
That's one minute gone in the round.
Brown is trying hard to land a takedown here. Trigga sprawls well and keeps this one on the feet.
Brown misses with a takedown
and Trigga counters with a quick right hand to the jaw.

Trigga closes the distance and clinches.
Trigga managing to block the knees to the body from Brown.
Knees in the clinch landing for Brown.
Trigga avoiding damage as Brown throws knees to the body.
Trigga managing to block the knees to the body from Brown.
Trigga slows down the pace here.
Brown tries to land a knee to the body but he is off balance and Trigga avoids it.
Brown using the Thai clinch to land knees to the body.
Brown tries to land a knee to the body but he is off balance and Trigga avoids it.
Trigga is working Brown over against the cage.
Trigga has moved round to his opponent's back and is looking for a suplex! Oh snap! He's tossed Brown clear over his head and slammed him to the mat!
That's two minutes gone in the round.
We've seen a great period of action over the last minute or so - credit to both fighters for going all out!
Brown is trying to stand back up.
Trigga lands strikes to the head.
Brown manages to reverse the position and now he's in Trigga's guard. Nice work there by Brown.
Brown working some strikes from top position.
Trigga avoiding any damage from the ground and pound.
Brown with a flurry of punches that miss.
Brown throwing strikes from guard but Trigga blocks nicely.
Brown working some strikes from top position.
That's three minutes gone in the round.
Trigga looking for submissions from the bottom here. Moving his hips around, possibly looking for an armbar.
Brown works over Trigga with some ground and pound from guard.
Brown throws a big right hand that misses.
Brown content to strike from guard, landing some decent shots.
Brown lands a couple of elbows.
A big thud reverberates around the arena there as Brown accidentally thumps the mat. Hopefully he's not broken his hand.
Brown landing with the ground and pound.
Trigga wants to stand but Brown is controlling the position.
Saint Trigga overall seems to be getting the better of the ground position in the fight so far.
Brown postures up to throw the ground and pound strikes but they don't connect.
That's four minutes gone in the round.
Trigga seems keen to control Brown's posture.
Brown landing some decent shots from guard.
Brown in full guard, throwing the ground and pound. No damage this time.
Trigga avoiding any damage from the ground and pound.
Hammerfist, elbow! yells Brown's corner. There ya go! There ya go!
Brown with a flurry of punches that miss.
Brown throws a big elbow that misses.
Trigga trying to keep a closed guard but Brown is proving a slippery customer.
Both fighters are absolutely exhausted here.
Brown with a couple of shots to the head there. Not particularly brutal.
Trigga looking for a sweep. Not yet Trigga, not yet.
And thats the end of the round the fighters go back to their corners.
That was a close second round but I would say that Saint Trigga will probably get the nod.
Well, the break between rounds is over. Let's get back to the scrappin! This is the final round!

Brown shoots in for a double leg but Trigga sprawls well. That's going to sap some energy.

Brown shoots in looking for a single leg takedown. Trigga is trying to defend but Brown finishes it well and ends up in half guard. Let's see if he can advance position further.
Trigga is trying is best to control the position here.
Trigga taking some punishment here, with Brown in his half guard.
Brown thumps the canvas. Not on purpose obviously - he just missed Trigga's head.
Trigga is looking for a sweep. Brown is wise to his cunning plan and keeps the top position.
Trigga is looking to escape.
Brown lands strikes from half guard.
We've had a slow start to the round here - hopefully the action picks up.
Brown landing with strikes to the body and head, softening up his opponent.
Ground and pound from Brown.
Trigga is controlling Brown's trapped leg to prevent Brown from advancing to side control.
Trigga is looking to escape.
That's one minute gone in the round.
Trigga avoiding damage under a succession of punches from Brown.
Brown scoring with strikes to the body and head.
Brown throwing shots but they're hitting the canvas more than the man.
Trigga looks like he's trying to stand up.
Brown thows a huge punch but Trigga dodges it nicely.
Both fighters are breathing heavily.
Trigga keeping his head moving to avoid the ground and pound.
Trigga regains full guard, whilst avoiding punches from Brown.
Brown is sitting in guard, working some ground and pound.

Trigga is rocked!
Brown postures up and scores with a shot to the body and a follow up elbow to the head.
Oh Trigga is still in real trouble! Will he be able to recover?!!
Trigga is working an open guard here, looking to improve his position. No doubt that will leave him open to counters but at least he's being more offensive.
Brown postures up from his opponent's guard, before exploding into some vicious ground and pound! Trigga covers up, he's hurt! Brown keeps throwing the strikes, glancing at the referee... Will he stop it?? One more big shot from Brown and the ref steps in to end the fight! Brown can't hide his delight as he celebrates with his corner.
Ladies and gentlemen, after 2:57 of round 3, we have a winner by way of TKO (Strikes). Aaron Brown!
|
|
|
|
|
|
|
|
|
|
|
|
|
|
|
|
|
|
|
|
|
|
|
| S |
C
A |
G |
S |
C
B |
G |
|
S |
C |
G |
|
energy
A | B |
|
hype
A | B |
|
pop
A | B |
|
mgr
A | B |
|
FIGHT
RATING
47% |
|
|
|
|
|
|
