|
|
PBP Commentary |
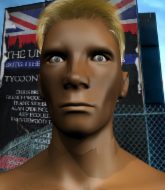
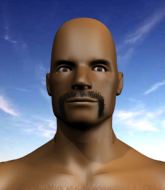
Coming up we have a lightweight MMA rules bout between Scot Grimes (ranked 0 p4p, 0 weight class) and Radama II (ranked 0 p4p, 0 weight class). I don't know about you partner, but I'm pumped for this one!
 |
|
 |
| 166 cm
18
161 lbs
2 - 0 - 0 |
|
170 cm
18
164 lbs
0 - 0 - 0 |
BJJ Blue Belt
Counter fighter
Cuts easily |
|
BJJ Blue Belt
Basic striking
Solid chin |
|
| |
|
Ladies and gentlemen. This fight is 3 rounds, in the lightweight division.
Introducing the fighter to my left, fighting out of the red corner.
With a record of
2 - 0 - 0, fighting out of London, Scot Grimes!
And introducing the fighter to my right, fighting out of the blue corner.
With a record of
0 - 0 - 0, fighting out of London, Radama II!
The judges for this bout are James Glass, William Gold and Sam Margolis.

The bell rings for round one and we are underway!
A nice combination there by II.
Grimes changes levels and looks for a double leg takedown. II tries to avoid it but Grimes manages to keep hold of a leg and drag II to the ground. II escapes though and pops straight back up to his feet.
II tries a head kick but it misses.
II throws out a leg kick but Grimes moves out of range and II only half commits.
Grimes slips a jab and a cross from II.

II gets in close and instigates a clinch.
Grimes lands an elbow that stopped II in his tracks for a moment.
II drops to a knee looking for a takedown but Grimes gets the underhooks and prevents it.
II looking for a takedown.
We've had a slow start to the round here - hopefully the action picks up.
Grimes has II pressed against the cage.
II is trying to drag Grimes to the mat but Grimes just about manages to keep his footing. He used the cage to his advantage there.
Scot Grimes has stuffed three takedown attempts in the round now. That's going to take a lot out of Radama II.
II takes an elbow to the forehead.

That's one minute gone in the round.
Grimes looking to slow down the pace here.
II prevents a takedown attempt there.
II tries for a takedown but Grimes manages to get underhooks.
Grimes tries to land knees in the clinch but II avoids the damage to the body.
II jumps guard but his hands slip and he falls flat on his back. Well, he's made himself look a right mug there, as Grimes walks away with a smile on his face. II gets slowly back to his feet and shakes his head.
Grimes misses with a takedown attempt - II sprawls well and throws a nice strike on the way out which just misses.
Horrible takedown attempt by Grimes or perhaps it was just good defense by II, which made it look bad.
The fight moves into the clinch position.

That's two minutes gone in the round.
II is trying to stall.
II is trying to pull guard but Grimes has him pressed against the cage.
II prevents a body shot from Grimes.

II turns his hips and lands a very nice judo throw into side control!
II tries to move into full mount but can't pass Grimes's legs.

II goes for an armbar here - this could be all over! But no, Grimes has escaped beautifully and is now on top in side control! Oh, that's unlucky for II but great work by Grimes.
II looks winded!
The crowd are loving this. Great action here.
Grimes wants to control but II is keeping him busy.
II is trying to improve his position.

That's three minutes gone in the round.
You can see the frustration on II's face, being in this tough position on the bottom.

Grimes decides to stand back up.
Grimes fakes high and shoots in for a takedown but II avoids it really well and circles away.

II gets tackled into the cage by Grimes. Grimes maintains the clinch.

That's four minutes gone in the round.
Neither fighter has done anything of merit for a good minute or two here and the crowd are not happy about it.

Grimes escapes the clinch and we're back to striking.
Grimes shoots in for a takedown but II shows good takedown defense there and keeps this one on the feet.
II connects with a crisp jab.
II lands a jab-cross combination.
II moves in looking to clinch but Grimes pushes him off.
II feints a jab promting Grimes to slip. II then demonstrates his capabilities by jabbing again. Grimes slips again and ducks right into an uppercut.
Grimes fails to land the takedown.
II moves into range and throws a combination. A nice jab followed by a hook to the body.
The fight stays on the outside here - Grimes looks like he's thinking about clinching though.
And thats the end of the round the fighters go back to their corners.
Radama II dominated that round.
That's the end of the interval. I'm sure that seemed a lot quicker than a minute for our two fighters! Back to the action.

Grimes moves into the clinch.
II has a body lock and is looking for a takedown. Grimes is bouncing around trying to prevent the takedown and somehow he has indeed managed to stay on his feet.
Grimes controlling the action here for a moment.
II tries for a takedown. No joy.

Grimes decides to pull guard.

Grimes is active off his back here, looking for submissions.
We've had a slow start to the round here - hopefully the action picks up.
II wants to stand but Grimes has a closed guard, so he can't escape.
Grimes looking to control.
That's one minute gone in the round.
II showing good wrestling skills to control the position.
II drops back, looking for a kneebar! Grimes looks panicked! The fighters roll across the mat, one looking to finish, one looking to escape. Grimes looks to have wriggled free... Yes, he's got his leg free and he's dived into side control! Good work there from Grimes!

Grimes is looking to take a break and control but II is keeping him honest, looking to work from the bottom.
II is looking to get back to his feet here but Grimes is keeping cool and he's managed to take II's back.
That's two minutes gone in the round.
II just trying to survive but Grimes is wriggling into a better position, looking to finish.
Grimes is riding his opponent, not letting II buck him off.
II is trying to break free.
Grimes just keeping the dominant position. He can't wait too long though, otherwise the referee will stand them back up.
That's three minutes gone in the round.
II is defending well here and trying to improve his position.
Grimes really has the hooks in deep now - there seems like no escape for II.
II tries to escape the position.
Grimes trying to control momentarily.
That's four minutes gone in the round.
A lull in the action here being met with boos from the crowd.
II tries to escape the position - he's now mounted. Is that better or worse? Hard to tell!
Grimes looking to control and managing it successfully.
II really trying hard to get back to half guard here.
II is squirming around, avoiding Grimes's attempts to control the action.
Boooooooooooooooooooo!!! God, this has been a terrible round. Come on you two, sort yourselves out!
Grimes is going to have to think about doing something other than just controlling because II is managing to avoid having the position dictated to him.
And thats the end of the round the fighters go back to their corners.
Scot Grimes dominated that second round.
The fighters' corners scream their final instructions, as the referee calls time. Here we go, back to the action! This is the final round!

II scores with a sloppy right hand. Grimes should have avoided that one.
Grimes swats away the attempt to clinch by II.
II has managed to clinch.
Grimes pulls guard effortlessly.
II is holding a leg here, probably looking for an ankle lock - he drops back and goes for it! Grimes is in trouble! Is it all over??? No! Grimes has escaped and now he's on top!
The fighters are pressed up against the cage, both looking to find a bit of space to work.
We've had a slow start to the round here - hopefully the action picks up.
Grimes slips nicely into half guard.
That's one minute gone in the round.
Grimes prevents II from improving his position.
We get told so often about how wrestlers don't like to be on their backs. Let's see if II can do anything to dispel that myth.
II actively working from the bottom here.
II looking to force a kimura from the bottom here. He's concentrating on that move too much though and Grimes pushes past his half guard into mount!
Grimes connects with a couple of good shots from mount.
II can't escape the position.
II takes a big intake of breath there - he's definitely tired.
That's two minutes gone in the round.
Grimes trying to control but he's not successful this time.
Grimes avoids the attempt from II to control.
Grimes putting on the heat here with some good ground and pound!
II is looking to improve his position but Grimes isn't that keen on the idea.
Grimes avoids the attempt from II to control.
Grimes tucks in and makes sure he doesn't lose the dominant position.
That's three minutes gone in the round.
Grimes lands with some vicious ground and pound - can II hang on?
II wants to hold on but Grimes pushes him away.
II keeping his composure momentarily, calmly looking to get back to half guard.
Grimes sitting in mount, just looking to control for the moment.
The referee warns II that he has to improve his position here as he takes two more clean shots to the head.
That's four minutes gone in the round.
Grimes content just to control the position here.
II tries to reverse the position but Grimes maintains control.
Grimes takes a little breather and maintains the position. The referee will be looking for him to stay active from such a dominant position though.
Grimes trying to control but II is having none of it.
II wants to hold on but Grimes pushes him away.
Boooooooooooooooooooo!!! God, this has been a terrible round. Come on you two, sort yourselves out!
Grimes prevents II from getting the reversal.
And that's the end of the fight!
Scot Grimes showed his dominance in that final round.
I think Grimes has won this one but let's see what the judges have to say. Over to the ring announcer for the scorecards.
Ladies and gentlemen, after 3 rounds of action, we go to the scorecards for a decision.
Judge James Glass scores the fight 29:28
Judge William Gold scores the fight 29:28
Judge Sam Margolis scores the fight 29:28
In favor of your winner, by unanimous decision... Scot Grimes!
|
|
|
|
|
|
|
|
|
|
|
|
|
|
|
|
|
|
|
|
|
|
|
| S |
C
A |
G |
S |
C
B |
G |
|
S |
C |
G |
|
energy
A | B |
|
hype
A | B |
|
pop
A | B |
|
mgr
A | B |
|
FIGHT
RATING
29% |
|
|
|
|
|
|
