|
|
PBP Commentary |
Coming up we have a welterweight MMA rules bout between Alastair Stirling (ranked 0 p4p, 0 weight class) and Struggling Desperately (ranked 0 p4p, 0 weight class). Chooooooooon! I think Stirling might be my favorite fighter, now he's come out to Endgestalt - Sturmkrieger. Desperately is bouncing up and down as he enters the arena, backed by Legend of a Banished Man. These two fighters really are very evenly matched on the feet - it will be fascinating to see who can assert themselves in that aspect of the fight.
 |
|
 |
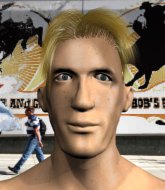
| 187 cm
22
175 lbs
5 - 2 - 0 |
|
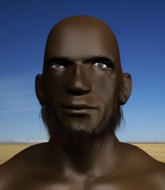
178 cm
26
185 lbs
12 - 5 - 0 |
Good wrestling
Excellent boxer
Cardio machine |
|
Good wrestler
Dangerous knees
Good gas tank |
|
| |
|
Ladies and gentlemen. This fight is 3 rounds, in the welterweight division.
Introducing the fighter to my left, fighting out of the red corner.
With a record of
5 - 2 - 0, fighting out of Hilo, Alastair Stirling!
And introducing the fighter to my right, fighting out of the blue corner.
With a record of
12 - 5 - 0, fighting out of London, Struggling Desperately!
The judges for this bout are Tiny Johnson, Daniel Franklin and Robert Twigg.

The bell rings for round one and we are underway!
Stirling lands with a shot to the body.
Desperately tries to close the distance and clinch up against the cage but Stirling paws at him with a jab and circles away.
Desperately takes one on the button.
Stirling connects with a hook to the side of his opponent's head.

It looks like Struggling Desperately has been cut.
Desperately moves away from the strike by Stirling.
Stirling fakes high and swings low for a body shot but Desperately manages to avoid it.
Stirling throws an overhand right that lands on Desperately's shoulder, as Desperately tries to avoid the shot.
Stirling connects with a lovely jab that went straight through the gap between Desperately's hands.
Desperately ducks under a wild hook from Stirling.
Jab from Stirling.
Desperately connects with a single shot there.
Stirling misses with a hook.
Desperately defending well as Stirling loads up on a big left hand.
Desperately is looking for the big counter here.
The crowd are loving this. Great action here.
Desperately steps to the side to avoid the strikes from Stirling.

Desperately moves into range and clinches up with Stirling.

That's one minute gone in the round.
Stirling prevents a body shot from Desperately.
Desperately softening up his opponent with strikes, against the cage.
Desperately has a body lock and is looking for a takedown. Stirling is bouncing around trying to prevent the takedown and somehow he has indeed managed to stay on his feet.
We've been hearing reports that Stirling has been drilling takedowns in recent sessions so let's see if that has an impact on the result of this fight.
Desperately is looking for a takedown up against the cage. Stirling gets underhooks though and prevents the takedown attempt.
Desperately is pressed up against the cage. Stirling has hold of a leg and is looking to drag Desperately down to the mat. Desperately avoids the attempt though and has circled away. We're back to striking at a distance.
Desperately closes the distance but Stirling moves to the side
and Stirling counters with a shot to the ribs. That looked like it hurt.
Desperately has closed the distance and engaged Stirling in a clinch.
Stirling wants to strike at distance but he can't break free of the clinch.
Desperately missing with knees to the body.
Desperately is looking to take this one to the mat.
Alastair Stirling has stuffed three takedown attempts in the round now. That's going to take a lot out of Struggling Desperately.
Desperately throws a punch but it's blocked by Stirling.

Stirling lands a takedown into guard.
Desperately is working an open guard here, looking to improve his position. No doubt that will leave him open to counters but at least he's being more offensive.

That's two minutes gone in the round.
Stirling stays in close to Desperately's body and controls the position.
Stirling lands a nice shot whilst sitting in his opponent's guard.
Desperately looking for a sweep. Not yet Desperately, not yet.
Stirling has been looking to land a fair amount of strikes on the ground. He might be looking to soften his opponent up in order to work for a submission.
Desperately keeping full guard, as Stirling tries to pass.
Desperately wants to sweep but no luck.
Stirling sitting in guard, not really doing much.
Stirling prevents Desperately from getting back to his feet.
Stirling wants to pass the guard but Desperately is keeping the position.

That's three minutes gone in the round.
Desperately tries to land a sweep but no joy.

The referee decides to stand the fighters back up.
Stirling avoids the clinch attempt nicely.
Nice defenses there by Desperately.
Desperately tries a counter takedown but it's more of a dummy move, and he uses it to push himself away.
Alastair Stirling seems to be the more aggressive standup fighter in this bout.
The fight stays on the outside here - Desperately looks like he's thinking about clinching though.
Desperately tries to clinch but is not successful on this occasion.
Stirling scores with a nice looking left hook and follows it up with an uppercut!
Desperately gets a clinch.
A nice right hand lands inside from Stirling.
Desperately tries a knee to the head but Stirling blocks it.

Desperately breaks the clinch and we're back to striking at distance.
Stirling swings wildly with a right hand that was never going to find it's target.
Desperately misses with a wild body shot.
Stirling throwing a counter right hand but Desperately manages to avoid it.

That's four minutes gone in the round.

Desperately scores with a nice takedown into half guard. Let's see what he's got on the ground.
The crowd are loving this. Great action here.
Stirling is trying to get back to full guard.
Desperately trying to mount his opponent but Stirling defends it.
Desperately lands with a punch from half guard.
The fighters are battling for position here. Stirling manages to regain full guard. Nice work.
Desperately postures up.
And thats the end of the round the fighters go back to their corners.
Alastair Stirling dominated that round.
The cut man is working on Struggling Desperately's cut.
OK. That's time! The bell goes and we're back to the action.

Nice uppercut lands for Stirling. That snapped Desperately's head back.
Desperately ducks under a wild hook from Stirling.
And Desperately tries to counter it with a takedown but Stirling pushes his down on his head and steps out.
Desperately uses good head movement to avoid the hook from Stirling.
Desperately drops down looking to force a counter takedown but Stirling defends it well.
Stirling lands a nice shot to the body.
Stirling throws a hook to the body but it doesn't connect.
Stirling throws a two punch combo that lands nicely.
Desperately has Stirling up against the cage in a clinch.
Desperately scores with a shoulder strike.
Desperately can't get the takedown.
With the two fighters working up against the cage, Desperately just misses with a elbow thrown towards Stirling's brow.
Desperately misses with a shot to the kidneys.
Stirling working hard to break the clinch.
Desperately is looking to score with knees to the body. Maybe he'll change it up and go body then head. Stirling is defending well for now.
That's one minute gone in the round.

Stirling breaks from the clinch.
Desperately uses good footwork to avoid the strikes from Stirling.
Desperately moves into range and clinches up with Stirling.
With the fighters clinched against the cage, Desperately creates a bit of distance for himself and scores with a nice uppercut.
Desperately with the Thai clinch. He's looking to land a big knee but he's not managed it this time.
Desperately is trying to pull guard but being pressed up against the cage enables Stirling to keep the fight standing.
Desperately misses with a hook to the ribs.
Stirling will no doubt start fighting again in a minute but for now he's just having a little rest, leaning Desperately up against the cage.
Stirling working hard to break the clinch.
Stirling tries to circle away but Desperately has him pinned against the cage.
Desperately cracks Stirling with a nice body shot.
Stirling fails to land with a short punch on the inside.
That's two minutes gone in the round.
Desperately lands an elbow inside.

It looks like Alastair Stirling has been cut.
Desperately can't get the takedown.
Alastair Stirling has stuffed three takedown attempts in the round now. That's going to take a lot out of Struggling Desperately.
Kneeeeees! The crowd are calling for knees to the body. Desperately obliges.
Desperately manages to get underhooks and slows down the pace for a moment.
Desperately connects with a knee to the head.
Stirling managing to block the knees to the body from Desperately.
Desperately blocks a body shot from Stirling.
Stirling lands a nice uppercut.
We've seen a great period of action over the last minute or so - credit to both fighters for going all out!
Desperately scores with an uppercut up the middle.
Desperately looking for a takedown.
Desperately stalling against the cage.
That's three minutes gone in the round.
With the fighters clinched against the cage, Desperately creates a bit of distance for himself and scores with a nice uppercut.
A head punch blocked on the inside by Desperately.
Stirling working on landing some head shots here - that one got through nicely.
Desperately landing knees to the body.
Stirling blocks a body shot from Desperately.
Stirling has dropped down and is working for a takedown. Desperately is trying to keep an underhook but Stirling manages to get the takedown into half guard.
Desperately tries to get to full guard but Stirling has control of the leg.
Stirling seems very keen to just sit and control from half guard but Desperately does not like that idea so much and is remaining active off his back.
Stirling working some ground and pound from close in. He's looking to maintain this position and strike for a while by the looks of things... although he'll probably advance to full mount in a minute now I've said that.
Stirling prevents Desperately from improving his position.
Stirling stops Desperately from getting back to his feet.
That's four minutes gone in the round.
Desperately is looking for a sweep. Stirling is wise to his cunning plan and keeps the top position.
Desperately trying to hold on to Stirling's head to control him but Stirling postures up.
Stirling content to sit in half guard and control for a moment.
Stirling has controlled the position for a good 20 seconds, which will no doubt be starting to frustrate his opponent.
Stirling wants to lay and pray for a moment but Desperately keeps working.
And thats the end of the round the fighters go back to their corners.
That was a close second round but I would say that Alastair Stirling will probably get the nod.
Both fighters have cut men working on them during the interval.
The fighters get back to their feet, the hooter sounds and we're back to the action! This is the final round!

Stirling lands with a straight right. Desperately didn't see that one coming.
Desperately moves out of range as Stirling strikes.
Despite the aggression on Desperately's face he doesn't fully commit to the counter.
A swing and a miss from Stirling.
Stirling misses with a looping left.
Stirling tries to land with a swinging hook to the body but Desperately was well out of range. Poor timing from Stirling.
Desperately tries to close the distance and clinch up but Stirling swats him away and circles back towards the center.
A telegraphed right hand from Stirling misses the target.
Desperately is looking to clinch but Stirling is avoiding it.
We've had a slow start to the round here - hopefully the action picks up.
Stirling looks to throw the jab but Desperately is out of range.
Desperately throws out a counter right but Stirling avoids it with no problem.
Stirling throws a poor cross that misses
and Desperately counters with a right hand to the body.
Desperately staying out of range there.
Stirling misses with a right hand
and Desperately counters with a lovely shot to the body.
That's one minute gone in the round.
Stirling throws a hook but Desperately avoids it easily.
Desperately ducks under an overhand right and circles away with a smile on his face.
Desperately keeping his hands up high there, blocking the jab from Stirling.
Stirling throws a body punch but Desperately moves out of range.
Desperately doesn't fully commit to the body shot counter.
Desperately shoots in for a takedown. "Ole!" shouts Stirling as he jumps to the side.
Desperately displays good takedown defense there as he swats away a double leg from Stirling.
Alastair Stirling is winning the standup battle so far.
Stirling throws a lazy right hand but Desperately sees it coming a mile off and sidesteps it easily.
Desperately wants to clinch.
That's two minutes gone in the round.
A left lands for Stirling.
Stirling waving his hands out in front of him, looking to distract Desperately.
Stirling smiles there as he lands a nice right hand right on the button.
A big left from Stirling misses.
Desperately takes the fight into the clinch.
Stirling is defending well against a takedown attempt.
Desperately pushes off and fires off an elbow that misses, before clinching up again, against the cage.
Desperately drops to a knee looking for a takedown but Stirling gets the underhooks and prevents it.
Alastair Stirling has stuffed three takedown attempts in the round now. That's going to take a lot out of Struggling Desperately.
Stirling is stalling here.
That's three minutes gone in the round.
Stirling misses with a shot to the kidneys.
Desperately prevents Stirling from breaking the clinch.
Desperately jumps guard but Stirling stands there with Desperately around his waist. Desperately gives up and drops back to his feet. We remain in the clinch.
Stirling lands a left hand.
Alastair Stirling is fighting for a decision here - he's started to take the cautious approach.
Desperately looking for a takedown.
Struggling Desperately has stepped it up - he knows he needs a finish here!
Stirling takes a knee right on the jaw!
Desperately is looking for a takedown up against the cage. Stirling gets underhooks though and prevents the takedown attempt.
Desperately misses with a hook from the clinch.
Stirling is trying to break free.
That's four minutes gone in the round.
Desperately misses with a hook from the clinch.
Desperately is looking to control Stirling's arms but Stirling gets an underhook and turns him. Now Desperately has his back to the cage.
Desperately is looking for a takedown up against the cage. Stirling gets underhooks though and prevents the takedown attempt.
Desperately has Stirling pressed up against the cage and is working for takedown. Stirling manages to improve position though and keeps the fight standing.
Stirling has had enough of the clinch and is looking to separate.
Desperately is looking to score with knees to the body. Maybe he'll change it up and go body then head. Stirling is defending well for now.
Desperately misses the knee to the body. Nice hip positioning from Stirling.
Desperately drops down for a takedown but doesn't get it.
The crowd thankful this round is nearly over.
Desperately lands with a left to the head.
And that's the end of the fight!
Alastair Stirling showed his dominance in that final round.
Well I reckon that's a shut out for Stirling, winning every round. Will the judges agree? They are the ones who matter, even if they are often depressingly incompetent. Over to the ring announcer for the scorecards.
Ladies and gentlemen, after 3 rounds of action, we go to the scorecards for a decision.
Judge Tiny Johnson scores the fight 30:27
Judge Daniel Franklin scores the fight 30:27
Judge Robert Twigg scores the fight 30:27
In favor of your winner, by unanimous decision... Alastair Stirling!
A victorious Alastair Stirling thanked his army of followers in his post fight interview, telling people to make sure they follow him on Twitter.
Struggling Desperately was interviewed post fight and said 'I pity da foo' that thinks he can beat me more than once!'.
|
|
|
|
|
|
|
|
|
|
|
|
|
|
|
|
|
|
|
|
|
|
|
| S |
C
A |
G |
S |
C
B |
G |
|
S |
C |
G |
|
energy
A | B |
|
hype
A | B |
|
pop
A | B |
|
mgr
A | B |
|
FIGHT
RATING
42% |
|
|
|
|
|
|

