|
|
PBP Commentary |
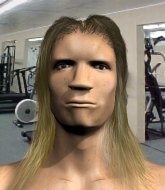
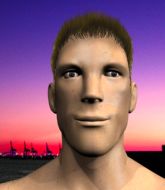
Coming up we have a middleweight MMA rules bout between Bowman Rook (ranked 0 p4p, 0 weight class) and Scott Fleming (ranked 0 p4p, 0 weight class). Fleming is bobbing his head along to his entrance song: T.N.T.. Man, I cannot wait for this one!
 |
|
 |
| 180 cm
33
190 lbs
21 - 19 - 0 |
|
172 cm
35
195 lbs
19 - 23 - 0 |
Good wrestling
Excellent boxer
Cardio machine |
|
Excellent grappler
World class MT
Powerful |
|
| |
|
Ladies and gentlemen. This fight is 5 rounds, in the middleweight division.
Introducing the fighter to my left, fighting out of the red corner.
With a record of
21 - 19 - 0, fighting out of Los Angeles, Bowman Rook!
And introducing the fighter to my right, fighting out of the blue corner.
With a record of
19 - 23 - 0, fighting out of Las Vegas, Scott Fleming!
The judges for this bout are Frank Antenori, Don Winkell and .

The bell rings for round one and we are underway!
Fleming throws a wild combination but nothing lands.
Rook takes a solid shot to the body. That one hurt him but he's trying not to show it.
Fleming steps to the side to avoid the strikes from Rook.
Fleming throws a counter combo.
Rook connects with a body shot.
Rook tries to drive through with a takedown attempt but Fleming defends well and Rook ends up having to push Fleming into the cage where they will battle it out in the clinch.
Fleming throws a counter combo.
Rook misses with the body kick
and Fleming counters with a straight right hand.
Fleming on the wrong end of an overhand right that came out of nowhere.
Rook jabbing away but nothing is landing.
Nice sprawl there from Rook as Fleming shoots in.
A counter left hand to the body from Rook misses its target.
We've had a slow start to the round here - hopefully the action picks up.
Rook throws a half hearted mid kick.
Rook looks for the body kick but Fleming saw that one coming.
Rook lands a nice leg kick that just misses Fleming's sensitive parts.
Rook lands a nice leg kick that just misses Fleming's sensitive parts.

That's one minute gone in the round.
Fleming uses good footwork to avoid the strikes from Rook.
Rook moves into range and lands a nice leg kick.
Fleming moves in looking to clinch but Rook pushes him off.
Fleming throws a body kick that misses.
A counter left hand to the body from Rook misses its target.
Rook throws a hook to the body but it doesn't connect.

Rook gets tackled into the cage by Fleming. Fleming maintains the clinch.
Fleming makes some space for himself and lands an uppercut.
We can't be sure of the tactics at this early stage but we have heard that Fleming has been working on his takedowns a lot in the buildup to the fight and we can only assume he's going to look to take this to the mat.
A right handed body shot lands from Rook.
Fleming scores with a knee to the head.
Fleming creates a bit of distance and throws an elbow that only just misses.
A short right from Rook on the inside.
A nice right hand lands inside from Fleming.
Rook throws a knee to the head but misses.
Rook using the Thai clinch to land knees to the body.
The fans in attendance giving it up for the two fighters, who have really let it all hang out in the last minute or so!
Fleming comes over the top with an elbow. That landed flush.
A right hand to the body from Fleming.

That's two minutes gone in the round.
Rook is trying to slow down the pace in the clinch, to catch his breath.
Rook avoids a wild elbow strike from Fleming.
Rook with a knee to the head.
Fleming looking to throw knees to the head but Rook is blocking nicely.
Fleming looks to throw an elbow but misses.
Fleming creates a bit of distance and throws an elbow that only just misses.
Fleming is looking to score with knees to the body. Maybe he'll change it up and go body then head. Rook is defending well for now.
Rook lands a nice elbow from the clinch.
Fleming misses with a knee to the head.
Fleming looks to throw an elbow but misses.
Rook is looking to score with knees to the body. Maybe he'll change it up and go body then head. Fleming is defending well for now.

Fleming has clasped his hands together around Rook's back... aaand, he's got a takedown into side control. Nicely done.
Fleming is chipping away with strikes.
Rook tries to work a leg under to get back to half guard but Fleming wriggles his own leg back out and remains in side control.
Fleming is trying to ground and pound but Rook uses the momentary lack of control by Fleming to regain half guard.
Rook blocking the ground and pound attempt from Fleming.

That's three minutes gone in the round.
Rook trying to control here.
Fleming lands a big shot. The thud that echoes around the arena is like music to the fans' ears.

Rook looking to work for a kimura from the bottom.
Fleming trying to control from half guard but Rook is working away.
Fleming is stalling here. Rook is in no mood to hang around though. He's locked up a kimura from the bottom! Fleming seems to be keeping calm but he's forced to roll out of the hold and Rook has ended up in side control on the top. Nice work.
Fleming can't do much from the bottom here.
Fleming is trying to get back to half guard. He's pushing on Rook's leg. He's managed it. Nice work.
Rook seems to be working for a kimura but Fleming defends the submission attempt.

That's four minutes gone in the round.
The fighters are starting to perspire pretty heavily.
Rook wants to take a breather but Fleming is having none of it.
Rook is thinking about going for an arm triangle but he can't free his leg.

Fleming looking for submissions off his back.
Rook thumps the canvas. Not on purpose obviously - he just missed Fleming's head.
Fleming tries to get to full guard but Rook has control of the leg.
Rook is looking for a kimura. It's going to be difficult to finish that from half guard though and Fleming defends it well.
And thats the end of the round the fighters go back to their corners.
A close round but Scott Fleming will probably get the nod.
Well, the break between rounds is over. Let's get back to the scrappin!

Rook fakes with a right hand and throws a good leg kick, right into the thigh. That had to hurt Fleming.
Rook scores with a slapping inside leg kick.
Fleming uses some good footwork to avoid the body shot by Rook.
Rook shakes his hands off, looking to compose himself, but takes a jab to the jaw whilst he does it.
Fleming shoots in for a takedown but Rook shows good takedown defense.
Fleming wants to clinch.
A little feinted left hand from Rook on the counter but he doesn't commit to it.
We've had a slow start to the round here - hopefully the action picks up.
Good work by Fleming as he checks the leg kick.
Nice body kick there by Rook.
That's one minute gone in the round.
Rook throws a head kick that misses.
Fleming tries to counter with a clinch but Rook shakes him off and moves away.
Rook fakes low and throws an overhand right that catches Fleming on the side of the head.
Rook throws a sloppy head kick and Fleming moves out of range easily.
Fleming missing with a left hand there. Rook was out of range so wasted energy throwing that one.
Fleming misses with a body punch
and Rook counters with a body kick that stops Fleming in his tracks momentarily.
Rook scores with a leg kick.
Rook misses with a takedown attempt. He shot from a bit too far out.
Fleming throws a hook but Rook avoids it easily.
Rook comes forward and lands a shot to the body, then darts back out of range.

Rook closes the distance and gets a double leg, slamming Fleming to the mat! Fleming manages to get full guard.
Fleming keeping moving, preventing Rook from controlling successfully.
That's two minutes gone in the round.
Rook is fighting to break Fleming's control of his arms but Fleming is doing a good job of controlling the position at the moment.
Fleming is throwing his legs up, looking for submissions. Rook is aware though and is defending well.
Rook drops back looking for a leg! Fleming is in trouble here! The fighters roll with the hold and Fleming manages to kick Rook off! Rook jumps back into Fleming's guard.
Fleming is working actively off his back, looking to secure an arm or perhaps work for a triangle.
We've seen a great period of action over the last minute or so - credit to both fighters for going all out!
Rook with a flurry of punches that miss.
That's three minutes gone in the round.
Fleming looking to sweep here. No luck so far.
Fleming escapes his hips to the side and looks to be working for an armbar. Rook gives him a little smile and shakes his head. No chance.
Rook with a nice head shot there.
Fleming looking to control.
Fleming looking for a guillotine here but Rook defends easily.
Fleming is looking for a triangle but Rook pushes his legs off easily.
Rook landing with the ground and pound.
That's four minutes gone in the round.
A lull in the action here being met with boos from the crowd.
Rook trying to control the position from guard on top but Fleming is wriggling around, looking for whatever he can.
Rook working some strikes from top position.
Bowman Rook overall seems to be getting the better of the ground position in the fight so far.
Fleming looking to control.
Rook wants to control from the top but Fleming keeps moving.
Rook is in close to Fleming's body, working some short punches and elbows.
Rook landing some decent shots from guard.
Fleming trying to keep a closed guard but Rook is proving a slippery customer.
The crowd thankful this round is nearly over.
Fleming has a loose triangle. He'll be looking to tighten that up but Rook can see exactly what he's planning and manages to posture up and free himself.
Fleming looking for submissions off his back, moving his hips, looking for an opening.
And thats the end of the round the fighters go back to their corners.
Bowman Rook dominated that second round.
The minute break is over - no more time for sponges and pep talks - back to the action!

Rook throws a solid leg kick but Fleming takes the impact on his shin and smiles at Rook.
Bowman Rook seems to be the more aggressive standup fighter in this bout.
Fleming misses with a body kick.
Rook throws a leg kick that misses.
Fleming gets in close and instigates a clinch.
Rook with the Thai clinch. He's looking to land a big knee but he's not managed it this time.
Fleming lands a knee to the head.
Fleming blocks a couple of punches on the inside.
Rook lands a nice knee to the body.
Fleming lands with a good tight uppercut to the head.
Fleming gets an overhook and lands an elbow to the side of the head.

It looks like Bowman Rook has been cut.
With the two fighters working up against the cage, Rook just misses with a elbow thrown towards Fleming's brow.
We've had a slow start to the round here - hopefully the action picks up.
Rook lands a shoulder strike that jolts his opponent's head backwards.
Rook prevents a body shot from Fleming.
Rook lands a glancing elbow in the clinch.

It looks like Scott Fleming has been cut.
Fleming misses with a knee strike.
We've seen a great period of action over the last minute or so - credit to both fighters for going all out!
Fleming throws an elbow but it's blocked.
Fleming using the Thai clinch to land knees to the body.
That's one minute gone in the round.
Rook trying to control the position but instead, Fleming has worked for underhooks and has pushed Rook into the cage.
A battle for position here, against the cage.
Rook on the defensive, avoiding the knees to the body.
Rook using the Thai clinch to land knees to the body.
Some stalling of biblical proportions here from Rook.
Rook lands a body shot in the clinch.
Fleming with the Thai clinch. He's looking to land a big knee but he's not managed it this time.
Fleming goes for a takedown attempt but Rook pushes him away and we're back to fighting at a distance.
Rook scores with a reasonable looking shot to the body. Fleming doesn't seem bothered though.
Fleming misses with a straight left.
Rook throws out a token jab with nothing on it.
Fleming is trying to avoid his opponent's strikes and get into the clinch.
That's two minutes gone in the round.
Fleming wants to clinch.
Bowman Rook is winning the standup battle so far.
Rook misses with an attempted mid kick.
Fleming lets it all go there with a big combo counter but none of the punches connected.
Fleming misses with a wild combination.
Rook fails with a takedown attempt.
A big right from Fleming misses.
A telegraphed right hand from Fleming misses the target.
Fleming takes one to the side of the head.
That's three minutes gone in the round.
Fleming shoots in for a takedown but Rook shows good takedown defense.
Rook throws a hook to the side of Fleming's head but Fleming sees it coming and ducks under it beautifully.
Fleming throws a combination that misses
letting Rook counter with a right hand.
Rook looks for a takedown but Fleming sprawls well.
Rook scores with a big left there. The judges will like that one.
Rook ducks right into an uppercut from Fleming.
Rook shapes like he's going to throw a leg kick but settles back down.
Fleming wants to clinch but Rook slips to the side
and Rook cracks him with a counter punch right on the button.
Rook lands a leg kick that knocks Fleming off balance momentarily.
That's four minutes gone in the round.
A clash of legs there as Fleming blocks the low kick.
Fleming moves out of range of the strikes.
Rook pivots, looking for a leg kick but Fleming is out of range and Rook settles back down.
Rook moves out of the way of the counter high kick fromFleming.
Fleming missing with a left hand there. Rook was out of range so wasted energy throwing that one.
Rook works the jab nicely.
Rook is using his height advantage well here, landing a good percentage of his punches.
A big right from Rook misses.
Scott Fleming is looking to throw some combinations by the looks of things.
Rook throws a body shot but no joy.
A big left from Rook misses.
Fleming steps in looking to clinch after the strikes miss from Rook.
The crowd are loving this. Great action here.
Fleming avoids a low kick by using good footwork.
A lazy body kick from Fleming
and Rook counters with a nice uppercut.
Rook digs a good hook to Fleming's body.
And thats the end of the round the fighters go back to their corners.
Bowman Rook clearly takes that round.
Both fighters have cut men working on them during the interval.
The fighters get back to their feet, the hooter sounds and we're back to the action!

Fleming is looking to clinch.
A combination from Fleming does no damage.
Rook lands a glancing blow to the side of Fleming's head.
Fleming fails with a takedown attempt.
Fleming smiles there as he lands a nice right hand right on the button.
We've had a slow start to the round here - hopefully the action picks up.
Rook tries for a takedown but Fleming circles away easily
and Fleming counters with a nice uppercut.
That's one minute gone in the round.
Rook takes a body kick right on the floating rib. Ouchie.
Rook misses with a hook.
Fleming misses with a jab, cross combination.
Rook chopping away at his opponent's legs.
Decent striking displayed by Rook there.
Rook swings for the body but Fleming moves out of range.
Rook lands a nice shot that snaps Fleming's head back.
This fight brought to you by 5M nutrition - it's mmmmm tasty. Nice jab by Rook.
Rook lands a jab.
Fleming avoids the body shot from Rook.
Rook feints a jab promting Fleming to slip. Rook then demonstrates his capabilities by jabbing again. Fleming slips again and ducks right into an uppercut.
That's two minutes gone in the round.
Fleming tries to close the distance and clinch up but Rook swats him away and circles back towards the center.
The crowd are loving this. Great action here.
Rook misses with a straight left.
Rook swings and misses with a hook to the body.
Rook cracks Fleming with a nice right hand that draws applause from the crowd.
Fleming scores with a jab to the head.
Fleming fakes a strike and closes the distance, dragging Rook to the ground. Fleming is now in Rook's guard.
Fleming works a leg free and moves into half guard.
Fleming looks to land a strike but Rook avoids it nicely and regains full guard.
Fleming trying to control but Rook is working from the bottom.
Fleming trying to land body shots but he keeps hitting the mat.
Fleming throwing elbows and punches but not connecting, as Rook works some decent striking defense from the bottom.
The ref warns both fighters not to hold the cage as they work up against the meshing.
That's three minutes gone in the round.
Rook looking to control.
Fleming postures up and lands a big shot to Rook's brow.
Rook throwing his legs up looking for a triangle.
Fleming working from the guard for now, landing some ground and pound.
Fleming scores with a decent looking elbow strike.
Fleming got a little sloppy there for a moment and Rook has worked his way into a loose triangle - can he finish it?! No, Fleming has managed to get both his arms back between Rook's legs - danger averted.
Rook not looking particularly offensive just at the moment.
Rook looking for submissions off his back, moving his hips, looking for an opening.
It's got to the stage where if one of these guys blows hard enough, the other might fall over.
That's four minutes gone in the round.
Fleming working in close now, lands a nice elbow to the side of Rook's head.
Fleming in full guard, throwing the ground and pound. No damage this time.
Rook preventing the ground and pound from doing any damage.
Rook looking to sweep here. No luck so far.
Fleming postures up.
It looks like the ref is thinking about a standup.
Fleming postures up to throw the ground and pound strikes but they don't connect.
Fleming trying to control but Rook is working from the bottom.

The ref stands the fighters back up due to a lack of activity.
Fleming connects with a body shot.
A slow jab from Fleming misses its intended target.
Fleming fails with an attempt to clinch.
And thats the end of the round the fighters go back to their corners.
A close fourth round but Scott Fleming will probably get the nod - 10:9.
Both fighters have cut men working on them during the interval.
That's time! Back to the action! This is the final round!

Rook swings away with a body shot that misses
and Fleming counters with a thumping low kick.
Fleming fails in his attempt to clinch.
Rook tries to counter with a takedown but Fleming is quick to defend against it.
Fleming stuns Rook with a nice body shot, before stepping back out of range.
Fleming clinches up against the cage.
Fleming's leg has a nasty welt from taking a succession of leg kicks. That must be slowing him down.
Fleming lands a nice elbow from the clinch.
A short uppercut from Fleming.
A right handed body shot lands from Fleming.
Fleming lands a knee to the head there! That was nasty!
Fleming misses with a knee to the head.
Rook gets double underhooks to prevent a takedown attempt from Fleming.
We've had a slow start to the round here - hopefully the action picks up.
Rook managing to block the knees to the body from Fleming.
Fleming comes over the top with an elbow. That landed flush.
A hook to the body from Rook.
Rook misses with a knee to the head.
That's one minute gone in the round.
Rook tries to land knees in the clinch but Fleming avoids the damage to the body.
Fleming tries to land a knee to the head but misses.
Fleming is wobbling all over the place through exhaustion. Will he make it to the final bell?
Fleming blocks a knee to the body. He'll have a nicely bruised forearm in the morning.
Rook blocks an uppercut.
Rook lands a knee to the head.
Rook blocks an uppercut.
Rook misses the knee to the body. Nice hip positioning from Fleming.
Rook lands with a short shot to the head.
Rook lands a left hand that snaps the head of Fleming backwards.
Fleming gets an overhook and lands an elbow to the side of the head.
Rook working aggressively here.
Rook tries to throw a body punch but Fleming avoids it by throwing Rook back against the cage.
Rook slowing the pace effectively.
Rook tries a shoulder strike but it doesn't do any damage.
Fleming throws an elbow but it misses.
Rook misses with a body punch.
Rook dodges an elbow strike from Fleming.
Rook presses Fleming against the cage and delivers a mid-strength body shot.
That's two minutes gone in the round.
Fleming looking for a takedown.
Rook lands a body punch.
Rook missing with knees to the body.
Rook tries to land a shot to the body but it's blocked.
A bit of stalling here from Rook.
Scott Fleming has stepped it up - he knows he needs a finish here!
This has been an exciting period of action!
Fleming dodges an elbow strike from Rook.
Fleming with the Thai clinch, lands a knee to the head.
Fleming crunches a lovely knee into Rook's ribcage.
Rook misses the knee to the body. Nice hip positioning from Fleming.
Fleming tries to land knees in the clinch but Rook avoids the damage to the body.
Fleming throws an elbow but it's blocked.
Rook pushes off an throws an elbow but Fleming leans to the side and avoids it. We're back to clinching against the cage.
Rook misses with a hook to the ribs.
Fleming looking to throw knees to the head but Rook is blocking nicely.
Rook tries to stall but Fleming uses the opportunity to gain a better position.
A short left from Fleming.
Rook misses with a shot to the kidneys.
That's three minutes gone in the round.
Rook misses with an elbow over the top.
Rook scores with a nice hook to the head.
Fleming takes a knee to the side of the body.
Fleming misses with a punch on the inside.
Fleming throws a punch but it's blocked by Rook.
Rook blocks a knee to the body. He'll have a nicely bruised forearm in the morning.
Fleming looking to throw knees to the head but Rook is blocking nicely.
Fleming lands a body shot in the clinch.
Rook lands a shoulder strike that jolts his opponent's head backwards.
Rook is looking to score with knees to the body. Maybe he'll change it up and go body then head. Fleming is defending well for now.
Rook unloads a knee to the mid-section. Fleming lets out a prehistoric sounding urrrrgh.
A short left from Rook.
Rook lands a nice knee to the body.
Rook gets through Fleming's defenses to land a nice punch to the side of the head.
Fleming misses with a knee strike.
Fleming tries to land a knee to the body but he is off balance and Rook avoids it.
Fantastic stuff here - a very entertaining period of action, which has drawn cheers from the crowd.
Rook takes an elbow to the forehead.
Rook gets underhooks to prevent Fleming's takedown attempt.
Bowman Rook has stuffed three takedown attempts in the round now. That's going to take a lot out of Scott Fleming.
Rook's corner are urging him to control the action in the clinch for a moment, rather than mount any serious offense. I'm sure the crowd appreciate those instructions... not.
That's four minutes gone in the round.
Rook scores a nice knee to the body.
Rook trying to land knees to the body.
Fleming creates a bit of space for himself and sneaks an elbow through Rook's defenses.
Rook takes an elbow to the temple.
Fleming is looking for a takedown.
The two fighters are working to gain dominance in the clinch.
Fleming takes a shot to the head.
Rook avoiding damage as Fleming throws knees to the body.
Fleming swings away with an uppercut that misses.
Rook throws a nice elbow but it doesn't land.
Rook trying to land knees to the body.
Rook lands a nice uppercut.
Knees in the clinch landing for Fleming.
Rook is trying to wear down his opponent with knees to the body.
Rook misses the knee to the body. Nice hip positioning from Fleming.
Fleming tries to land a knee to the head but misses.
And that's the end of the fight!
That was a close round. You could make an argument for either fighter but I would give it to Bowman Rook.
I think Rook has won this one but let's see what the judges have to say. Over to the ring announcer for the scorecards.
Ladies and gentlemen, after 5 rounds of action, we go to the scorecards for a decision.
Judge Frank Antenori scores the fight for Bowman Rook!
Judge Don Winkell scores the fight for Bowman Rook!
Judge Percy O'Donnell scores the fight for Bowman Rook!
Bowman Rook wins by unanimous decision!
An out of breath and clearly excited Bowman Rook thanked Milwaukee's Best 160 (85% laundry) for their help and support (and free stuff they sent him).
|
|
|
|
|
|
|
|
|
|
|
|
|
|
|
|
|
|
|
|
|
|
|
| S |
C
A |
G |
S |
C
B |
G |
|
S |
C |
G |
|
energy
A | B |
|
hype
A | B |
|
pop
A | B |
|
mgr
A | B |
|
FIGHT
RATING
53% |
|
|
|
|
|
|

