|
|
PBP Commentary |
Coming up we have a welterweight MMA rules bout between Jamel Morin (ranked 0 p4p, 0 weight class) and James Hawke (ranked 0 p4p, 0 weight class). James Hawke has the better chin. Will he look to stand and bang today?
 |
|
 |
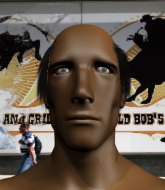
| 195 cm
18
177 lbs
2 - 0 - 0 |
|
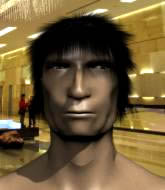
189 cm
25
167 lbs
1 - 0 - 0 |
BJJ Blue Belt
Counter fighter
Good in bed |
|
BJJ Blue Belt
Solid Muay Thai
Very confident |
|
| |
|
Ladies and gentlemen. This fight is 3 rounds, in the welterweight division.
Introducing the fighter to my left, fighting out of the red corner.
With a record of
2 - 0 - 0, fighting out of Sydney, Jamel Morin!
And introducing the fighter to my right, fighting out of the blue corner.
With a record of
1 - 0 - 0, fighting out of Sydney, James Hawke!
The judges for this bout are Ron Honeybunn, Bruno Hogan and Winston Howard.

The bell rings for round one and we are underway!

Hawke moves into range and clinches up with Morin.
Hawke tries to land a knee to the head but misses.
Hawke looks more muscular than last time we saw him. He must have been on the weights.
Hawke is looking for a takedown.
Hawke landing knees to the body.
Morin is trying to slow down the pace in the clinch, to catch his breath.
Morin leaning his opponent against the cage.
Morin trying to land knees to the body.

Hawke breaks the clinch and we're back to striking at distance.
We've had a slow start to the round here - hopefully the action picks up.

Morin rushes Hawke and pushes him back against the cage in a clinch.
Morin is looking to control Hawke's arms but Hawke gets an underhook and turns him. Now Morin has his back to the cage.
Stalling in the clinch from Hawke.
Hawke gets an overhook and lands an elbow to the side of the head.

It looks like Jamel Morin has been cut.

That's one minute gone in the round.
Hawke manages to break the clinch.
Morin takes the fight into the clinch.
Hawke will no doubt start fighting again in a minute but for now he's just having a little rest, leaning Morin up against the cage.
Some stalling of biblical proportions here from Morin.
Morin is clearly stalling here... Pick up the pace son.
Some stalling of biblical proportions here from Hawke.
Morin trying to stall but Hawke improves his position.
Hawke pushes off and circles away, back to the middle of the mat.

That's two minutes gone in the round.
Morin fakes with an overhand right and moves in to clinch with Hawke, pushing him back against the cage.
Hawke tries to take the fight to the ground by pulling guard but can't manage it.
Morin wants to stall.
Morin taking a break, stalling in the clinch.
Morin has Hawke pressed against the cage.
The ref breaks the fighters up, due to lack of action by Jamel Morin.
Hawke tries to drive through with a takedown attempt but Morin defends well and Hawke ends up having to push Morin into the cage where they will battle it out in the clinch.
As Hawke looks to move away, Morin throws a big counter combo bu Hawke just gets out of the way.
Jamel Morin has stuffed three takedown attempts in the round now. That's going to take a lot out of James Hawke.
Hawke misses with a head kick.
Morin really does look like a pencil wearing a pair of gloves. Let's hope he has a gameplan to suit that ridiculous body shape.
Morin rushes Hawke and pushes him back against the cage in a clinch.
Hawke works for underhooks and lands a body shot in the process.
Morin leaning his opponent against the cage.
Hawke tries to pull guard but Morin forces him back to his feet, against the cage.
Hawke looks winded!

That's three minutes gone in the round.

Hawke pulls guard effortlessly.
Morin wants to stand and escape but instead Hawke has hit a sweep and he's now on top in guard.

Morin is trying to keep Hawke in close.
Hawke trying to control but Morin is working from the bottom.
The ref warns both fighters not to hold the cage as they work up against the meshing.
Morin wants to stand and escape but Hawke is having none of it.

That's four minutes gone in the round.
Morin is working an open guard here, looking to improve his position. No doubt that will leave him open to counters but at least he's being more offensive.
Morin working a defensive guard here.
A real slowdown in the pace of the fight for a moment, as Morin holds on and takes a little breather.

The referee has motioned to the fighters to stand back up. He just wasn't happy with the level of activity.
Morin forces Hawke back against the cage and clinches.
Boooooooooooooooooooo!!! God, this has been a terrible round. Come on you two, sort yourselves out!
Morin tries to stall but Hawke uses the opportunity to gain a better position.
Hawke pushes off and circles away, back to the middle of the mat.
And thats the end of the round the fighters go back to their corners.
A close round but James Hawke will probably get the nod.
The cut man is working on Jamel Morin's cut.
That's the end of the interval. I'm sure that seemed a lot quicker than a minute for our two fighters! Back to the action.

Morin shoots for a double leg takedown but Hawke sprawls well. He's pushed Morin's face into the mat and manages to get back to his feet relatively easily.
Morin sets himself, and Hawke steps forward looking for the clinch! Morin avoids it this time.
Morin moves into the clinch.
Hawke tries to take the fight to the ground by pulling guard but can't manage it.
Hawke jumps guard but Morin turns him against the cage and keeps the fight standing.
A nice glancing elbow lands by Hawke.
Hawke utilising his Muay Thai to score with a knee to the body.
Hawke is trying to pull guard but being pressed up against the cage enables Morin to keep the fight standing.
Jamel Morin has stuffed three takedown attempts in the round now. That's going to take a lot out of James Hawke.
Hawke tries to break free but Morin pushes him back against the cage.
We've had a slow start to the round here - hopefully the action picks up.
Hawke swings away with an uppercut that misses.
A head punch blocked on the inside by Hawke.
Morin is trying to slow down the pace of the fight but Hawke is keeping busy.
Hawke pushes off and circles away, back to the middle of the mat.
That's one minute gone in the round.
Hawke clinches up with Morin and pushes him back against the cage.
Hawke breaks the clinch and we're back to striking at distance.
Morin just misses with a punch to the body.
Hawke forces Morin back against the cage and clinches.
Hawke has been the more effective fighter overall so far.
Some stalling of biblical proportions here from Morin.
Morin tries to stall but Hawke uses the opportunity to gain a better position.
Morin tried to land a shot to the body but connects with Hawke's elbow.
Morin looking to stall.
Hawke escapes the clinch and we're back to striking.
Hawke has a takedown stuffed.
Hawke is breathing heavily.
That's two minutes gone in the round.
Hawke throws a body kick that digs right into the meat.
Hawke is trying hard to land a takedown here. Morin sprawls well and keeps this one on the feet.
Morin clinches.
Morin has Hawke pushed against the cage.
Hawke tries to pull guard but Morin forces him back to his feet, against the cage.
Morin misses with an elbow strike.
Morin prevents Hawke from breaking the clinch.
Morin taking a breather.
That's three minutes gone in the round.
Morin throws a punch but it's blocked by Hawke.
Morin taking a breather.
Morin tries to stall but Hawke uses the opportunity to gain a better position.
Hawke blocks an uppercut.
Morin trying to stall but Hawke improves his position.
The ref breaks the fighters up, due to lack of action by Jamel Morin.
Hawke shoots in looking for a double leg takedown. Morin defends it nicely.
Morin gets tackled into the cage by Hawke. Hawke maintains the clinch.
That's four minutes gone in the round.
There's not a lot going on here and the crowd are letting the fighters know they're not willing to tolerate a lack of action.
Morin has a couple of punches blocked by Hawke.
Hawke being controlled against the cage.
Hawke is trying to pull guard but being pressed up against the cage enables Morin to keep the fight standing.
Morin missing with knees to the body.
Hawke tries a knee to the head but Morin blocks it.
Hawke missing with knees to the body.
Hawke jumps guard but Morin stands there with Hawke around his waist. Hawke gives up and drops back to his feet. We remain in the clinch.
Boooooooooooooooooooo!!! God, this has been a terrible round. Come on you two, sort yourselves out!
Hawke wants a takedown but no success here.
An uppercut on the inside fails to land for Morin.
And thats the end of the round the fighters go back to their corners.
A close second round but James Hawke will probably get the nod - 10:9.
The cut man is working on Jamel Morin's cut.
Well, the break between rounds is over. Let's get back to the scrappin! This is the final round!

Nice takedown defense from Hawke. No joy for Morin on that attempt.
Morin moves into the clinch successfully.
Jamel Morin has scored more points in the clinch so far.
Morin fails to land with a short punch on the inside.
Hawke wants to strike at distance but he can't break free of the clinch.
Morin has a couple of punches blocked by Hawke.
Morin manages to get underhooks and slows down the pace for a moment.
Hawke wants to push off and get back to the center of the mat but Morin has him pressed against the cage.
We've had a slow start to the round here - hopefully the action picks up.
Hawke pushes off and circles away, back to the middle of the mat.
No luck with that takedown attempt from Hawke.
That's one minute gone in the round.
Morin moves into the clinch.
Hawke takes a big intake of breath there - he's definitely tired.
Morin will no doubt start fighting again in a minute but for now he's just having a little rest, leaning Hawke up against the cage.
Morin is trying to slow down the pace of the fight but Hawke is keeping busy.
Morin trying to stall but Hawke improves his position.
Morin seems a little flustered. He's come in with the intention of controlling the clinch but Hawke is preventing him from doing so, at least for the moment.
Hawke breaks the clinch and we're back to striking at distance.
Hawke throws a head kick that misses and slips in the process. He scrambles back to his feet and the fighters circle.
Hawke moves into range and clinches up with Morin.
Morin trying to stall but Hawke improves his position.
That's two minutes gone in the round.
Morin slows down the pace here.
Hawke misses with a hook to the ribs.
Hawke lands a body shot in the clinch.
Morin trying to control the position but instead, Hawke has worked for underhooks and has pushed Morin into the cage.
The ref breaks the fighters up, due to lack of action by Jamel Morin.
Morin closes the distance and pushes Hawke back into the cage.
Hawke breaks the clinch and we're back to striking at distance.
Morin fakes with an overhand right and moves in to clinch with Hawke, pushing him back against the cage.
Good anti-grappling being displayed by Hawke as Morin tries to tie him up.
That's three minutes gone in the round.
Morin is looking to control Hawke's arms but Hawke gets an underhook and turns him. Now Morin has his back to the cage.
Hawke blocks an uppercut.
Hawke breaks the clinch.
Morin takes the fight into the clinch.
Hawke landing knees to the body.
Hawke is trying to pull guard but being pressed up against the cage enables Morin to keep the fight standing.
Hawke manages to break the clinch.
James Hawke is looking to throw some combinations by the looks of things.
Morin swinging wildly here.
That's four minutes gone in the round.
Hawke shoots in for a takedown but doesn't get it.
Jamel Morin has stuffed three takedown attempts in the round now. That's going to take a lot out of James Hawke.
Hawke rushes Morin and pushes him back against the cage in a clinch.
Hawke tries to pull guard but can't drag his opponent to the mat. Morin just stands there and leans against the cage.
Hawke slowing the pace effectively.
Hawke breaks the clinch and we return to the middle of the mat.
Morin forces Hawke back against the cage and clinches.
Hawke is trying to pull guard but being pressed up against the cage enables Morin to keep the fight standing.
Hawke manages to break the clinch.
Boooooooooooooooooooo!!! God, this has been a terrible round. Come on you two, sort yourselves out!
Morin throws a body punch but Hawke moves out of range.
Morin has taken the fight to the clinch.
Jamel Morin has stepped it up - he knows he needs a finish here!
James Hawke is fighting for a decision - hopefully he's judged it right and he's actually winning the fight.
Morin stalling in the clinch.
And that's the end of the fight!
Jamel Morin showed his dominance in that final round.
I think Hawke has won this one but let's see whether the judges agree with me. Over to the ring announcer for the scorecards.
Ladies and gentlemen, after 3 rounds of action, we go to the scorecards for a decision.
Judge Ron Honeybunn scores the fight 29:28
Judge Bruno Hogan scores the fight 28:29
Judge Winston Howard scores the fight 28:29
In favor of your winner, by split decision... James Hawke!
|
|
|
|
|
|
|
|
|
|
|
|
|
|
|
|
|
|
|
|
|
|
|
| S |
C
A |
G |
S |
C
B |
G |
|
S |
C |
G |
|
energy
A | B |
|
hype
A | B |
|
pop
A | B |
|
mgr
A | B |
|
FIGHT
RATING
28% |
|
|
|
|
|
|
