|
|
PBP Commentary |
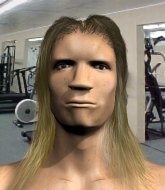
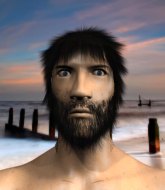
Coming up we have a middleweight MMA rules bout between Bowman Rook (ranked 0 p4p, 0 weight class) and Miyamoto Musashi (ranked 0 p4p, 0 weight class). Both fighters look fresh as a daisy as they make their way towards the cage.
 |
|
 |
| 180 cm
34
190 lbs
22 - 19 - 0 |
|
178 cm
33
197 lbs
15 - 17 - 0 |
Good wrestling
Excellent boxer
Cardio machine |
|
Excellent grappler
World class boxer
Good gas tank |
|
| |
|
Ladies and gentlemen. This fight is 5 rounds, in the middleweight division.
Introducing the fighter to my left, fighting out of the red corner.
With a record of
22 - 19 - 0, fighting out of Los Angeles, Bowman Rook!
And introducing the fighter to my right, fighting out of the blue corner.
With a record of
15 - 17 - 0, fighting out of Las Vegas, Miyamoto Musashi!
The judges for this bout are Frank Antenori, Jack Bonds and Don Winkell.

The bell rings for round one and we are underway!
Rook throws a solid leg kick but Musashi takes the impact on his shin and smiles at Rook.
Musashi walks into a straight right hand from Rook.
Rook ducks down and throws a hook to the body but Musashi moves away.
Rook gets his takedown attempt stuffed easily
and Musashi counters with a lovely straight right hand!
Musashi lunges at Rook with a hook that half lands and is half blocked by Rook's hand.
Rook misses with a wild body shot.
A big right from Rook misses.
Rook's corner calls for a 1-2. Rook obliges with the 1 part as he scores the single shot and moves back out of range.
Musashi throws a right and a left that Rook avoids nicely.
Rook fakes with the hands and throws a leg kick but Musashi is out of range.
Despite the aggression on Musashi's face he doesn't fully commit to the counter.
We've had a slow start to the round here - hopefully the action picks up.
Rook avoids the head kick by Musashi.
Rook tries to counter by clinching up but Musashi breaks away and moves out of range.
Nice body punch from Rook.
Musashi takes one on the chin but keeps coming.
Rook fakes high and swings low for a body shot but Musashi manages to avoid it.
We've seen a great period of action over the last minute or so - credit to both fighters for going all out!

Musashi gets to the clinch - let's see what his plan is here.

That's one minute gone in the round.
Rook tries to land knees in the clinch but Musashi avoids the damage to the body.
Musashi tries to work over Rook's body with a swooping hook but it only glances the target.
Musashi misses with a shot to the kidneys.
Rook lands with a short head shot on the inside.
A bit of stalling here from Musashi.
Musashi tries to work over Rook's body with a swooping hook but it only glances the target.
Musashi content to slow the pace in the clinch.
Musashi taking a break, stalling in the clinch.
Rook is leaning against Musashi and scores with a nice uppercut to the body.
Rook doesn't land with the attempted body shot.
A battle for position here, against the cage.
Rook lands a body punch - he's looking to wear down Musashi.
Musashi fails to pull guard.
Musashi drops to a knee looking for a takedown but Rook gets the underhooks and prevents it.
A head punch on the inside from Musashi fails to land.
Rook stalling in the clinch but Musashi improves position.
Musashi blocks a knee to the body. He'll have a nicely bruised forearm in the morning.
Rook misses with a knee strike.

That's two minutes gone in the round.
Rook scores a nice knee to the body.
Musashi managing to block the knees to the body from Rook.
Musashi lands with a short shot to the head.
Rook tries to throw a body punch but Musashi avoids it by throwing Rook back against the cage.
Musashi fails to land with a short punch on the inside.
Musashi is trying to slow down the pace in the clinch, to catch his breath.
Musashi misses with a hook to the ribs.
Rook scores a nice knee to the body.
Rook slowing the pace effectively.
We've seen a great period of action over the last minute or so - credit to both fighters for going all out!
Rook works on Musashi's body with a couple of short punches.
Rook trying to control the position but instead, Musashi has worked for underhooks and has pushed Rook into the cage.
Rook with an attempt at a knee that misses.
Rook has Musashi pressed against the cage.
Stalling in the clinch from Musashi.
Rook lands a hook to the body. It's hard to tell if that hurt Musashi or not.
Rook misses with some punches.

That's three minutes gone in the round.
Musashi lands a left hand.
Musashi being controlled against the cage.
With the two fighters working up against the cage, Rook just misses with a elbow thrown towards Musashi's brow.
Both guys are working to get underhooks.
Musashi is stalling here. The referee will be looking to step in if he doesn't pick up the pace.
Musashi avoiding damage as Rook throws knees to the body.
The pace slowing considerably in the clinch, as Rook takes a break from that fighting nonsense to think about the finer things in life.
Rook lands an elbow that stopped Musashi in his tracks for a moment.
Rook creates a bit of distance and throws an elbow that only just misses.
Rook goes for a body shot but it's blocked.
A short right hand to the side of the head by Rook.
Musashi throws a head punch that misses.
The referee is keeping an eye on Musashi - much more stalling and he will separate the fighters.
Musashi misses with a hook from the clinch.

That's four minutes gone in the round.
Rook throws a punch but it's blocked by Musashi.
Musashi letting Rook take a breather here.
Musashi lands with a short punch from the clinch.
Rook tried to land a shot to the body but connects with Musashi's elbow.
Rook just leaning against Musashi, taking a breather.
Rook tries to work over Musashi's body with a swooping hook but it only glances the target.
Rook tries a body shot but Musashi blocks it.
Rook tries to land a knee to the head but Musashi blocks with his arms.
Rook creates a bit of space for himself and sneaks an elbow through Musashi's defenses.

It looks like Miyamoto Musashi has been cut.
We've seen a great period of action over the last minute or so - credit to both fighters for going all out!
Rook lands a nice shot to the body.
The fighters are pressed against the cage, as the pace of the fight slows.
Rook working aggressively here.
Rook lands a good knee to the midsection. Musashi won't want to take too many of those.
Rook tries to land a knee to the body but he is off balance and Musashi avoids it.
Musashi working some nice short punches in the clinch.
Rook with an attempt at a knee that misses.
Musashi lands a body punch in the clinch.
And thats the end of the round the fighters go back to their corners.
Bowman Rook dominated that round.
The cut man is working on Miyamoto Musashi's cut.
That's the end of the round. The referee orders the cornermen out of the cage so we can get back down to business.

Rook clobbers Musashi with an overhand right that has the crowd gasping. That made a horrendous noise.
Rook misses the jab.
Musashi misses with a kick to the body.
Rook blocks a head kick by Musashi.
Musashi throws a body kick but he was well out of range there.
Rook slips a jab and a cross from Musashi.
Rook is really dominating this fight. Is there anything that Musashi can do to turn this around?
Rook moving in and out of range nicely, whilst landing the scoring shot.
Musashi takes one to the chin there.
Rook takes a shot to the body in his stride.
Musashi avoids a low kick by using good footwork.
We've had a slow start to the round here - hopefully the action picks up.
Musashi throws a right high kick that is partially blocked by Rook.
Rook bobs and weaves well there to avoid the strikes.
A left lands for Rook.
Musashi misses with a body punch
and Rook counters with a good right hand that lands right on the jaw.
This is a great period of action - very entertaining stuff!
A big left from Rook misses.
That's one minute gone in the round.
Rook loads up on a big right hand but Musashi slips the punch.
Musashi swings away with a counter right hand but no contact made.
Musashi throws a right and a left that Rook avoids nicely.
Rook looks for a takedown here. Will he get it? Musashi is fending him off so far but Rook persists. Nope, Musashi circles away and we're back to standing.
As Rook backs off Musashi throws a huge counter combo but Rook manages to avoid it all.
Musashi closes the distance and presses his opponent up against the cage.
Rook is looking to score with knees to the body. Maybe he'll change it up and go body then head. Musashi is defending well for now.
Musashi struggles to land a body shot inside as Rook controls his hands.
Good anti-grappling being displayed by Musashi as Rook tries to tie him up.
Nice elbow from Rook.
Rook misses with a punch to the body.

Musashi gets control of Rook's arms and successfully pulls guard. Musashi will no doubt be looking for submissions off his back.
Rook throws an elbow that misses. Musashi uses the momentum to reverse the position. He's now in Rook's guard. Nice move by Musashi!
Musashi wants to control from the top but Rook keeps moving.
That's two minutes gone in the round.

Musashi drops back looking for a leg! Rook is in trouble here! The fighters roll with the hold and Rook manages to kick Musashi off! Musashi jumps back into Rook's guard.
Rook trying to keep a closed guard but Musashi is proving a slippery customer.
Musashi trying to control but Rook is working from the bottom.
Musashi looking to sit in guard and control but Rook gets the butterfly guard and sweeps. He's now in the guard on the top.
Rook trying to control but Musashi is working from the bottom.
That's three minutes gone in the round.

Rook drops back looking for a heel hook - he quickly realises he's not going to get it but Musashi manages to dive on top of him before he can escape and now Rook has Musashi in his guard.
Musashi looking to sit in guard and control but Rook gets the butterfly guard and sweeps. He's now in the guard on the top.
The ref warns both fighters not to hold the cage as they work up against the meshing.
Rook throwing shots from guard but he's hitting more mat than opponent.
The referee is asking the fighters to pick up the pace.
Musashi pulls Rook in close to his closed guard and prevents Rook from doing any damage or advancing position.

The referee has stepped in and called for a break in the action. We'll restart on the feet.
A lazy body kick from Musashi
and Rook counters with an outside leg kick.
Rook is the aggressor but that punch slipped nicely by Musashi.
Rook throws a hook to the side of Musashi's head but Musashi sees it coming and ducks under it beautifully.

The fight moves into the clinch position.
That's four minutes gone in the round.
Rook goes for a body shot but it's blocked.
Rook goes for a body shot but it's blocked.
Rook misses with a knee strike.
Musashi scores with a hook to the body.
Musashi lands a body punch.
Musashi tries to pull guard but Rook holds him up against the cage and eventually Musashi drops back down to his feet.
Rook throws a punch but it's blocked by Musashi.
Rook tries to land knees in the clinch but Musashi avoids the damage to the body.
Musashi blocks a punch to the side of the head.
Musashi misses with a body punch.
Rook doesn't land with the attempted body shot.
Rook presses Musashi against the cage and delivers a mid-strength body shot.
Rook tries a knee to the head but he's missed.
The crowd thankful this round is nearly over.
Musashi lands with a short shot to the head.
Rook tries a body shot but Musashi blocks it.
Musashi drags the fight down to the ground.
There's a bit of a scramble here and now Musashi is on top in guard.

And thats the end of the round the fighters go back to their corners.
That was a close second round but I would say that Bowman Rook will probably get the nod.
The cut man is working on Miyamoto Musashi's cut.
The fighters get back to their feet, the hooter sounds and we're back to the action!

Rook's hands are dropping dangerously low here and Musashi connects clean with a right hook that sends him down to one knee! Rook scrambles back to his feet.
Musashi lands with a right hand.
Musashi throws a head kick that misses.
Rook looks to score with a jab to the body but Musashi is just out of range.
Musashi on the wrong end of a nice low kick. He's acting like it's no big deal but he doesn't want to take many more of those.
Musashi throws a head kick that misses.
Musashi looks to land a combination. Rook sees it coming but can only parry a couple of the shots.
Musashi dives in for a single leg takedown but Rook sprawls and the fighters end up clinched against the cage.
Musashi fails to land the takedown.
We've had a slow start to the round here - hopefully the action picks up.
Rook throws out a loose jab but Musashi uses good head movement to avoid it.
Musashi is clearly trying to counter these attacks from Rook with a body shot.
Musashi ducks under a wild hook from Rook.
A left and a right from Musashi both land. Nice combination.
That's one minute gone in the round.
Musashi tries a switch kick but it misses it's target.
Musashi avoids the head kick by Rook.
Rook pushes Musashi up against the cage in a clinch.
A short right hand to the side of the head by Musashi.

Musashi pushes off and circles away, back to the middle of the mat.
Musashi shoots in for a double leg but Rook sprawls well. That's going to sap some energy.
Bowman Rook has stuffed three takedown attempts in the round now. That's going to take a lot out of Miyamoto Musashi.
Rook throws a decent looking leg kick but it doesn't land clean.
A solid body kick from Rook.
Rook tries a low kick but Musashi avoids it.
Musashi throws a sloppy head kick
and he gets countered with a snapping leg kick.
Musashi misses with a body shot. Nice footwork from Rook.
Rook pivots, looking for a leg kick but Musashi is out of range and Rook settles back down.
Rook throws a shot from downtown. Musashi moves away and avoids it.
Rook looks to score with a jab to the body but Musashi is just out of range.
Despite the aggression on Musashi's face he doesn't fully commit to the counter.
Rook throws a hard body shot but it just misses.
That's two minutes gone in the round.
Musashi keeps the fight standing with a nice sprawl.
Rook fakes a head shot and lands one to the body.
Miyamoto Musashi is looking to throw some combinations by the looks of things.
Musashi bobs and weaves well there to avoid the strikes.
Musashi steps to the side to avoid the strikes from Rook.
Musashi feints and as Rook raises his hands in defense, Musashi changes levels and drives through with a takedown into guard.
This has been an exciting period of action!
Musashi trying to control the position from guard on top but Rook is wriggling around, looking for whatever he can.
Rook is trying to keep Musashi in close.
Rook is throwing his legs up, looking for submissions. Musashi is aware though and is defending well.
Musashi looking to control the position here, rather than advance.
That's three minutes gone in the round.
A big thud reverberates around the arena there as Musashi accidentally thumps the mat. Hopefully he's not broken his hand.
Musashi won't allow Rook to sweep him here.
Rook is working the butterfly guard. He manages to land a nice scissor sweep and is now in half guard on the top. Nice move.

Rook throwing shots but they're hitting the canvas more than the man.
Musashi is looking to improve his position.
Rook throwing shots but they're hitting the canvas more than the man.
Musashi trying to control but Rook postures up.
That's four minutes gone in the round.
Musashi wants to get back to full guard.
Rook throws a strike but Musashi avoids it easily and moves to full guard.
Rook throwing elbows and punches but not connecting, as Musashi works some decent striking defense from the bottom.
Rook looking to sit in guard and control but Musashi gets the butterfly guard and sweeps. He's now in the guard on the top.
Rook working from the bottom, still in full guard. He's managed to get a loose triangle. Musashi doesn't seem to be doing much to defend here, obviously he feels comfortable in the position. Musashi manages to throw the legs off his shoulder and he's back into guard - no problem.
Miyamoto Musashi has got the better of the ground game so far.
Rook looking to sweep here. No luck so far.
Musashi landing with the ground and pound.
And thats the end of the round the fighters go back to their corners.
That was a close round but Bowman Rook did the better work so I'd imagine he'll take it.
The cut man is working on Miyamoto Musashi's cut.
The corners get their ten second warning. Both fighters stand from their stools and stare eachother down, ready to get back to the action.

Rook tried to score with a low kick but Musashi checks it.
A big left from Rook misses.
Musashi misses with a two punch combination.
Rook connects with a leg kick. He turned his hip over nicely there.
Bowman Rook is winning the standup battle so far.
A big left from Rook misses.
Musashi chopping away at his opponent's legs.
Rook clobbers Musashi with an overhand right that has the crowd gasping. That made a horrendous noise.
Jab from Rook.
Musashi shoots in for a takedown but doesn't get it.
Musashi swings and misses with a hook to the body.
We've had a slow start to the round here - hopefully the action picks up.
Musashi uses good head movement to avoid the hook from Rook.
Rook swings away with a leg kick that misses.
Rook connects with a looping right hand.
Musashi shoots and misses
and Rook makes him pay by landing a thudding low kick.
That's one minute gone in the round.
Musashi throws a combination that misses
and Rook counters with a nice uppercut.
A looping hook to the body misses from Rook. Musashi does a little dance to reset his feet.
Rook fakes high and swings low for a body shot but Musashi manages to avoid it.
Rook lands with a thumping leg kick.
Rook throws a chopping leg kick but Musashi manages to avoid taking any serious damage.
Miyamoto Musashi seems to be the more aggressive standup fighter in this bout.
Musashi shoots in looking for a double leg takedown. Rook defends it nicely.
Bowman Rook has stuffed three takedown attempts in the round now. That's going to take a lot out of Miyamoto Musashi.
Musashi shoots in with a takedown attempt and he has Rook pinned against the cage. Rook gets the underhooks and manages to circle away.
Rook half committed to a counter leg kick.
Rook pivots as if he's going to throw a leg kick but stops half way.
Rook misses with a body shot. Nice footwork from Musashi.
That's two minutes gone in the round.
Musashi is looking to land body kicks.
Rook jabbing away but nothing is landing.
Musashi misses with a jab, cross combination.
Rook throws a hard body shot but it just misses.
Musashi is looking for the big counter here.
Rook looks to score with a jab to the body but Musashi is just out of range.
Rook shoots in for a takedown but doesn't get it.
Musashi misses with a wild combination.
Rook throws a nice outside leg kick.
The sound of bone on bone echoes around the arena as Musashi checks a leg kick.
A nice side step and Musashi releases a counter shot to the body, but it doesn't find it's home.
Musashi throws a head kick that misses.
Rook darts in and out, connecting with a jab.
That's three minutes gone in the round.
Musashi rushes forward with a series of wild hooks but Rook moves out of range and avoids them all easily.
Rook misses with a body shot
and Musashi counters with a three punch combo that has Rook backing up. Rook nods at Musashi to acknowledge the strikes.
A slapping leg kick lands for Rook.
Musashi misses with a few strikes there.
Musashi wants to clinch.
Rook appears to be looking for a counter punch to the body.

Rook gets a double leg takedown into Musashi's guard.
Musashi manages to sweep nicely, so he's now on top. Rook manages to get himself to full guard.
Rook keeping moving, preventing Musashi from controlling successfully.
That's four minutes gone in the round.
Rook working for a triangle but Musashi defends it easily.
Rook is working an open guard here, looking to improve his position. No doubt that will leave him open to counters but at least he's being more offensive.
Wooooo! Give it up for these two warriors! They are putting on a show!
Rook is trying to control the position but Musashi postures up.
And thats the end of the round the fighters go back to their corners.
Bowman Rook had his way with Miyamoto Musashi in that round.
The cut man is working on Miyamoto Musashi's cut.
That's time! Back to the action! The crowd applaud as we get ready to start the final round!

Musashi shoots in and gets a takedown into Rook's guard.
Rook throwing his legs up looking for a triangle.
Rook is working from a closed guard but he's struggling to control his opponent.
Rook wants to stand but Musashi is controlling the position.
The fighters are pressed up against the cage, both looking to find a bit of space to work.
Musashi is in close to Rook's body, working some short punches and elbows.
We've had a slow start to the round here - hopefully the action picks up.
Rook had isolated an arm as going for a kimura. Musashi defends it easily.
Rook had isolated an arm as going for a kimura. Musashi defends it easily.
Both of our modern day gladiators look out of it here - a gruelling 5 rounds of action taking it's toll on them, no doubt.
That's one minute gone in the round.
Musashi slows down the pace of the fight, as he sits in guard.
Musashi lands a couple of elbows.
Musashi won't allow Rook to sweep him here.
Rook working from the bottom, still in full guard. He's managed to get a loose triangle. Musashi doesn't seem to be doing much to defend here, obviously he feels comfortable in the position. Musashi manages to throw the legs off his shoulder and he's back into guard - no problem.
Rook escapes his hips to the side and looks to be working for an armbar. Musashi gives him a little smile and shakes his head. No chance.
That's two minutes gone in the round.
Well. There's a bit of a lull in the action here and the crowd are starting to get restless.
Musashi postures up in Rook's guard and throws a big left but Rook blocks it.
Rook looking to hit a scissor sweep but Musashi is one step ahead there.
Musashi stops Rook from standing up.
We've had a lack of effective grappling in the last minute or so, which could well see a referee standup.
Musashi wants to control from the top but Rook keeps moving.
The referee decides to stand the fighters back up.
Musashi is trying hard to land a takedown here. Rook sprawls well and keeps this one on the feet.
A quick step to the side and Rook tries to counter with a shot to the body but it doesn't connect.
Musashi closes the distance and gets a trip takedown into side control. Rook quickly recovers to half guard.
Rook is looking for a sweep. Musashi is wise to his cunning plan and keeps the top position.
Rook is working hard here to advance position.
That's three minutes gone in the round.
Musashi is looking for a kimura here.
Rook is looking to regain full guard. Not this time though.
Musashi is looking for a kimura here.
Rook tries to roll over but Musashi keeps him under control.
That's four minutes gone in the round.
Neither fighter has done anything of merit for a good minute or two here and the crowd are not happy about it.
Musashi wants to free his trapped foot but Rook is holding on for dear life with his legs.
Rook gets back to full guard.
Miyamoto Musashi has stepped it up - he knows he needs a finish here!
Musashi trying to control the position from guard on top but Rook is wriggling around, looking for whatever he can.
Rook is looking for a guillotine. You can't force these things though and Musashi defends well.
Boooooooooooooooooooo!!! God, this has been a terrible round. Come on you two, sort yourselves out!
Rook utilising some decent striking defenses from the guard, preventing the ground and pound.
And that's the end of the fight!
Miyamoto Musashi comfortably won the final round on my scorecard.
I think Rook has won this one but let's see what the judges have to say. Over to the ring announcer for the scorecards.
Ladies and gentlemen, after 5 rounds of action, we go to the scorecards for a decision.
Judge Frank Antenori scores the fight for Bowman Rook!
Judge Jack Bonds scores the fight for Bowman Rook!
Judge Don Winkell scores the fight for Bowman Rook!
Bowman Rook wins by unanimous decision!
After the big win, Bowman Rook made sure to do all the important stuff like thanking his sponsors Milwaukee's Best 160 (85% laundry) and telling the interviewer how much he loves him.
|
|
|
|
|
|
|
|
|
|
|
|
|
|
|
|
|
|
|
|
|
|
|
| S |
C
A |
G |
S |
C
B |
G |
|
S |
C |
G |
|
energy
A | B |
|
hype
A | B |
|
pop
A | B |
|
mgr
A | B |
|
FIGHT
RATING
46% |
|
|
|
|
|
|
