|
|
PBP Commentary |
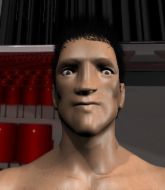
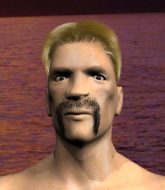
Coming up we have a heavyweight MMA rules bout between Mohamad Salem (ranked 0 p4p, 0 weight class) and The Wrestler Ii (ranked 0 p4p, 0 weight class). The Wrestler Ii has the power to score a knockout today if he connects clean with Mohamad Salem's chin.
 |
|
 |
| 190 cm
19
260 lbs
1 - 0 - 0 |
|
180 cm
20
280 lbs
0 - 1 - 0 |
BJJ White Belt
Excellent boxer
Cardio machine |
|
Good wrestler
Decent boxing
Granite chin |
|
| |
|
Ladies and gentlemen. This fight is 3 rounds, in the heavyweight division.
Introducing the fighter to my left, fighting out of the red corner.
With a record of
1 - 0 - 0, fighting out of New York, Mohamad Salem!
And introducing the fighter to my right, fighting out of the blue corner.
With a record of
0 - 1 - 0, fighting out of Las Vegas, The Wrestler Ii!
The judges for this bout are Cecil Peabody, Tiny Johnson and Robert Twigg.

The bell rings for round one and we are underway!
Nice straight punches there by Salem. You know Roy Jones Jr respects the hands of Salem.
Wrestler Ii doesn't succeed with the takedown
letting Salem counter with a right hand.
We're hearing some news coming in from back stage. It's official - Wrestler Ii has eaten all the pies!
Salem throws a hook to the side of Wrestler Ii's head but Wrestler Ii sees it coming and ducks under it beautifully.
Wrestler Ii throws a predictable looking body shot
and Salem counters with a straight right hand.
Wrestler Ii doesn't succeed with the takedown
and Salem cracks him with a counter punch right on the button.
Wrestler Ii ducks under a wild hook from Salem.
Donk. Salem catches Wrestler Ii right on the button with a cross.
Salem works the jab nicely.
Wrestler Ii just misses with a punch to the body.
Wrestler Ii slips a jab from Salem.
Wrestler Ii moves out of range of the strikes.
Salem circles away from the clinch attempt
and Salem counters with a straight right hand.

That's one minute gone in the round.
Wrestler Ii keeping his hands up high there, blocking the jab from Salem.
Salem lands a beauty of a right hand that gets the crowd cheering.
Wrestler Ii dodges the punch combination from Salem.
A big right from Salem misses.
Wrestler Ii moves away from the strike by Salem.
Wrestler Ii tries to counter with a clinch but Salem shakes him off and moves away.
Wrestler Ii throws a sloppy body shot
and Salem counters with a lovely straight right hand!
Wrestler Ii fails in his attempt to clinch.
Wrestler Ii fakes high and shoots in for a takedown but Salem avoids it really well and circles away.
Wrestler Ii looks more muscular than last time we saw him. He must have been on the weights.
Mohamad Salem has stuffed three takedown attempts in the round now. That's going to take a lot out of The Wrestler Ii.
Wrestler Ii throws a lazy uppercut
enabling Salem to counter with a crisp jab.
Wrestler Ii steps to the side to avoid the strikes from Salem.
Salem has been talking about how he's improved his wrestling in the run up to the fight so let's see if that's enough to sway the balance.
Salem keeps the fight standing with a nice sprawl.

That's two minutes gone in the round.
Wrestler Ii takes a really solid shot there but just smiles back and shrugs his shoulders.
Wrestler Ii on the wrong end of a vicious looking body shot.
A big left from Wrestler Ii misses.
A left lands for Salem.
This has been an exciting period of action!
Nice defenses there by Salem.
Salem scores with a big left there. The judges will like that one.
Salem throws out a loose jab but Wrestler Ii uses good head movement to avoid it.
Wrestler Ii ducks under a wild hook from Salem.
Wrestler Ii drops down looking to force a counter takedown but Salem defends it well.
Wrestler Ii misses with a takedown attempt
and Salem counters with a straight right hand.
Wrestler Ii looks to land a left hand but Salem moved out of range nicely.
Wrestler Ii misses with a lunging right hand
and Wrestler Ii takes a counter punch right on the button for his troubles.
Salem is really head hunting here, hardly looking to strike to the body at all.
Salem will need to tighten up his combinations if he doesn't want to gas himself out, swinging at thin air.

That's three minutes gone in the round.
Wrestler Ii rushes in with a sloppy looking punch
and Salem counters with a nice uppercut.
Salem scores with a big left there. The judges will like that one.
Salem scores with a nice right hand.
Wrestler Ii fails with the takedown
and Salem counters with a quick right hand to the jaw.
A shot to the body from Wrestler Ii misses
and Salem counters with a nice uppercut.
Wrestler Ii is really struggling to land any decent head shots against his taller opponent.
Salem misses with a looping left.
Salem missing with a left hand there. Wrestler Ii was out of range so wasted energy throwing that one.
Wrestler Ii with poor footwork there. He got himself in a bit of a tangle, enabling Salem to score with a decent uppercut.
Wrestler Ii with a poor takedown
and Salem connects with a straight left hand counter down the middle.
Wrestler Ii throws an ugly left hook that misses
and Salem counters with a crisp hook to the side of the head.
The crowd cheering loudly, showing their appreciation for the quality fight we're seeing here.
Wrestler Ii misses with an uppercut. Salem saw that one coming.
Salem swung with a counter right hand that didn't connect.
Wrestler Ii ducks under an overhand right and circles away with a smile on his face.
Wrestler Ii looks to clinch
and Wrestler Ii takes a counter punch right on the button for his troubles.

That's four minutes gone in the round.
Salem throws a big shot that misses.
A big left from Salem misses.
Salem throws the left hand but Wrestler Ii avoids the punch easily.
Wrestler Ii throws a hook but Salem avoids it easily.
Salem swung with a counter right hand that didn't connect.
Wrestler Ii fails with the takedown
and Salem connects with a straight left hand counter down the middle.
Salem stuffs a takedown. It's all about dictating where the fight takes place and Salem wants it to stay on the feet.
Wrestler Ii moves out of range as Salem strikes.
Salem throws a jab but it's blocked by Wrestler Ii.
Salem is really peppering his opponent's head with punches.
Wrestler Ii doesn't succeed with the takedown
letting Salem counter with a right hand.
Salem stuffs the takedown.
Wrestler Ii closes the distance and clinches up with Salem, looking for a takedown. Wrestler Ii pushes Salem against the cage but Salem circles to the side and manages to break the clinch.
Wrestler Ii shoots in for a takedown. He's persisting with it as Salem sprawls well. Salem wins this battle and keeps the fight standing. Wrestler Ii gets slowly back to his feet.
And thats the end of the round the fighters go back to their corners.
Mohamad Salem dominated that round.
That's the end of the round. The referee orders the cornermen out of the cage so we can get back down to business.

Wrestler Ii blocks a jab.
Wrestler Ii tries to clinch there but Salem circles away.
Salem misses with an uppercut.
Nice shot lands for Salem.
Wrestler Ii misses with a right hand
letting Salem counter with a right hand.
Salem is using his height advantage well here, landing a good percentage of his punches.
Wrestler Ii throws a hook to the body but it doesn't connect.

Wrestler Ii rushes Salem and pushes him back against the cage in a clinch.
Salem is trying to break free.

Salem pushes off and circles away, back to the middle of the mat.
Wrestler Ii tries to clinch but fails miserably
and Salem connects with a straight left hand counter down the middle.
We've had a slow start to the round here - hopefully the action picks up.
Salem lands a head shot.
Salem lands with a good body shot.
Wrestler Ii doesn't succeed with the takedown
letting Salem counter with a right hand.
Salem is really dominating this fight. Is there anything that Wrestler Ii can do to turn this around?
A decent looking cross lands there for Salem.
That's one minute gone in the round.
Nice uppercut there from Salem.
A really sloppy takedown attempt there from Wrestler Ii.
A shot to the liver by Salem. Beautiful body shot.
Wrestler Ii tries to clinch but Salem is having none of it.
Wrestler Ii looks shocked there as he takes a right hand to the temple.
Salem misses with a right hand

and Wrestler Ii counters with a takedown into side control.

Salem throws his opponent off and manages to get back to his feet! Nicely done!
The crowd are loving this. Great action here.
Wrestler Ii uses decent footwork to sidestep a right hand from Salem.
Salem looks to land a left hand but Wrestler Ii moved out of range nicely.
A punch lands to the side of Wrestler Ii 's head but he takes it in his stride.
Mohamad Salem is winning the standup battle so far.
Salem scores with a jab to the head.
Wrestler Ii uses decent footwork to sidestep a right hand from Salem.
That's two minutes gone in the round.
Wrestler Ii moves out of range of the strikes.
Decent striking displayed by Salem there.
Salem displaying good standup as he scores with a three punch combination.
Salem connects with a jab.
Wrestler Ii on the wrong end of a decent looking cross there.
A big right from Salem misses.
Wrestler Ii slips under a jab from Salem.
And Wrestler Ii tries to counter it with a takedown but Salem pushes his down on his head and steps out.
Wrestler Ii tries to close the distance and clinch but Salem swats him to one side with an open hand palm strike and circles away.
Wrestler Ii walks into a jab.
Salem misses with a looping right.
Salem bobs and weaves and throws out a fast jab that snaps Wrestler Ii's head backwards.
Salem scores with a nice right hand.
Salem swings wildly with a right hand that was never going to find it's target.
That's three minutes gone in the round.
Salem connects with a lovely jab that went straight through the gap between Wrestler Ii's hands.
The fight stays on the outside here - Wrestler Ii looks like he's thinking about clinching though.
Wrestler Ii uses good head movement to avoid the hook from Salem.
Salem circles away from the clinch attempt.
Wrestler Ii ducks under a wild hook from Salem.
Wrestler Ii steps to the side to avoid the strikes from Salem.
Salem misses with a straight right.
Wrestler Ii tries to close the distance and clinch up but Salem swats him away and circles back towards the center.
A big right from Salem misses.
Wrestler Ii doesn't succeed with the takedown
and Salem counters with a lovely straight right hand!
Mohamad Salem has stuffed three takedown attempts in the round now. That's going to take a lot out of The Wrestler Ii.
Salem fakes low and throws an overhand right that catches Wrestler Ii on the side of the head.
Salem throws a monster uppercut resembling something out of street fighter but it doesn't land.
Salem sets himself, and Wrestler Ii steps forward looking for the clinch! Salem avoids it this time.
That's four minutes gone in the round.
Wrestler Ii ducks under a wild hook from Salem.
Wrestler Ii dodges the punch combination from Salem.
Salem dips down and scores with a jab to the body.
A slow jab from Salem misses its intended target.
Salem stooping low to avoid any incoming strikes and then lunges in with an uppercut come cross that lands flush.
We've seen a great period of action over the last minute or so - credit to both fighters for going all out!
Salem misses with an uppercut. Wrestler Ii saw that one coming.
Wrestler Ii closes the distance but Salem moves to the side
and Salem counters with a nice uppercut.
A punch combination from Salem misses.
Wrestler Ii wants to clinch but Salem slips to the side
and Salem counters with a stiff right hand.
Salem moves out of range as Wrestler Ii strikes.
And thats the end of the round the fighters go back to their corners.
Mohamad Salem dominated that second round.
That's the end of the round. The referee orders the cornermen out of the cage so we can get back down to business. This is the final round!

Wrestler Ii throws a jab but it's blocked by Salem.
Wrestler Ii shoots in but doesn't get the takedown
and Salem cracks him with a counter punch right on the button.
Wrestler Ii on the wrong end of a nice jab.
Wrestler Ii swings wildly with a couple of big hooks
and Wrestler Ii takes a counter punch right on the button for his troubles.
Wrestler Ii misses with a right hand
and Salem counters with a stiff right hand.
Wrestler Ii gets cracked there but stands up to it.
Salem sizes up Wrestler Ii with a pawing jab and scores with a straight right down the middle.
A big left from Salem misses.
Wrestler Ii tries to counter by closing the distance.
Wrestler Ii with a lazy takedown attempt
and Salem counters with a straight right hand.
Salem stuffs the takedown attempt from Wrestler Ii. Wrestler Ii gets slowly back to his feet.
Mohamad Salem has stuffed three takedown attempts in the round now. That's going to take a lot out of The Wrestler Ii.
Salem's corner calls for a 1-2. Salem obliges with the 1 part as he scores the single shot and moves back out of range.
That's one minute gone in the round.
Salem lets the fists fly and connects with a left straight followed by a right hook.
Wrestler Ii doesn't succeed with the takedown
and Salem counters with a quick right hand to the jaw.
Salem scores with a jab.
Salem waving his hands out in front of him, looking to distract Wrestler Ii.
Wrestler Ii tries for a takedown but Salem circles away easily
letting Salem counter with a right hand.
Wrestler Ii takes a big intake of breath there - he's definitely tired.
Salem keeping his hands up high there, blocking the jab from Wrestler Ii.
Wrestler Ii shoots in for a takedown. He's persisting with it as Salem sprawls well. Salem wins this battle and keeps the fight standing. Wrestler Ii gets slowly back to his feet.
Salem misses with a straight left.
Salem thows a left - swing and a miss!
Salem throws a hook but Wrestler Ii avoids it easily.
That's two minutes gone in the round.
Wrestler Ii tries to clinch but Salem moves away
and Salem counters with a nice uppercut.
Wrestler Ii takes a punch right to his stomach. That took the wind out of him momentarily.
The crowd are loving this. Great action here.
Salem stooping low to avoid any incoming strikes and then lunges in with an uppercut come cross that lands flush.
Wrestler Ii bobs and weaves well there to avoid the strikes.
Wrestler Ii has a pretty nasty looking mouse under his right eye.
Boom, another hit is landed. "You're gunna get knocked out" taunts Salem, as that shot connected.
A big right from Salem misses.
Wrestler Ii fakes high and swings low for a body shot but Salem manages to avoid it.
Wrestler Ii walks into a jab.
Wrestler Ii tries for a takedown but Salem circles away easily
and Salem counters with a good right hand that lands right on the jaw.
Salem jabbing away but nothing is landing.
Salem lands with an uppercut that bounces Wrestler Ii off the cage and back into range.
Salem uses good footwork to avoid the strikes from Wrestler Ii.
Mohamad Salem is fighting for a decision here - he's started to take the cautious approach.
That's three minutes gone in the round.
Salem slips under a jab from Wrestler Ii.
Salem fakes and then throws a beautiful body shot. Wrestler Ii looks a bit winded and takes a step backwards to take a breath.
Salem lands a jab to Wrestler Ii's midsection.
Wrestler Ii gets his takedown attempt stuffed easily
and Salem counters with a quick right hand to the jaw.
Salem misses with a few strikes there.
Wrestler Ii moves forwards but Salem connects with a nice, crisp jab.
Wrestler Ii shoots in but doesn't get the takedown
letting Salem counter with a right hand.
Wrestler Ii tries to clinch there but Salem circles away.
Salem connects with a jab.
Mohamad Salem is looking to keep the fight on the feet at all costs.
Wrestler Ii takes a jab right on the kisser.
Wrestler Ii takes a jab right on the kisser.
That's four minutes gone in the round.
Fantastic stuff here - a very entertaining period of action, which has drawn cheers from the crowd.
Wrestler Ii takes a body punch that cleary hurt but he's trying not to show any weakness.
Wrestler Ii is on the wrong end of a nice combination from Salem.
Salem stooping low to avoid any incoming strikes and then lunges in with an uppercut come cross that lands flush.
Salem misses with a few strikes there.
A jab from Salem finds it's way through Wrestler Ii's defenses.
Salem bobbing and weaving, closes the distance and lands a hook to the side of Wrestler Ii's head.
Wrestler Ii slips a jab from Salem.
Salem scores with a big left there. The judges will like that one.
Wrestler Ii ducks under a wild hook from Salem.
Salem misses with a series of wild punches.
Wrestler Ii tries to counter by closing the distance.
Salem stooping low to avoid any incoming strikes and then lunges in with an uppercut come cross that lands flush.
And that's the end of the fight!
Mohamad Salem showed his dominance in that final round.
Well I reckon that's a shut out for Salem, winning every round. Will the judges agree? They are the ones who matter, even if they are often depressingly incompetent. Over to the ring announcer for the scorecards.
Ladies and gentlemen, after 3 rounds of action, we go to the scorecards for a decision.
Judge Cecil Peabody scores the fight 30:24
Judge Tiny Johnson scores the fight 30:24
Judge Robert Twigg scores the fight 30:24
In favor of your winner, by unanimous decision... Mohamad Salem!
|
|
|
|
|
|
|
|
|
|
|
|
|
|
|
|
|
|
|
|
|
|
|
| S |
C
A |
G |
S |
C
B |
G |
|
S |
C |
G |
|
energy
A | B |
|
hype
A | B |
|
pop
A | B |
|
mgr
A | B |
|
FIGHT
RATING
72% |
|
|
|
|
|
|
