|
|
PBP Commentary |
Coming up we have a middleweight MMA rules bout between Kermit Earlandson (ranked 0 p4p, 0 weight class) and Bowman Rook (ranked 0 p4p, 0 weight class). Earlandson comes to the cage accompanied by the theme from titanic. These two fighters really are very evenly matched on the feet - it will be fascinating to see who can assert themselves in that aspect of the fight.
 |
|
 |
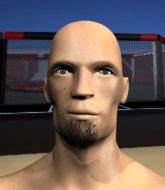
| 185 cm
32
201 lbs
24 - 32 - 0 |
|
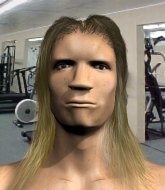
180 cm
34
190 lbs
24 - 19 - 0 |
BJJ Red Belt
Excellent boxer
Insanely flexible |
|
Good wrestler
Excellent MT
Powerful |
|
| |
|
Ladies and gentlemen. This fight is 5 rounds, in the middleweight division.
Introducing the fighter to my left, fighting out of the red corner.
With a record of
24 - 32 - 0, fighting out of Las Vegas, Kermit Earlandson!
And introducing the fighter to my right, fighting out of the blue corner.
With a record of
24 - 19 - 0, fighting out of Los Angeles, Bowman Rook!
The judges for this bout are Jack Bonds, and Frank Antenori.

The bell rings for round one and we are underway!
Earlandson shoots in for a takedown but Rook shows good takedown defense there and keeps this one on the feet.
Kermit Earlandson seems to be the more aggressive standup fighter in this bout.
Earlandson wants to clinch up but Rook keeps it at a distance.
Earlandson scores with a push kick.
Rook swings and misses with a hook to the body.
A jab from Rook misses.
Earlandson misses with a takedown
and Rook connects with a straight left hand counter down the middle.
Earlandson misses with a takedown

and Rook counters by moving into the clinch. Good anticipation by Rook.
That's three failed takedown attempts in the round for Kermit Earlandson. That's going to take a lot out of him.
Rook misses with an elbow over the top.
Earlandson is trying to slow down the pace of the fight but Rook is keeping busy.
Earlandson is trying to drag Rook to the mat but Rook just about manages to keep his footing. He used the cage to his advantage there.
We've had a slow start to the round here - hopefully the action picks up.
Good anti-grappling being displayed by Earlandson as Rook tries to tie him up.

Earlandson's corner calls for him to break the clinch, which he does.
Earlandson tries for a takedown but Rook circles away easily
and Rook counters with a straight punch to the midsection.

That's one minute gone in the round.
Earlandson looks for a takedown here. Will he get it? Rook is fending him off so far but Earlandson persists. Nope, Rook circles away and we're back to standing.
Rook appeared to try and counter that last move with a leg kick.
Earlandson gets his takedown attempt stuffed easily
and Rook counters with a right hand to the body.
Rook loads up on a big right hand but Earlandson slips the punch.
Rook connects with the punch.
Earlandson shoots for a takedown but Rook saw that one coming a mile off and avoided it easily.
Rook misses with a body shot. Nice footwork from Earlandson.
We can't be sure of the tactics at this early stage but we have heard that Rook has been working on his takedowns a lot in the buildup to the fight and we can only assume he's going to look to take this to the mat.
Horrible takedown attempt by Earlandson or perhaps it was just good defense by Rook, which made it look bad.
Earlandson closes the distance and clinches up with Rook, looking for a takedown. Earlandson pushes Rook against the cage but Rook circles to the side and manages to break the clinch.
A telegraphed takedown attempt from Earlandson is defended easily by Rook.
Rook appears to be waiting to throw a counter punch to the body.
Earlandson fails with a takedown attempt.
Earlandson is trying hard to land a takedown here. Rook sprawls well and keeps this one on the feet.
Earlandson tries for a takedown but Rook circles away easily
and Rook counters with a stiff right hand.

That's two minutes gone in the round.
Earlandson fails with a takedown attempt.
And Rook tries to counter it with a takedown but Earlandson pushes his down on his head and steps out.
Earlandson shoots for a double leg takedown but Rook sprawls well. He's pushed Earlandson's face into the mat and manages to get back to his feet relatively easily.
Earlandson on the wrong end of a vicious looking body shot.
Earlandson shoots in and drives through. Rook sprawls well.

Earlandson shoots in for a takedown! He's got it and he's managed to land in side control! That's better than Earlandson was expecting from the takedown attempt, I'm sure!

Rook throws Earlandson to one side and escapes!
Wooooo! Give it up for these two warriors! They are putting on a show!
Rook scores with a nice body kick.
Earlandson gets his takedown attempt stuffed easily
and he gets countered with a snapping leg kick.

Rook looking to shoot here. He's gone for it and he's landed a takedown into side control! Oh, that's bad for Earlandson!
Rook trying to control the position but Earlandson is working away.

That's three minutes gone in the round.
You can see the frustration on Earlandson's face, being in this tough position on the bottom.
Rook controlling the position.
Earlandson manages to work his way to half guard, despite Rook's best efforts.
Rook working over Earlandson with some ground and pound. Earlandson looks like he wants out of this position, which is understandable.

Earlandson looking for submissions off his back.
Earlandson is looking to control Rook's leg but it's slowly edging free. Can Earlandson avoid being mounted?
Earlandson tries to regain full guard. Instead though, Rook has advanced to mount. Uh oh.
The fighters are going at a pretty good pace and they're both starting to sweat now.
Earlandson is in all sorts of trouble here.

That's four minutes gone in the round.
Rook lands a big elbow.
Rook lands a heavy elbow.
Rook working the ground and pound effectively.
The referee warns Earlandson that he has to improve his position here as he takes two more clean shots to the head.
Rook lands an elbow that was bordering on illegal but the referee lets it go with a warning.
The crowd cheering loudly, showing their appreciation for the quality fight we're seeing here.
Earlandson is trying desperately to improve position.
A nice elbow there by Rook.
Rook with the ground and pound from mount.
Earlandson is writhing around trying to get back to his feet.
Earlandson really trying hard to get back to half guard here.
Rook pausing momentarily but resumes with a couple of decent strikes that do a bit of damage.
Earlandson is wriggling around trying to escape.
And thats the end of the round the fighters go back to their corners.
Bowman Rook dominated that round.
The fighters get back to their feet, the hooter sounds and we're back to the action!

Rook moves into the clinch successfully.
Earlandson tries a knee to the head but Rook blocks it.
Rook with the Thai clinch, lands a knee to the head.
Rook can't find room to land a body shot as Earlandson controls the action.
Rook has been the more effective fighter overall so far.
Rook trying to land knees to the body.
Earlandson takes a knee to the side of the body.
Earlandson is looking for a takedown up against the cage. Rook gets underhooks though and prevents the takedown attempt.
A short right from Rook on the inside.
Rook is leaning against Earlandson and scores with a nice uppercut to the body.
Rook is pressed up against the cage. Earlandson has hold of a leg and is looking to drag Rook down to the mat. Rook avoids the attempt though and has circled away. We're back to striking at a distance.
Earlandson shoots in but Rook avoids the takedown attempt easily.
That's three failed takedown attempts in the round for Kermit Earlandson. That's going to take a lot out of him.
Rook lands a body shot.
We've had a slow start to the round here - hopefully the action picks up.
Rook clinches up against the cage.
Earlandson avoids the elbow strike from Rook, against the cage.
Earlandson tries to pull guard but Rook holds him up against the cage and eventually Earlandson drops back down to his feet.
Rook tries to land a shot to the body but it's blocked.
Rook tries to land a knee to the head but Earlandson blocks with his arms.
That's one minute gone in the round.
Rook throws a punch but it's blocked by Earlandson.
Rook tries a knee to the head but Earlandson blocks it.
Earlandson tries to pull guard but Rook holds him up against the cage and eventually Earlandson drops back down to his feet.
Earlandson tries to pull guard but Rook won't allow it.
Earlandson avoiding damage as Rook throws knees to the body.
Rook creates a bit of distance and throws an elbow that only just misses.
Rook with an attempt at a knee that misses.
Earlandson blocks the elbow strike.
Rook lands a right hand.
Rook lands with a short head shot on the inside.
Earlandson wants a takedown.
Earlandson manages to break the clinch.
Earlandson takes a shot to the body in his stride.
Bowman Rook seems to be getting the better of the standup.
Rook misses with an attempted mid kick.
Danga de danga de dang - Earlandson scores with a four punch combination!
Earlandson with a poor takedown
and Rook cracks him with a counter punch right on the button.
Both fighters are absolutely exhausted here.
Wooooo! Give it up for these two warriors! They are putting on a show!
Earlandson tries to drive through with a takedown attempt but Rook defends well and Earlandson ends up having to push Rook into the cage where they will battle it out in the clinch.
Earlandson shoots for a double leg takedown but Rook sprawls well. He's pushed Earlandson's face into the mat and manages to get back to his feet relatively easily.
That's two minutes gone in the round.
Earlandson tries to clinch up but Rook circles away and keeps his distance.
Rook is throwing a lot of body shots here, looking to wear down Earlandson rather than just go for the knockout.
Earlandson throws a low kick but Rook avoids it.
Earlandson slips a straight right by Rook.
Earlandson blocks a low kick nicely.
Both fighters circling a little - Rook finishes the exchange with a kick to the body.
Rook stuffs a takedown. It's all about dictating where the fight takes place and Rook wants it to stay on the feet.
Earlandson tries to clinch but Rook moves out of range.
Earlandson sets himself, and Rook steps forward looking for the clinch! Earlandson avoids it this time.
Rook shoots in looking for a single leg takedown. Earlandson is trying to defend but Rook finishes it well and ends up in half guard. Let's see if he can advance position further.
The referee walks around the fighters to get a better view of the action. Rook lands a nice short elbow.
Earlandson is looking to sinch up a guillotine here but Rook pulls his head out easily.
Rook working the head and body with strikes.
Rook lands a big shot. The thud that echoes around the arena is like music to the fans' ears.
Earlandson regains full guard. Nicely done.
That's three minutes gone in the round.
Rook postures up.
Earlandson is working an open guard here, looking to improve his position. No doubt that will leave him open to counters but at least he's being more offensive.
Rook stands up over Earlandson, holding his feet. He dives back in and lands a decent shot to the head.
Rook working from the guard for now, landing some ground and pound.
Earlandson escapes his hips to the side and looks to be working for an armbar. Rook gives him a little smile and shakes his head. No chance.
Rook wants to pass the guard but Earlandson is keeping the position.
Rook trying to control but Earlandson is working from the bottom.
Rook with a nice head shot there.
Rook working some strikes from top position.
Rook must be cautious of submissions here, given that his opponent has the superior Jiu Jitsu.
That's four minutes gone in the round.
Earlandson throwing his legs up looking for a triangle.
Rook loading up with the ground and pound but he's missing more than he's landing in this flurry.
Earlandson is looking for a guillotine. You can't force these things though and Rook defends well.
Earlandson had isolated an arm as going for a kimura. Rook defends it easily.
Rook avoids a guillotine attempt easily.
Rook trying to control but Earlandson is working from the bottom.
Rook with a couple of shots to the head there. Not particularly brutal.
And thats the end of the round the fighters go back to their corners.
Bowman Rook showed his class in that round. I'd imagine he'll take it on all the scorecards.
The minute break is over - no more time for sponges and pep talks - back to the action!

Earlandson tries for a takedown but Rook sees it coming a mile off and avoids it easily.
Rook closes the distance and clinches.
Good body shot from Rook.
With the two fighters working up against the cage, Rook just misses with a elbow thrown towards Earlandson's brow.
Earlandson is trying to pull guard but being pressed up against the cage enables Rook to keep the fight standing.
Rook lands a body punch in the clinch.
Rook lands punches inside but they're not really causing much damage.
Rook using the Thai plumb to throw knees but Earlandson has his back arched nicely, preventing the strike.
Earlandson can't get the takedown.
That's three failed takedown attempts in the round for Kermit Earlandson. That's going to take a lot out of him.
Rook is working Earlandson over against the cage.
Rook creates a bit of space for himself and sneaks an elbow through Earlandson's defenses.
Rook lands a shot to the body.
A left hand lands to the body for Rook.
Rook using the Thai clinch to land knees to the body.
Rook digs a right hand into Earlandson's ribs. Those have got to be taking their toll on Earlandson's gas tank.
Earlandson avoiding damage as Rook throws knees to the body.
Earlandson tries to jump guard but he falls flat on his backside. Rook smiles and moves away.
Both fighters are breathing heavily.
A solid leg kick lands there for Rook.
That's one minute gone in the round.
Good leg kick by Rook there. It's the ones that make that thud noise that hurt and that was an almighty thud.
Earlandson closes the distance and takes a jab right on the nose as he does so.
A nice inside leg kick there by Rook. That's going to slow Earlandson down.
Earlandson drops his hands and takes a jab to the jaw for his troubles.
Earlandson fakes high and shoots in for a takedown but Rook avoids it really well and circles away.
Rook scores with a jab. Earlandson acknowledges it with a nod of the head.
Rook throws a body shot but no joy.
Rook scores with the left hand. Earlandson knows he should have avoided that one.
Earlandson shoots in but no luck this time.
Rook follows through with a counter body kick but it doesn't land.
Earlandson doesn't succeed with the takedown
and Rook counters with a straight right hand.
Earlandson looks shocked there as he takes a right hand to the temple.
That's two minutes gone in the round.
Earlandson closes the distance and clinches up with Rook, looking for a takedown. Earlandson pushes Rook against the cage but Rook circles to the side and manages to break the clinch.
Earlandson misses with a looping right.
Rook shapes to counter with a head kick.
Earlandson throws out a leg kick but Rook moves out of range and Earlandson only half commits.
Rook appeared to try and counter that last move with a leg kick.
Wooooo! Give it up for these two warriors! They are putting on a show!
Earlandson tries to clinch there but Rook circles away.
Rook misses with a wild combination.
Earlandson moves in looking to clinch but Rook pushes him off.
Rook feints the counter takedown.
Rook connects with a body shot that sends Earlandson's belly button to the back.
Rook leaves Earlandson with his face pressed against the mat as he sprawls beautifully, defending against a solid takedown attempt.
Rook doesn't fully commit to the body shot counter.
Earlandson shoots in for a double leg but Rook sprawls well. That's going to sap some energy.
Rook fakes a head shot and lands one to the body.
Rook closes the distance and scores a nice trip takedown into half guard. Earlandson did well to prevent Rook getting side control.
Rook is figuring out what he wants to do next.
Earlandson looking for submissions from an awkward position here.
That's three minutes gone in the round.
Rook lands strikes from half guard.
Earlandson has hold of Rook's hands but Rook slips his arm to the side and lands an elbow.

Rook is trying a forearm choke
I don't think that's going to do much at this level of the game.
Earlandson looking to work for a kimura from the bottom.
Rook is keen to just control but Earlandson is a slippery customer.
Rook might have to switch it up a bit here because his efforts to control Earlandson haven't been going to plan, at least at the current moment in time.
Earlandson is looking to sinch up a guillotine here but Rook pulls his head out easily.
Earlandson is looking to sinch up a guillotine here but Rook pulls his head out easily.
That's four minutes gone in the round.
Earlandson is trying to defend against the ground and pound but Rook scores with a couple of nice shots.
Bowman Rook has got the better of the ground game so far.
Earlandson wants to control but Rook is keeping busy.
Earlandson actively working from the bottom here.
Rook is looking to take a break and control but Earlandson is keeping him honest, looking to work from the bottom.
The fighters are pressed up against the cage, both looking to find a bit of space to work.
Rook landing with strikes to the body and head, softening up his opponent.
Rook is trying to control the action in half guard but Earlandson is working away on the bottom, looking perhaps to get back to full guard.
Rook is keeping good posture, landing some ground and pound.
Earlandson actively working from the bottom here.
The referee walks around the fighters to get a better view of the action. Rook lands a nice short elbow.
Earlandson is looking to sinch up a guillotine here but Rook pulls his head out easily.
And thats the end of the round the fighters go back to their corners.
Bowman Rook really dominated that round.
Well, the break between rounds is over. Let's get back to the scrappin!

Earlandson moves forwards but Rook connects with a nice, crisp jab.
Earlandson drives through with a takedown into guard.
Earlandson trying to control the position from guard on top but Rook is wriggling around, looking for whatever he can.
Rook is working an open guard here, looking to improve his position. No doubt that will leave him open to counters but at least he's being more offensive.
Earlandson is looking to pass into half guard but Rook pushes him away with his feet and jumps on top - now Rook is in guard.

Earlandson throwing his legs up looking for a triangle.
Earlandson isolates an arm and boxes in a triangle. Rook stacks Earlandson on his neck as he steps over and passes to the side. He's now in a much more dominant position where he can look to do some serious damage. Nice move by Rook!
We've had a slow start to the round here - hopefully the action picks up.
Earlandson manages to get one leg in to regain half guard.
Rook working over Earlandson with some ground and pound. Earlandson looks like he wants out of this position, which is understandable.
That's one minute gone in the round.
Rook drops an elbow to the side of Earlandson's head.
Earlandson looking to work for a kimura from the bottom.
Still in half guard, Rook seems content to control.
Rook wants to take a breather but Earlandson is having none of it.
Rook looks to score some points with some ground and pound.
Earlandson trying to control but Rook postures up.
Earlandson moves his hips nicely and gets into full guard.
Earlandson looking for a guillotine here but Rook defends easily.
Rook advances position into side control!
That's two minutes gone in the round.
Rook wants to lay and pray for a moment but Earlandson keeps working.
Earlandson can't do much from the bottom here.
Rook working the head and body with strikes.
Earlandson is positioning himself to get back to half guard.
Rook creates a bit of distance and throws down some hard shots.
You can see the frustration on Earlandson's face, being in this tough position on the bottom.
Earlandson manages to get one leg in to regain half guard.
That's three minutes gone in the round.
Rook seems to be looking for submissions.
Earlandson actively working from the bottom here.
Rook not throwing his punches with enough precision this time.
Rook is sneakily working for an arm triangle but Earlandson sees it coming and defends easily.
Earlandson actively working from the bottom here.
Rook controlling the pace.
Rook throwing shots but Earlandson is blocking nicely.
Earlandson tries to roll over but Rook keeps him under control.
Earlandson is looking to sinch up a guillotine here but Rook pulls his head out easily.
That's four minutes gone in the round.
The crowd are starting to boo a lack of action.
Rook is looking for a kimura but Earlandson is holding onto that half guard position, so it's hard for Rook to get the leverage.
Earlandson is looking to sinch up a guillotine here but Rook pulls his head out easily.
Earlandson looking for submissions from an awkward position here.
It's got to the stage where if one of these guys blows hard enough, the other might fall over.
Rook wants to take a breather but Earlandson is having none of it.
Rook is sneakily working for an arm triangle but Earlandson sees it coming and defends easily.
Earlandson looking for submissions from an awkward position here.
Boooooooooooooooooooo!!! God, this has been a terrible round. Come on you two, sort yourselves out!
Earlandson is looking to sinch up a guillotine here but Rook pulls his head out easily.
Rook takes advantage of the dominant position to land a couple of big hammer fists.
And thats the end of the round the fighters go back to their corners.
Bowman Rook dominated that fourth round.
Well, the break between rounds is over. Let's get back to the scrappin! Let's get this one finished - here comes the final round!

Earlandson goes for a double leg but Rook avoids the attempt and the two fighters end up clinched against the cage as Rook continues to drive forward.
Rook only half commits to the counter leg kick.
Earlandson shoots for a takedown but Rook saw that one coming a mile off and avoided it easily.
Rook leaves Earlandson with his face pressed against the mat as he sprawls beautifully, defending against a solid takedown attempt.
That's three failed takedown attempts in the round for Kermit Earlandson. That's going to take a lot out of him.
Rook misses with a looping left.
Rook slaps away a takedown attempt from Earlandson, before circling back to the center of the mat.
Earlandson tries to score a power double leg takedown but Rook sees that one coming and sprawls well. That will dishearten Earlandson somewhat.
Rook slaps away a takedown attempt from Earlandson, before circling back to the center of the mat.
We've had a slow start to the round here - hopefully the action picks up.
Earlandson shoots and misses
and Rook counters with a straight right hand.
Earlandson fails with a takedown attempt from distance.
Rook manages to get an easy takedown there - catching Earlandson on his heels. He'll look to pass Earlandson's guard now, I'm sure.
Both of our modern day gladiators look out of it here - a gruelling 5 rounds of action taking it's toll on them, no doubt.
Earlandson is looking for a triangle but Rook pushes his legs off easily.
That's one minute gone in the round.
Earlandson has momentary wrist control but Rook slips an elbow through the middle.
Earlandson working for a triangle but Rook defends it easily.
Rook stands up over Earlandson, holding his feet. He dives back in and lands a decent shot to the head.
Rook got a little sloppy there for a moment and Earlandson has worked his way into a loose triangle - can he finish it?! No, Rook has managed to get both his arms back between Earlandson's legs - danger averted.
Rook forces his way into half guard.
Rook drops an elbow to the side of Earlandson's head.
Earlandson is looking to sinch up a guillotine here but Rook pulls his head out easily.
Rook is nestled in close to Earlandson, controlling him well. He's worked in a nice elbow to the side of the head as well, for good measure.
That's two minutes gone in the round.
Rook looks to score some points with some ground and pound.
Earlandson is looking to sinch up a guillotine here but Rook pulls his head out easily.
Rook seems to be looking for submissions.
Earlandson is staying active underneath Rook, who seems content to just control the action from this position.
Rook thumps the canvas. Not on purpose obviously - he just missed Earlandson's head.
Rook winds up and cracks Earlandson with a swinging punch to the side of the head.
Earlandson actively working from the bottom here.
Earlandson looking for submissions from an awkward position here.
Earlandson looking to work for a kimura from the bottom.
Rook is trying a forearm choke
I don't think that's going to do much at this level of the game.
That's three minutes gone in the round.
Earlandson looking for submissions from an awkward position here.
Earlandson wants to control the action here but instead Rook manages to pass to full mount!
Earlandson wants to hold on but Rook pushes him away.
Rook working for a guillotine from mount but Earlandson is in no mood to give up.
Earlandson is writhing around trying to get back to his feet.
Earlandson is trying to escape the mount.
Earlandson tries to hold on but Rook postures up.
That's four minutes gone in the round.
Rook scoring with some good ground and pound from mount here. Will he manage to finish Earlandson?
Earlandson keeping his composure momentarily, calmly looking to get back to half guard.
Earlandson tries to lock up and control but Rook gives him a forearm to the face and pushes him away.
The crowd growing excited in anticipation of a finish here! Right on cue, Rook cracks his opponent with a massive right hand that draws loud cheers!
Earlandson is squirming around, avoiding Rook's attempts to control the action.
Earlandson tries to hold on but Rook pushes him away.
Rook looking to finish Earlandson with some ground and pound. This is bad for Earlandson!
The crowd thankful this round is nearly over.
Rook putting on the heat here with some good ground and pound!
Rook lands a shot to the body, followed up by a shot to the exposed head of his trapped opponent.
The fans in attendance giving it up for the two fighters, who have really let it all hang out in the last minute or so!
Earlandson is desperately trying to get back to half guard.
Kermit Earlandson has stepped it up - he knows he needs a finish here!
Earlandson throwing hammer fists to the chest of Rook. What's that going to do exactly?
And that's the end of the fight!
Bowman Rook comfortably won the final round on my scorecard.
Well Rook has outworked and out performed his opponent in all aspects of the game today. He was simply too good and the decision should be no more than a formality. Over to the ring announcer for the scorecards.
Ladies and gentlemen, after 5 rounds of action, we go to the scorecards for a decision.
Judge Jack Bonds scores the fight for Bowman Rook!
Judge Percy O'Donnell scores the fight for Bowman Rook!
Judge Frank Antenori scores the fight for Bowman Rook!
Bowman Rook wins by unanimous decision!
Jumping up and down and very excited, Bowman Rook waved his t-shirt featuring Milwaukee's Best 160 (80% laundry)'s logo in front of the cameras.
|
|
|
|
|
|
|
|
|
|
|
|
|
|
|
|
|
|
|
|
|
|
|
| S |
C
A |
G |
S |
C
B |
G |
|
S |
C |
G |
|
energy
A | B |
|
hype
A | B |
|
pop
A | B |
|
mgr
A | B |
|
FIGHT
RATING
53% |
|
|
|
|
|
|

