|
|
PBP Commentary |
Coming up we have a welterweight MMA rules bout between Corak Hoon (ranked 0 p4p, 0 weight class) and Klay Montez (ranked 0 p4p, 0 weight class). This should be a great matchup!
 |
|
 |
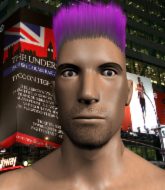
| 170 cm
25
165 lbs
3 - 4 - 0 |
|
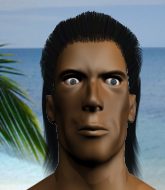
175 cm
21
185 lbs
5 - 7 - 0 |
Good wrestling
Counter fighter
Granite chin |
|
BJJ Blue Belt
Counter fighter
Granite chin |
|
| |
|
Ladies and gentlemen. This fight is 3 rounds, in the welterweight division.
Introducing the fighter to my left, fighting out of the red corner.
With a record of
3 - 4 - 0, fighting out of The Island, Corak Hoon!
And introducing the fighter to my right, fighting out of the blue corner.
With a record of
5 - 7 - 0, fighting out of The Island, Klay Montez!
The judges for this bout are Bart Greer, Sandra Marshall and Winston Alpacca.

The bell rings for round one and we are underway!
Hoon closes this distance looking for a takedown but Montez circles away.
Hoon looks to have improved his striking defense since last time we saw him fight.
Hoon shoots in looking for a takedown. Montez tries to sprawl out of it but Hoon keeps driving through. The fighters are pinned against the cage. Montez manages to get underhooks and after a bit of a struggle, circles away and we're back to standing.
Montez is trying to avoid his opponent's strikes and get into the clinch.
Hoon fails with a takedown attempt.
That's three failed takedown attempts in the round for Corak Hoon. That's going to take a lot out of him.
Montez throws a leg kick but Hoon sees it coming and checks it nicely.
We've had a slow start to the round here - hopefully the action picks up.
Montez misses with a double jab.

Montez rushes Hoon and presses him up against the cage.
Hoon on the defensive, avoiding the knees to the body.

Montez turns his hips and lands a very nice judo throw into side control!

That's one minute gone in the round.
Hoon is trying to get back to half guard.
Hoon is not content to let Montez control the position.
Hoon tries to improve position but can't.
Montez scores with a couple of short elbows.
Montez working the ground and pound but he's contacting the mat, not the fighter.
Hoon manages to work his way to half guard, despite Montez's best efforts.
Montez is figuring out what he wants to do next.
Hoon missing with punches from the bottom.
Hoon makes his way to full guard. A much better position for Hoon.
The ref warns both fighters not to hold the cage as they work up against the meshing.
Hoon controlling the position.

That's two minutes gone in the round.
Hoon working a defensive guard here.

Hoon is working actively off his back, looking to secure an arm or perhaps work for a triangle.
Hoon controlling the position.
Hoon working a defensive guard but Montez manages to pass into side control anyway.
Montez trying to control the action but Hoon is working from the bottom.
Hoon tries to strike but it doesn't land.

Montez working hard here to secure a kimura but he's not really in the right position for it.
Hoon tries to buck Montez off but Montez is having none of it.

That's three minutes gone in the round.

Montez has had enough of the ground for now and decides to stand.
Hoon shoots for a double leg takedown but Montez sprawls well. He's pushed Hoon's face into the mat and manages to get back to his feet relatively easily.
We've been informed that Montez has been working hard on his conditioning in the buildup to the fight.
Montez tries to bum rush Hoon with a series of wild strikes but Hoon uses good footwork to avoid the assault.
Hoon misses with a takedown attempt
and Montez counters with a shoot takedown into half guard.
Hoon tries to roll over but Montez keeps him under control.
Hoon is trying to control but can't.
Montez trying to pass the guard but Hoon defending well.
Hoon has hold of Montez's hands but Montez slips his arm to the side and lands an elbow.
Montez controlling the action here.

That's four minutes gone in the round.
Montez is looking for a kimura but Hoon is holding onto that half guard position, so it's hard for Montez to get the leverage.
The fighters are pressed up against the cage, both looking to find a bit of space to work.
Hoon wants to improve his position but Montez is controlling well.
Hoon moves his hips nicely and gets into full guard.

Hoon wriggles free and stands up.
Wooooo! Give it up for these two warriors! They are putting on a show!
Montez fails to land the takedown.
Hoon drops down looking for a counter takedown but Montez sprawls and moves away.
The crowd thankful this round is nearly over.
Montez tries a head kick but it misses.
Hoon fails with a takedown attempt.
And thats the end of the round the fighters go back to their corners.
Klay Montez dominated that round.
That's the end of the interval. I'm sure that seemed a lot quicker than a minute for our two fighters! Back to the action.

Hoon fails with a rather predictable takedown attempt.
Hoon shoots in for a takedown. "Ole!" shouts Montez as he jumps to the side.
Corak Hoon is looking to throw some combinations by the looks of things.

Hoon gets a double leg takedown into Montez's guard.
Hoon wants to control from the top but Montez keeps moving.
We've had a slow start to the round here - hopefully the action picks up.
Hoon drops back looking for a heel hook - he quickly realises he's not going to get it but Montez manages to dive on top of him before he can escape and now Hoon has Montez in his guard.

Hoon looking to hit a scissor sweep but Montez is one step ahead there.
That's one minute gone in the round.
Montez wants to pass the guard but Hoon is keeping the position.
Hoon looking to control.
Hoon is avoiding any damage by keeping wrist control.
Hoon wants to sweep but no luck.
Montez tries to free his leg and advance position but Hoon is retaining full guard.
Montez is stalling in the full guard.
Hoon not looking particularly offensive just at the moment.
That's two minutes gone in the round.
Neither fighter has done anything of merit for a good minute or two here and the crowd are not happy about it.
Montez landing some decent shots from guard.
Hoon looking to hit a scissor sweep but Montez is one step ahead there.
Hoon is working from a closed guard but he's struggling to control his opponent.
Montez pressing down on his opponent's thigh, looking to pass guard. Hoon is keeping the position for now.
Montez wants to get up but he can't break Hoon's closed guard. He needs to be careful trying to break the legs open, as he's open to submissions here.
Montez wants to control from the top but Hoon keeps moving.

The referee has stepped in and called for a break in the action. We'll restart on the feet.
Montez throws a sloppy head kick and Hoon moves out of range easily.
Hoon has his takedown stuffed
and Montez holds on and brings the fighters into a clinch.
That's three failed takedown attempts in the round for Corak Hoon. That's going to take a lot out of him.
That's three minutes gone in the round.
Hoon looking for a takedown.
Montez prevents the takedown attempt.
Montez can't find room to land a body shot as Hoon controls the action.

Montez breaks the clinch and we return to the middle of the mat.
Montez misses with a body kick.
Hoon takes a jab right on the nose. That must have hurt but he shrugs his shoulders and looks to return the favor.
Nice takedown defense from Hoon. No joy for Montez on that attempt.
Hoon fails with a rather predictable takedown attempt.
Montez tries to counter by closing the distance.
Montez tries a head kick but it misses.
That's four minutes gone in the round.
Hoon shoots in and drives through. Montez sprawls well.
Hoon has his takedown stuffed
and Montez counters by clinching up.
Montez doesn't land with the attempted body shot.
Hoon blocks a knee to the body. He'll have a nicely bruised forearm in the morning.
Montez prevents a takedown attempt there.
Montez lands a nice trip takedown into half guard.
The crowd thankful this round is nearly over.
Hoon wants to improve his position but Montez is controlling well.
Hoon wants to get back to full guard but Montez has mounted him!
And thats the end of the round the fighters go back to their corners.
Klay Montez showed his class in that round. I'd imagine he'll take it on all the scorecards.
The minute break is over - no more time for sponges and pep talks - back to the action! The crowd applaud as we get ready to start the final round!

Montez tries to score a power double leg takedown but Hoon sees that one coming and sprawls well. That will dishearten Montez somewhat.
Montez goes for a spinning back kick but it misses.
Hoon shoots in for a takedown but Montez shows good takedown defense.
Montez wants to counter with a clinch but Hoon pushes him away.
Hoon shoots in and drives through. Montez sprawls well.
Montez tries to land a front kick but Hoon steps back. That was a bit too telegraphed.
Hoon drops down looking for a counter takedown but Montez sprawls and moves away.
We've had a slow start to the round here - hopefully the action picks up.

Montez gets tackled into the cage by Hoon. Hoon maintains the clinch.
Montez avoiding damage.
Montez missing with knees to the body.
That's one minute gone in the round.
Hoon tries for a takedown but Montez manages to get underhooks.
That's three failed takedown attempts in the round for Corak Hoon. That's going to take a lot out of him.
Montez jumps into guard, dragging Hoon to the mat.
Hoon pushing down on Montez's thigh, trying to pass to half guard. He's managed it... Nice work.
Hoon seems to be working for a kimura but Montez defends the submission attempt.
Montez is staying active underneath Hoon, who seems content to just control the action from this position.
Hoon is really struggling to control Montez but he's trying to hold on to the position.
Montez is trying to defend against the ground and pound but Hoon scores with a couple of nice shots.
Hoon wants to take a breather but Montez is having none of it.
Montez on the receiving end of some nice ground and pound.
Hoon takes advantage of the dominant position to land a couple of big hammer fists.
That's two minutes gone in the round.
Montez is not content to let Hoon control the position.
Hoon is stalling here. Montez is in no mood to hang around though. He's locked up a kimura from the bottom! Hoon seems to be keeping calm but he's forced to roll out of the hold and Montez has ended up in side control on the top. Nice work.
Both fighters are breathing heavily.
Hoon sneaks back into half guard.
Hoon trying to control but Montez postures up.
Hoon wants to improve his position but Montez is controlling well.
Hoon wants to control but Montez is keeping busy and won't allow it.
Montez slips a nice elbow through Hoon's hands, connecting with Hoon's forehead.
Montez wants to take a breather but Hoon is having none of it.
Hoon gets full guard.
That's three minutes gone in the round.
Hoon trying to control the position.
Montez decides he's had enough of playing guard and decides to stand. Come on Hoon, up you get!
Sloppy strikes from Montez. Those never looked like landing.
Hoon shoots in for a takedown and gets it.

Montez kicks Hoon off and gets back to his feet.
Montez throws a head kick that misses and slips in the process. He scrambles back to his feet and the fighters circle.
Hoon tries to clinch
and Montez counters with a shoot takedown into half guard.
Hoon kicks off Montez and gets to his feet.
Wooooo! Give it up for these two warriors! They are putting on a show!
Hoon circles away from the clinch attempt.
A counter left hand to the body from Hoon misses its target.
That's four minutes gone in the round.
Montez fakes a jab and throws a low kick but Hoon checks it well.
Hoon appears to be looking for a counter takedown.
Montez throws a head kick that misses
and Hoon holds on and brings the fighters into a clinch.
Montez tries to land a shot to the body but it's blocked.
Montez is trying to slow down the pace of the fight but Hoon is keeping busy.
Hoon is working for a takedown up against the cage. He can't get it on this occasion though.
Hoon changes levels and goes for a takedown here. Montez fights it off and pushes away nicely.
Montez moves into range and lands a nice leg kick.
And that's the end of the fight!
I would just about give that final round to Klay Montez.
Well Montez has outworked and out performed his opponent in all aspects of the game today. He was simply too good and the decision should be no more than a formality. Over to the ring announcer for the scorecards.
Ladies and gentlemen, after 3 rounds of action, we go to the scorecards for a decision.
Judge Bart Greer scores the fight 27:30
Judge Sandra Marshall scores the fight 27:30
Judge Winston Alpacca scores the fight 27:30
In favor of your winner, by unanimous decision... Klay Montez!
An out of breath Klay Montez thanked his loyal fans in his post fight interview, giving them credit for his success over the course of his career.
|
|
|
|
|
|
|
|
|
|
|
|
|
|
|
|
|
|
|
|
|
|
|
| S |
C
A |
G |
S |
C
B |
G |
|
S |
C |
G |
|
energy
A | B |
|
hype
A | B |
|
pop
A | B |
|
mgr
A | B |
|
FIGHT
RATING
39% |
|
|
|
|
|
|
