|
|
PBP Commentary |
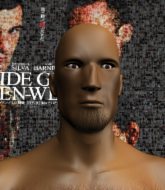
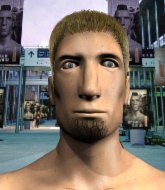
Coming up we have a bantamweight MMA rules bout between Buff Bagwell (ranked 0 p4p, 0 weight class) and Conor Byrne (ranked 0 p4p, 0 weight class). Byrne comes into a darkened arena with his song building. I'm Shipping Up To Boston kicks in, the lights come on and the crowd goes wild! What a showman! These two fighters really are very evenly matched on the feet - it will be fascinating to see who can assert themselves in that aspect of the fight.
 |
|
 |
| 178 cm
23
147 lbs
5 - 5 - 0 |
|
162 cm
20
131 lbs
6 - 5 - 0 |
BJJ Brown Belt
Brawler
Very strong |
|
BJJ Brown Belt
Brawler
Granite chin |
|
| |
|
Ladies and gentlemen. This fight is 3 rounds, in the bantamweight division.
Introducing the fighter to my left, fighting out of the red corner.
With a record of
5 - 5 - 0, fighting out of Tokyo, Buff Bagwell!
And introducing the fighter to my right, fighting out of the blue corner.
With a record of
6 - 5 - 0, fighting out of Tokyo, Conor Byrne!
The judges for this bout are Tatsuya Matsuyama, Taro Takaoka and Sosuke Kotani.

The bell rings for round one and we are underway!
Bagwell throws a hook but Byrne blocks it.
Byrne moves out of range as Bagwell strikes.
Bagwell misses with a jab and misses with a cross straight after too.
Byrne doesn't manage to clinch there - Bagwell circles away.
Bagwell closes the distance and clinches up with Byrne, looking for a takedown. Bagwell pushes Byrne against the ropes but Byrne circles to the side and manages to break the clinch.
Buff Bagwell seems to be the more aggressive standup fighter in this bout.

Byrne looks for a takedown. He's got it. We're now in half guard.

Byrne is thinking about going for an arm triangle but he can't free his leg.
Byrne is trying to work for a kimura but Bagwell is defending well.
Bagwell is looking to regain full guard. Not this time though.
The fighters are tangled up in the ropes here. We might need a restart if the fighters can't break free themselves.
Byrne wants to control but Bagwell is keeping him busy.
Bagwell is looking to improve his position.

That's one minute gone in the round.
Bagwell is working for an escape here. He's hooked one of Byrne's legs and he's managed to sneak out and take Byrne's back!
The fighters are trapped in the ropes so we're going to have a reposition here. The ref calls for a break and repositions the fighters in the center of the ring.
Byrne looks to control his opponent's hands but he's not mananging it at the moment.
Byrne is defending well here and trying to improve his position.
Bagwell lands strikes to the head.
Bagwell patiently working for the choke. Which fighter will keep their nerve here?
Bagwell looking to break Byrne's wrist control so he can sink in the choke. Byrne remaining controlled and patient though - he really has to keep calm otherwise Bagwell will wrap this one up with the rear naked choke!
Bagwell is breathing heavily.
Bagwell trying desperately to keep hold of the dominant position.
Byrne tries to escape the position - he's now mounted. Is that better or worse? Hard to tell!
Byrne sneaks a leg under to get to half guard.
Byrne makes his way to full guard. A much better position for Byrne.
The fighters are starting to perspire pretty heavily.
Byrne looking for a sweep. Not yet Byrne, not yet.

That's two minutes gone in the round.
Byrne throwing some rather feeble looking strikes off his back.
Byrne looking to hit a scissor sweep but Bagwell is one step ahead there.
Byrne bucks up whilst keeping hold of a body lock, managing to reverse the position. Now he's in top in Bagwell's guard.
Bagwell keeping full guard, as Byrne tries to pass.
Byrne won't allow Bagwell to sweep him here.
Bagwell working from the bottom, still in full guard. He's managed to get a loose triangle. Byrne doesn't seem to be doing much to defend here, obviously he feels comfortable in the position. Byrne manages to throw the legs off his shoulder and he's back into guard - no problem.
Byrne thinks about going for a leg but decides against it, in order to maintain the position.
Bagwell is trying to keep Byrne in close.

That's three minutes gone in the round.
Byrne wants to pass the guard but Bagwell is keeping the position.
Byrne trying to control but Bagwell is working from the bottom.
Bagwell manages to sweep nicely, so he's now on top. Byrne manages to get himself to full guard.
Bagwell sneaks a leg through and gets to half guard. That was like a knife through butter how easily he passed Byrne's guard.
Byrne is trying to maintain the position but Bagwell is very close to passing his half guard.
Bagwell will need to keep those long limbs tucked in whilst he's on the ground, to prevent any submissions.
Bagwell is thinking about going for an arm triangle but he can't free his leg.
Bagwell is working for a submission of some sort.
Byrne manages to get to full guard.

That's four minutes gone in the round.
Byrne looking to control.
Byrne tries to strike from the bottom.
Byrne is working from a closed guard but he's struggling to control his opponent.
Bagwell drops back looking for a leg! Byrne is in trouble here! The fighters roll with the hold and Byrne manages to kick Bagwell off! Bagwell jumps back into Byrne's guard.
Byrne has control of Bagwell's left arm, preventing Bagwell from doing any damage.
Bagwell wants to control from the top but Byrne keeps moving.
And thats the end of the round the fighters go back to their corners.
A close round but Conor Byrne will probably get the nod.
That's the end of the round. The referee orders the cornermen out of the ring so we can get back down to business.

Bagwell pulls out of a head kick attempt.
Bagwell tries a switch kick but it misses it's target.
Byrne misses with a takedown attempt - Bagwell sprawls well and throws a nice strike on the way out which just misses.
Wow, both these guys are really going for it!
Bagwell avoids the clinch attempt nicely.
Byrne tries to clinch up but Bagwell circles away and keeps his distance.
Bagwell throws a couple of head shots and lands with the final one - a decent hook, which struck Byrne on the side of the head.
Bagwell throws a sloppy head kick and Byrne moves out of range easily.
Bagwell throws a head kick but Byrne moves out of range.
Byrne slips under a jab from Bagwell.
Byrne moves in looking to clinch but Bagwell pushes him off.
We've had a slow start to the round here - hopefully the action picks up.

Byrne gets in close and instigates a clinch.
Byrne misses with a hook to the ribs.
Byrne tries to work over Bagwell's body with a swooping hook but it only glances the target.
Byrne's corner are urging him to control the action in the clinch for a moment, rather than mount any serious offense. I'm sure the crowd appreciate those instructions... not.
Byrne pushes off an throws an elbow but Bagwell leans to the side and avoids it. We're back to clinching against the ropes.
Both fighters are absolutely exhausted here.
That's one minute gone in the round.
Byrne fails to pull the fight into his guard.

Bagwell pushes off and circles away, back to the middle of the mat.
Bagwell shoots in for a takedown and gets it. Let's see what he's got on the mat.
Byrne is trying to control the position from the bottom.
Byrne manages to sweep nicely, so he's now on top. Bagwell manages to get himself to full guard.
Byrne avoids a guillotine attempt easily.
Bagwell trying to punch from his back but it's not doing any damage.
Byrne postures up and lands some nice ground and pound.
Byrne with a nice head shot there.
Bagwell keeping full guard, as Byrne tries to pass.
That's two minutes gone in the round.
Bagwell throwing his legs up looking for a triangle.
Byrne slips effortlessly into side control - very nice.
Bagwell is not content to let Byrne control the position.
Bagwell throws a couple of strikes even though he's not really in a good position to do so.
Byrne landing a few strikes.
Bagwell tries to work a leg under to get back to half guard but Byrne wriggles his own leg back out and remains in side control.
Byrne goes for an armbar here - this could be all over! But no, Bagwell has escaped beautifully and is now on top in side control! Oh, that's unlucky for Byrne but great work by Bagwell.
Byrne wants to control but Bagwell postures up.
That's three minutes gone in the round.
Bagwell tries to advance to mount but can't.
Bagwell works to advance to full mount. Byrne defends for a few seconds but eventually he succumbs.
Bagwell tries to control but Byrne wriggling away.
Byrne manages to regain half guard. Good work.
Byrne looking for submissions from an awkward position here.
Bagwell throwing shots but they're hitting the canvas more than the man.
Bagwell frees up his trapped foot and advances to mount.
Bagwell fails to move to back control.
Bagwell looks like he's working for a submission but he's not found anything just yet.
That's four minutes gone in the round.
Byrne is wriggling around trying to escape.
Bagwell is in the full mount, landing strikes.
Bagwell fails to advance to Byrne's back.
Byrne tries to hold on but Bagwell pushes him away.
Bagwell can't quite control the action as he would like just now, as Byrne is looking to escape.
Bagwell is working to isolate an arm here. It's a telegraphed submission attempt but he's gone for it anyway - and he's got it! Bagwell extends the arm and Byrne is forced to tap!
Ladies and gentlemen, after 4:57 of round 2, we have a winner by way of Submission (Armbar). Buff Bagwell!
|
|
|
|
|
|
|
|
|
|
|
|
|
|
|
|
|
|
|
|
|
|
|
| S |
C
A |
G |
S |
C
B |
G |
|
S |
C |
G |
|
energy
A | B |
|
hype
A | B |
|
pop
A | B |
|
mgr
A | B |
|
FIGHT
RATING
37% |
|
|
|
|
|
|
