|
|
PBP Commentary |
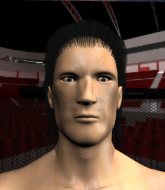
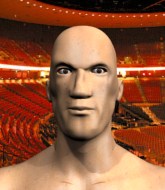
Coming up we have a middleweight MMA rules bout between Biggie Shackleton (ranked 0 p4p, 0 weight class) and Gorg St Pier (ranked 0 p4p, 0 weight class). St Pier has chosen Remember the name as his entrance music. Biggie Shackleton has the edge in experience - let's see if he can make that count tonight.
 |
|
 |
| 178 cm
30
201 lbs
13 - 12 - 0 |
|
184 cm
24
188 lbs
5 - 2 - 0 |
Good wrestling
Solid boxing
Very quick |
|
BJJ Blue Belt
Solid Muay Thai
Knockout power |
|
| |
|
Ladies and gentlemen. This fight is 3 rounds, in the middleweight division.
Introducing the fighter to my left, fighting out of the red corner.
With a record of
13 - 12 - 0, fighting out of Montreal, Biggie Shackleton!
And introducing the fighter to my right, fighting out of the blue corner.
With a record of
5 - 2 - 0, fighting out of Montreal, Gorg St Pier!
The judges for this bout are Robert Douchet, Dillan Fox and William Peck.

The bell rings for round one and we are underway!
Shackleton throws a leg kick that misses.
St Pier tries to clinch but Shackleton is having none of it.
St Pier throws a front kick aimed at Shackleton's knee but Shackleton avoids it well.
Shackleton throws a solid leg kick but St Pier takes the impact on his shin and smiles at Shackleton.

Shackleton looking for a takedown here - he's got it.

St Pier scrambles and gets back to his feet.
Jab, cross, leg kick. Nice combination by St Pier!
Shackleton lunges in with swinging rights and lefts but St Pier circles away quickly and effectively.
The crowd are loving this. Great action here.
Shackleton will need to tighten up his combinations if he doesn't want to gas himself out, swinging at thin air.
Shackleton motions for St Pier to come forward. Shackleton throws a leg kick but it misses it's target.
Shackleton throws a jab, cross combination which is slipped

and St Pier counters with a single leg into guard. Shackleton didn't expect that.
We could do with one of the fighters taking the initiative a bit more on the ground - they're both waiting to capitalize on a mistake.

St Pier decides to stand up and beckons his opponent to follow.
We can't be sure of the tactics at this early stage but we have heard that St Pier has been working on his takedowns a lot in the buildup to the fight and we can only assume he's going to look to take this to the mat.
St Pier shoots in for a double leg but Shackleton sprawls well. That's going to sap some energy.

That's one minute gone in the round.
St Pier lands with a nice low kick. That'll leave a bruise.
Shackleton fakes high and shoots in for a takedown but St Pier avoids it really well and circles away.
St Pier defends well against a solid takedown attempt from Shackleton.
Shackleton throws a leg kick that misses.

The fight moves into the clinch position.
Shackleton throws an elbow but it's blocked.
The pace really dropping off here, momentarily.
Shackleton misses with a punch to the body.

That's two minutes gone in the round.
Shackleton stops a takedown attempt from St Pier.

St Pier breaks the clinch.
Shackleton thows a leg kick but St Pier checks it
and St Pier counters with a good right hand that lands right on the jaw.
St Pier just misses with a punch to the body.
Sloppy strikes from Shackleton. Those never looked like landing.
St Pier tries to clinch but Shackleton is having none of it.
Shackleton rushes St Pier and pushes him back against the cage in a clinch.
Shackleton lands a nice trip takedown into half guard.
The fans in attendance giving it up for the two fighters, who have really let it all hang out in the last minute or so!
Shackleton blocks the strikes from St Pier.
St Pier is doing well to control the position and prevent Shackleton from advancing to side control.
Shackleton lands strikes from half guard.
Shackleton wants to free his trapped foot but St Pier is holding on for dear life with his legs.
St Pier wants to get back to his feet.

That's three minutes gone in the round.
St Pier wants to improve his position but Shackleton is controlling well.
Shackleton wants to pass the guard but St Pier is defending well.
St Pier wants to control but Shackleton is keeping busy and won't allow it.
Shackleton with a momentary lay and pray from half guard.
The ref warns both fighters not to hold the cage as they work up against the meshing.
St Pier wants to improve his position but Shackleton is controlling well.
Still in half guard, Shackleton seems content to control.
The fighters are pressed up against the cage, both looking to find a bit of space to work.

That's four minutes gone in the round.
Neither fighter has done anything of merit for a good minute or two here and the crowd are not happy about it.
Shackleton takes advantage of the dominant position to land a couple of big hammer fists.
Shackleton performing his best blanket impression for a moment.

St Pier actively working from the bottom here.
Shackleton not doing much here.
Shackleton is nestled in close to St Pier, controlling him well. He's worked in a nice elbow to the side of the head as well, for good measure.
Shackleton prevents St Pier from standing back up.
Shackleton scoring with strikes to the body and head.
Shackleton prevents St Pier from improving his position.
And thats the end of the round the fighters go back to their corners.
That was a close round but I would say that Biggie Shackleton will probably get the nod.
The corners get their ten second warning. Both fighters stand from their stools and stare eachother down, ready to get back to the action.

Shackleton clinches.
St Pier pushes off and circles away, back to the middle of the mat.
Shackleton takes a step towards his opponent and connects with a left hand, before circling away.
Gorg St Pier seems to be getting the better of the standup.
St Pier tries to close the distance and clinch but Shackleton swats him to one side with an open hand palm strike and circles away.
Shackleton is looking to counter with head kicks.
Shackleton is looking for a takedown here. He's shot in and has managed to get it, finishing up in St Pier's half guard.
St Pier manages to escape and get back to his feet!
Shackleton throws a leg kick which misses St Pier's front leg but catches the back leg as St Pier tries to avoid it.
This has been an exciting period of action!
St Pier misses with a head kick.
Shackleton tries a switch kick but it misses it's target.
St Pier checks a leg kick.
St Pier shoots in for a takedown. "Ole!" shouts Shackleton as he jumps to the side.
Shackleton appears to be looking for a big counter.
St Pier shoots in looking for a takedown but Shackleton manages to keep the fight standing, pushing St Pier's face into the canvas for good measure before circling away.
That's one minute gone in the round.
Donk. Shackleton catches St Pier right on the button with a cross.
St Pier gets tackled into the cage by Shackleton. Shackleton maintains the clinch.
Some stalling of biblical proportions here from Shackleton.
Shackleton lands a nice elbow from the clinch.
Shackleton prevents a body shot from St Pier.
St Pier breaks from the clinch.
St Pier wants to clinch.
St Pier fails in his attempt to clinch.
St Pier tries to clinch up.
Shackleton tries to counter by clinching up but St Pier breaks away and moves out of range.
Shackleton clobbers St Pier with an overhand right that has the crowd gasping. That made a horrendous noise.
Shackleton tries to clinch there but St Pier circles away.
St Pier keeping at a good range here, avoiding a leg kick.
Biggie Shackleton seems to be the more aggressive standup fighter in this bout.
That's two minutes gone in the round.
A momentary lapse in concentration from St Pier enables Shackleton to shoot in and score with a neat double leg. St Pier manages to secure a closed guard as the fighters hit the mat.
St Pier has managed to wall walk up one of the corner posts to get back to his feet. Shackleton is pushing him up against the cage, looking to control the position.
This has been an exciting period of action!
A short body shot lands from Shackleton as the two fighters clinch.
St Pier misses the knee to the body. Nice hip positioning from Shackleton.
St Pier is trying to maintain a safe position but Shackleton gets an underhook and turns St Pier into the cage.
Shackleton lands a nice looking hook to the body, against the cage.
St Pier throws an elbow but it's blocked.
Shackleton leaning his opponent against the cage.
Shackleton tightens his grip and picks St Pier up, before dumping him to the ground. St Pier manages to land in guard.
Shackleton working in close now, lands a nice elbow to the side of St Pier's head.
St Pier looking to sweep using the butterfly guard but Shackleton puts pay to that idea as he passes nicely into half guard.
That's three minutes gone in the round.
Shackleton controlling the action here.
Shackleton scores with a couple of good hammerfists.
Shackleton looking to pass the half guard. Not this time.
Shackleton slips a nice elbow through St Pier's hands, connecting with St Pier's forehead.
We get told so often about how wrestlers don't like to be on their backs. Let's see if St Pier can do anything to dispel that myth.
Shackleton controlling the pace.
St Pier wants to control but Shackleton is keeping busy and won't allow it.
St Pier really doesn't want to stay on the ground with Shackleton. If he can't get it back to his feet, it's only a matter of time before he'll be tapping out.
Still in half guard, Shackleton seems content to control.
That's four minutes gone in the round.
A lull in the action here being met with boos from the crowd.
Shackleton looks to score some points with some ground and pound.
Shackleton performing his best blanket impression for a moment.
Shackleton working over St Pier with some ground and pound. St Pier looks like he wants out of this position, which is understandable.
St Pier is looking to regain full guard. Not this time though.
And thats the end of the round the fighters go back to their corners.
Biggie Shackleton dominated that second round.
Well, the break between rounds is over. Let's get back to the scrappin! This is the final round!

Shackleton lets the fists fly and connects with a left straight followed by a right hook.
St Pier takes one to the side of the head.

St Pier is rocked!
Shackleton throws a combination but it was largely blocked by St Pier.
St Pier is still on wobbly legs! Can Shackleton finish him?
Shackleton connects with a leg kick. He turned his hip over nicely there.
Shackleton throws a combination but comes up with nothing but fresh air.
Biggie Shackleton is looking to throw some combinations by the looks of things.
Shackleton rushes St Pier and presses him up against the cage.
Shackleton lands a body shot in the clinch.
St Pier seems to have recovered his senses.
St Pier is looking to score with knees to the body. Maybe he'll change it up and go body then head. Shackleton is defending well for now.
Shackleton blocks a knee to the body. He'll have a nicely bruised forearm in the morning.
With the fighters up against the cage, St Pier throws an elbow but misses.
An uppercut on the inside fails to land for St Pier.
Shackleton lands a right hand that snaps the head of St Pier backwards.
Fantastic stuff here - a very entertaining period of action, which has drawn cheers from the crowd.

Shackleton manages to break the clinch.
Shackleton instigates a clinch.
That's one minute gone in the round.
Shackleton digs a right hand underneath St Pier's ribcage. St Pier let out a lung full of air as it connected.
St Pier looking to throw knees to the head but Shackleton is blocking nicely.
St Pier jumps guard but Shackleton stands there with St Pier around his waist. St Pier gives up and drops back to his feet. We remain in the clinch.
St Pier is trying to slow down the pace of the fight but Shackleton is keeping busy.
St Pier tries to stall but Shackleton uses the opportunity to gain a better position.
St Pier misses with an elbow strike.
Shackleton is stalling here. The referee will be looking to step in if he doesn't pick up the pace.
With the fighters up against the cage, St Pier throws an elbow but misses.
St Pier with a knee to the head.
St Pier trying to land knees to the body.
That's two minutes gone in the round.
Shackleton stalling in the clinch.
St Pier scores with a shoulder strike.
St Pier breaks the clinch.
St Pier showing good head movement there, avoiding the strikes from Shackleton.
And St Pier tries to counter it with a takedown but Shackleton pushes his down on his head and steps out.
Good standup being displayed there by Shackleton as he connects with a hook.
Shackleton throws a leg kick that misses.
The fight stays on the outside here - Shackleton looks like he's thinking about clinching though.
St Pier tries a quick counter leg kick but Shackleton is wise to it.
Shackleton throws a right hand that St Pier ducks under and follows up with a left that St Pier also avoids with ease.
Shackleton drives through and clinches with St Pier against the cage.
Shackleton managing to block the knees to the body from St Pier.
The crowd are loving this. Great action here.
Shackleton blocks a knee to the body. He'll have a nicely bruised forearm in the morning.
That's three minutes gone in the round.
St Pier tries to pull guard but Shackleton holds him up against the cage and eventually St Pier drops back down to his feet.
St Pier putting his Muay Thai to good use. He has Shackleton in a tight clinch and is doing some damage with knees to the body.
Biggie Shackleton has scored more points in the clinch so far.
Shackleton gets through St Pier's defenses to land a nice punch to the side of the head.
Shackleton managing to block the knees to the body from St Pier.
Shackleton breaks from the clinch.
Biggie Shackleton is fighting for a decision here - he's started to take the cautious approach.
Shackleton gets a clinch.
Shackleton is really dominating this fight. Is there anything that St Pier can do to turn this around?
St Pier using the Thai plumb to throw knees but Shackleton has his back arched nicely, preventing the strike.
St Pier goes for a takedown in the clinch but Shackleton prevents it.
Biggie Shackleton has stuffed three takedown attempts in the round now. That's going to take a lot out of Gorg St Pier.
St Pier struggles to land a body shot inside as Shackleton controls his hands.
Shackleton blocks a punch to the side of the head.
That's four minutes gone in the round.
St Pier breaks the clinch and we return to the middle of the mat.
St Pier tries to clinch but is not successful on this occasion.
Shackleton swats away the attempt to clinch by St Pier.
Shackleton is looking to counter with head kicks.
St Pier tries to sprawl but Shackleton drives through with a takedown into half guard.
Shackleton perhaps working for something from half guard, or maybe not. It looks like he's just sitting there.
The crowd cheering loudly, showing their appreciation for the quality fight we're seeing here.
Shackleton scoring with strikes to the body and head.
St Pier is trying to stand.
Gorg St Pier has stepped it up - he knows he needs a finish here!
St Pier gets back to full guard.
And that's the end of the fight!
Biggie Shackleton showed his dominance in that final round.
Well Shackleton has outscored his opponent in every aspect of the fight today. Only a scarily incompetent judge or two will keep him from a well deserved win... Over to the ring announcer for the scorecards.
Ladies and gentlemen, after 3 rounds of action, we go to the scorecards for a decision.
Judge Robert Douchet scores the fight 29:28
Judge Dillan Fox scores the fight 30:27
Judge William Peck scores the fight 29:28
In favor of your winner, by unanimous decision... Biggie Shackleton!
The defeated Gorg St Pier had this to say: 'I wuz nut im-pressed by my pe-for-mance'.
|
|
|
|
|
|
|
|
|
|
|
|
|
|
|
|
|
|
|
|
|
|
|
| S |
C
A |
G |
S |
C
B |
G |
|
S |
C |
G |
|
energy
A | B |
|
hype
A | B |
|
pop
A | B |
|
mgr
A | B |
|
FIGHT
RATING
50% |
|
|
|
|
|
|
