|
|
PBP Commentary |
Coming up we have a heavyweight MMA rules bout between Spartacus Halo (ranked 0 p4p, 0 weight class) and Mac Force (ranked 0 p4p, 0 weight class). These two fighters really are very evenly matched on the feet - it will be fascinating to see who can assert themselves in that aspect of the fight.
 |
|
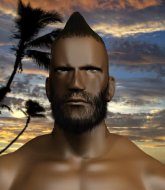 |
| 195 cm
27
232 lbs
13 - 5 - 1 |
|
188 cm
34
245 lbs
19 - 11 - 0 |
Great wrestler
Excellent boxer
Cardio machine |
|
Good wrestler
Excellent MT
Good gas tank |
|
| |
|
Ladies and gentlemen. This fight is 3 rounds, in the heavyweight division.
Introducing the fighter to my left, fighting out of the red corner.
With a record of
13 - 5 - 1, fighting out of Amsterdam, Spartacus Halo!
And introducing the fighter to my right, fighting out of the blue corner.
With a record of
19 - 11 - 0, fighting out of Los Angeles, Mac Force!
The judges for this bout are Trevor Gratis, Elvis Blanc and Yves DeLean.

The bell rings for round one and we are underway!
Force throws a wild combination but nothing lands.
Halo scores with a jab to the jaw.
Force throws a hook but Halo avoids it easily.
Halo connects with a good right hand that stumbles Force. Force circles away out of range and recomposes himself.
Force misses with a double jab.
Force misses with a series of wild punches.
A really sloppy takedown attempt there from Halo.
Force throws a lazy right hand but Halo sees it coming a mile off and sidesteps it easily.
Halo defending well as Force loads up on a big left hand.
Force misses with a wild body shot.
Force throws a poor cross that misses
and Force takes a counter punch right on the button for his troubles.
Halo swings and misses with a hook to the body.
Halo walks straight into an uppercut. Luckily it didn't land flush.
Wooooo! Give it up for these two warriors! They are putting on a show!
Halo displays some good footwork, moving neatly out of range as Force throws out the jab.
Force throws an overhand right that lands on Halo's shoulder, as Halo tries to avoid the shot.
Force swings wildly with a right hand that was never going to find it's target.
Force dips down and scores with a jab to the body.

That's one minute gone in the round.
Force avoids the head kick by Halo.
Halo moves into range and throws a combination. A nice jab followed by a hook to the body.
Force misses with a right hand

and Halo counters with a driving takedown into guard. Nice work there by Halo.
Halo landing some decent shots from guard.
Halo wants to pass the guard but Force is keeping the position.
Halo preventing the sweep.
Halo won't allow Force to get back to his feet.
Halo throwing shots from guard but he's hitting more mat than opponent.
Halo loading up with the ground and pound but he's missing more than he's landing in this flurry.
A big thud reverberates around the arena there as Halo accidentally thumps the mat. Hopefully he's not broken his hand.
Halo working some ground and pound from guard but it's not doing any damage.
Halo tries to free his leg and advance position but Force is retaining full guard.

That's two minutes gone in the round.
Halo stays in close to Force's body and controls the position.
Halo trying to pass the guard but can't manage it just yet.
Force wants to stand and escape but Halo is having none of it.
Force is trying to control the position but Halo postures up.

The referee decides to stand the fighters back up.
Force throws out a powerful jab.
Wooooo! Give it up for these two warriors! They are putting on a show!
Halo avoids the body shot from Force.
Halo misses the shot to the body.
Halo throws a hard body shot but it just misses.
Halo takes a solid shot to the body. That one hurt him but he's trying not to show it.
Halo shoots in and bounces Force off the cage to secure the takedown into guard.
Halo working in close now, lands a nice elbow to the side of Force's head.

That's three minutes gone in the round.
Halo postures up in Force's guard and throws a big left but Force blocks it.
The fighters are pressed up against the cage, both looking to find a bit of space to work.
Halo postures up in Force's guard and throws a big left but Force blocks it.
Halo throws a big right hand that misses.
Force trying to control the position here.
Halo throws a strike but Force rolls with it and manages to sweep. Now he's in guard on top.

A big thud reverberates around the arena there as Force accidentally thumps the mat. Hopefully he's not broken his hand.
Force looking to sit in guard and control but Halo gets the butterfly guard and sweeps. He's now in the guard on the top.

Halo with a flurry of punches that miss.
Halo throws an elbow that misses. Force uses the momentum to reverse the position. He's now in Halo's guard. Nice move by Force!
Force wants to control from the top but Halo keeps moving.

That's four minutes gone in the round.
Halo trying to keep a closed guard but Force is proving a slippery customer.
Force slows down the pace of the fight for a moment. He'll need to remain active if he doesn't want to see the fight stood back up.
Force trying to control but Halo is working from the bottom.
Halo is working from a closed guard but he's struggling to control his opponent.
Force trying to control the position from guard on top but Halo is wriggling around, looking for whatever he can.
Halo has been looking to land a fair amount of strikes on the ground. He might be looking to soften his opponent up in order to work for a submission.
Force controls the pace of the fight for a moment.
And thats the end of the round the fighters go back to their corners.
That was a close round but I would say that Spartacus Halo will probably get the nod.
That's time! Halo's corner gives him a slap on the ass as he gets ready to fight.

Halo avoids a lazy jab quite easily.
Mac Force seems to be getting the better of the standup.
Halo tries to clinch but Force moves away
and Force counters with a stiff right hand.
Halo keeping a good distance there, avoiding the body shot.
Halo ducks down and throws a hook to the body but Force moves away.
Force looks like he wants to counter punch here.
Force lands a nice shot that snaps Halo's head back.
Force throws out a token jab with nothing on it.
Force lands a body shot.
Force takes a swing at Halo's ribcage but misses.
Force throws out a token jab with nothing on it.
Halo feinted with a counter takedown.
Halo slips under a jab from Force.
Halo looks to land a combination but Force avoids it well.
Force lands a straight punch to the body, keeping Halo at a distance.
Nice takedown defense from Force. No joy for Halo on that attempt.
Force throws a hook but Halo blocks it.
Halo has his hands up protecting his head but a hook from Force finds it's way round the side to connect with Halo's head.
Fantastic stuff here - a very entertaining period of action, which has drawn cheers from the crowd.
Force jabbing away but nothing is landing.
Force takes a nasty kick to the mid section... That should keep him thinking. Does he try and block and risk a head kick landing?
Halo throws a body shot but no joy.
That's one minute gone in the round.
Halo misses with a takedown attempt - Force sprawls well and throws a nice strike on the way out which just misses.
Force misses with an uppercut.
An attempted straight right counter from Halo misses the target.
Halo cracks the inside of Force's front leg.
Force slips under a jab.
Force connects with a good right hand that stumbles Halo. Halo circles away out of range and recomposes himself.

It looks like Spartacus Halo has been cut.
Halo misses with a kick to the body.
Force jabs Halo right on the nose. Halo blinks but takes it well.
Halo throws a body punch but Force moves out of range.
Halo uses good head movement to avoid the hook from Force.
Force throws a body shot but no joy.
Halo scores with a jab to the jaw.
Halo throws a front kick aimed at Force's knee but Force avoids it well.
Force is clearly trying to counter these attacks from Halo with a body shot.
Force misses the jab.
Force swings and misses with a hook to the body.
Force avoids the clinch attempt nicely.
Force appears to be waiting to throw a counter punch to the body.
Halo is using his height advantage well here, landing a good percentage of his punches.
That's two minutes gone in the round.
A telegraphed right hand from Force misses the target.
Force lands with a cross to side of his opponent's head.
The crowd cheering loudly, showing their appreciation for the quality fight we're seeing here.
Force connects with a right hand. Halo shakes it off.

Halo is rocked!
Halo keeping a good distance there, avoiding the body shot.
Halo half commits to a counter takedown before pushing away, out of range.
Force works Halo's body with a nice hook.
Halo throws an overhand right that lands on Force's shoulder, as Force tries to avoid the shot.
Halo avoids a lazy jab quite easily.
Well, he's not going to score with shots like that. A lazy body kick attempt from Halo.
Nice shot by Force.
Decent striking displayed by Force there.
Oh Halo is still all over the place! His legs are completely gone! Will he be able to recover?!!
Force has been the more effective fighter overall so far.

Halo moves into the clinch.
Halo seems to have got his legs back now.

Force breaks from the clinch.
Force misses with a jab and misses with a cross straight after too.
Halo takes a shot right to the bread basket.
Force throws a right and a left that Halo avoids nicely.
Halo will need to tighten up his combinations if he doesn't want to gas himself out, swinging at thin air.
That's three minutes gone in the round.
A telegraphed right hand from Force misses the target.
Halo uses good footwork to get in and out and land a nice right hand before Force has time to react.
Force misses with a body shot.
Mac Force is looking to keep the fight on the feet at all costs.
Halo uses good head movement to avoid the hook from Force.
No joy there for Force, who threw a few shots but didn't land.
Force throws a big shot that misses.
Force misses with an uppercut.
Halo scores with the left hand. Force knows he should have avoided that one.
Halo throws a body kick that misses.
Force tries to bum rush Halo with a series of wild strikes but Halo uses good footwork to avoid the assault.
Halo tries to counter with a takedown but Force is quick to defend against it.
Force lands a nice shot to the body.
Nice jab there from Force.
Force ducks down and throws a hook to the body.
Force scores with a sloppy punch to the body. Not much technique there but it did the business.
The crowd cheering loudly, showing their appreciation for the quality fight we're seeing here.
Force looks to land a left hand but Halo moved out of range nicely.
Force is on the wrong end of a nice combination from Halo.
That's four minutes gone in the round.
Halo tries a head kick but it misses.
Halo is trying hard to land a takedown here. Force sprawls well and keeps this one on the feet.
That's three failed takedown attempts in the round for Spartacus Halo. That's going to take a lot out of him.
Both fighters are absolutely exhausted here.
Force darts in and out, connecting with a jab.
Force uses good footwork to get in and out and land a nice right hand before Halo has time to react.
Nice sprawl there from Force as Halo shoots in.
Force lands a pitter patter jab to the forehead of his opponent.
Force lands with a hook. Halo tried to avoid it but it clipped the top of his head.
Force slips a jab from Halo.
A big right from Force misses.
A telegraphed right hand from Force misses the target.
Halo throws a wild body kick that Force sees coming a mile off.
The crowd applaud the fighters' efforts here as the round comes to an end.
Force waving his hands out in front of him, looking to distract Halo.
Force misses with a wild body shot.
Force misses the shot to the body.
Halo takes a body punch that cleary hurt but he's trying not to show any weakness.
And thats the end of the round the fighters go back to their corners.
Mac Force showed his class in that round. I'd imagine he'll take it on all the scorecards.
The cut man is working on Spartacus Halo's cut.
OK. That's time! The bell goes and we're back to the action. Ladies and gentlemen, this is the final round!

Halo throws a wild combination but nothing lands.
Halo throws a half hearted mid kick.
Halo gets a clinch.
Halo wants to take the fight to the mat but Force manages to get underhooks and keep the fight in the clinch.
Halo throws a head punch that misses.
Halo struggles to land a body shot inside as Force controls his hands.
Force swings away with an uppercut that misses.
Halo goes for a body shot but it's blocked.
Halo swings away with an uppercut that misses.
A frustrated look appears on Force's face as he tries to break the clinch.
Force trying to control the position but instead, Halo has worked for underhooks and has pushed Force into the cage.
Halo misses with a hook from the clinch.
We've had a slow start to the round here - hopefully the action picks up.
Force tries to circle away but Halo has him pinned against the cage.
Halo drops to a knee looking for a takedown but Force gets the underhooks and prevents it.
Force looking to stall.
That's one minute gone in the round.
Halo tried to land a shot to the body but connects with Force's elbow.
Halo working aggressively here.
Halo misses with a shot to the kidneys.
A quick uppercut on the inside from Halo.
Halo tries to throw a body punch but Force avoids it by throwing Halo back against the cage.
Halo has a body lock and is looking for a takedown. Force is bouncing around trying to prevent the takedown and somehow he has indeed managed to stay on his feet.
That's three failed takedown attempts in the round for Spartacus Halo. That's going to take a lot out of him.
An uppercut on the inside fails to land for Force.
Halo goes for a takedown in the clinch but Force prevents it.
Halo tries to work over Force's body with a swooping hook but it only glances the target.
Force has been looking to improve his clinch game in recent weeks. Halo seems to have the measure of him in the clinch so far, so let's see if Force can turn it around.
Halo can't find room to land a body shot as Force controls the action.
Halo wants a takedown.
Force is trying to break the clinch but Halo has him pressed against the cage.
Force lands a nice uppercut.
That's two minutes gone in the round.
A short body shot lands from Halo as the two fighters clinch.
Halo keeps control of Force as he tries to wriggle out of the double underhooks.
Force stops a takedown attempt from Halo.
Halo throws a punch but it's blocked by Force.
Force lands with a short shot to the head.
Force breaks the clinch and we're back to striking at distance.
Force looks to land a right hand but Halo moved out of range.
Halo avoids the body shot from Force.
Halo takes a punch right to his stomach. That took the wind out of him momentarily.
Halo on the wrong end of a nice hook.
Force moves into range and connects with a jab.
Fantastic stuff here - a very entertaining period of action, which has drawn cheers from the crowd.
Force lands a nice shot that snaps Halo's head back.
Spartacus Halo's cut is getting worse.
Force with a body punch. A glancing blow.
Both fighters are breathing heavily.
Halo throws a nice inside leg kick.
Force lands with a big left! Halo is wobbled badly! Force comes in with a flurry of punches and drops Halo to the floor. The ref jumps in to save him from unneccessary punishment.
Ladies and gentlemen, after 3:55 of round 3, we have a winner by way of TKO (Punches). Mac Force!
Mac Force bigged himself up after the win. The crowd seemed to love it.
|
|
|
|
|
|
|
|
|
|
|
|
|
|
|
|
|
|
|
|
|
|
|
| S |
C
A |
G |
S |
C
B |
G |
|
S |
C |
G |
|
energy
A | B |
|
hype
A | B |
|
pop
A | B |
|
mgr
A | B |
|
FIGHT
RATING
72% |
|
|
|
|
|
|
