|
|
PBP Commentary |
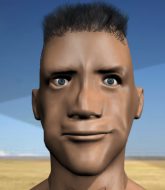
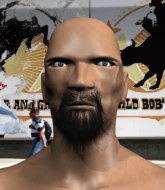
Coming up we have a welterweight MMA rules bout between Jack Badger (ranked 0 p4p, 0 weight class) and Ryan Rage (ranked 0 p4p, 0 weight class). The fight MMA fans around the world have waited their entire lives for!
 |
|
 |
| 180 cm
25
162 lbs
7 - 9 - 0 |
|
185 cm
29
175 lbs
5 - 9 - 0 |
BJJ White Belt
Solid boxing
Granite chin |
|
BJJ Blue Belt
Decent boxing
Knockout power |
|
| |
|
Ladies and gentlemen. This fight is 3 rounds, in the welterweight division.
Introducing the fighter to my left, fighting out of the red corner.
With a record of
7 - 9 - 0, fighting out of London, Jack Badger!
And introducing the fighter to my right, fighting out of the blue corner.
With a record of
5 - 9 - 0, fighting out of Las Vegas, Ryan Rage!
The judges for this bout are Ben Zyskovitsi, Anni Minnemäki and Tarja Halkonen.

The bell rings for round one and we are underway!
Nice uppercut lands for Badger. That snapped Rage's head back.

Rage tries to sprawl but Badger drives through with a takedown into half guard.

Rage kicks Badger off and gets back to his feet.
Badger looks for a takedown here. Will he get it? Rage is fending him off so far but Badger persists. Nope, Rage circles away and we're back to standing.
Badger is breathing heavily.
Badger avoids the head kick by Rage.
Badger drops down looking for a counter takedown but Rage sprawls and moves away.
Badger dodges the punch combination from Rage.
Badger blocks a jab.
The crowd are loving this. Great action here.
Badger lands a jab. Then a cross. Then finally a nice hook to the body. Good work there by Badger.
A telegraphed takedown attempt from Rage is defended easily by Badger.
Badger has been working on his balance at Quick Fingers BEST BANG FOR BUCK Gym, so perhaps that has help him stuff some of the takedown attempts by Rage.
Badger takes a kick to the side of the head.
Jack Badger seems to be the more aggressive standup fighter in this bout.
Nice sprawl there from Rage as Badger shoots in.
Rage misses with the combination.

That's one minute gone in the round.
Rage lands a pitter patter jab to the forehead of his opponent.
Rage listening to his corner there, landing a nice uppercut.
Rage scores with a punch to the gut of his opponent.
Badger throws a right hand that Rage ducks under and follows up with a left that Rage also avoids with ease.
Rage shoots in for a takedown but Badger shows good takedown defense.
Rage throws a sloppy head kick and Badger moves out of range easily.
Badger tries to shoot in for a takedown. He's got hold of a leg but Rage swivels and escapes.
That's three failed takedown attempts in the round for Jack Badger. That's going to take a lot out of him.
Rage misses with a jab and misses with a cross straight after too.
Rage swings for the body but Badger moves out of range.
Badger changes levels looking for a counter takedown but doesn't commit.
Rage misses with a half-hearted attempt at a head kick.
Badger fails to land with a series of punches.
Rage staying out of range there.
Rage throws a head kick that misses and slips in the process. He scrambles back to his feet and the fighters circle.
Rage displays good takedown defense there as he swats away a double leg from Badger.

That's two minutes gone in the round.
Rage misses with an uppercut. Badger saw that one coming.
No joy there for Rage, who threw a few shots but didn't land.
The crowd are loving this. Great action here.
Rage throws a sloppy head kick and Badger moves out of range easily.
Badger misses with a double jab.
Badger swinging wildly here.
Rage moves into range and connects with a jab.
Rage throws a quick head kick that skims the top of Badger's head.
Rage misses with a half-hearted attempt at a head kick.
Rage throws a head kick that misses and slips in the process. He scrambles back to his feet and the fighters circle.
Badger feints with a shoulder and throws a nice leg kick to Rage's calf.
Badger lands a jab-cross combination.

That's three minutes gone in the round.
Badger moves out of range of the strikes.
Badger gets his head snapped back by a nice shot there.
Good shot there by Badger.

Rage closes the distance, clinches up and gets a nice trip takedown into side control. Very smooth.

Badger throws his opponent off and manages to get back to his feet! Nicely done!
Horrible takedown attempt by Rage or perhaps it was just good defense by Badger, which made it look bad.
This has been an exciting period of action!
Badger throws the overhand right but ducks down into a quick takedown attempt. Rage was covering up waiting for the punch and Badger finishes the takedown easily into guard.
Rage has scooted to the edge of the canvas and used the cage to get back to his feet. Badger has stuck on his opponent and is forcing him back against the cage.

That's four minutes gone in the round.

Rage breaks the clinch and we return to the middle of the mat.
Rage tries a switch kick but it misses it's target.
Badger tries to counter with a takedown but Rage is quick to defend against it.
No joy there for Badger, who threw a few shots but didn't land.
Rage shoots for a takedown but Badger saw that one coming a mile off and avoided it easily.
A combination from Badger does no damage.
Badger wants to clinch.
Badger misses with a hook. Rage ducked under it nicely.
Badger takes one on the chin but seems OK.
The crowd applaud the fighters' efforts here as the round comes to an end.
Badger looking to score a takedown here. Rage is defending well but Badger drives through and ends up in Rage's guard.
Rage has scooted to the edge of the canvas and used the cage to get back to his feet. Badger has stuck on his opponent and is forcing him back against the cage.
Rage is trying to break the clinch but Badger is controlling him.
And thats the end of the round the fighters go back to their corners.
Ryan Rage dominated that round.
The minute break is over - no more time for sponges and pep talks - back to the action!

Rage misses with a jab, cross combination.
Ryan Rage seems to be getting the better of the standup.
Badger throws a big shot that misses.
Badger shoots in with a lovely double leg takedown. Rage manages to land in full guard to minimise the damage.
Rage uses the cage to get back to his feet.
Badger shoots in for a takedown. "Ole!" shouts Rage as he jumps to the side.
Rage shoots in for a takedown but Badger shows good takedown defense there and keeps this one on the feet.
Rage shoots for a takedown but Badger saw that one coming a mile off and avoided it easily.
Badger wants to clinch.
Sloppy strikes from Rage. Those never looked like landing.
Badger keeps the fight standing with a nice sprawl.
Jack Badger has stuffed three takedown attempts in the round now. That's going to take a lot out of Ryan Rage.
That's one minute gone in the round.
Badger scores with a nice one two combo and darts back out of range to avoid anything coming in the opposite direction.
Both fighters are absolutely exhausted here.
Badger will need to tighten up his combinations if he doesn't want to gas himself out, swinging at thin air.
Badger tries to clinch but Rage moves out of range.
Rage scores with a three punch combo!
Rage tries a head kick but it misses.
Rage shoots in looking for a takedown. Badger tries to sprawl out of it but Rage keeps driving through. The fighters are pinned against the cage. Badger manages to get underhooks and after a bit of a struggle, circles away and we're back to standing.
Badger throws a series of punches but Rage moves out of range.
Rage looked like he wanted to counter with a punch but didn't throw it.

Badger has closed the distance and engaged Rage in a clinch.
The fighters are going at a pretty good pace and they're both starting to sweat now.
Rage breaks from the clinch.
That's two minutes gone in the round.
Badger fakes high and shoots in for a takedown but Rage avoids it really well and circles away.
Badger changes levels and looks for a double leg takedown. Rage tries to avoid it but Badger manages to keep hold of a leg and drag Rage to the ground. Rage escapes though and pops straight back up to his feet.
Rage misses with a half-hearted attempt at a head kick.
Rage throws a head kick but Badger moves out of range.
The crowd are loving this. Great action here.
Badger avoids the body shot from Rage.
Badger closes the distance and clinches.
Rage breaks from the clinch.
Badger ducks under a wild hook from Rage.
Badger moves into the clinch.
Badger works for the underhooks and manages to get a trip takedown into guard.
Rage has scooted to the edge of the canvas and used the cage to get back to his feet. Badger has stuck on his opponent and is forcing him back against the cage.
Rage manages to pull guard. Let's see whether he can land a sub off his back.
That's three minutes gone in the round.
There's a bit of a scramble here and now Rage is on top in guard.


Rage decides to stand up and beckons his opponent to follow.
Badger scores with a takedown into Rage's guard.
Rage uses the cage to get back to his feet.
Rage misses with a two punch combination.
Badger lands a jab. Then a cross. Then finally a nice hook to the body. Good work there by Badger.
This is a great period of action - very entertaining stuff!
Nice defenses there by Rage.
Badger shoots in from a long way out. He's driving through with the takedown attempt and he eventually gets it, landing in Rage's guard.
Rage pushes Badger off and scrambles back to his feet.
That's four minutes gone in the round.
Badger tries for a takedown but Rage circles away easily
and Rage counters with a one-two to the body.
A left and a right from Badger both land. Nice combination.
Badger throws out a loose jab but Rage uses good head movement to avoid it.

Rage rushes Badger and presses him up against the cage.
Badger changes levels and goes for a takedown here. Rage fights it off and pushes away nicely.
Rage misses with a two punch combination.
As Rage looks to move away, Badger throws a big counter combo but Rage just gets out of the way.
Jack Badger is looking to throw some combinations by the looks of things.
Rage shoots in from a long way out. He's driving through with the takedown attempt and he eventually gets it, landing in Badger's guard.
Badger not looking particularly offensive just at the moment.
Badger wants to stand and escape but Rage is having none of it.
The crowd applaud the fighters' efforts here as the round comes to an end.

Badger throwing his legs up looking for a triangle.
Badger on his back here. We all know that wrestlers don't like being on their back so let's see if Badger tries to get out of the position.
Rage stands up from Badger's guard - Rage perhaps looking for a knockout.
And thats the end of the round the fighters go back to their corners.
Ryan Rage showed his class in that round. I'd imagine he'll take it on all the scorecards.
The corners get their ten second warning. Both fighters stand from their stools and stare eachother down, ready to get back to the action. And we move into the final round!

Rage misses with a body shot.
Badger throws a big counter combination but Rage scrambles out of danger and avoids any damage.
Badger throws out a powerful jab.
Badger throws a head kick that misses
and Rage counters with a nice uppercut.
Badger shoots for a takedown but Rage saw that one coming a mile off and avoided it easily.
A telegraphed right hand from Rage misses the target.
Badger throwing a counter right hand but Rage manages to avoid it.
Rage throws out a token jab with nothing on it.
Rage moving in and out of range nicely, whilst landing the scoring shot.
Rage has been the more effective fighter overall so far.
Rage shoots in and drives through. Badger sprawls well.
Rage throws a head kick that misses and slips in the process. He scrambles back to his feet and the fighters circle.
Badger rushes Rage and presses him up against the cage.
We've had a slow start to the round here - hopefully the action picks up.
Rage jumps into guard, dragging Badger to the mat.
Rage pushes Badger off for just long enough to get back to his feet. Very athletic spring there.
The crowd are loving this. Great action here.
Badger slaps away a takedown attempt from Rage, before circling back to the center of the mat.
Both fighters are breathing heavily.
That's one minute gone in the round.
Badger works over Rage's head and body with a nice combination.
Badger shoots in for a takedown and gets it.
Rage makes some distance and scrambles quickly back to his feet. Nice work!
Rage connects with a nice looking jab.
Rage pivots as if he's going to throw a leg kick but stops half way.
Badger throwing a counter right hand but Rage manages to avoid it.
We've seen a great period of action over the last minute or so - credit to both fighters for going all out!
Badger gets a clinch.
Rage is trying to break the clinch but Badger is controlling him.
Rage has had enough of the clinch and is looking to separate.
Rage is trying to force a seperation but Badger has the dominant position.
A head punch blocked on the inside by Badger.
That's two minutes gone in the round.
Rage wants to push off and get back to the center of the mat but Badger has him pressed against the cage.

Badger breaks from the clinch.
No joy there for Badger, who threw a few shots but didn't land.
Rage moves into range and connects with a jab.
The crowd cheers as Rage lands an impressive looking overhand right. Badger doesn't seem phased though.
Badger throws a looping left and ducks down for a takedown. He's got his arms around Rage's waist but Rage gets an underhook and avoids the takedown by throwing Badger off to one side.
Rage tries to counter by closing the distance.
Rage shoots in for a takedown. "I don't think so" says Badger as he avoids it easily.
Jack Badger has stuffed three takedown attempts in the round now. That's going to take a lot out of Ryan Rage.
Rage takes a step back and watches a body kick go sailing past his mid section.
Badger lunges in with swinging rights and lefts but Rage circles away quickly and effectively.
Rage shoots in for a takedown. He's persisting with it as Badger sprawls well. Badger wins this battle and keeps the fight standing. Rage gets slowly back to his feet.
Badger scores a trip takedown into side control. Nice.
Rage throws his opponent off and manages to get back to his feet! Nicely done!
That's three minutes gone in the round.
Rage throws a head kick that misses and slips in the process. He scrambles back to his feet and the fighters circle.
Badger rushes forward with a series of wild hooks but Rage moves out of range and avoids them all easily.
Badger throws a body kick but he was well out of range there.
Rage lands with a straight right. Badger didn't see that one coming.
Rage shoots in for a takedown but doesn't get it.
Badger looking to score a takedown here. Rage is defending well but Badger drives through and ends up in Rage's guard.
Rage pushes Badger off for just long enough to get back to his feet. Very athletic spring there.
Fantastic stuff here - a very entertaining period of action, which has drawn cheers from the crowd.
Badger ducks under a wild hook from Rage.
Rage has his head slapped from side to side by a 3 punch combination. That must have hurt him.
Badger takes a jab on the nose there. A little bit of blood seems to be coming out. Hopefully that won't affect his breathing.
Rage throws a sloppy body shot
and Badger counters with a three punch combo that has Rage backing up. Rage nods at Badger to acknowledge the strikes.
Ryan Rage is fighting for a decision - hopefully he's judged it right and he's actually winning the fight.
That's four minutes gone in the round.
Rage throws a hook but Badger blocks it.
Badger throws a wild combination but nothing lands.
Badger moves out of the way of the counter high kick fromRage.
Rage looks for a takedown but Badger sprawls well.
Rage tries a head kick but it misses.
Rage is trying hard to land a takedown here. Badger sprawls well and keeps this one on the feet.
Badger drives through with a takedown into guard.
Badger with a couple of shots to the head there. Not particularly brutal.
Rage wants to get back to his feet but Badger is in a dominant position and won't allow it.
Badger landing some decent shots from guard.
Badger has to be careful here, sitting in the guard of a superior BJJ player.
The crowd applaud the fighters' efforts here as the round comes to an end.
Rage preventing the ground and pound from doing any damage.
Jack Badger has stepped it up - he knows he needs a finish here!
Badger throwing strikes from guard but Rage blocks nicely.
And that's the end of the fight!
I would just about give that final round to Ryan Rage.
I've got Rage winning every round here. Surely the decision will go his way and he'll pick up a well deserved decision victory. Over to the ring announcer for the scorecards.
Ladies and gentlemen, after 3 rounds of action, we go to the scorecards for a decision.
Judge Ben Zyskovitsi scores the fight 27:30
Judge Anni Minnemäki scores the fight 27:30
Judge Tarja Halkonen scores the fight 27:30
In favor of your winner, by unanimous decision... Ryan Rage!
After winning the bout, Ryan Rage thanked all his fans and promised he'd do even better in his next fight. The crowd seemed to love his humility.
|
|
|
|
|
|
|
|
|
|
|
|
|
|
|
|
|
|
|
|
|
|
|
| S |
C
A |
G |
S |
C
B |
G |
|
S |
C |
G |
|
energy
A | B |
|
hype
A | B |
|
pop
A | B |
|
mgr
A | B |
|
FIGHT
RATING
85% |
|
|
|
|
|
|
