|
|
PBP Commentary |
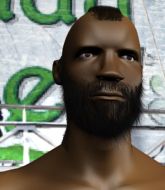
Coming up we have a middleweight MMA rules bout between Macadam Baird (ranked 0 p4p, 0 weight class) and Dane Brigglett (ranked 0 p4p, 0 weight class). Macadam Baird has the better chin. Will he look to stand and bang today?
 |
|
 |
| 182 cm
33
190 lbs
22 - 18 - 2 |
|
199 cm
41
199 lbs
22 - 20 - 0 |
BJJ Red Belt
Excellent boxer
Insanely flexible |
|
Good wrestler
World class boxer
Heavy handed |
|
| |
|
Ladies and gentlemen. This fight is 3 rounds, in the middleweight division.
Introducing the fighter to my left, fighting out of the red corner.
With a record of
22 - 18 - 2, fighting out of Las Vegas, Macadam Baird!
And introducing the fighter to my right, fighting out of the blue corner.
With a record of
22 - 20 - 0, fighting out of Sydney, Dane Brigglett!
The judges for this bout are Kenichi Hosakawa, Hirohito Nitta and Yuuki Gou.

The bell rings for round one and we are underway!
Brigglett walks into a stiff left hand from Baird.
Baird is pinned up against the cage taking some big shots here. The referee is looking closely deciding whether he should stop the fight.
Baird scores with a sloppy punch to the body. Not much technique there but it did the business.

Baird looking for a takedown here - he's got it.
Baird scoring with some ground and pound.
Baird has been looking to land a fair amount of strikes on the ground. He might be looking to soften his opponent up in order to work for a submission.
Hammerfist, elbow! yells Baird's corner. There ya go! There ya go!
Baird sitting in guard here, content to control.

That's one minute gone in the round.
Baird stands up and looks to throw the legs aside to pass to side control. Brigglett swivels though and keeps the full guard.
Brigglett keeping moving, preventing Baird from controlling successfully.
Baird controls the pace of the fight for a moment.
Baird tries to free his leg and advance position but Brigglett is retaining full guard.
Baird stands and throws Brigglett's legs to the side, diving into side control.
Brigglett tries to bench press Baird off him but Baird keeps the position.

That's two minutes gone in the round.
The crowd are showing their displeasure at the lack of action as loud boos ring out around the arena.
Brigglett wants to escape from the position here - easier said than done!
Brigglett gets back to half guard.
The fighters are pressed up against the cage, both looking to find a bit of space to work.
Baird slows the pace down in half guard.
Baird seems to have a rather negative gameplan on the ground. He seems keen to just score the takedown and hold down Brigglett for as long as he can get away with.

Baird is looking for a kimura here.
Baird is looking to advance position but Brigglett won't allow it.

That's three minutes gone in the round.
Baird scoring with strikes to the body and head.
The ref warns both fighters not to hold the cage as they work up against the meshing.
Well, if Baird is going to just lie there, perhaps we should talk about what we're having for dinner tonight
I'm having a ham and pineapple pizza
Yum. Can't wait.
Baird looks towards his corner to check for any instructions. The corner give him nothing to work with, so he cracks Brigglett with a short hammerfist. I guess that's as good as any advice he could get in this position.
Neither fighter is being very active at the moment, with Baird in particular looking to stall.
Brigglett wants to improve his position but Baird is controlling well.

That's four minutes gone in the round.
My god... these two guys really need to pick up the pace or everyone will leave to go get a beer.
Baird wants to take a breather but Brigglett is having none of it.
Brigglett avoiding damage under a succession of punches from Baird.
Baird is looking for a kimura. It's going to be difficult to finish that from half guard though and Brigglett defends it well.
Baird is nestled in close to Brigglett, controlling him well. He's worked in a nice elbow to the side of the head as well, for good measure.
Baird works his foot free and advances to mount.
Boooooooooooooooooooo!!! God, this has been a terrible round. Come on you two, sort yourselves out!
Baird thuds his fist into the canvas! Oooouch!
And thats the end of the round the fighters go back to their corners.
Macadam Baird dominated that round.
The referee calls time. The cornermen exit stage left and we're back to business.

Baird misses with a wild body shot.
Baird misses with a wild body shot.
Brigglett throws a counter combo.
Like a baseball bat into the meat of his leg there - nice leg kick by Baird.
Brigglett on the wrong end of a vicious looking body shot.
Baird moves his head to the side to avoid a jab but walks straight into a cross.
Baird throws a hard body shot but it just misses.
Baird looks to have improved his striking defense since last time we saw him fight.
Baird changes levels and looks for a double leg takedown. Brigglett tries to avoid it but Baird manages to keep hold of a leg and drag Brigglett to the ground. Brigglett escapes though and pops straight back up to his feet.
Baird shoots in with a takedown attempt and he has Brigglett pinned against the cage. Brigglett gets the underhooks and manages to circle away.
We've had a slow start to the round here - hopefully the action picks up.
Good work by Brigglett as he checks the leg kick.
Macadam Baird seems to be the more aggressive standup fighter in this bout.
Baird with a body punch. A glancing blow.
That's one minute gone in the round.
Baird misses with a body shot. Nice footwork from Brigglett.
Baird is really dominating this fight. Is there anything that Brigglett can do to turn this around?
Baird dives in for a single leg takedown but Brigglett sprawls and the fighters end up clinched against the cage.
That's three failed takedown attempts in the round for Macadam Baird. That's going to take a lot out of him.
Baird shoots for a takedown but Brigglett saw that one coming a mile off and avoided it easily.
Baird with a lazy takedown attempt
and Brigglett counters with a crisp hook to the side of the head.
Baird fails with a takedown attempt from distance.
Brigglett moves into range and throws a combination. A nice jab followed by a hook to the body.
Baird lunges in with an uppercut that skims his opponent's chin.
Baird throws a low kick but it's checked well by Brigglett.
Brigglett wants to land a leg kick but Baird is out of range.
Brigglett avoids the body shot from Baird.
Brigglett throws a counter combo.
Dane Brigglett seems to be getting the better of the standup.
Baird shoots in for a takedown! He's got it and he's managed to land in side control! That's better than Baird was expecting from the takedown attempt, I'm sure!
The fans in attendance giving it up for the two fighters, who have really let it all hang out in the last minute or so!
Baird working away diligently from side control. Landing strikes effectively there - that will score him some points on the judges scorecards.
That's two minutes gone in the round.
Baird is looking to take a break and control but Brigglett is keeping him honest, looking to work from the bottom.
Baird landing strikes.
Baird wants to lay and pray for a moment but Brigglett keeps working.
Baird is looking for a kimura. He might have it! No, Brigglett has escaped the position, nice work there.
That's three minutes gone in the round.
Baird is looking to take a break and control but Brigglett is keeping him honest, looking to work from the bottom.
Baird misses with an attempted head punch from side control.
Brigglett is looking to reverse the position.
You can see the frustration on Brigglett's face as Baird controls the position.
Baird tries to score with some ground and pound. Brigglett controls his posture well this time though and the shots don't do any damage.
Sloppy strikes there by Baird.
That's four minutes gone in the round.
A few boos can be heard. I'm sure they will multiply if the fighters don't pick up the pace.
Baird tries to advance to mount but Brigglett denies him.
Baird throws an elbow but Brigglett slips to the side and avoids it well.
Baird wants to lay and pray for a moment but Brigglett keeps working.
Brigglett seems a little lost for a moment, as Baird dominates the positioning.
The crowd thankful this round is nearly over.

The referee has stepped in and called for a break in the action. We'll restart on the feet.
Baird catches Brigglett with a nice straight right. He seems pissed - ooooh, it's on now! On like donkey kong!
And thats the end of the round the fighters go back to their corners.
Macadam Baird dominated that second round.
That's time! Baird's corner gives him a slap on the ass as he gets ready to fight. This is the final round!

Baird uses good footwork to get in and out and land a nice right hand before Brigglett has time to react.
Brigglett waving his hands out in front of him, looking to distract Baird.
Baird attempts a counter takedown but Brigglett avoids it well and moves away.
Baird throws a hook but Brigglett avoids it easily.
Brigglett swings away with a counter right hand but no contact made.
Baird throws a wild combination but nothing lands.
Brigglett dodges the punch combination from Baird.
Brigglett connects with a nice looking jab.
We've had a slow start to the round here - hopefully the action picks up.
Brigglett uses good head movement to avoid the hook from Baird.
Brigglett throws a nice looking combination but Baird bobs and weaves to avoid any damage.
Brigglett on the wrong end of a nice hook.
A leg kick checked by Brigglett.
That's one minute gone in the round.
Brigglett takes a shot right to the bread basket.
Brigglett walks into a stiff left hand from Baird.
Baird lands a jab to the nose.
Baird fakes high and swings low for a body shot but Brigglett manages to avoid it.
Brigglett misses with a combination
and Baird counters with a straight punch to the midsection.
Dane Brigglett is looking to keep the fight on the feet at all costs.
Baird avoids a low kick by using good footwork.
Baird scores with a nice right hand.
Brigglett takes a body punch that cleary hurt but he's trying not to show any weakness.
Baird takes a swing at Brigglett's ribcage but misses.

Baird closes the distance and clinches.
Macadam Baird is fighting for a decision here - he's started to take the cautious approach.
That's two minutes gone in the round.
Baird looking for a takedown.
Brigglett wants to strike at distance but he can't break free of the clinch.
Baird tries for a takedown. No joy.
Baird stays in close to his opponent and throws a right hand to the body.
Brigglett will no doubt start fighting again in a minute but for now he's just having a little rest, leaning Baird up against the cage.
Baird blocks a punch to the side of the head.
That's three minutes gone in the round.
Brigglett wants to break free but Baird has control.
Brigglett misses with some punches.
Brigglett has had enough of the clinch but Baird keeps him there for the moment.
Dane Brigglett has stepped it up - he knows he needs a finish here!
Brigglett tried to land a shot to the body but connects with Baird's elbow.
Baird prevents Brigglett from breaking the clinch.
Baird is looking to take this one to the mat.
That's three failed takedown attempts in the round for Macadam Baird. That's going to take a lot out of him.
That's four minutes gone in the round.
My god... these two guys really need to pick up the pace or everyone will leave to go get a beer.
The referee is keeping an eye on Brigglett - much more stalling and he will separate the fighters.

Brigglett manages to break the clinch.
Baird misses with a two punch combination.
A countering left hand to the body from Brigglett misses.
Baird fails with the takedown.
Baird closes the distance and scores a nice trip takedown into half guard. Brigglett did well to prevent Baird getting side control.

Brigglett has one foot on Baird's thigh - he pushes off and manages to get back to his feet.
And that's the end of the fight!
Dane Brigglett comfortably won the final round on my scorecard.
I think Baird has won this one but let's see what the judges have to say. Over to the ring announcer for the scorecards.
Ladies and gentlemen, after 3 rounds of action, we go to the scorecards for a decision.
Judge Kenichi Hosakawa scores the fight 29:28
Judge Hirohito Nitta scores the fight 29:28
Judge Yuuki Gou scores the fight 28:28
In favor of your winner, by majority decision... Macadam Baird!
After the big win, Macadam Baird made sure to do all the important stuff like thanking his sponsors Voodoo Nutrition and telling the interviewer how much he loves him.
|
|
|
|
|
|
|
|
|
|
|
|
|
|
|
|
|
|
|
|
|
|
|
| S |
C
A |
G |
S |
C
B |
G |
|
S |
C |
G |
|
energy
A | B |
|
hype
A | B |
|
pop
A | B |
|
mgr
A | B |
|
FIGHT
RATING
34% |
|
|
|
|
|
|
