|
|
PBP Commentary |
Coming up we have a featherweight MMA rules bout between Bruce Armstrong (ranked 0 p4p, 0 weight class) and Steven Stark (ranked 0 p4p, 0 weight class). Stark has chosen Sledgehammer! as his entrance music. Over to our ring announcer for the fighter introductions!
 |
|
 |
| 188 cm
29
155 lbs
18 - 6 - 1 |
|
172 cm
33
156 lbs
15 - 5 - 0 |
Abu Dhabi Champ
Solid Muay Thai
Insanely flexible |
|
Excellent grappler
World class MT
Good gas tank |
|
| |
|
Ladies and gentlemen. This fight is 3 rounds, in the featherweight division.
Introducing the fighter to my left, fighting out of the red corner.
With a record of
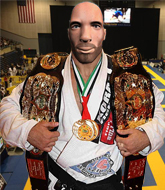
18 - 6 - 1, fighting out of Hilo, Bruce Armstrong!
And introducing the fighter to my right, fighting out of the blue corner.
With a record of
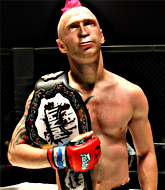
15 - 5 - 0, fighting out of Amsterdam, Steven Stark!
The judges for this bout are Paul Gruel, Colin Fray and Ryoma Takatsuka.

The bell rings for round one and we are underway!
Stark lands a head kick!

It looks like Bruce Armstrong has been cut.

Armstrong closes the distance and clinches up, looking for a takedown. He shifts his weight and gets a nice trip into half guard.
Armstrong will need to keep those long limbs tucked in whilst he's on the ground, to prevent any submissions.
Stark is doing well to avoid being mounted. He's controlling the position at the moment.
Stark has found himself in a tricky position here. He's been working his transitions in training so let's see if he can work his way out of it.
Armstrong thows a wild elbow that connects with the canvas.
Stark is looking to regain full guard. Not this time though.
Stark is still trying to improve position.
Armstrong really does look like a pencil wearing a pair of gloves. Let's hope he has a gameplan to suit that ridiculous body shape.
Armstrong wants to control but Stark is keeping him busy.
We've had a slow start to the round here - hopefully the action picks up.
Armstrong takes advantage of the dominant position to land a couple of big hammer fists.
Stark manages to get to full guard.
Stark working the defensive guard well to avoid strikes from Armstrong.

That's one minute gone in the round.
Stark is doing well to control the posture of his opponent and prevent any damage.
Stark keeping full guard, as Armstrong tries to pass.
Stark is trying to control the position but Armstrong postures up.
Stark is adopting a defensive guard.
Stark utilising some decent striking defenses from the guard, preventing the ground and pound.
Armstrong is looking to advance position but Stark has hit a scissor sweep - now he's on top in mount!

Armstrong is desperately trying to get back to half guard.
The fighters are pressed up against the cage, both looking to find a bit of space to work.
Stark lands a heavy elbow.

That's two minutes gone in the round.
Stark working away from the top, dropping strikes.
Armstrong is trying to escape the mount.
Armstrong has been looking to land a fair amount of strikes on the ground. He might be looking to soften his opponent up in order to work for a submission.
Armstrong tries to lock up and control but Stark gives him a forearm to the face and pushes him away.
Stark raining down shots from the mount!

Armstrong is rocked!
Armstrong is trying to escape the mount.
Stark with shots to the head and body - Armstrong looks very uncomfortable down there.
Stark avoids the attempt from Armstrong to control.

That's three minutes gone in the round.
Armstrong is working to get back to half guard.
The ref warns both fighters not to hold the cage as they work up against the meshing.
Armstrong regains half guard.
Armstrong is pressing down on Stark's left leg trying to get back to full guard. He's managed it.
Armstrong keeping moving, preventing Stark from controlling successfully.

Armstrong has a loose triangle. He'll be looking to tighten that up but Stark can see exactly what he's planning and manages to posture up and free himself.
Armstrong has an omoplata and is looking to use it perhaps as a submission or perhaps to transition. Stark is in a bit of discomfort here, but he's managed to free himself and has dived into side control! That didn't work out too well for Armstrong.
Armstrong being controlled for a moment.

That's four minutes gone in the round.
Stark sitting in side control, looking to soften his opponent up with elbows and hammerfists but Armstrong is avoiding damage well and looking to escape the position.
Armstrong is looking to reverse the position.
Armstrong is working hard here to advance position.
Stark working away.
The crowd thankful this round is nearly over.
The referee tells the fighters to keep busy.
Let's hope that Stark has the urge to step up the pace any second now because for the last 15 or 20 seconds he's just been holding on tight.
And thats the end of the round the fighters go back to their corners.
Steven Stark dominated that round.
The cut man is working on Bruce Armstrong's cut.
The fighters' corners scream their final instructions, as the referee calls time. Here we go, back to the action!

Stark cracks Armstrong with an open hand slap.
Stark avoids the clinch attempt nicely.
Armstrong takes a big uppercut there. He seems a bit wobbly but no, he's OK.
Armstrong shoots in but Stark avoids the takedown attempt easily.
Stark swings away with a counter right hand but no contact made.
Stark has been the more effective fighter overall so far.
Stark throws a head kick but Armstrong moves out of range.
Armstrong feinted with a counter takedown.
Stark digs a good body shot into Armstrong's ribs.
Armstrong shoots in with a takedown attempt and he has Stark pinned against the cage. Stark gets the underhooks and manages to circle away.
We've had a slow start to the round here - hopefully the action picks up.
A combination from Stark does no damage.
Stark just misses with a punch to the body.
Stark misses with an uppercut. Armstrong saw that one coming.
Armstrong feints with a shoulder and throws a nice leg kick to Stark's calf.
Armstrong tries to shoot in for a takedown. He's got hold of a leg but Stark swivels and escapes.
That's three failed takedown attempts in the round for Bruce Armstrong. That's going to take a lot out of him.
That's one minute gone in the round.
Well, he's not going to score with shots like that. A lazy body kick attempt from Stark.
Steven Stark is looking to keep the fight on the feet at all costs.
Stark keeps the fight on the outside.
Armstrong takes a body punch but keeps moving.
Stark throws a head kick but Armstrong moves out of range.
Stark plants his feet and lands a nice head kick!
Stark looks to score with a combo but nothing lands.
Stark misses with a head kick.

The fight moves into the clinch position.
Armstrong takes an elbow to the forehead.
Stark misses with a hook to the ribs.
Armstrong wants a takedown but no success here.
Armstrong avoids a wild elbow strike from Stark.
Stark misses with an elbow over the top.
Stark tries a shoulder strike but it doesn't do any damage.
Stark digs a right hand underneath Armstrong's ribcage. Armstrong let out a lung full of air as it connected.
Stark pushes Armstrong back against the cage and lands a hook to the side of the head.
Wooooo! Give it up for these two warriors! They are putting on a show!
Armstrong tries to pull guard but Stark holds him up against the cage and eventually Armstrong drops back down to his feet.
That's two minutes gone in the round.
Armstrong jumps guard but Stark turns him against the cage and keeps the fight standing.
Stark comes over the top with an elbow. That landed flush.
Stark can't find room to land a body shot as Armstrong controls the action.
Armstrong is looking for a takedown up against the cage. Stark gets underhooks though and prevents the takedown attempt.
Stark working on landing some head shots here - that one got through nicely.
Stark scores with a nice hook to the head.
Oh Armstrong is still all over the place! His legs are completely gone! Will he be able to recover?!!
Armstrong jumps guard but Stark stands there with Armstrong around his waist. Armstrong gives up and drops back to his feet. We remain in the clinch.
Stark lands a right hand that snaps the head of Armstrong backwards.
A nice right hand lands inside from Stark.
Stark lands on the inside with an uppercut.
Armstrong tries to take the fight to the ground by pulling guard but can't manage it.
Stark prevents a takedown attempt there.
Stark tries a shoulder strike but it doesn't do any damage.
Armstrong blocking some punches.
Steven Stark seems to be working more effectively in the clinch in the fight so far.
A body shot lands from Stark.
Both fighters are absolutely exhausted here.
Stark working some nice short punches in the clinch.
Stark lands a left hand.
That's three minutes gone in the round.
Armstrong has dropped down and is looking to force the takedown but it's defended by Stark after a bit of a struggle.
Stark pushes Armstrong against the cage. Stark is working some dirty boxing. Stark pushes off with a quick right hook! Armstrong goes down! Armstrong tries to stand but stumbles back to his kness! Stark moves in to finish and the ref steps in to prevent any more damage!
Ladies and gentlemen, after 3:12 of round 2, we have a winner by way of TKO (Strikes). Steven Stark!
Steven Stark bigged himself up after the win. The crowd seemed to love it.
|
|
|
|
|
|
|
|
|
|
|
|
|
|
|
|
|
|
|
|
|
|
|
| S |
C
A |
G |
S |
C
B |
G |
|
S |
C |
G |
|
energy
A | B |
|
hype
A | B |
|
pop
A | B |
|
mgr
A | B |
|
FIGHT
RATING
44% |
|
|
|
|
|
|
