|
|
PBP Commentary |
Coming up we have a bantamweight MMA rules bout between Leeroy Jenkins (ranked 0 p4p, 0 weight class) and Tyrone The Crack Head (ranked 0 p4p, 0 weight class). Jenkins comes into the arena with Rock On blaring out of the sound system. The Crack Head has chosen Mr. Flamboyant as his entrance music. The atmosphere really building for this one as we go over to our ring announcer for the fighter introductions!
 |
|
 |
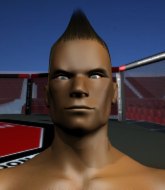
| 184 cm
27
135 lbs
10 - 11 - 0 |
|
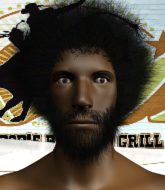
150 cm
20
140 lbs
6 - 2 - 0 |
BJJ Purple Belt
Excellent MT
Granite chin |
|
BJJ Purple Belt
Dangerous knees
Powerful |
|
| |
|
Ladies and gentlemen. This fight is 3 rounds, in the bantamweight division.
Introducing the fighter to my left, fighting out of the red corner.
With a record of
10 - 11 - 0, fighting out of Los Angeles, Leeroy Jenkins!
And introducing the fighter to my right, fighting out of the blue corner.
With a record of
6 - 2 - 0, fighting out of Los Angeles, Tyrone The Crack Head!
The judges for this bout are Jack Bonds, Frank Antenori and .

The bell rings for round one and we are underway!
The Crack Head throws a head kick that connects with a bit of head and a bit of hand.
A head kick misses from The Crack Head.
A head kick from Jenkins lands but The Crack Head takes it in his stride.
Jenkins thumps The Crack Head with a low kick.
The Crack Head throws a head kick that misses.
Like a baseball bat into the meat of his leg there - nice leg kick by Jenkins.

The Crack Head rushes Jenkins and presses him up against the cage.
The Crack Head working Jenkins over with knees to the body.
The Crack Head lands a nice knee to the body.
The Crack Head tries to land a knee to the head but Jenkins blocks with his arms.
Wooooo! Give it up for these two warriors! They are putting on a show!
Knees to the body from The Crack Head.
The Crack Head is looking to score with knees to the body. Maybe he'll change it up and go body then head. Jenkins is defending well for now.
Kneeeeees! The crowd are calling for knees to the body. The Crack Head obliges.
Jenkins is trying to force a seperation but The Crack Head has the dominant position.
Jenkins wants to push off and get back to the center of the mat but The Crack Head has him pressed against the cage.
The Crack Head putting his Muay Thai to good use. He has Jenkins in a tight clinch and is doing some damage with knees to the body.
The Crack Head unloads a knee to the mid-section. Jenkins lets out a prehistoric sounding urrrrgh.
Jenkins tries to land a knee to the body but he is off balance and The Crack Head avoids it.

That's one minute gone in the round.
The Crack Head tries a knee to the head but Jenkins blocks it.
The Crack Head lands an elbow that stopped Jenkins in his tracks for a moment.
The Crack Head told us before the fight that he's been working on his elbows. An under utilised technique these days - let's see if it can sway the outcome of the fight.
Jenkins being controlled against the cage.
Jenkins on the defensive, avoiding the knees to the body.

Jenkins breaks the clinch and we return to the middle of the mat.
Jenkins throws a sloppy head kick and The Crack Head moves out of range easily.
The Crack Head throws a leg kick
and Jenkins counters with a head kick.
Tyrone The Crack Head seems to be the more aggressive standup fighter in this bout.
The Crack Head clinches up against the cage.
The Crack Head lands a good knee to the midsection. Jenkins won't want to take too many of those.
The Crack Head taking a break, stalling in the clinch.
Jenkins avoiding damage as The Crack Head throws knees to the body.
Jenkins blocks a knee to the body. He'll have a nicely bruised forearm in the morning.
Jenkins wants to get back to striking at distance but The Crack Head won't allow it.

That's two minutes gone in the round.
The Crack Head taking a break, stalling in the clinch.
Jenkins managing to block the knees to the body from The Crack Head.
The Crack Head slowing the pace effectively.
Jenkins takes a knee right on the jaw!
We've seen a great period of action over the last minute or so - credit to both fighters for going all out!
The Crack Head scores a nice knee to the body.
Jenkins is trying to work out of this bad position, with his back against the cage.
The Crack Head stalling here - the referee won't stand for too much of that.
Jenkins really does look like a pencil wearing a pair of gloves. Let's hope he has a gameplan to suit that ridiculous body shape.
Jenkins can't break the clinch.
The two fighters are working to gain dominance in the clinch.
A bit of stalling here from The Crack Head.
The Crack Head with the Thai clinch. He's looking to land a big knee but he's not managed it this time.
The Crack Head throws a knee to the head but misses.
Jenkins is trying to break free.
The Crack Head tries to land knees in the clinch but Jenkins avoids the damage to the body.
The Crack Head avoiding damage as Jenkins throws knees to the body.

That's three minutes gone in the round.
Jenkins avoids a wild elbow strike from The Crack Head.
The Crack Head manages to get underhooks and slows down the pace for a moment.
Jenkins is trying to force a seperation but The Crack Head has the dominant position.
The Crack Head is pushing Jenkins up against the cage, for a bit of lean and pray action. Action being used the in the loosest possible sense of the word.
Jenkins wants to strike at distance but he can't break free of the clinch.
The Crack Head connects with a nasty looking knee right to Jenkins's face.
The Crack Head tries to land a knee to the head but Jenkins blocks with his arms.
Jenkins breaks the clinch and we're back to striking at distance.
Jenkins throws a head kick that misses.
The Crack Head forces Jenkins back against the cage and clinches.
The Crack Head slows down the pace here.
The Crack Head has Jenkins pressed against the cage, preventing Jenkins from circling away and getting back to striking at range.

That's four minutes gone in the round.
The Crack Head lands an elbow just above Jenkins 's eye.
The Crack Head effectively controlling the action here.
Jenkins has had enough of the clinch but The Crack Head keeps him there for the moment.
The Crack Head lands a nice knee to the body.
The Crack Head tries a knee to the head but Jenkins blocks it.
The Crack Head utilising his Muay Thai to score with a knee to the body.
The Crack Head keeps the fight in the clinch, despite Jenkins's efforts to push away.
A knee to the head by The Crack Head.
We've seen a great period of action over the last minute or so - credit to both fighters for going all out!
Jenkins can't break the clinch.
The Crack Head tries to land a knee to the body but he is off balance and Jenkins avoids it.
The Crack Head unloads a knee to the mid-section.
And thats the end of the round the fighters go back to their corners.
Tyrone The Crack Head dominated that round.
The fighters get back to their feet, the hooter sounds and we're back to the action!

The Crack Head misses with a head kick.
The Crack Head misses with a head kick.
The Crack Head tries to clinch but Jenkins is having none of it.
A head kick from Jenkins lands but The Crack Head takes it in his stride.
The Crack Head throws a head kick that misses
and Jenkins counters with a big head kick but The Crack Head shrugs it off.
A head kick misses from Jenkins.
The Crack Head blocks a head kick by Jenkins.
Jenkins misses with a head kick.
Jenkins misses with a head kick.
The Crack Head tries to clinch but Jenkins moves out of range.
The Crack Head wants to clinch.
Leeroy Jenkins is winning the standup battle so far.
We've had a slow start to the round here - hopefully the action picks up.
The Crack Head misses with a half-hearted attempt at a head kick.
The Crack Head moves into the clinch successfully.
The referee calls for The Crack Head to work.
That's one minute gone in the round.
The Crack Head tries a knee to the head but he's missed.
The pace really dropping off here, momentarily.
Jenkins has had enough of the clinch and is looking to separate.
The Crack Head looking to throw knees to the head but Jenkins is blocking nicely.
The Crack Head looking to throw knees to the head but Jenkins is blocking nicely.
The Crack Head landing knees to the body.
A frustrated look appears on Jenkins's face as he tries to break the clinch.
Jenkins tries to land a knee to the body but he is off balance and The Crack Head avoids it.
The Crack Head throws a vicious knee straight up the middle but Jenkins blocks it with crossed arms.
The Crack Head tries to land a knee to the head but misses.
The Crack Head goes for a body shot but it's blocked.
Jenkins is trying to break the clinch but The Crack Head has him pressed against the cage.
That's two minutes gone in the round.
Jenkins is trying to break the clinch but The Crack Head is controlling him.
Jenkins wants to push off and get back to the center of the mat but The Crack Head has him pressed against the cage.
The Crack Head utilising his Muay Thai to score with a knee to the body.
The Crack Head misses the knee to the body. Nice hip positioning from Jenkins.
The fighters are pressed against the cage, as the pace of the fight slows.
The Crack Head tries to land a knee to the head but Jenkins blocks with his arms.
Jenkins wants to strike at distance but he can't break free of the clinch.
Jenkins wants to get back to striking at distance but The Crack Head won't allow it.
Jenkins is trying to break the clinch but The Crack Head has him pressed against the cage.
The Crack Head looking to throw knees to the head but Jenkins is blocking nicely.
Jenkins wants to break free but The Crack Head has control.
Jenkins is trying to work out of this bad position, with his back against the cage.
Jenkins is trying to push The Crack Head away but The Crack Head has him pressed against the cage, so he's going nowhere.
That's three minutes gone in the round.
Jenkins escapes the clinch and we're back to striking.
The Crack Head fakes a couple of low kicks, before throwing one on the third attempt. It connects and Jenkins has to reset his feet before getting ready to engage.
The Crack Head has managed to clinch.
A bit of stalling here from The Crack Head.
The Crack Head taking a breather.
The Crack Head trying to land knees to the body.
The Crack Head lands an elbow that stopped Jenkins in his tracks for a moment.
The Crack Head has Jenkins pressed against the cage, preventing Jenkins from circling away and getting back to striking at range.
Jenkins is looking to break free of the clinch but The Crack Head has double underhooks.
The Crack Head has been the more effective fighter overall so far.
The Crack Head with the Thai clinch. He's looking to land a big knee but he's not managed it this time.
The Crack Head with the Thai clinch. He's looking to land a big knee but he's not managed it this time.
Tyrone The Crack Head seems to be working more effectively in the clinch in the fight so far.
Jenkins has had enough of the clinch and is looking to separate.
Jenkins is trying to break free.
Jenkins tries to work over The Crack Head's body with a swooping hook but it only glances the target.
That's four minutes gone in the round.
Jenkins has had enough of the clinch and is looking to separate.
Jenkins avoiding damage as The Crack Head throws knees to the body.
Jenkins is looking to break free of the clinch but The Crack Head has double underhooks.
Jenkins wants to break free. God knows he wants to breaaaak freeee.
The Crack Head tries a knee to the head but Jenkins blocks it.
Jenkins is looking to break free of the clinch but The Crack Head has double underhooks.
The Crack Head tries a knee to the head but he's missed.
The Crack Head just leaning against Jenkins, taking a breather.
The Crack Head throws a vicious knee straight up the middle but Jenkins blocks it with crossed arms.
The Crack Head landing some nice looking knees to the body.
Jenkins is trying to break free.
The crowd thankful this round is nearly over.
The Crack Head trying to land knees to the body.
The Crack Head using the Thai plumb to throw knees but Jenkins has his back arched nicely, preventing the strike.
The Crack Head prevents Jenkins from breaking the clinch.
The Crack Head tries a knee to the head but Jenkins blocks it.
And thats the end of the round the fighters go back to their corners.
Tyrone The Crack Head showed his class in that round. I'd imagine he'll take it on all the scorecards.
The fighters get back to their feet, the hooter sounds and we're back to the action! This is the final round!

The Crack Head wants to clinch up but Jenkins keeps it at a distance.
Jenkins throws a quick head kick that skims the top of The Crack Head's head.
Jenkins throws a quick head kick that skims the top of The Crack Head's head.
The Crack Head gets in close and instigates a clinch.
Jenkins wants to break free. God knows he wants to breaaaak freeee.
The Crack Head stalling here - the referee won't stand for too much of that.
Jenkins wants to strike at distance but he can't break free of the clinch.
The Crack Head prevents Jenkins from breaking the clinch.
The Crack Head looking to throw knees to the head but Jenkins is blocking nicely.
The Crack Head tries to land a knee to the head but Jenkins blocks with his arms.
We've had a slow start to the round here - hopefully the action picks up.
Knees to the body from The Crack Head.
A bit of stalling here from The Crack Head.
The Crack Head dictating the pace here, as the fighters clinch against the cage.
The Crack Head receives a warning from the referee for stalling.
The Crack Head misses with a knee strike.
That's one minute gone in the round.
The Crack Head prevents Jenkins from breaking the clinch.
Jenkins wants to get back to striking at distance but The Crack Head won't allow it.
Jenkins avoiding damage as The Crack Head throws knees to the body.
Jenkins's corner calls for him to break the clinch, which he does.
Jenkins looking to take his opponent's legs away with the low kicks.
Jenkins throws a right high kick that is partially blocked by The Crack Head.
A head kick misses from Jenkins.
Jenkins avoids the head kick by The Crack Head.
The Crack Head drives through and clinches with Jenkins against the cage.
Jenkins managing to block the knees to the body from The Crack Head.
Jenkins blocks a knee to the body. He'll have a nicely bruised forearm in the morning.
The Crack Head landing knees to the body. They look like they could hurt.
Jenkins working hard to break the clinch.
Knees in the clinch landing for The Crack Head.
That's two minutes gone in the round.
The Crack Head unloads a knee to the mid-section. Jenkins lets out a prehistoric sounding urrrrgh.
Both fighters are breathing heavily.
Jenkins missing with knees to the body.
The Crack Head connects with a knee to the head.
Fantastic stuff here - a very entertaining period of action, which has drawn cheers from the crowd.
Jenkins working hard to break the clinch.
Jenkins tries to circle away but The Crack Head has him pinned against the cage.
The Crack Head using the Thai clinch to land knees to the body.
The Crack Head tries to land a knee to the body but he is off balance and Jenkins avoids it.
Stalling in the clinch from The Crack Head.
The Crack Head with the Thai clinch. He's looking to land a big knee but he's not managed it this time.
Jenkins is trying to force a seperation but The Crack Head has the dominant position.
Jenkins managing to block the knees to the body from The Crack Head.
The Crack Head tries to land a knee to the head but misses.
The Crack Head tries to land a knee to the body but he is off balance and Jenkins avoids it.
The referee is keeping an eye on The Crack Head - much more stalling and he will separate the fighters.
That's three minutes gone in the round.
Jenkins is looking to control The Crack Head's arms but The Crack Head gets an underhook and turns him. Now Jenkins has his back to the cage.
The Crack Head is looking to score with knees to the body. Maybe he'll change it up and go body then head. Jenkins is defending well for now.
The Crack Head holding his opponent close, against the cage.
The Crack Head looking to throw knees to the head but Jenkins is blocking nicely.
The Crack Head is looking to score with knees to the body. Maybe he'll change it up and go body then head. Jenkins is defending well for now.
The Crack Head is looking to score with knees to the body. Maybe he'll change it up and go body then head. Jenkins is defending well for now.
The Crack Head stalling against the cage.
A frustrated look appears on Jenkins's face as he tries to break the clinch.
Good anti-grappling being displayed by Jenkins as The Crack Head tries to tie him up.
Jenkins tries to circle away but The Crack Head has him pinned against the cage.
That's four minutes gone in the round.
The crowd are getting on the fighters' backs, as the pace has dropped off in the last minute or so.
The Crack Head gets an overhook and lands an elbow to the side of the head.
The Crack Head looking to throw knees to the head but Jenkins is blocking nicely.
Jenkins wants to get back to striking at distance but The Crack Head won't allow it.
Jenkins wants to break free but The Crack Head has control.
The Crack Head connects with a knee to the head.
Tyrone The Crack Head is fighting for a decision - hopefully he's judged it right and he's actually winning the fight.
The Crack Head misses with a knee strike.
Jenkins can't break the clinch.
Jenkins wants to strike at distance but he can't break free of the clinch.
Jenkins is trying to break free.
The Crack Head lands a good knee to the midsection. Jenkins won't want to take too many of those.
Jenkins is trying to force a seperation but The Crack Head has the dominant position.
Leeroy Jenkins has stepped it up - he knows he needs a finish here!
Jenkins wants to strike at distance but he can't break free of the clinch.
The Crack Head goes for a body shot but it's blocked.
The Crack Head on the defensive, avoiding the knees to the body.
And that's the end of the fight!
Tyrone The Crack Head comfortably won the final round on my scorecard.
I've got The Crack Head winning every round here. Surely the decision will go his way and he'll pick up a well deserved decision victory. Over to the ring announcer for the scorecards.
Ladies and gentlemen, after 3 rounds of action, we go to the scorecards for a decision.
Judge Jack Bonds scores the fight 27:30
Judge Frank Antenori scores the fight 27:30
Judge Percy O'Donnell scores the fight 27:30
In favor of your winner, by unanimous decision... Tyrone The Crack Head!
Tyrone The Crack Head took some time post fight to say the following; 'F the UFC!!'.
The defeated Leeroy Jenkins had this to say: 'Juast luck mate...'.
|
|
|
|
|
|
|
|
|
|
|
|
|
|
|
|
|
|
|
|
|
|
|
| S |
C
A |
G |
S |
C
B |
G |
|
S |
C |
G |
|
energy
A | B |
|
hype
A | B |
|
pop
A | B |
|
mgr
A | B |
|
FIGHT
RATING
46% |
|
|
|
|
|
|
