|
|
PBP Commentary |
Coming up we have a light heavyweight MMA rules bout between Mercury Hayes (ranked 0 p4p, 0 weight class) and Jimmy Crackajack (ranked 0 p4p, 0 weight class). Jimmy Crackajack is the more experienced fighter, so let's see if that makes a difference tonight.
 |
|
 |
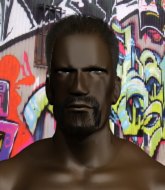
| 190 cm
23
208 lbs
0 - 1 - 0 |
|
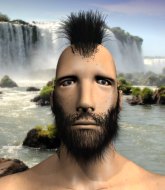
192 cm
24
222 lbs
4 - 1 - 0 |
Dangerous GnP
Solid boxing
Granite chin |
|
Decent wrestler
Excellent boxer
Good gas tank |
|
| |
|
Ladies and gentlemen. This fight is 3 rounds, in the light heavyweight division.
Introducing the fighter to my left, fighting out of the red corner.
With a record of
0 - 1 - 0, fighting out of New York, Mercury Hayes!
And introducing the fighter to my right, fighting out of the blue corner.
With a record of
4 - 1 - 0, fighting out of Rio de Janeiro, Jimmy Crackajack!
The judges for this bout are John Roberts, Chad Campbell and Joseph Jones.

The bell rings for round one and we are underway!
Crackajack tries to land with a swinging hook to the body but Hayes was well out of range. Poor timing from Crackajack.
Crackajack throws a body punch but Hayes moves out of range.
Hayes jinks towards his opponent looking like he wants to counter with a mid kick but doesn't commit.
Crackajack lunges at Hayes with a hook that half lands and is half blocked by Hayes's hand.
Hayes fails to land the takedown.
Crackajack appears to be waiting to throw a counter punch to the body.
Hayes doesn't succeed with the takedown
and Crackajack counters with a lovely straight right hand!
Hayes darts in looking for a takedown but Crackajack gets double underhooks and turns Hayes into the cage.
That's three failed takedown attempts in the round for Mercury Hayes. That's going to take a lot out of him.

Crackajack gets tackled into the cage by Hayes. Hayes maintains the clinch.
Crackajack misses with a punch to the body.
Crackajack blocks an uppercut.
We've had a slow start to the round here - hopefully the action picks up.

Hayes ties up his opponent against the cage and manages to drag the fight down to the ground. Hayes no doubt will be looking to work submissions from his guard.
Crackajack postures up.
Crackajack trying to stand up but can't free himself from Hayes's guard.

Hayes looking for submissions from the bottom here. Moving his hips around, possibly looking for an armbar.
Crackajack trying to control the position from guard on top but Hayes is wriggling around, looking for whatever he can.

That's one minute gone in the round.
Hayes is throwing his legs up, looking for submissions. Crackajack is aware though and is defending well.
Crackajack wants to stand but Hayes has a closed guard, so he can't escape.

Crackajack drops back looking for a heel hook - he quickly realises he's not going to get it but Hayes manages to dive on top of him before he can escape and now Crackajack has Hayes in his guard.

Hayes drops back for a leg! It's a sloppy attempt though and Hayes jumps back into guard quickly, to retain the dominant position.
Crackajack is trying to control the position but Hayes postures up.
Hayes drops back looking for a leg! Crackajack is in trouble here! The fighters roll with the hold and Crackajack manages to kick Hayes off! Hayes jumps back into Crackajack's guard.
Hayes thinks about going for a leg but decides against it, in order to maintain the position.

That's two minutes gone in the round.
A few boos can be heard. I'm sure they will multiply if the fighters don't pick up the pace.
Hayes passes Crackajack's left leg - he's now in half guard.
Hayes scoring with strikes to the body and head.
Hayes seems to be working for a kimura but Crackajack defends the submission attempt.
Hayes trying to pass the guard but Crackajack defending well.
Hayes prevents Crackajack from improving his position.
Hayes passes to full mount!
Hayes wants to finish this one by submission but Crackajack is holding onto his waist, trying to prevent any attacks from Hayes.
Hayes working for a submission but Crackajack is keeping him at bay.
Crackajack takes a big shot to the head but keeps on trying to improve his position.

That's three minutes gone in the round.
Hayes with some aggressive grappling here. He's looking for submissions here, rather than waiting for the opportunity to counter.
Hayes wants to finish this one by submission but Crackajack is holding onto his waist, trying to prevent any attacks from Hayes.
Hayes is looking to work his way around to Crackajack's back. He needs to be careful though, as he's in danger of losing this dominant position.
Hayes working for a guillotine from mount but Crackajack is in no mood to give up.
Hayes moves into side control, trying to work for a kimura. That looks painful! Will he finish!!?? No, Crackajack has worked his arm free - good work by Crackajack!
Crackajack tries to buck Hayes off but Hayes is having none of it.
Hayes landing with strikes to the head and body from side control.
Hayes in side control lands a nice looking series of punches and elbows.
Crackajack wants to get back to his feet but Hayes drags him back down.
Hayes wants to work for a kimura but he's foiled early by Crackajack, who protects the arm well.
Hayes looking for an arm triangle but it's way too loose to do anything.
Crackajack really doesn't want to stay on the ground with Hayes. If he can't get it back to his feet, it's only a matter of time before he'll be tapping out.

That's four minutes gone in the round.
Crackajack tries to buck Hayes off but Hayes is having none of it.
Crackajack is persisting with the attempt to improve his position.
Crackajack manages to get back to half guard.
Crackajack is controlling Hayes's position as best he can from this difficult position.
Crackajack tries to get to full guard but Hayes has control of the leg.
Crackajack is trying to stand up here but Hayes is controlling him well.
The crowd thankful this round is nearly over.
Crackajack is trying to get back to full guard.
Hayes is working for submissions here but there's nothing on.
Hayes seems to be looking for submissions.
And thats the end of the round the fighters go back to their corners.
Mercury Hayes dominated that round.
The referee calls time. The cornermen exit stage left and we're back to business.

Crackajack swings and misses with a hook to the body.
Hayes is really dominating this fight. Is there anything that Crackajack can do to turn this around?
Nice jab there from Crackajack.
Crackajack leaves Hayes with his face pressed against the mat as he sprawls beautifully, defending against a solid takedown attempt.
Crackajack comes forward and lands a shot to the body, then darts back out of range.
Hayes throws a head kick that misses and slips in the process. He scrambles back to his feet and the fighters circle.
Hayes doesn't succeed with the takedown
and Crackajack counters with a shot to the ribs. That looked like it hurt.
Hayes looks to have improved his striking defense since last time we saw him fight.
A big right from Crackajack misses.
We've had a slow start to the round here - hopefully the action picks up.
Hayes fails with the takedown
and Hayes takes a counter punch right on the button for his troubles.

It looks like Mercury Hayes has been cut.
That's three failed takedown attempts in the round for Mercury Hayes. That's going to take a lot out of him.
Crackajack fakes high and swings low for a body shot but Hayes manages to avoid it.
Nice takedown defense from Crackajack. No joy for Hayes on that attempt.
Hayes tries to score a power double leg takedown but Crackajack sees that one coming and sprawls well. That will dishearten Hayes somewhat.
That's one minute gone in the round.
Hayes with a lazy takedown attempt
and Crackajack counters with a good right hand that lands right on the jaw.
Hayes misses with a kick to the body.
Hayes closes this distance looking for a takedown but Crackajack circles away.
Both fighters are absolutely exhausted here.
Crackajack fakes high and swings low for a body shot but Hayes manages to avoid it.
Crackajack thuds a left hand into Hayes's body.
A telegraphed right hand from Crackajack misses the target.
Crackajack lands a nice hook to Hayes's body. Hayes takes it in his stride and looks to land his own strikes.
Hayes takes a solid shot to the body. That one hurt him but he's trying not to show it.
Hayes gets his head snapped back by a nice shot there.
Crackajack is throwing a lot of body shots here, looking to wear down Hayes rather than just go for the knockout.
Crackajack lands with a good body shot.
A shot to the liver by Crackajack. Beautiful body shot.
That's two minutes gone in the round.
Hayes walks straight into a jab right on the nose. That one stung - he's blinking and trying to clear his head.
We've seen a great period of action over the last minute or so - credit to both fighters for going all out!
Hayes shoots in for a takedown. "Ole!" shouts Crackajack as he jumps to the side.
Crackajack thuds a left hand into Hayes's body.
Crackajack lands a jab.
Hayes keeping a good distance there, avoiding the body shot.
Crackajack misses with a looping right.
Crackajack scores with a jab to the body.
Crackajack misses the shot to the body.
Hayes shoots and misses
and Crackajack counters with a good right hand that lands right on the jaw.
Mercury Hayes's cut is getting worse.
Crackajack lands a jab to the nose.
Crackajack misses the shot to the body.
Crackajack digs a good hook to Hayes's body.
That's three minutes gone in the round.
It's a brutal combination of punches from Crackajack! Hayes is backing up but he can't get away as Crackajack lands with one final shot to the jaw that drops Hayes and ends the fight. Great knockout.
Ladies and gentlemen, after 3:09 of round 2, we have a winner by way of TKO (Punches). Jimmy Crackajack!
|
|
|
|
|
|
|
|
|
|
|
|
|
|
|
|
|
|
|
|
|
|
|
| S |
C
A |
G |
S |
C
B |
G |
|
S |
C |
G |
|
energy
A | B |
|
hype
A | B |
|
pop
A | B |
|
mgr
A | B |
|
FIGHT
RATING
43% |
|
|
|
|
|
|
