|
|
PBP Commentary |
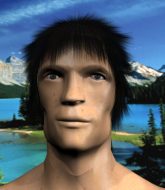
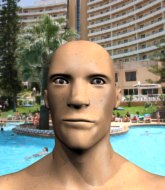
Coming up we have a featherweight MMA rules bout between Kelley Bowman (ranked 0 p4p, 0 weight class) and Keiran McGuinness (ranked 0 p4p, 0 weight class). Kelley Bowman has the edge in experience - let's see if he can make that count tonight.
 |
|
 |
| 168 cm
18
151 lbs
2 - 3 - 0 |
|
179 cm
25
145 lbs
1 - 1 - 0 |
BJJ Blue Belt
Counter fighter
Cuts easily |
|
BJJ White Belt
Decent boxing
Granite chin |
|
| |
|
Ladies and gentlemen. This fight is 3 rounds, in the featherweight division.
Introducing the fighter to my left, fighting out of the red corner.
With a record of
2 - 3 - 0, fighting out of London, Kelley Bowman!
And introducing the fighter to my right, fighting out of the blue corner.
With a record of
1 - 1 - 0, fighting out of London, Keiran McGuinness!
The judges for this bout are Richard Clark, Daniel Bishop and James Glass.

The bell rings for round one and we are underway!
Bowman gets his takedown attempt stuffed easily
and McGuinness counters with a shot to the ribs. That looked like it hurt.
Bowman shoots in but no luck this time.
The sound of bone on bone echoes around the arena as McGuinness checks a leg kick.
McGuinness fails to land with the punch combination there - jab, cross, hook, miss, miss, miss.
Bowman shoots in with a takedown attempt and he has McGuinness pinned against the cage. McGuinness gets the underhooks and manages to circle away.
That's three failed takedown attempts in the round for Kelley Bowman. That's going to take a lot out of him.
We've had a slow start to the round here - hopefully the action picks up.
Bowman fails with the takedown
and McGuinness counters with a one-two to the body.
Bowman shoots in but doesn't get the takedown
and McGuinness counters with a three punch combination, finished off with a leg kick. Nice work.

That's one minute gone in the round.
A low kick from Bowman misses
and McGuinness counters with a three punch combo that has Bowman backing up. Bowman nods at McGuinness to acknowledge the strikes.
Bowman avoids a punch combination nicely.

Bowman scores with a nice takedown into half guard. Let's see what he's got on the ground.
We could do with one of the fighters taking the initiative a bit more on the ground - they're both waiting to capitalize on a mistake.
McGuinness trying to control from the bottom.
McGuinness on the receiving end of some nice ground and pound.
The ref warns both fighters not to hold the cage as they work up against the meshing.
McGuinness blocking the ground and pound attempt from Bowman.
Bowman working some ground and pound from close in. He's looking to maintain this position and strike for a while by the looks of things... although he'll probably advance to full mount in a minute now I've said that.
Bowman has been looking to land a fair amount of strikes on the ground. He might be looking to soften his opponent up in order to work for a submission.

That's two minutes gone in the round.
Bowman working McGuinness over with strikes.
Bowman throwing punches and elbows but they're not doing any damage.
Bowman lands with an elbow from half guard - that looked like it hurt.
The referee walks around the fighters to get a better view of the action. Bowman lands a nice short elbow.
Wooooo! Give it up for these two warriors! They are putting on a show!
Bowman is keeping good posture, landing some ground and pound.
Bowman drops an elbow to the side of McGuinness's head.
Bowman thumps the canvas. Not on purpose obviously - he just missed McGuinness's head.
Bowman is thwarting McGuinness's attempts to control the position.
McGuinness is doing well to control the position and prevent Bowman from advancing to side control.
Bowman working over McGuinness with some ground and pound. McGuinness looks like he wants out of this position, which is understandable.
McGuinness really doesn't want to stay on the ground with Bowman. If he can't get it back to his feet, it's only a matter of time before he'll be tapping out.

That's three minutes gone in the round.
McGuinness trying to get back to full guard but Bowman takes advantage of the position and moves to full mount!
Bowman is landing with some decent strikes but McGuinness is trying to advance his position so the referee is letting the fight continue.
Bowman landing shots from mount.
McGuinness stops Bowman from taking his back. Still, being mounted isn't any better.
Bowman looking to finish McGuinness with some ground and pound. This is bad for McGuinness!
McGuinness tries to hold on but Bowman postures up.
Bowman is still in mount, landing shots to his trapped opponent. McGuinness can't stay in a position like this for much longer.
McGuinness tries to hold on but Bowman pushes him away.

That's four minutes gone in the round.
Bowman prevents McGuinness from getting the reversal.
Bowman is landing with some decent strikes but McGuinness is trying to advance his position so the referee is letting the fight continue.
Bowman landing strikes from the mount.
McGuinness tries to hold on but Bowman postures up.
This has been an exciting period of action!
Bowman working the ground and pound effectively.
McGuinness takes a big shot to the head but keeps on trying to improve his position.
McGuinness can't escape the position.
McGuinness wants to hold on but Bowman pushes him away.
McGuinness really trying hard to get back to half guard here.
And thats the end of the round the fighters go back to their corners.
Kelley Bowman dominated that round.
That's the end of the interval. I'm sure that seemed a lot quicker than a minute for our two fighters! Back to the action.

McGuinness stuffs the takedown attempt from Bowman. Bowman gets slowly back to his feet.
McGuinness throws a counter combo.
McGuinness lands with an overhand left.
Bowman shoots in for a takedown but doesn't get it.
McGuinness lets it all go there with a big combo counter but none of the punches connected.
McGuinness wants to clinch up but Bowman keeps it at a distance.
We've had a slow start to the round here - hopefully the action picks up.

McGuinness shoots in and scores a nice double leg takedown into half guard.
Bowman works his way to full guard. Good work.
That's one minute gone in the round.

Bowman has his foot on McGuinness's thigh. He's trying to push off and get in position for a triangle, I think. McGuinness works his way back into a safe position though.
Bowman working from the bottom, still in full guard. He's managed to get a loose triangle. McGuinness doesn't seem to be doing much to defend here, obviously he feels comfortable in the position. McGuinness manages to throw the legs off his shoulder and he's back into guard - no problem.
McGuinness wanted to stand there but Bowman had control of the position.
McGuinness wants to control from the top but Bowman keeps moving.
McGuinness got a little sloppy there for a moment and Bowman has worked his way into a loose triangle - can he finish it?! No, McGuinness has managed to get both his arms back between Bowman's legs - danger averted.
Bowman looking to sweep using the butterfly guard but McGuinness puts pay to that idea as he passes nicely into half guard.
That's two minutes gone in the round.
Bowman looking for submissions off his back.
Bowman actively working from the bottom here.
McGuinness looks over to his corner - he wants some instructions but his corner are not responding.
Bowman looking for submissions from an awkward position here.
McGuinness trying to control from half guard but Bowman is working away.
Bowman is looking for a sweep. McGuinness is wise to his cunning plan and keeps the top position.
That's three minutes gone in the round.
McGuinness throwing shots but they're hitting the canvas more than the man.
McGuinness drops an elbow to the side of Bowman's head.
Bowman is trying to get back to full guard.
McGuinness wants to take a breather but Bowman is having none of it.
Bowman lands with a few short shots to the body.
Bowman is trying to stand back up but McGuinness is controlling him

The ref stands the fighters back up due to a lack of activity.
Bowman throws a left and a right that both miss
letting McGuinness counter with a right hand.
Bowman shoots and misses

and McGuinness holds on and brings the fighters into a clinch.
That's three failed takedown attempts in the round for Kelley Bowman. That's going to take a lot out of him.
Both fighters are absolutely exhausted here.
That's four minutes gone in the round.
McGuinness avoids the elbow strike from Bowman, against the cage.

McGuinness's corner calls for him to break the clinch, which he does.
McGuinness throws a head kick that connects with a bit of head and a bit of hand.
McGuinness throws a wild combination but nothing lands.
Bowman appears to be looking for a big counter.
McGuinness scores to the head and body with a nice combination!
McGuinness lands with a two punch combination before moving back out of range.
The crowd are loving this. Great action here.
McGuinness keeps the fight standing with a nice sprawl.
The crowd thankful this round is nearly over.
Decent striking displayed by McGuinness there.
And thats the end of the round the fighters go back to their corners.
Keiran McGuinness showed his class in that round. I'd imagine he'll take it on all the scorecards.
That's time! Bowman's corner gives him a slap on the ass as he gets ready to fight. This is the final round!

Jab, cross, leg kick. Nice combination by McGuinness!
Bowman misses with a takedown
and McGuinness counters with a two punch combo.

Bowman is rocked!
McGuinness lands a big right hand and follows it up with an uppercut. Oh and another big punch and a knee - Bowman can't take much more of this! Another big shot to the jaw from McGuinness and Bowman drops to the floor. Beaten and bloodied - he had enough there. A vicious beatdown by McGuinness.
Ladies and gentlemen, after 0:26 of round 3, we have a winner by way of TKO (Strikes). Keiran McGuinness!
Keiran McGuinness spent the whole post fight interview bigging himself up. It didn't go down that well with the fans after a while as they thought it was a bit arrogant.
|
|
|
|
|
|
|
|
|
|
|
|
|
|
|
|
|
|
|
|
|
|
|
| S |
C
A |
G |
S |
C
B |
G |
|
S |
C |
G |
|
energy
A | B |
|
hype
A | B |
|
pop
A | B |
|
mgr
A | B |
|
FIGHT
RATING
48% |
|
|
|
|
|
|
