|
|
PBP Commentary |
Coming up we have a featherweight MMA rules bout between Antonia Bailey (ranked 0 p4p, 0 weight class) and Keiran McGuinness (ranked 0 p4p, 0 weight class). Keiran McGuinness will no doubt be looking to use his reach advantage to good effect.
 |
|
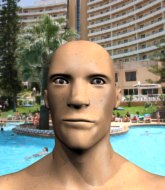 |
| 157 cm
22
151 lbs
1 - 1 - 0 |
|
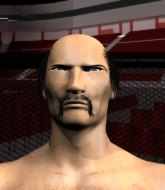
179 cm
25
145 lbs
2 - 1 - 0 |
BJJ Blue Belt
Counter fighter
Cuts easily |
|
BJJ White Belt
Decent boxing
Granite chin |
|
| |
|
Ladies and gentlemen. This fight is 3 rounds, in the featherweight division.
Introducing the fighter to my left, fighting out of the red corner.
With a record of
1 - 1 - 0, fighting out of London, Antonia Bailey!
And introducing the fighter to my right, fighting out of the blue corner.
With a record of
2 - 1 - 0, fighting out of London, Keiran McGuinness!
The judges for this bout are James Ackerman, Chris Edwards and Daniel Bishop.

The bell rings for round one and we are underway!
McGuinness goes to the watering hole and comes back with a big thumbs up from the judges as he scores a three punch combo.
McGuinness throws a combination. Bailey tries to block but a couple of punches get through.
Bailey could do with losing a few pounds - he looks very soft around the mid section, to put it politely.
McGuinness misses with a two punch combination.
McGuinness stalks Bailey and leaps in with a furious combination of punches. Uppercuts and crosses smash into Bailey's face. Bailey staggers backwards, shaken.
McGuinness throws a series of punches but Bailey avoids them all with ease.
McGuinness throws a wild combination but nothing lands.

Bailey moves into range and clinches up with McGuinness.
Fantastic stuff here - a very entertaining period of action, which has drawn cheers from the crowd.
McGuinness lands a knee to the head.
McGuinness misses with a shot to the kidneys.
Bailey can't get the takedown.

McGuinness pulls guard.

That's one minute gone in the round.
McGuinness trying to control the position.
Bailey lands a couple of digs.
McGuinness controls Bailey momentarily but Bailey frees himself.
McGuinness looking to hit a scissor sweep but Bailey is one step ahead there.
Bailey is in close to McGuinness's body, working some short punches and elbows.
Bailey content to strike from guard, landing some decent shots.

That's two minutes gone in the round.
McGuinness wants to hit a switch here but Bailey passes into full mount! Oh no, disaster for McGuinness there!
McGuinness is working to get back to half guard.
Bailey is in the full mount, landing strikes.
McGuinness tries to get back to half guard but can't.
McGuinness wants to control but Bailey is having none of it.
Bailey has his opponent pinned against the cage, landing some nasty ground and pound that is really making a bit of a mess out of McGuinness's face.

That's three minutes gone in the round.
Bailey scores with a couple of good head shots there.

Bailey has hold of McGuinness's left arm, perhaps looking for a submission. The two fighters tussle over control of the isolated limb and McGuinness manages to get his arm back to his side and away from danger.
McGuinness is trying to reverse the position but instead Bailey has taken his back - oops!
Bailey doesn't have the hooks in and McGuinness manages to turn into his guard.
Bailey wants to control here, rather than go for any submissions from the bottom. At least for now.
McGuinness is looking to work some ground and pound but Bailey has wrist control.

That's four minutes gone in the round.
Bailey keeping moving, preventing McGuinness from controlling successfully.
McGuinness trying to pass the guard but can't manage it just yet.
Bailey has been looking to land a fair amount of strikes on the ground. He might be looking to soften his opponent up in order to work for a submission.
Bailey pulls McGuinness in close to prevent any damage.
McGuinness trying to control but Bailey is working from the bottom.
Bailey tries to land a sweep but no joy.
Bailey lands a beautiful sweep and he's now moved into his opponent's guard.

And thats the end of the round the fighters go back to their corners.
A close round but Keiran McGuinness will probably get the nod.
The corners get their ten second warning. Both fighters stand from their stools and stare eachother down, ready to get back to the action.

Bailey takes a punch to the jaw and another one to the bread basket.
Bailey dodges the punch combination from McGuinness.
McGuinness tries to clinch up.
We've had a slow start to the round here - hopefully the action picks up.
McGuinness fails in his attempt to clinch.
Bailey is looking to counter with a shot to the body.
Bailey swings away with a body shot that misses
and McGuinness counters with a lovely straight right hand!
Bailey shoots in looking for a double leg takedown. McGuinness defends it nicely.
That's one minute gone in the round.
Bailey blocks a head kick by McGuinness.
Bailey was looking to counter that last move with a shot to the body but he didn't commit.
Bailey misses with a straight left.
McGuinness getting the better of the striking in that exchange.
Bailey dives in for a single leg takedown but McGuinness sprawls and the fighters end up clinched against the cage.
Despite the aggression on McGuinness's face he doesn't fully commit to the counter.
Some wild striking there from McGuinness.
Keiran McGuinness is looking to throw some combinations by the looks of things.
That's two minutes gone in the round.
Bailey tries to clinch up against the cage, rushing in to close the distance. McGuinness manages to break the clinch and circles back to the middle of the mat.
McGuinness will need to tighten up his combinations if he doesn't want to gas himself out, swinging at thin air.
McGuinness looks for a takedown here. Will he get it? Bailey is fending him off so far but McGuinness persists. Nope, Bailey circles away and we're back to standing.
Some wild striking there from McGuinness.
That's three minutes gone in the round.
McGuinness looks to score with a combo but nothing lands.
A counter left hand to the body from Bailey misses its target.
Both fighters are looking to counter, which isn't making for the most exciting fight in the world.
Bailey takes an uppercut right on the button but keeps his composure.
Bailey rushes McGuinness and presses him up against the cage.
Both fighters working to control the clinch.

McGuinness pushes off and circles away, back to the middle of the mat.
McGuinness misses with a jab, cross combination.
McGuinness shoots in but doesn't get the takedown
and Bailey counters with a nice jab to the body that keeps McGuinness thinking.
That's four minutes gone in the round.
Bailey lands with a nice body punch.

McGuinness forces Bailey back against the cage and clinches.
McGuinness jumps guard but Bailey turns him against the cage and keeps the fight standing.
Antonia Bailey has stuffed three takedown attempts in the round now. That's going to take a lot out of Keiran McGuinness.
McGuinness breaks the clinch and we're back to striking at distance.
McGuinness is looking to clinch but Bailey is avoiding it.
No joy there for McGuinness, who threw a few shots but didn't land.
McGuinness misses with a series of wild punches.
Bailey tries to counter by moving into the clinch but McGuinness manages to circle out of the way.
And thats the end of the round the fighters go back to their corners.
Keiran McGuinness showed his class in that round. I'd imagine he'll take it on all the scorecards.
That's time! Back to the action! This is the final round!

McGuinness throws a series of punches but Bailey moves out of range.
The fighters circling - Bailey throws out the jab but it was never going to land.
McGuinness is loading up here, looking for a big counter of his own.
McGuinness moves into range and throws a combination. A nice jab followed by a hook to the body.
McGuinness tries to clinch but Bailey is having none of it.
McGuinness misses with a double jab.
McGuinness is using his reach advantage to land shots from outside his opponent's range.
We've had a slow start to the round here - hopefully the action picks up.
McGuinness clinches with his opponent.
Bailey is trying to work for a single leg takedown but McGuinness pulls him back up using the underhooks.
McGuinness has been the more effective fighter overall so far.
McGuinness pulls guard successfully.
The fighters are pressed up against the cage, both looking to find a bit of space to work.

McGuinness isolates an arm and boxes in a triangle. Bailey stacks McGuinness on his neck as he steps over and passes to the side. He's now in a much more dominant position where he can look to do some serious damage. Nice move by Bailey!
That's one minute gone in the round.
McGuinness is looking to regain half guard here but Bailey keeps moving and retains side control.

Bailey stands up and beckons McGuinness to his feet.
A jab from Bailey misses.
McGuinness is moving around nicely and scores here with a single head shot.
Bailey tries to clinch up but McGuinness circles away and keeps his distance.
McGuinness fails to land with the punch combination there - jab, cross, hook, miss, miss, miss.
Bailey swung with a counter punch to the body but it didn't connect.
That's two minutes gone in the round.
McGuinness misses with a double jab.
Bailey throws a predictable looking body shot
and McGuinness counters with a series of strikes. Bailey will be more careful next time no doubt.
Bailey takes the fight into the clinch.

Bailey gets a trip takedown into half guard.
McGuinness really doesn't want to stay on the ground with Bailey. If he can't get it back to his feet, it's only a matter of time before he'll be tapping out.
The crowd cheering loudly, showing their appreciation for the quality fight we're seeing here.
Bailey scores with a couple of good hammerfists.
Bailey working over McGuinness with some ground and pound. McGuinness looks like he wants out of this position, which is understandable.
McGuinness is trying to maintain the position but Bailey is very close to passing his half guard.
That's three minutes gone in the round.
Nice strikes from Bailey there.
Ground and pound from Bailey.
Bailey seems to be taking a bit of a break to think of his next move. He lands a short punch in the meantime.
Antonia Bailey overall seems to be getting the better of the ground position in the fight so far.
McGuinness wants to get back to full guard.
McGuinness trying to control here.
McGuinness takes a big intake of breath there - he's definitely tired.
Bailey lands with a punch from half guard.
McGuinness is looking to improve his position.
Bailey is working for a submission of some sort.
That's four minutes gone in the round.
Bailey looks towards his corner to check for any instructions. The corner give him nothing to work with, so he cracks McGuinness with a short hammerfist. I guess that's as good as any advice he could get in this position.
Bailey passes into side control, despite McGuinness's attempt to control the position.
The ref warns both fighters not to hold the cage as they work up against the meshing.
Bailey scoring with punches from side control.
McGuinness trying his best to control but Bailey has mounted him.
Antonia Bailey has stepped it up - he knows he needs a finish here!
Keiran McGuinness is fighting for a decision - hopefully he's judged it right and he's actually winning the fight.
Bailey with shots to the head and body - McGuinness looks very uncomfortable down there.
And that's the end of the fight!
That was a close round. You could make an argument for either fighter but I would give it to Antonia Bailey.
I think McGuinness has won this one but let's see whether the judges agree with me. Over to the ring announcer for the scorecards.
Ladies and gentlemen, after 3 rounds of action, we go to the scorecards for a decision.
Judge James Ackerman scores the fight 29:29
Judge Chris Edwards scores the fight 28:29
Judge Daniel Bishop scores the fight 28:29
In favor of your winner, by majority decision... Keiran McGuinness!
Keiran McGuinness decided to go for the less than humble approach in his post fight interview, telling everyone how he is going to conquer the world. The crowd seemed to like it when really that sort of approach could have gone either way.
|
|
|
|
|
|
|
|
|
|
|
|
|
|
|
|
|
|
|
|
|
|
|
| S |
C
A |
G |
S |
C
B |
G |
|
S |
C |
G |
|
energy
A | B |
|
hype
A | B |
|
pop
A | B |
|
mgr
A | B |
|
FIGHT
RATING
39% |
|
|
|
|
|
|
