|
|
PBP Commentary |
Coming up we have a middleweight MMA rules bout between Billy Bailey (ranked 0 p4p, 0 weight class) and Fred Hampton (ranked 0 p4p, 0 weight class). Both fighters look fresh as a daisy as they make their way towards the cage.
 |
|
 |
| 188 cm
27
195 lbs
9 - 1 - 0 |
|
188 cm
29
199 lbs
7 - 1 - 0 |
Decent wrestler
Excellent MT
Very strong |
|
BJJ Brown Belt
Counter fighter
Powerful |
|
| |
|
Ladies and gentlemen. This fight is 5 rounds, for the middleweight championship of the world!
Introducing the champion to my left, fighting out of the red corner.
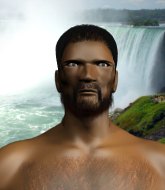
With a record of
9 - 1 - 0, fighting out of New York, Billy Bailey!
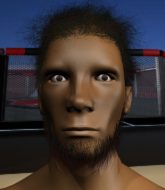
And introducing the challenger to my right, fighting out of the blue corner.
With a record of
7 - 1 - 0, fighting out of Hilo, Fred Hampton!
The judges for this bout are Aleksei Zolotukhin, Igor Prikhodko and Valeri Chadov.

The bell rings for round one and we are underway!
Bailey looks to score with a jab to the body but Hampton is just out of range.
Hampton throws a looping overhand right but Bailey ducks down to avoid it.
Hampton on the wrong end of a nice hook.
Bailey stuffs the takedown.
A punch combination from Bailey misses.
Bailey ducks down and throws a hook to the body but Hampton moves away.
Bailey throws a monster uppercut resembling something out of street fighter but it doesn't land.
Hampton changes levels for a counter takedown but doesn't follow through with his attempt.
Hampton ducks down and throws a hook to the body but Bailey moves away.
Bailey throws a right and a left that both miss.
Bailey misses with a wild combination.
We've had a slow start to the round here - hopefully the action picks up.
Hampton goes for a double leg but Bailey avoids the attempt and the two fighters end up clinched against the cage as Bailey continues to drive forward.
Hampton misses with an uppercut. Bailey saw that one coming.
Bailey fakes high and swings low for a body shot but Hampton manages to avoid it.
Hampton misses the shot to the body.
As Hampton looks to move away, Bailey throws a big counter combo but Hampton just gets out of the way.
Hampton misses with a shot to the body
and Hampton takes a counter punch right on the button for his troubles.

It looks like Fred Hampton has been cut.

That's one minute gone in the round.
Hampton throws a body punch but Bailey moves out of range.
Bailey tries to clinch but Hampton moves out of range.
Good exchange - Bailey coming out on top.
Bailey lands an overhand left. A wild punch that just about connected.
A looping hook to the body misses from Bailey. Hampton does a little dance to reset his feet.
Hampton looks for a takedown but Bailey sprawls well.
Billy Bailey has stuffed three takedown attempts in the round now. That's going to take a lot out of Fred Hampton.
Hampton shoots in but Bailey avoids the takedown attempt easily.
Hampton tries to land with a swinging hook to the body but Bailey was well out of range. Poor timing from Hampton.
Bailey swings for the body but Hampton moves out of range.

Bailey takes the fight into the clinch.
Bailey working some nice short punches in the clinch.

That's two minutes gone in the round.
Bailey tries a body shot but Hampton blocks it.
Hampton's head jolts backwards as he takes an uppercut right on the button!

Hampton breaks the clinch and we return to the middle of the mat.
Bailey throws a body punch but Hampton moves out of range.
A looping hook to the body misses from Bailey. Hampton does a little dance to reset his feet.
Hampton fakes high and swings low for a body shot but Bailey manages to avoid it.
We've seen a great period of action over the last minute or so - credit to both fighters for going all out!
Hampton's hands are dropping dangerously low here and Bailey connects clean with a right hook that sends him down to one knee! Hampton scrambles back to his feet.
Bailey throws a right and a left that both miss.
Bailey on the wrong end of an overhand right that came out of nowhere.
Bailey throws a looping overhand right but Hampton ducks down to avoid it.
Hampton ducks under a wild hook from Bailey.
Hampton lands a right hook to the body.
Hampton throws a predictable looking body shot
and Bailey counters with a stiff right hand.
A shot to the body from Hampton misses
and Hampton takes a counter punch right on the button for his troubles.

Hampton is rocked!

That's three minutes gone in the round.
Bailey steps to the side to avoid the strikes from Hampton.
It looked like Bailey wanted to counter with a hook but didn't fully commit.
Hampton is still on wobbly legs! Can Bailey finish him?
Bailey takes a swing at Hampton's ribcage but misses.
We've been told by Bailey's head coaches at Phoenix Mixed Martial Arts that he's been working on his takedown defense in preparation for this fight.
Bailey drives through and clinches with Hampton against the cage.
Hampton seems to have recovered his senses.
Bailey misses with a punch on the inside.
Hampton is trying to break free.
Bailey lands with a short shot to the head.
Bailey working some nice short punches in the clinch.
Hampton looking for a takedown.
Hampton is working for a takedown up against the cage. He can't get it on this occasion though.
Hampton is working for a takedown up against the cage. He can't get it on this occasion though.

Bailey's corner calls for him to break the clinch, which he does.
Bailey defends well against a solid takedown attempt from Hampton.
Hampton keeping a good distance there, avoiding the body shot.

That's four minutes gone in the round.
Hampton swings and misses with a hook to the body.
Hampton defending well as Bailey loads up on a big left hand.
Hampton throws a hook to the body but it doesn't connect.
Bailey misses with a jab and misses with a cross straight after too.
Hampton fails to land the takedown.
Hampton defending well as Bailey loads up on a big left hand.
Bailey cracks Hampton with a nice right hand that draws applause from the crowd.
The fans in attendance giving it up for the two fighters, who have really let it all hang out in the last minute or so!
Bailey misses with a telegraphed body shot

so Hampton counters with a double leg into guard. Good agility.
Bailey keeping moving, preventing Hampton from controlling successfully.
Hampton tries to free his leg and advance position but Bailey is retaining full guard.

Hampton drops back, looking for a kneebar! Bailey looks panicked! The fighters roll across the mat, one looking to finish, one looking to escape. Bailey looks to have wriggled free... Yes, he's got his leg free and he's dived into side control! Good work there from Bailey!

Hampton tries to improve position but can't.
And thats the end of the round the fighters go back to their corners.
Billy Bailey dominated that round.
The cut man is working on Fred Hampton's cut.
The minute break is over - no more time for sponges and pep talks - back to the action!

Bailey throws a left and a right that both miss
and Hampton decides to take the opportunity to score a takedown. He's landed in Bailey's guard.
Hampton trying to land body shots but he keeps hitting the mat.
Hampton has the superior BJJ but he's also working some ground strikes into his gameplan.
Bailey looking to hit a scissor sweep but Hampton is one step ahead there.
Hampton with a flurry of punches that miss.
Bailey is pulling down on Hampton's head to control his posture.
Hampton connects with a couple of short punches.
We've had a slow start to the round here - hopefully the action picks up.
Hampton looking to sit in guard and control but Bailey gets the butterfly guard and sweeps. He's now in the guard on the top.
Bailey controls from within his opponent's guard.
Hampton is working an open guard here, looking to improve his position. No doubt that will leave him open to counters but at least he's being more offensive.
That's one minute gone in the round.
Hampton is throwing his legs up, looking for submissions. Bailey is aware though and is defending well.
Hampton controls Bailey momentarily but Bailey frees himself.
Hampton is throwing his legs up, looking for submissions. Bailey is aware though and is defending well.
Hampton looking for submissions from the bottom but instead Bailey passes into side control.
Bailey knows he needs to get back to his feet asap. He's simply no match for Hampton on the ground.
Hampton tries to bench press Bailey off him but Bailey keeps the position.
Hampton is persisting with the attempt to improve his position.
Hampton misses with an elbow from the bottom.
That's two minutes gone in the round.
Hampton is looking for a sweep.
Hampton gets one leg under and gets the fight to half guard.
Hampton works his way to full guard. Good work.
Bailey stays in close to Hampton's body and controls the position.
Hampton thows some rabbit punches from the bottom but they don't do any damage.
Hampton wants to sweep here but Bailey controlling him for the moment.
Fred Hampton has got the better of the ground game so far.
Hampton is working actively off his back, looking to secure an arm or perhaps work for a triangle.
Hampton looking to sweep here. No luck so far.
That's three minutes gone in the round.
Hampton throws a couple of shots from the bottom but they don't land.
Hampton trying to strike off his back.
Hampton looking for submissions from the bottom but instead Bailey passes into side control.
Hampton is looking to reverse the position.
Hampton can't do much from the bottom here.
Hampton is looking to reverse the position.
That's four minutes gone in the round.
Neither fighter has done anything of merit for a good minute or two here and the crowd are not happy about it.
Hampton is being controlled here.
Bailey blocks the strikes from Hampton.
We may be looking at a referee standup if the pace doesn't pick up soon.
Hampton wants to control but Bailey postures up.

The ref stands the fighters back up due to a lack of activity.
Hampton gets cracked there but stands up to it.
A jab from Bailey misses.
Bailey slips in close and lands a nice hook before moving back out of range.
Bailey just misses with a punch to the body.
Bailey sizes up Hampton with a pawing jab and scores with a straight right down the middle.
Hampton shoots in for a takedown but Bailey shows good takedown defense there and keeps this one on the feet.
The crowd thankful this round is nearly over.
Bailey throws an overhand right that lands on Hampton's shoulder, as Hampton tries to avoid the shot.
Hampton ducks right into an uppercut from Bailey.
Hampton looking to shoot here. He's gone for it and he's landed a takedown into side control! Oh, that's bad for Bailey!
And thats the end of the round the fighters go back to their corners.
Billy Bailey dominated that second round.
The cut man is working on Fred Hampton's cut.
OK. That's time! The bell goes and we're back to the action.

Bailey looks to land a left hand but Hampton moved out of range nicely.
Hampton slips a straight right by Bailey.
Hampton feints the counter takedown.
Hampton steps to the side to avoid the strikes from Bailey.
Bailey misses with a hook. Hampton ducked under it nicely.
Bailey misses the jab.
Hampton defending well as Bailey loads up on a big left hand.
Bailey rushes forward with a series of wild hooks but Hampton moves out of range and avoids them all easily.
Hampton misses with a wild body shot.
Bailey tries to clinch but Hampton is having none of it.
We've had a slow start to the round here - hopefully the action picks up.
Bailey fakes high and swings low for a body shot but Hampton manages to avoid it.
Hampton fakes a strike and closes the distance, dragging Bailey to the ground. Hampton is now in Bailey's guard.
Hampton trying to land body shots but he keeps hitting the mat.
Bailey is trying to control the position but Hampton postures up.
Hampton throws an elbow that misses. Bailey uses the momentum to reverse the position. He's now in Hampton's guard. Nice move by Bailey!
Bailey is really dominating this fight. Is there anything that Hampton can do to turn this around?
That's one minute gone in the round.
Bailey got a little sloppy there for a moment and Hampton has worked his way into a loose triangle - can he finish it?! No, Bailey has managed to get both his arms back between Hampton's legs - danger averted.
Hampton throws his legs up looking to secure a triangle. Oh, that looks pretty tight, I gotta say! Bailey escapes and throws Hampton's legs to the side, diving into side control!
Bailey working away.
The fighters are pressed up against the cage, both looking to find a bit of space to work.
Hampton tries to improve position but can't.
That's two minutes gone in the round.
Hampton seems a little lost for a moment, as Bailey dominates the positioning.
Hampton tries to buck Bailey off but Bailey is having none of it.
Hampton is still trying to improve position.

Bailey decides to stand up, so the ref orders Hampton to his feet.
Hampton shoots in but no luck this time.
Hampton looks to score with a jab to the body but Bailey is just out of range.
Bailey swings for the body but Hampton moves out of range.
Hampton drops down looking to force a counter takedown but Bailey defends it well.
Hampton looks to score with a jab to the body but Bailey is just out of range.
Hampton avoids the clinch attempt nicely.
Bailey avoids a lazy jab quite easily.
Bailey misses with an uppercut.
Hampton changes levels for a counter takedown but doesn't follow through with his attempt.
Billy Bailey seems to be the more aggressive standup fighter in this bout.
Hampton swings and misses with a hook to the body.
Hampton lands a slapping body shot.
That's three minutes gone in the round.
Bailey pushing out the jab but it's not landing.
Hampton swings for the body but Bailey moves out of range.
Bailey bobs and weaves well there to avoid the strikes.
Bailey scores with a jab to the jaw of his opponent.
Nice defenses there by Hampton.
Hampton needs to keep his hands up - Bailey had a free shot at his head there.
Bailey changes levels and scores with a jab to the body.
Hampton takes one to the chin there.
Hampton is the aggressor but that punch slipped nicely by Bailey.
Hampton defending well as Bailey loads up on a big left hand.
Bailey slaps away a takedown attempt from Hampton, before circling back to the center of the mat.
Billy Bailey is looking to keep the fight on the feet at all costs.
Bailey waving his hands out in front of him, looking to distract Hampton.
That's four minutes gone in the round.
Hampton throws a body shot but no joy.
Bailey throws a looping overhand right but Hampton ducks down to avoid it.
Hampton fakes high and swings low for a body shot but Bailey manages to avoid it.
Bailey cracks Hampton with a right hand to the side of the head.
Bailey tries to close the distance and clinch up against the cage but Hampton paws at him with a jab and circles away.
Fantastic stuff here - a very entertaining period of action, which has drawn cheers from the crowd.
Bailey is the aggressor but that punch slipped nicely by Hampton.
Bailey uses good footwork to get in and out and land a nice right hand before Hampton has time to react.
Bailey swings wildly with a right hand that was never going to find it's target.
Bailey misses with a wild body shot.
Bailey misses with a looping right.
Bailey looks to throw the jab but Hampton is out of range.
Hampton changes levels for a counter takedown but doesn't follow through with his attempt.
Billy Bailey is winning the standup battle so far.
Bailey throws a series of punches but Hampton moves out of range.
Hampton changes levels for a counter takedown but doesn't follow through with his attempt.
And thats the end of the round the fighters go back to their corners.
Billy Bailey clearly takes that round.
The cut man is working on Fred Hampton's cut.
The referee calls time. The cornermen exit stage left and we're back to business.

Hampton throws a looping left and ducks down for a takedown. He's got his arms around Bailey's waist but Bailey gets an underhook and avoids the takedown by throwing Hampton off to one side.
Bailey looks to land a left hand but Hampton moved out of range nicely.
Bailey looks to score with a jab to the body but Hampton is just out of range.
Hampton drops his hands momentarily and Bailey takes advantage with a crisp shot to the head.
Bailey uses some good footwork to avoid the body shot by Hampton.
Bailey misses with a looping right.
Bailey throws a hard body shot but it just misses.
Bailey is looking to take this fight into the clinch.
We've had a slow start to the round here - hopefully the action picks up.
Bailey tries to land with a swinging hook to the body but Hampton was well out of range. Poor timing from Bailey.
And Hampton tries to counter it with a takedown but Bailey pushes his down on his head and steps out.
Hampton looks for a takedown but Bailey sprawls well.
Bailey misses the shot to the body.
That's one minute gone in the round.
Bailey swings wildly with a right hand that was never going to find it's target.
Bailey throws a predictable looking body shot
and Hampton counters with a driving takedown into guard. Nice work there by Hampton.

Bailey pushes Hampton off and gets back to his feet.
Bailey throws an uppercut from half a mile away. Hampton sees it coming and avoids it easily.
Hampton changes levels for a counter takedown but doesn't follow through with his attempt.
Hampton tries to move into range but Bailey moves to the side and lands with a nice right hand.
Bailey is looking to clinch.
Bailey defends well against a solid takedown attempt from Hampton.
Billy Bailey has stuffed three takedown attempts in the round now. That's going to take a lot out of Fred Hampton.
Bailey throws a body shot but no joy.
Bailey closes the distance and presses his opponent up against the cage.
The crowd cheering loudly, showing their appreciation for the quality fight we're seeing here.
Bailey avoids a wild elbow strike from Hampton.
Hampton tries to break the clinch but Bailey is controlling the position.
Hampton is looking for a takedown.
That's two minutes gone in the round.
Hampton's head jolts backwards as he takes an uppercut right on the button!
Bailey works on Hampton's body with a couple of short punches.
A quick uppercut on the inside from Bailey.
Hampton blocks an uppercut.
Hampton misses with a shot to the kidneys.
Hampton goes for a takedown in the clinch but Bailey prevents it.
Hampton is working for a takedown up against the cage. He can't get it on this occasion though.
Hampton is trying to drag Bailey to the mat but Bailey just about manages to keep his footing. He used the cage to his advantage there.
Hampton is absolutely dripping with sweat - he looks exhausted.
Hampton misses with a shot to the kidneys.
That's three minutes gone in the round.
Bailey misses with a hook from the clinch.
Bailey lands with a short head shot on the inside.
Bailey struggles to land a body shot inside as Hampton controls his hands.
Bailey lands with a quick shot inside that doesn't really do much damage.
A hook to the body from Bailey.
Bailey holding his opponent close, against the cage.
Hampton is working on a leg, looking for a takedown but Bailey is defending well.
Still in the clinch, Bailey scores with a nice short uppercut.
Hampton blocking some punches.
Bailey lands a big right hand that drops Hampton! The killer instinct kicks in and Bailey finishes his opponent with a series of strikes from mount. A dominating finish by Bailey!
Ladies and gentlemen, after 4:56 of round 4, we have a winner by way of TKO (Strikes). Billy Bailey!
Billy Bailey retains his middleweight title!
Billy Bailey very nearly forgot to thank Urban Fighter amongst all the excitement of his win but just as the interview came to a close, he screamed their name. Hopefully he'll get a few nice freebies in the mail as a thank you.
|
|
|
|
|
|
|
|
|
|
|
|
|
|
|
|
|
|
|
|
|
|
|
| S |
C
A |
G |
S |
C
B |
G |
|
S |
C |
G |
|
energy
A | B |
|
hype
A | B |
|
pop
A | B |
|
mgr
A | B |
|
FIGHT
RATING
54% |
|
|
|
|
|
|
