|
|
PBP Commentary |
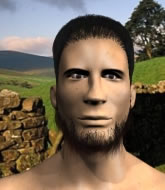
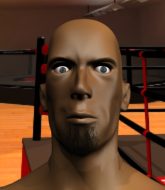
Coming up we have a light heavyweight MMA rules bout between Kieran Taylor (ranked 0 p4p, 0 weight class) and Jack Hamilton (ranked 0 p4p, 0 weight class). Both fighters look fresh as a daisy as they make their way towards the cage.
 |
|
 |
| 184 cm
18
200 lbs
1 - 1 - 0 |
|
190 cm
25
205 lbs
0 - 0 - 0 |
BJJ Blue Belt
Counter fighter
KO power |
|
BJJ Blue Belt
Brawler
Solid chin |
|
| |
|
Ladies and gentlemen. This fight is 3 rounds, in the light heavyweight division.
Introducing the fighter to my left, fighting out of the red corner.
With a record of
1 - 1 - 0, fighting out of The Island, Kieran Taylor!
And introducing the fighter to my right, fighting out of the blue corner.
With a record of
0 - 0 - 0, fighting out of The Island, Jack Hamilton!
The judges for this bout are Peter Branson, Bart Greer and Daniel Franklin.

The bell rings for round one and we are underway!

Hamilton instigates a clinch.
Taylor is trying to break the clinch but Hamilton is controlling him.
Hamilton is looking for a takedown.
Taylor wants to break free but Hamilton has control.
Taylor is stalling here. The referee will be looking to step in if he doesn't pick up the pace.

Taylor has managed to pull guard. Let's see whether he can work an aggressive guard. It will also be interesting to see what tactics Hamilton uses from the top position.
Taylor is trying to keep Hamilton in close.
Taylor throwing strikes off his back to little effect.
We've had a slow start to the round here - hopefully the action picks up.

Taylor throws his legs up looking for a submission but Hamilton uses it to pass to side control.
Taylor stuck in half guard on the bottom here.
Taylor wants to get back to his feet.

That's one minute gone in the round.

Hamilton decides to stand up, so the ref orders Taylor to his feet.
Jack Hamilton seems to be the more aggressive standup fighter in this bout.
Taylor throws a right hand that Hamilton ducks under and follows up with a left that Hamilton also avoids with ease.

Taylor gets to the clinch - let's see what his plan is here.
Taylor wants to break free but Hamilton has control.
Hamilton stalling.
Taylor misses with a hook from the clinch.
Taylor is trying to work out of this bad position, with his back against the cage.
Taylor is looking to break free of the clinch but Hamilton has double underhooks.
Both fighters working to control the clinch.
Taylor jumps guard but Hamilton turns him against the cage and keeps the fight standing.

That's two minutes gone in the round.

Hamilton jumps guard.
Taylor wants to stand but Hamilton is controlling his posture from full guard.

Hamilton is looking for a guillotine. You can't force these things though and Taylor defends well.
Hamilton can't keep his opponent in guard - Taylor advances to half guard, no doubt looking to mount.
Hamilton tries to roll over but Taylor keeps him under control.
Hamilton is trying to control but can't.

That's three minutes gone in the round.
Hamilton keeping control of the position.
Hamilton lands one or two decent shots to the body here. Although from his own half guard, he's not going to be causing too much damage.
Hamilton is looking to control Taylor's leg but it's slowly edging free. Can Hamilton avoid being mounted?
Hamilton might have to switch it up a bit here because his efforts to control Taylor haven't been going to plan, at least at the current moment in time.

That's four minutes gone in the round.
The crowd are hurling abuse towards the fighters... You can hardly blame them though because there isn't a lot going on in the fight.
Taylor wants to control but Hamilton is keeping him busy.
Hamilton is looking for a sweep. Taylor is wise to his cunning plan and keeps the top position.

The referee decides to stand the fighters back up.
Taylor misses with a series of wild punches.
Boooooooooooooooooooo!!! God, this has been a terrible round. Come on you two, sort yourselves out!
Hamilton closes the distance and presses his opponent up against the cage.
And thats the end of the round the fighters go back to their corners.
A close round but Jack Hamilton will probably get the nod.
That's time! Back to the action!

Hamilton lands with a slapping head kick.
Taylor tries to close the distance and clinch up but Hamilton swats him away and circles back towards the center.
Taylor looks to score with a jab to the body but Hamilton is just out of range.
Hamilton clinches up against the cage.

Hamilton's corner calls for him to break the clinch, which he does.
Taylor tries to clinch up.
The fight moves into the clinch position.
Hamilton lands with a left to the head.
We've had a slow start to the round here - hopefully the action picks up.
Hamilton jumps guard and drags Taylor to the mat. He's obviously going to be looking for submissions off his back.
Hamilton wants to stand but Taylor is controlling the position.
The ref warns both fighters not to hold the cage as they work up against the meshing.
Taylor controls the pace of the fight for a moment.
Taylor has to be careful here, sitting in the guard of a superior BJJ player.
That's one minute gone in the round.
Taylor is in close to Hamilton's body, working some short punches and elbows.
Taylor trying to control the position from guard on top but Hamilton is wriggling around, looking for whatever he can.
Taylor with a nice head shot there.
Taylor wants to control from the top but Hamilton keeps moving.
Hamilton is working from a closed guard but he's struggling to control his opponent.
Taylor trying to control but Hamilton is working from the bottom.
The referee claps his hands together and tells the fighters to work.
That's two minutes gone in the round.
The crowd are showing their displeasure at the lack of action as loud boos ring out around the arena.
Hamilton is trying to keep Taylor in close.
The ref stands the fighters back up due to a lack of activity.
Taylor pivots as if he's going to throw a leg kick but stops half way.
Hamilton fails with a rather predictable takedown attempt.
Hamilton misses with a takedown attempt - Taylor sprawls well and throws a nice strike on the way out which just misses.
Hamilton misses with a jab and misses with a cross straight after too.
Hamilton tries to clinch there but Taylor circles away.
Hamilton fails miserably with a takedown attempt.
Taylor drops down looking for a counter takedown but Hamilton sprawls and moves away.
Kieran Taylor has stuffed three takedown attempts in the round now. That's going to take a lot out of Jack Hamilton.
Hamilton is breathing heavily.
That's three minutes gone in the round.
Hamilton scores with a head kick. Taylor tried to block it but didn't get his arm up in time.
Taylor lands a nice hook to Hamilton's body. Hamilton takes it in his stride and looks to land his own strikes.
Hamilton looks for a takedown here. Will he get it? Taylor is fending him off so far but Hamilton persists. Nope, Taylor circles away and we're back to standing.
Hamilton fails to land the takedown.
Taylor went nuts there looking for a big combo counter but none of the flurry connected.
A combination from Taylor does no damage.
Hamilton misses with a takedown
and Taylor counters with a lovely straight right hand!
That's four minutes gone in the round.
Taylor misses with a few strikes there.
Hamilton fails to land with the punch combination there - jab, cross, hook, miss, miss, miss.
Taylor appears to be looking for a counter takedown.
Taylor wants to clinch up but Hamilton keeps it at a distance.
Taylor tries to close the distance and clinch but Hamilton swats him to one side with an open hand palm strike and circles away.
Taylor wants to clinch.
Boooooooooooooooooooo!!! God, this has been a terrible round. Come on you two, sort yourselves out!
Taylor takes a thudding leg kick, right into the meat of the thigh.
And thats the end of the round the fighters go back to their corners.
Jack Hamilton showed his class in that round. I'd imagine he'll take it on all the scorecards.
That's the end of the interval. I'm sure that seemed a lot quicker than a minute for our two fighters! Back to the action. This is the final round!

Hamilton closes the distance and gets a double leg, slamming Taylor to the mat! Taylor manages to get full guard.
Hamilton seems content to control from guard here. He's going to have to remain active though if he doesn't want to get stood back up.
Taylor working from the bottom, still in full guard. He's managed to get a loose triangle. Hamilton doesn't seem to be doing much to defend here, obviously he feels comfortable in the position. Hamilton manages to throw the legs off his shoulder and he's back into guard - no problem.
Hamilton decides to stand up and beckons his opponent to follow.
We've had a slow start to the round here - hopefully the action picks up.
Taylor throws a nice looking combination but Hamilton bobs and weaves to avoid any damage.
Nice takedown defense from Taylor. No joy for Hamilton on that attempt.
Taylor tries to clinch but Hamilton moves away
and Hamilton counters with a one-two to the body.
That's one minute gone in the round.
Hamilton scores with a jab to the body.
Taylor displays good takedown defense there as he swats away a double leg from Hamilton.
Taylor went nuts there looking for a big combo counter but none of the flurry connected.
Hamilton takes a big intake of breath there - he's definitely tired.
Taylor keeps the fight standing with a nice sprawl.
Taylor tries to counter by clinching up but Hamilton breaks away and moves out of range.
Kieran Taylor has stuffed three takedown attempts in the round now. That's going to take a lot out of Jack Hamilton.
Hamilton wants to clinch up but Taylor keeps it at a distance.
Taylor rushes forward with a series of wild hooks but Hamilton moves out of range and avoids them all easily.
Hamilton moves in looking to clinch but Taylor pushes him off.
Taylor will need to tighten up his combinations if he doesn't want to gas himself out, swinging at thin air.
That's two minutes gone in the round.
Hamilton shoots in for a takedown but Taylor shows good takedown defense.
Taylor appears to be looking for a big counter.
Taylor tries to clinch but Hamilton is having none of it.
Taylor darts in and clinches Hamilton up against the cage.
Hamilton's corner calls for him to break the clinch, which he does.
Hamilton tries to clinch but is not successful on this occasion.
Taylor keeps the fight standing with a nice sprawl.
Taylor fails to land with a series of punches.
That's three minutes gone in the round.
Hamilton drives through and clinches with Taylor against the cage.

Taylor pushes off and circles away, back to the middle of the mat.
Taylor fails to land with a series of punches.
Hamilton tries to drive through with a takedown attempt but Taylor defends well and Hamilton ends up having to push Taylor into the cage where they will battle it out in the clinch.
Hamilton tries for a takedown but Taylor circles away easily
and Taylor counters with a straight right hand.
Taylor instigates a clinch.
Taylor misses with a hook to the ribs.
Taylor drops down for a takedown but doesn't get it.
Taylor breaks the clinch and we're back to striking at distance.
That's four minutes gone in the round.
Taylor fakes high and swings low for a body shot but Hamilton manages to avoid it.
Hamilton showing good head movement there, avoiding the strikes from Taylor.
Kieran Taylor is looking to throw some combinations by the looks of things.
Hamilton throws the overhand right but ducks down into a quick takedown attempt. Taylor was covering up waiting for the punch and Hamilton finishes the takedown easily into guard.
Taylor looking to hit a scissor sweep but Hamilton is one step ahead there.
And that's the end of the fight!
Kieran Taylor showed his dominance in that final round.
I think Hamilton has won this one but let's see whether the judges agree with me. Over to the ring announcer for the scorecards.
Ladies and gentlemen, after 3 rounds of action, we go to the scorecards for a decision.
Judge Peter Branson scores the fight 28:29
Judge Bart Greer scores the fight 29:28
Judge Daniel Franklin scores the fight 29:29
The fight is ruled a draw!
|
|
|
|
|
|
|
|
|
|
|
|
|
|
|
|
|
|
|
|
|
|
|
| S |
C
A |
G |
S |
C
B |
G |
|
S |
C |
G |
|
energy
A | B |
|
hype
A | B |
|
pop
A | B |
|
mgr
A | B |
|
FIGHT
RATING
29% |
|
|
|
|
|
|

