|
|
PBP Commentary |
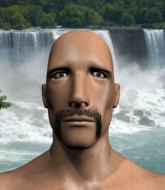
Coming up we have a middleweight MMA rules bout between Totte Alesund (ranked 0 p4p, 0 weight class) and Flash Barger (ranked 0 p4p, 0 weight class). Totte Alesund had a look across the cage there at his opponent. He definitely means business
 |
|
 |
| 188 cm
25
185 lbs
0 - 0 - 0 |
|
183 cm
19
188 lbs
6 - 3 - 0 |
BJJ White Belt
Excellent boxer
Cuts easily |
|
BJJ Blue Belt
Basic striking
Knockout power |
|
| |
|
Ladies and gentlemen. This fight is 3 rounds, in the middleweight division.
Introducing the fighter to my left, fighting out of the red corner.
With a record of
0 - 0 - 0, fighting out of London, Totte Alesund!
And introducing the fighter to my right, fighting out of the blue corner.
With a record of
6 - 3 - 0, fighting out of Amsterdam, Flash Barger!
The judges for this bout are Phil Schofield, William Gold and James Ackerman.

The bell rings for round one and we are underway!
Alesund closes the distance and clinches up with Barger, looking for a takedown. Alesund pushes Barger against the cage but Barger circles to the side and manages to break the clinch.
Alesund shoots in with a takedown attempt and he has Barger pinned against the cage. Barger gets the underhooks and manages to circle away.

Alesund takes the fight into the clinch.
Barger swings wildly with an uppercut but Alesund uses good head movement to avoid it.

Alesund breaks the clinch.
Barger tries to clinch up but Alesund circles away and keeps his distance.
Alesund appears to be looking for a big counter.
Barger tries to clinch there but Alesund circles away.
We've had a slow start to the round here - hopefully the action picks up.
Alesund keeps the fight on the outside.
A little feinted left hand from Alesund on the counter but he doesn't commit to it.
Barger is looking to clinch but Alesund is avoiding it.
Barger tries to clinch up.
Barger tries to clinch but Alesund moves out of range.
Alesund throws a body kick but he was well out of range there.
Barger is looking to clinch but Alesund is avoiding it.
Alesund feinted with a counter takedown.
Alesund shoots for a takedown but Barger saw that one coming a mile off and avoided it easily.
That's three failed takedown attempts in the round for Totte Alesund. That's going to take a lot out of him.

That's one minute gone in the round.
Barger tries to clinch but Alesund is having none of it.
Barger tries to clinch up against the cage, rushing in to close the distance. Alesund manages to break the clinch and circles back to the middle of the mat.
Barger tries to clinch there but Alesund circles away.
Alesund closes the distance and clinches.
Barger tries to throw a body punch but Alesund avoids it by throwing Barger back against the cage.
Barger tries to throw a body punch but Alesund avoids it by throwing Barger back against the cage.
Barger is defending well against a takedown attempt.
Barger swings away with an uppercut that misses.
Barger swings wildly with an uppercut but Alesund uses good head movement to avoid it.
The referee calls for Alesund to work.
Barger misses with a short punch on the inside.
Barger misses with some punches.
Barger lands a hook to the side of the head.
Alesund fails to pull the fight into his guard.
Alesund breaks the clinch and we return to the middle of the mat.

That's two minutes gone in the round.

Alesund shoots in with a lovely double leg takedown. Barger manages to land in full guard to minimise the damage.
The ref warns both fighters not to hold the cage as they work up against the meshing.

Barger working from the bottom, still in full guard. He's managed to get a loose triangle. Alesund doesn't seem to be doing much to defend here, obviously he feels comfortable in the position. Alesund manages to throw the legs off his shoulder and he's back into guard - no problem.
Alesund has to be careful here, sitting in the guard of a superior BJJ player.
Fantastic stuff here - a very entertaining period of action, which has drawn cheers from the crowd.
Alesund's corner is telling him to maintain position.
Alesund throws a big right hand that misses.
The fighters are pressed up against the cage, both looking to find a bit of space to work.
Alesund got a little sloppy there for a moment and Barger has worked his way into a loose triangle - can he finish it?! No, Alesund has managed to get both his arms back between Barger's legs - danger averted.
Barger trying to control the position.
Barger preventing the ground and pound from doing any damage.

That's three minutes gone in the round.
Barger is active off his back here, looking for submissions.
Alesund seems content to control from guard here. He's going to have to remain active though if he doesn't want to get stood back up.
Alesund throwing elbows and punches but not connecting, as Barger works some decent striking defense from the bottom.
Barger keeping full guard, as Alesund tries to pass.

Alesund decides to stand up and beckons his opponent to follow.

That's four minutes gone in the round.

Barger has Alesund up against the cage in a clinch.
Barger has a couple of punches blocked by Alesund.
Alesund looking for a takedown.
Alesund pushes off and circles away, back to the middle of the mat.
Barger tries to clinch but Alesund is having none of it.
Alesund appears to be looking for a big counter.
Barger tries to clinch up against the cage, rushing in to close the distance. Alesund manages to break the clinch and circles back to the middle of the mat.
Alesund has a takedown stuffed.
Alesund fails with a takedown attempt.
Flash Barger is looking to keep the fight on the feet at all costs.
The fight stays on the outside here - Barger looks like he's thinking about clinching though.
Alesund is trying to close the distance and clinch up, after that failed offence from Barger.
No luck for Alesund with that takedown attempt.
The fight stays on the outside here - Barger looks like he's thinking about clinching though.
And thats the end of the round the fighters go back to their corners.
A close round but Flash Barger will probably get the nod.
The referee calls time. The cornermen exit stage left and we're back to business.

Barger doesn't manage to clinch there - Alesund circles away.
Flash Barger seems to be the more aggressive standup fighter in this bout.
Alesund shoots in for a takedown but doesn't get it.
Alesund looks for a takedown but Barger sprawls well.
Alesund clinches with his opponent.
Barger tries to work over Alesund's body with a swooping hook but it only glances the target.
Barger tries a shoulder strike but it doesn't do any damage.
Barger gets underhooks to prevent Alesund's takedown attempt.
That's three failed takedown attempts in the round for Totte Alesund. That's going to take a lot out of him.
Barger lands on the inside with an uppercut.
Barger misses with a hook from the clinch.
Alesund escapes the clinch and we're back to striking.
We've had a slow start to the round here - hopefully the action picks up.
Barger tries to close the distance and clinch up against the cage but Alesund paws at him with a jab and circles away.
Alesund drops down looking for a counter takedown but Barger sprawls and moves away.
Alesund closes the distance and clinches.
Alesund's corner are urging him to control the action in the clinch for a moment, rather than mount any serious offense. I'm sure the crowd appreciate those instructions... not.
Barger swings wildly with an uppercut but Alesund uses good head movement to avoid it.
That's one minute gone in the round.
Barger tries to throw a body punch but Alesund avoids it by throwing Barger back against the cage.
Barger throws a head punch that misses.
Alesund manages to pull guard. Let's see whether he can land a sub off his back.
Barger sitting in guard, not really doing much.
Barger wants to control from the top but Alesund keeps moving.
Barger stopping the sweep attempt from Alesund.
Flash Barger has got the better of the ground game so far.
That's two minutes gone in the round.
A few boos can be heard. I'm sure they will multiply if the fighters don't pick up the pace.

Alesund working away from the bottom but not quite defensive enough there because Barger has passed into half guard!
Alesund trying to control from the bottom.
Alesund is pressing down on Barger's left leg trying to get back to full guard. He's managed it.
Alesund trying to control the position here.
Alesund working a defensive guard but Barger passes into half guard.
Alesund tries to kick Barger off in order to stand up. Barger Avoids the leg push though and dives into side control.
That's three minutes gone in the round.
Barger taking a breather here.
Alesund wants to control the position but that's not easy when your opponent is in side control! Barger seems to be going for some sort of submission here. Hard to say what - oh, it's a Brabo choke! He's got it! Alesund is tapping! Wow, great finish!
Ladies and gentlemen, after 3:28 of round 2, we have a winner by way of Submission (Brabo Choke). Flash Barger!
|
|
|
|
|
|
|
|
|
|
|
|
|
|
|
|
|
|
|
|
|
|
|
| S |
C
A |
G |
S |
C
B |
G |
|
S |
C |
G |
|
energy
A | B |
|
hype
A | B |
|
pop
A | B |
|
mgr
A | B |
|
FIGHT
RATING
36% |
|
|
|
|
|
|

