|
|
PBP Commentary |
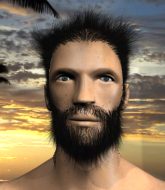
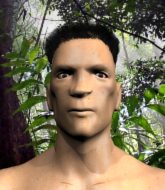
Coming up we have a light heavyweight MMA rules bout between Johnny Bean (ranked 0 p4p, 0 weight class) and Tom Mitchell (ranked 0 p4p, 0 weight class). Mitchell has chosen Baha Men - Island Boy as his entrance music, which hasn't gone down very well with the crowd. These two fighters really are very evenly matched on the feet - it will be fascinating to see who can assert themselves in that aspect of the fight.
 |
|
 |
| 190 cm
27
220 lbs
7 - 4 - 1 |
|
198 cm
27
211 lbs
8 - 6 - 0 |
BJJ Blue Belt
Excellent boxer
Very strong |
|
Good wrestler
Decent boxing
Solid chin |
|
| |
|
Ladies and gentlemen. This fight is 3 rounds, in the light heavyweight division.
Introducing the fighter to my left, fighting out of the red corner.
With a record of
7 - 4 - 1, fighting out of The Island, Johnny Bean!
And introducing the fighter to my right, fighting out of the blue corner.
With a record of
8 - 6 - 0, fighting out of The Island, Tom Mitchell!
The judges for this bout are Winston Alpacca, Daniel Franklin and Dirk Anderson.

The bell rings for round one and we are underway!
Bean stuns Mitchell with a nice body shot, before stepping back out of range.
Bean throws a body punch but Mitchell moves out of range.
Mitchell has been working on his striking defense in training and it's paying off as Bean is landing a low percentage of strikes.
Johnny Bean seems to be the more aggressive standup fighter in this bout.
Nice jab there from Bean.
Mitchell misses with a takedown attempt - Bean sprawls well and throws a nice strike on the way out which just misses.
Bean missing with a left hand there. Mitchell was out of range so wasted energy throwing that one.
And Mitchell tries to counter it with a takedown but Bean pushes his down on his head and steps out.
Bean throws a body shot but no joy.
Bean steps to the side to avoid the strikes from Mitchell.

Bean takes the fight into the clinch.
Mitchell working hard to break the clinch.
We've had a slow start to the round here - hopefully the action picks up.
Bean lands a shoulder strike that jolts his opponent's head backwards.
Bean has a couple of punches blocked by Mitchell.
Bean tries to land a shot to the body but it's blocked.
Mitchell tries to pull guard but Bean won't allow it.
Mitchell displaying some good clinch control by pressing Bean up against the cage.
Mitchell misses with a short punch on the inside.

That's one minute gone in the round.

Bean breaks the clinch.
Bean scores with a jab to the jaw of his opponent.
A big left from Bean misses.
Bean rushes in with a sloppy looking punch
and Mitchell counters with a lovely shot to the body.
Bean throws a hook to the body but it doesn't connect.
Mitchell avoids the body shot from Bean.
Mitchell changes levels for a counter takedown but doesn't follow through with his attempt.
Mitchell swats away the attempt to clinch by Bean.
Bean looks to score with a combo but nothing lands.
Bean tries to land with a swinging hook to the body but Mitchell was well out of range. Poor timing from Bean.
Mitchell misses with a takedown attempt - Bean sprawls well and throws a nice strike on the way out which just misses.
A little feinted left hand from Bean on the counter but he doesn't commit to it.
Johnny Bean has stuffed three takedown attempts in the round now. That's going to take a lot out of Tom Mitchell.

That's two minutes gone in the round.
Bean misses with an uppercut. Mitchell saw that one coming.
Bean is looking light on his feet compared to last time was saw him fight.
Bean closes the distance and clinches.
Mitchell prevents Bean from breaking the clinch.
Mitchell can't find room to land a body shot as Bean controls the action.
Bean throws a head punch that misses.
Bean throws a head punch that misses.
Bean misses with some punches.
Bean misses with a short punch on the inside.
Bean gets double underhooks to prevent a takedown attempt from Mitchell.
Mitchell has Bean pressed against the cage.

Mitchell escapes the clinch and we're back to striking.
Mitchell moves away from the strike by Bean.
We've seen a great period of action over the last minute or so - credit to both fighters for going all out!
A shot to the body from Bean misses
and Mitchell counters with a nice uppercut.
Bean throws a lazy uppercut
and Mitchell counters with a nice jab to the body that keeps Bean thinking.

That's three minutes gone in the round.
Mitchell tries to move into range but Bean moves to the side and lands with a nice right hand.
Boom, another hit is landed. "You're gunna get knocked out" taunts Bean, as that shot connected.
Bean throws a right hand that misses
and Mitchell counters with a quick right hand to the jaw.
Bean scores with a decent looking hook.
Bean loads up on a big right hand but Mitchell slips the punch.
Bean gets to the clinch - let's see what his plan is here.
A head punch blocked on the inside by Mitchell.
Bean lands with a good tight uppercut to the head.
Bean escapes the clinch and we're back to striking.
Bean throws a right hand that misses
and Mitchell counters with a straight right hand.
Bean misses with a looping left.
Bean lands a lovely overhand right.
This has been an exciting period of action!
Bean throws an ugly left hook that misses
and Bean takes a counter punch right on the button for his troubles.

That's four minutes gone in the round.
Bean misses with a hook
and Bean takes a counter punch right on the button for his troubles.
Bean misses with a double jab

so Mitchell counters with a double leg into guard. Good agility.

Bean is rocked!
Mitchell passes easily into side control. Nice work.

Mitchell tries for an arm triangle. That looks pretty tight to me. Is this one over!?! Possibly, maybe, no Mitchell has let go of the choke. Obviously it wasn't as tight as we thought!
Bean on his back here. We all know that wrestlers don't like being on their back so let's see if Bean tries to get out of the position.
Bean manages to land a sweep and he's now on top! Lovely Jiu Jitsu!
Mitchell looking for submissions off his back.
Mitchell moves into full guard.
And thats the end of the round the fighters go back to their corners.
Johnny Bean dominated that round.
The referee calls time. The cornermen exit stage left and we're back to business.

Bean misses with a straight left.
Mitchell changes levels for a counter takedown but doesn't follow through with his attempt.
Mitchell fakes high and shoots in for a takedown but Bean avoids it really well and circles away.
Bean misses with a hook
and Mitchell counters with a stiff right hand.
Mitchell shoots in and bounces Bean off the cage to secure the takedown into guard.
Bean keeping moving, preventing Mitchell from controlling successfully.
We've had a slow start to the round here - hopefully the action picks up.
Mitchell advances to half guard.
Still in half guard, Mitchell seems content to control.
Mitchell is looking for a kimura here.
That's one minute gone in the round.
Bean wants to get back to full guard.
Mitchell is trying to control the action in half guard but Bean is working away on the bottom, looking perhaps to get back to full guard.
Bean is in trouble now - Mitchell has advanced to mount!
Bean knows he needs to get back to his feet asap. He's simply no match for Mitchell on the ground.
Mitchell working to secure an arm triangle but it's not happening for him just yet.
Mitchell with some aggressive grappling here. He's looking for submissions here, rather than waiting for the opportunity to counter.
Mitchell is going oldschool here, as he tries to force Bean to tap using a forearm choke. This isn't 1993 though, so Bean shrugs it off.
That's two minutes gone in the round.
Mitchell is working for a guillotine from mount but Bean frees his head quite easily.
Bean is trying to escape the mount.
Mitchell can't quite control the action as he would like just now, as Bean is looking to escape.
The ref warns both fighters not to hold the cage as they work up against the meshing.
Bean is writhing around trying to get back to his feet.
Bean tries to control Mitchell's body but Mitchell pushes him off. Bean squirms to his side and now Mitchell has his back!
That's three minutes gone in the round.
Bean trying to control but not successfully.
Mitchell is looking for the choke from the back position but Bean is controlling his hands well.
Bean trying to get back to his feet but Mitchell is in full control for now.
Bean trying to control the action but Mitchell just sinks the hooks in.
Bean is in a bad position, trying to hold on for dear life but he is really struggling to maintain any sort of control.
Bean tries to escape but Mitchell has the hooks in and won't let him break free.
Bean looking very determined here, making life difficult for Mitchell.
Mitchell is persistently looking for the submission but Bean is defending it well.
That's four minutes gone in the round.
Mitchell is staying calm and holding on to the back position, whilst working on a rear naked choke. Bean is defending well though. Mitchell let's go of the attempt for now.
Mitchell looking to break Bean's wrist control so he can sink in the choke. Bean remaining controlled and patient though - he really has to keep calm otherwise Mitchell will wrap this one up with the rear naked choke!
Mitchell controlling the position well here. Bean rolled but Mitchell kept the hooks locked in and stayed in the dominant position.
Mitchell has managed to slip his arm under Bean's chin. This could be all over... yep, Bean is tapping out! Submission win for Mitchell.
Ladies and gentlemen, after 4:59 of round 2, we have a winner by way of Submission (RNC). Tom Mitchell!
Tom Mitchell thanked the fans post fight for their support.
|
|
|
|
|
|
|
|
|
|
|
|
|
|
|
|
|
|
|
|
|
|
|
| S |
C
A |
G |
S |
C
B |
G |
|
S |
C |
G |
|
energy
A | B |
|
hype
A | B |
|
pop
A | B |
|
mgr
A | B |
|
FIGHT
RATING
52% |
|
|
|
|
|
|

