|
|
PBP Commentary |
Coming up we have a light heavyweight MMA rules bout between Punch Rockgroin II (ranked 0 p4p, 0 weight class) and Aima Hei (ranked 0 p4p, 0 weight class). Punch Rockgroin II has the edge in experience - let's see if he can make that count tonight.
 |
|
 |
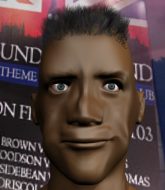
| 182 cm
20
200 lbs
2 - 0 - 0 |
|
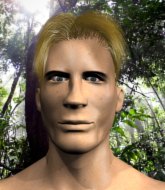
202 cm
18
212 lbs
2 - 0 - 0 |
BJJ Blue Belt
Counter striker
Good chin |
|
BJJ Blue Belt
Counter striker
Determined |
|
| |
|
Ladies and gentlemen. This fight is 3 rounds, in the light heavyweight division.
Introducing the fighter to my left, fighting out of the red corner.
With a record of
2 - 0 - 0, fighting out of London, Punch Rockgroin II!
And introducing the fighter to my right, fighting out of the blue corner.
With a record of
2 - 0 - 0, fighting out of London, Aima Hei!
The judges for this bout are James Ackerman, Andrew Berry and Chris Edwards.

The bell rings for round one and we are underway!
Rockgroin II tries to clinch up.
Hei throws a jab but it's blocked by Rockgroin II.
Rockgroin II tries to land a front kick but Hei steps back. That was a bit too telegraphed.
Hei keeps the fight standing with a nice sprawl.

Rockgroin II fakes an overhand right and shoots for a takedown. Hei sprawls well initially but Rockgroin II persists and gets the takedown into half guard.
Rockgroin II wants to stand but Hei has hold of a leg and an arm, so he's trapped for now.
Hei won't allow Rockgroin II to pass to mount.
Rockgroin II is just content to waste time from the top position. Hei takes advantage of the situation and regains full guard.
The fighters are tangled up in the ropes here. We might need a restart if the fighters can't break free themselves.
Hei looking to sweep here. No luck so far.
Rockgroin II trying to move into half guard but instead Hei has managed to sweep!
Rockgroin II might be looking to lock onto one of his opponent's long limbs for a submission, whilst we're on the ground.

That's one minute gone in the round.
Hei controls from within his opponent's guard.
Hei stands and throws Rockgroin II's legs to the side, diving into side control.
Rockgroin II is trying to improve his position.
Rockgroin II wants to control but Hei postures up.
Rockgroin II is looking for a sweep.
Rockgroin II can't do much from the bottom here.
Rockgroin II is trying to escape the position but Hei is controlling the position.
Hei working away.

That's two minutes gone in the round.
The crowd are hurling abuse towards the fighters... You can hardly blame them though because there isn't a lot going on in the fight.
Rockgroin II throws a couple of punches but he's in a bad position and they don't land.

Well, the referee has seen enough. Neither fighter is active enough on the ground so he's stood them back up.
Hei stuffs the takedown.
Rockgroin II slips a jab and a cross from Hei.
Rockgroin II shoots in and drives through. Hei sprawls well.
That's three failed takedown attempts in the round for Punch Rockgroin II. That's going to take a lot out of him.
Hei darts in and lands a nice takedown into half guard.
Rockgroin II keeping his head moving to avoid the ground and pound.
Rockgroin II is looking to improve his position.

That's three minutes gone in the round.
Hei perhaps working for something from half guard, or maybe not. It looks like he's just sitting there.
Rockgroin II wants to improve his position but Hei is controlling well.
Hei landing with strikes to the body and head, softening up his opponent.
Hei slows the pace down in half guard.
Rockgroin II wants to get back to his feet.
Rockgroin II wants to improve his position but Hei is controlling well.
Hei trying to pass the guard but Rockgroin II defending well.
Hei is looking to stall here but Rockgroin II recovers full guard.

That's four minutes gone in the round.
Neither fighter has done anything of merit for a good minute or two here and the crowd are not happy about it.
Rockgroin II is working from a closed guard but he's struggling to control his opponent.
Hei tries to free his leg and advance position but Rockgroin II is retaining full guard.
Rockgroin II looking to control.
Well, the referee has seen enough. Neither fighter is active enough on the ground so he's stood them back up.
Rockgroin II scores with a shot to the body.
Rockgroin II misses with a two punch combination.

Rockgroin II instigates a clinch.
Rockgroin II is trying to work for a single leg takedown but Hei pulls him back up using the underhooks.
Rockgroin II keeps control of Hei as he tries to wriggle out of the double underhooks.
Rockgroin II wants to break free. God knows he wants to breaaaak freeee.
Both guys are working to get underhooks.
And thats the end of the round the fighters go back to their corners.
Aima Hei dominated that round.
Well, the break between rounds is over. Let's get back to the scrappin!

Rockgroin II decides to change it up a bit and drives through with a nice takedown into half guard.
Rockgroin II stops Hei from getting back to his feet.
Hei is holding on to half guard well.
Hei throws a strike from the bottom that misses.
Rockgroin II moves into full mount! Hei won't be happy about that!
Rockgroin II landing punches.
Hei regains half guard.
Hei works his way to full guard. Good work.
Rockgroin II tries to free his leg and advance position but Hei is retaining full guard.
Rockgroin II trying to control the position from guard on top but Hei is wriggling around, looking for whatever he can.
That's one minute gone in the round.
Rockgroin II sneaks a leg through and gets to half guard. That was like a knife through butter how easily he passed Hei's guard.
Hei works his way to full guard. Good work.
Hei striking from the bottom here.
Hei keeping moving, preventing Rockgroin II from controlling successfully.
Hei looking for a sweep. Not yet Hei, not yet.

Rockgroin II is trying to work a guillotine from the top, or something like that? Don't know how he thinks he's going to get a finish from there.
Hei keeping full guard, as Rockgroin II tries to pass.
Rockgroin II preventing the sweep.
That's two minutes gone in the round.
A few boos can be heard. I'm sure they will multiply if the fighters don't pick up the pace.
Rockgroin II working in close now, lands a nice elbow to the side of Hei's head.
Rockgroin II stands up and looks to throw the legs aside to pass to side control. Hei swivels though and keeps the full guard.
The referee decides to stand the fighters back up.
Hei fails to land with the punch combination there - jab, cross, hook, miss, miss, miss.
Hei looks to land a body kick but Rockgroin II moved away.
Rockgroin II bobs and weaves into range and then changes levels and scores with a nice takedown into side control.
Rockgroin II trying to control the action but Hei is working from the bottom.
Rockgroin II wants to stand but Hei is controlling his arm.
Hei tries to bench press Rockgroin II off him but Rockgroin II keeps the position.
Hei stops Rockgroin II from passing to mount.
That's three minutes gone in the round.
Hei dodges the ground and pound from Rockgroin II.
Hei regains half guard.
Hei is trying to get back to full guard.
Hei tries to strike from the bottom but it doesn't land.
The referee has ruled that neither fighter is active enough on the ground and has stood them back up.
Rockgroin II tries to clinch up.
Rockgroin II takes a big uppercut there. He seems a bit wobbly but no, he's OK.
Hei throws a right hand that Rockgroin II ducks under and follows up with a left that Rockgroin II also avoids with ease.
Rockgroin II bobs and weaves into range and then changes levels and scores with a nice takedown into side control.
Hei is trying to control Rockgroin II's posture but Rockgroin II avoids it.
Hei gives up the full mount - oops, sloppy defensive grappling there!
That's four minutes gone in the round.
Hei regains half guard.
Hei wants to get back to full guard.
Rockgroin II is trying to control the action in half guard but Hei is working away on the bottom, looking perhaps to get back to full guard.
Rockgroin II is going to have to think about doing something other than just controlling because Hei is managing to avoid having the position dictated to him.
Rockgroin II stops Hei from getting back to his feet.
Hei is looking to get full guard. It looks like he might be successful but at the last minute Rockgroin II jumps into side control!
Rockgroin II tries for an arm triangle. That looks pretty tight to me. Is this one over!?! Possibly, maybe, no Rockgroin II has let go of the choke. Obviously it wasn't as tight as we thought!
Both fighters are absolutely exhausted here.
Hei manages to work his way to half guard, despite Rockgroin II's best efforts.
And thats the end of the round the fighters go back to their corners.
That was a close second round but I would say that Punch Rockgroin II will probably get the nod.
That's time! Back to the action! This is the final round!

Hei keeping a good distance there, avoiding the body shot.
A head kick misses from Hei.
Rockgroin II tries to clinch up.
A clash of legs there as Rockgroin II blocks the low kick.
Rockgroin II fails with a takedown attempt from distance.
Rockgroin II shoots in and drives through. Hei sprawls well.
Hei stuffs the takedown attempt from Rockgroin II. Rockgroin II gets slowly back to his feet.
That's three failed takedown attempts in the round for Punch Rockgroin II. That's going to take a lot out of him.
We've had a slow start to the round here - hopefully the action picks up.
Hei throws a hook but Rockgroin II avoids it easily.
Hei throws a sloppy head kick and Rockgroin II moves out of range easily.
That's one minute gone in the round.
Rockgroin II doesn't manage to clinch there - Hei circles away.
Aima Hei seems to be the more aggressive standup fighter in this bout.
Rockgroin II tries to shoot in for a takedown. He's got hold of a leg but Hei swivels and escapes.
Hei throws a wild combination but nothing lands.
Rockgroin II misses with a takedown attempt
and Hei counters nicely by changing levels and landing a hook to the body.
Both fighters are breathing heavily.
Good shot there by Hei.
Rockgroin II displays some good footwork, moving neatly out of range as Hei throws out the jab.
Hei connects with a looping left hand that seems like it dazed Rockgroin II momentarily.
The fans in attendance giving it up for the two fighters, who have really let it all hang out in the last minute or so!
Rockgroin II slips under a jab.
Hei misses with a straight right.
Hei bobs and weaves into range and then changes levels and scores with a nice takedown into side control.
That's two minutes gone in the round.
Rockgroin II takes a nasty elbow to the side of the head.
Rockgroin II taking punishment in the form of punches.
Hei scores with a couple of nice shots to the head there. The referee takes a look at Rockgroin II to see if he's OK.
Hei is putting a hurting on Rockgroin II here, landing some big shots from side control.
Hei in side control lands a nice looking series of punches and elbows.
Rockgroin II wants to control but Hei postures up.
Hei scores with punches from side control.
Hei has knee on belly and now moves to full mount! Trouble for Rockgroin II!
Rockgroin II tries to hold on but Hei pushes him away.
Hei trying to control but he's not successful this time.
Hei controlling his opponent.
Rockgroin II can't escape the position.
That's three minutes gone in the round.
Rockgroin II tries to lock up and control but Hei gives him a forearm to the face and pushes him away.
Aima Hei has got the better of the ground game so far.
Hei lands with some strikes.
Hei punishing his opponent with strikes.
Hei dominating with strikes here.
Hei postures up and cracks his opponent a couple of times before moving back into close ground control. Rockgroin II looks a forlorn figure.
Rockgroin II taking shots to the head.
Rockgroin II in a bad spot here, taking shots to the head.
Hei raining down shots from the mount!
Wooooo! Give it up for these two warriors! They are putting on a show!
The crowd growing excited in anticipation of a finish here! Right on cue, Hei cracks his opponent with a massive right hand that draws loud cheers!
That's four minutes gone in the round.
Hei dominating with strikes here.
Rockgroin II tries to reverse the position but Hei maintains control.
Hei trying to control but Rockgroin II is having none of it.
Aima Hei is fighting for a decision here - he's started to take the cautious approach.
Rockgroin II wants to control but Hei is having none of it.
Punch Rockgroin II has stepped it up - he knows he needs a finish here!
Hei fakes a shot to the body and cracks his opponent in the head. Nice ground and pound there!
Rockgroin II tries to get back to half guard but can't.
As the round comes to an end the crowd are showing their appreciation for a great round of action.
Hei controlling the pace for now.
Hei scoring with strikes but Rockgroin II is staying in there.
And that's the end of the fight!
Aima Hei comfortably won the final round on my scorecard.
I think Hei has won this one but let's see whether the judges agree with me. Over to the ring announcer for the scorecards.
Ladies and gentlemen, after 3 rounds of action, we go to the scorecards for a decision.
Judge James Ackerman scores the fight for Aima Hei!
Judge Andrew Berry scores the fight for Aima Hei!
Judge Chris Edwards scores the fight for Aima Hei!
Aima Hei wins by unanimous decision!
|
|
|
|
|
|
|
|
|
|
|
|
|
|
|
|
|
|
|
|
|
|
|
| S |
C
A |
G |
S |
C
B |
G |
|
S |
C |
G |
|
energy
A | B |
|
hype
A | B |
|
pop
A | B |
|
mgr
A | B |
|
FIGHT
RATING
68% |
|
|
|
|
|
|
