|
|
PBP Commentary |
Coming up we have a welterweight MMA rules bout between Corey Burton (ranked 0 p4p, 0 weight class) and Raphael Mendoza (ranked 0 p4p, 0 weight class). Corey Burton has a significant reach advantage - let's see if he can make it count.
 |
|
 |
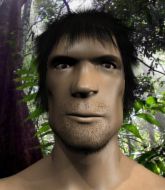
| 188 cm
20
177 lbs
0 - 1 - 0 |
|
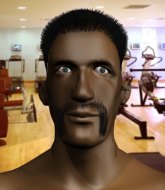
175 cm
24
167 lbs
1 - 0 - 0 |
BJJ Blue Belt
Counter fighter
Good in bed |
|
BJJ Purple Belt
Counter fighter
Determined |
|
| |
|
Ladies and gentlemen. This fight is 3 rounds, in the welterweight division.
Introducing the fighter to my left, fighting out of the red corner.
With a record of
0 - 1 - 0, fighting out of Sydney, Corey Burton!
And introducing the fighter to my right, fighting out of the blue corner.
With a record of
1 - 0 - 0, fighting out of Sydney, Raphael Mendoza!
The judges for this bout are Ben Watson, Skip Squint and Eliza Hachem.

The bell rings for round one and we are underway!

Mendoza shoots in looking for a single leg takedown. Burton is trying to defend but Mendoza finishes it well and ends up in half guard. Let's see if he can advance position further.
Mendoza blocks the strikes from Burton.
Burton is looking to improve his position.
Mendoza landing with strikes to the body and head, softening up his opponent.

Burton actively working from the bottom here.

Mendoza is looking for a kimura. It's going to be difficult to finish that from half guard though and Burton defends it well.
Mendoza seems very keen to just sit and control from half guard but Burton does not like that idea so much and is remaining active off his back.
Mendoza tries to pass the half guard into mount. Burton knows what he's doing though and prevents the attempt.
We've had a slow start to the round here - hopefully the action picks up.
Mendoza is figuring out what he wants to do next.
Mendoza has the superior BJJ but he's also working some ground strikes into his gameplan.
The fighters are battling for position here. Burton manages to regain full guard. Nice work.
Mendoza looking to pass the guard.
Burton doesn't do any damage with a couple of strikes from the bottom.

That's one minute gone in the round.
Burton is working actively off his back, looking to secure an arm or perhaps work for a triangle.
Mendoza avoids a guillotine attempt easily.
Mendoza stays in close to Burton's body and controls the position.
Burton working from the bottom, still in full guard. He's managed to get a loose triangle. Mendoza doesn't seem to be doing much to defend here, obviously he feels comfortable in the position. Mendoza manages to throw the legs off his shoulder and he's back into guard - no problem.
Burton trying to keep a closed guard but Mendoza is proving a slippery customer.
Burton throws a couple of shots from the bottom but they don't land.
Burton working for a triangle but Mendoza defends it easily.
Burton has a loose triangle. He'll be looking to tighten that up but Mendoza can see exactly what he's planning and manages to posture up and free himself.
Burton is breathing heavily.

That's two minutes gone in the round.
The crowd are getting on the fighters' backs, as the pace has dropped off in the last minute or so.
Mendoza controls from within his opponent's guard.
The referee is pacing around the two fighters - he looks like he's thinking about a standup.
Burton wants to sweep but no luck.
Burton is active off his back here, looking for submissions.
Mendoza showing good wrestling skills to control the position.

The ref stands the fighters back up due to a lack of activity.
Burton fails in his attempt to clinch.
Mendoza drops down looking to force a counter takedown but Burton defends it well.
Mendoza tries to close the distance and clinch up against the cage but Burton paws at him with a jab and circles away.
Mendoza shoots in looking for a single leg takedown. Burton is trying to defend but Mendoza finishes it well and ends up in half guard. Let's see if he can advance position further.
Mendoza trying to control from half guard but Burton is working away.

That's three minutes gone in the round.
Mendoza is looking to pass the guard... He's managed it - he's now in full mount!
The fighters are pressed up against the cage, both looking to find a bit of space to work.
Mendoza takes a little breather and maintains the position. The referee will be looking for him to stay active from such a dominant position though.
Burton manages to regain half guard. Good work.
Mendoza is trying to control the action in half guard but Burton is working away on the bottom, looking perhaps to get back to full guard.
Burton misses with some strikes from the bottom.
Burton is looking to sinch up a guillotine here but Mendoza pulls his head out easily.
The ref warns both fighters not to hold the cage as they work up against the meshing.
Mendoza wants to control but Burton is keeping him busy.
Burton trying to get back to full guard but Mendoza takes advantage of the position and moves to full mount!
Mendoza working away from the top, dropping strikes.

That's four minutes gone in the round.
Burton is desperately trying to improve his position but Mendoza has a good base and remains in mount.
Mendoza trying to control but he's not successful this time.
Mendoza is in a good position here but he's just trying to control... And he's not even managing to do that successfully.
Mendoza controlling the position easily from mount.
Burton working to try and regain half guard.
Mendoza working the ground and pound effectively.
Mendoza can't quite control the action as he would like just now, as Burton is looking to escape.
The crowd thankful this round is nearly over.
The crowd growing excited in anticipation of a finish here! Right on cue, Mendoza cracks his opponent with a massive right hand that draws loud cheers!
Burton is flailing around like a fish out of water, trying to land strikes.
And thats the end of the round the fighters go back to their corners.
Raphael Mendoza dominated that round.
Well, the break between rounds is over. Let's get back to the scrappin!

Burton misses with a few strikes there.

Burton moves into the clinch successfully.
Burton wants a takedown but no success here.
Mendoza is working hard here but doesn't seem to be able to control effectively, up against the cage.

Mendoza breaks the clinch and we're back to striking at distance.
Burton tries to clinch
and Mendoza counters with a thumping low kick.
Mendoza has been the more effective fighter overall so far.
Mendoza swats away the attempt to clinch by Burton.
Mendoza is clearly trying to counter these attacks from Burton with a body shot.
We've had a slow start to the round here - hopefully the action picks up.
Mendoza feints and as Burton raises his hands in defense, Mendoza changes levels and drives through with a takedown into guard.
That's one minute gone in the round.
Mendoza tries to free his leg and advance position but Burton is retaining full guard.
Burton throwing his legs up looking for a triangle.
Mendoza trying to control the position from guard on top but Burton is wriggling around, looking for whatever he can.

Mendoza stands up from guard. Let's bang!
Burton closes the distance and pushes Mendoza back into the cage.

Burton jumps into guard, dragging Mendoza to the mat.
Mendoza trying to pass the guard but can't manage it just yet.
Burton will need to keep those long limbs tucked in whilst he's on the ground, to prevent any submissions.
Mendoza avoids a guillotine attempt easily.
Both fighters are absolutely exhausted here.
Mendoza trying to control but Burton is working from the bottom.
Burton wants to sweep but no luck.
That's two minutes gone in the round.
Burton keeping moving, preventing Mendoza from controlling successfully.
Burton has an omoplata and is looking to use it perhaps as a submission or perhaps to transition. Mendoza is in a bit of discomfort here, but he's managed to free himself and has dived into side control! That didn't work out too well for Burton.
Mendoza is looking to finish here, going for an Americana. Burton knows the correct defense though, so he's OK.
Burton is looking for a sweep.
Burton looks to move to half guard but instead Mendoza has passed into mount! Damn!
Mendoza moves to back control.
Mendoza looking for the choke but no joy.
Mendoza keeps control of the position as Burton tries to break free.
That's three minutes gone in the round.
Mendoza has his hand under the chin of his opponent looking for the choke. He's nearly got it! This one could be all over! But no, Burton has freed his hand and lives to survive another
well, another couple of seconds at least!
Mendoza looking for the choke but no joy.
Mendoza is working the ground and pound here and the referee is taking a close look at Burton. He must escape soon or this one will be stopped.
Mendoza is hanging on to Burton's back as he tries to escape.
Mendoza scores with strikes from the back.
Mendoza looking for the rear naked choke. And he's got it! Burton taps!
Ladies and gentlemen, after 4:55 of round 2, we have a winner by way of Submission (RNC). Raphael Mendoza!
|
|
|
|
|
|
|
|
|
|
|
|
|
|
|
|
|
|
|
|
|
|
|
| S |
C
A |
G |
S |
C
B |
G |
|
S |
C |
G |
|
energy
A | B |
|
hype
A | B |
|
pop
A | B |
|
mgr
A | B |
|
FIGHT
RATING
38% |
|
|
|
|
|
|
