|
|
PBP Commentary |
Coming up we have a middleweight MMA rules bout between Mark Croft (ranked 0 p4p, 0 weight class) and Jack Woods (ranked 0 p4p, 0 weight class). Croft comes to the cage accompanied by Living in the Sunlight. This should be fireworks!
 |
|
 |
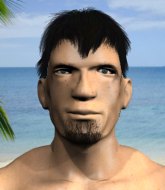
| 183 cm
22
188 lbs
1 - 0 - 0 |
|
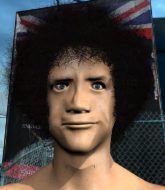
190 cm
25
189 lbs
0 - 0 - 0 |
BJJ Blue Belt
Solid Muay Thai
Big heart |
|
Powerful takedowns
Brawler
Granite chin |
|
| |
|
Ladies and gentlemen. This fight is 3 rounds, in the middleweight division.
Introducing the fighter to my left, fighting out of the red corner.
With a record of
1 - 0 - 0, fighting out of London, Mark Croft!
And introducing the fighter to my right, fighting out of the blue corner.
With a record of
0 - 0 - 0, fighting out of London, Jack Woods!
The judges for this bout are James Ackerman, Steven Brown and Phil Schofield.

The bell rings for round one and we are underway!
Croft fails in his attempt to clinch.
Croft tries to clinch up against the cage, rushing in to close the distance. Woods manages to break the clinch and circles back to the middle of the mat.
Croft moves into range and lands a nice leg kick.
Woods takes a swing at Croft's ribcage but misses.
Croft tries to counter by clinching up but Woods breaks away and moves out of range.
Croft stuns Woods with a nice body shot, before stepping back out of range.
Woods throws a jab but it's blocked by Croft.
Croft definitely looks more muscular than last time we saw him fight.
Woods shoots in but doesn't get the takedown
enabling Croft to counter with a crisp jab.

Croft closes the distance and clinches.
We've had a slow start to the round here - hopefully the action picks up.
Woods has hold of a leg and is looking for a trip takedown. Croft avoids it nicely though and we remain in the clinch.
Woods tries for a takedown. No joy.
Mark Croft has stuffed three takedown attempts in the round now. That's going to take a lot out of Jack Woods.

Croft breaks the clinch.
Croft wings a very wild body shot but it does the job and lands to the midsection.
Croft throws a head kick but Woods moves out of range.
Jack Woods seems to be the more aggressive standup fighter in this bout.

That's one minute gone in the round.
Croft throws a head kick but Woods moves out of range.
Woods misses with a takedown attempt - Croft sprawls well and throws a nice strike on the way out which just misses.

Croft drives through with a takedown into Woods's guard. Let's see what he can do from the top position.
The ref warns both fighters not to hold the cage as they work up against the meshing.

Woods looking for a guillotine here but Croft defends easily.
Croft wanted to stand there but Woods had control of the position.
Croft tries to free his leg and advance position but Woods is retaining full guard.

That's two minutes gone in the round.
Croft wanted to stand there but Woods had control of the position.
Croft scoring with some ground and pound.
Croft seems content to control from guard here. He's going to have to remain active though if he doesn't want to get stood back up.
Croft preventing the sweep.

Croft stands up from Woods's guard - Croft perhaps looking for a knockout.

Woods manages to get an easy takedown there - catching Croft on his heels. He'll look to pass Croft's guard now, I'm sure.
Wooooo! Give it up for these two warriors! They are putting on a show!
Woods trying to control but Croft is working from the bottom.

That's three minutes gone in the round.
Croft wants to sweep but no luck.
Croft is working hard here to advance position.
Croft keeping moving, preventing Woods from controlling successfully.
Woods sneaks a leg through and gets to half guard. That was like a knife through butter how easily he passed Croft's guard.
Woods keeping composed on the top, looking to control the action.
Woods is trying to work for a kimura but Croft is defending well.
Woods is looking for a kimura here.

That's four minutes gone in the round.
Woods wants to free his trapped foot but Croft is holding on for dear life with his legs.
Woods stalling away here and it's allowed Croft to slip out his trapped foot and regain full guard.
Woods prevents Croft from getting back to his feet.
Woods drops back looking for a leg! Croft is in trouble here! The fighters roll with the hold and Croft manages to kick Woods off! Woods jumps back into Croft's guard.
Woods trying to control the position from guard on top but Croft is wriggling around, looking for whatever he can.
The crowd thankful this round is nearly over.
Woods slips nicely into half guard.
And thats the end of the round the fighters go back to their corners.
That was a close round but I would say that Mark Croft will probably get the nod.
That's time! Croft's corner gives him a slap on the ass as he gets ready to fight.

Woods shoots in with a takedown attempt and he has Croft pinned against the cage. Croft gets the underhooks and manages to circle away.
Woods takes a body punch but keeps moving.
Woods misses with an uppercut.
Croft is trying to close the distance and clinch up, after that failed offence from Woods.
Woods misses with a looping left.
Croft closes the distance and scores a nice trip takedown into half guard. Woods did well to prevent Croft getting side control.
We've had a slow start to the round here - hopefully the action picks up.
Croft wants to take a breather but Woods is having none of it.
Mark Croft overall seems to be getting the better of the ground position in the fight so far.
Woods regains full guard. Nicely done.
Woods trying to keep a closed guard but Croft is proving a slippery customer.
Woods has his foot on Croft's thigh. He's trying to push off and get in position for a triangle, I think. Croft works his way back into a safe position though.
That's one minute gone in the round.
Woods wants to sweep here but Croft controlling him for the moment.
Croft tries to free his leg and advance position but Woods is retaining full guard.
Croft slows down the pace of the fight, as he sits in guard.
Woods lands a beautiful sweep and he's now moved into his opponent's guard.

Woods wants to control from the top but Croft keeps moving.
That's two minutes gone in the round.
A few boos can be heard. I'm sure they will multiply if the fighters don't pick up the pace.
Croft wants to get back to his feet but Woods is in a dominant position and won't allow it.
Woods being controlled here momentarily.
Woods wants to stand but Croft has a closed guard, so he can't escape.
Croft keeping moving, preventing Woods from controlling successfully.
Woods advances to half guard.
That's three minutes gone in the round.
Croft has no desire to be mounted, so is trying to control. Woods is working away from the top position though.
Croft is not content to let Woods control the position.
Woods is working hard to pass the guard. He's done it - he's now in full mount! Trouble for Croft!
Woods trying to control but he's not successful this time.
Woods has hold of an arm here, looking to extend it. He's committed to the armbar attempt here! Will he get it?! Yes! Croft is forced to tap!
Ladies and gentlemen, after 3:48 of round 2, we have a winner by way of Submission (Armbar). Jack Woods!
|
|
|
|
|
|
|
|
|
|
|
|
|
|
|
|
|
|
|
|
|
|
|
| S |
C
A |
G |
S |
C
B |
G |
|
S |
C |
G |
|
energy
A | B |
|
hype
A | B |
|
pop
A | B |
|
mgr
A | B |
|
FIGHT
RATING
35% |
|
|
|
|
|
|

