|
|
PBP Commentary |
Coming up we have a light heavyweight MMA rules bout between Tyson Brown (ranked 0 p4p, 0 weight class) and Darryl Haze (ranked 0 p4p, 0 weight class). Haze comes into a darkened arena with his song building. Border Patrol - Eek A Mouse kicks in, the lights come on and the crowd goes wild! What a showman! Darryl Haze has the better chin. Will he look to stand and bang today?
 |
|
 |
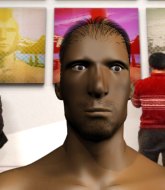
| 187 cm
25
208 lbs
9 - 6 - 0 |
|
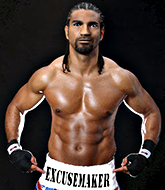
197 cm
29
224 lbs
10 - 9 - 0 |
Abu Dhabi Champ
Excellent boxer
Insanely flexible |
|
Good wrestler
Lethal high kicks
Good gas tank |
|
| |
|
Ladies and gentlemen. This fight is 3 rounds, in the light heavyweight division.
Introducing the fighter to my left, fighting out of the red corner.
With a record of
9 - 6 - 0, fighting out of Las Vegas, Tyson Brown!
And introducing the fighter to my right, fighting out of the blue corner.
With a record of
10 - 9 - 0, fighting out of London, Darryl Haze!
The judges for this bout are Reed Andrews, Jonathan Paton and John Roberts.

The bell rings for round one and we are underway!
A shot to the liver by Brown. Beautiful body shot.
Haze closes the distance and takes a jab right on the nose as he does so.
Haze misses with a straight left.
Brown keeping a good distance there, avoiding the body shot.
Brown moves in looking to clinch but Haze pushes him off.
Haze swings away with a counter right hand but no contact made.
Brown digs a good hook to Haze's body.

Brown moves into the clinch.
Haze blocking some punches.
Brown blocks an uppercut.
Brown avoids the elbow strike from Haze, against the cage.
Haze looks to throw an elbow but misses.
Haze swings wildly with an uppercut but Brown uses good head movement to avoid it.
Haze lands a left hand.

Haze breaks the clinch and we're back to striking at distance.
Brown shoots in for a takedown but Haze shows good takedown defense there and keeps this one on the feet.
A head kick misses from Brown.
Brown backing away here, and Haze unleashes a leg kick that just misses.
Brown misses with an uppercut
and Haze counters with a leg kick.
Tyson Brown seems to be the more aggressive standup fighter in this bout.
The fans in attendance giving it up for the two fighters, who have really let it all hang out in the last minute or so!
Haze misses with the combination.

That's one minute gone in the round.
Horrible takedown attempt by Brown or perhaps it was just good defense by Haze, which made it look bad.
Haze unleashes a big counter combination but Brown bobs and weaves and avoids any damage.
Brown uses some good footwork to avoid the body shot by Haze.
Brown darts in and clinches Haze up against the cage.
Haze leaning against his opponent.
Haze breaks the clinch.
Brown shoots and misses
and Haze counters with a straight right hand.
That's three failed takedown attempts in the round for Tyson Brown. That's going to take a lot out of him.
Haze moves out of range as Brown throws a body kick.
A combination from Brown does no damage.
Haze jabbing away but nothing is landing.
Haze throws a lazy right hand but Brown sees it coming a mile off and sidesteps it easily.
Haze throws a hook but Brown blocks it.
Brown attempts a counter takedown but Haze avoids it well and moves away.

Excellent takedown into side control there by Brown.

That's two minutes gone in the round.
The fans in attendance giving it up for the two fighters, who have really let it all hang out in the last minute or so!
Brown wants to lay and pray for a moment but Haze keeps working.
The fighters are pressed up against the cage, both looking to find a bit of space to work.

Brown wants to work for a kimura but he's foiled early by Haze, who protects the arm well.
Brown is looking to finish here, going for an Americana. Haze knows the correct defense though, so he's OK.
Haze is trying to get back to his feet.

That's three minutes gone in the round.
Brown tries to move into full mount but can't pass Haze's legs.
Brown is trying to get an arm triangle but Haze is defending well.
Haze is not content to let Brown control the position.
Brown definitely looks more muscular than last time we saw him fight.
Brown controls the position.

That's four minutes gone in the round.
There's not a lot going on here and the crowd are letting the fighters know they're not willing to tolerate a lack of action.
Haze is pushing Brown's head away, looking to escape. Brown manages to hold on to the position though.
Brown advances nicely into full mount.
Brown looking to control and managing it successfully.
Brown with some aggressive grappling here, looking for the finish.
Brown trying to control but Haze is having none of it.
And thats the end of the round the fighters go back to their corners.
That was a close round but I would say that Tyson Brown will probably get the nod.
The fighters get back to their feet, the hooter sounds and we're back to the action!

Brown tries to clinch there but Haze circles away.
Haze bobs and weaves well there to avoid the strikes.
Brown takes a step towards his opponent and connects with a left hand, before circling away.
Brown connects with a body shot that sends Haze's belly button to the back.
Brown throws a looping overhand right but Haze ducks down to avoid it.
Brown doesn't manage to clinch there - Haze circles away.
Brown gets a double leg takedown into Haze's guard.
Brown trying to pass the guard but can't manage it just yet.
Haze keeping moving, preventing Brown from controlling successfully.
The ref warns both fighters not to hold the cage as they work up against the meshing.
We've had a slow start to the round here - hopefully the action picks up.
Haze keeping full guard, as Brown tries to pass.
That's one minute gone in the round.
Brown prevents Haze from getting back to his feet.
Brown trying to control the position from guard on top but Haze is wriggling around, looking for whatever he can.
Brown is standing up over Haze. Haze looks to escape but Brown dives into side control.
Haze is being controlled here.
Brown trying to control the action but Haze is working from the bottom.
Brown wants to work for a kimura but he's foiled early by Haze, who protects the arm well.
That's two minutes gone in the round.
The crowd are starting to boo a lack of action.
Brown is trying to land an Americana. He has the arm isolated but Haze is keeping cool and he's avoided the danger for now.
Brown looking for an arm triangle but it's way too loose to do anything.
Brown wants to work for a kimura but he's foiled early by Haze, who protects the arm well.
Brown wants to control but Haze is keeping him busy.
Brown is really dominating this fight. Is there anything that Haze can do to turn this around?
That's three minutes gone in the round.
Brown goes for an armbar here - this could be all over! But no, Haze has escaped beautifully and is now on top in side control! Oh, that's unlucky for Brown but great work by Haze.
Brown keeps Haze under control for a moment.
Brown is trying to improve his position.
Brown is working hard here to advance position.
Brown is trying to control Haze's posture but Haze avoids it.
Brown tries to work a leg under to get back to half guard but Haze wriggles his own leg back out and remains in side control.
That's four minutes gone in the round.
Brown is looking to slip a leg under and get half guard but Haze is one step ahead and moves to full mount!
Brown wants to control but Haze is having none of it.
Brown is desperately trying to get back to half guard.
Haze wants to stand but Brown is holding on to him, trying to stop him posturing up.
Brown is trying desperately to improve position.
Boooooooooooooooooooo!!! God, this has been a terrible round. Come on you two, sort yourselves out!
Brown bucks up and manages to get a nice reversal! He's in guard on the top - nicely done!
Brown stays in close to Haze's body and controls the position.
And thats the end of the round the fighters go back to their corners.
Tyson Brown dominated that second round.
The fighters get back to their feet, the hooter sounds and we're back to the action! This is the final round!

Brown tries to clinch up.
Brown scores with the left hand. Haze knows he should have avoided that one.
Brown fails miserably with a takedown attempt.
Brown digs a good hook to Haze's body.
Haze displays some good footwork, moving neatly out of range as Brown throws out the jab.
Brown tries to land with a swinging hook to the body but Haze was well out of range. Poor timing from Brown.
Brown loads up on a big right hand but Haze slips the punch.
Haze walks straight into a jab right on the nose. That one stung - he's blinking and trying to clear his head.
We've had a slow start to the round here - hopefully the action picks up.
Haze checks a leg kick.
Brown tries to clinch
and Haze connects with a straight left hand counter down the middle.
Brown dives in for a single leg takedown but Haze sprawls and the fighters end up clinched against the cage.
Haze uses good head movement to avoid the hook from Brown.
Brown misses with an uppercut.
That's one minute gone in the round.
Brown slips in close and lands a nice hook before moving back out of range.
Brown misses the jab.
Haze throws a counter combo.
Brown lands a nice looking body shot.
Brown dives in and grabs Haze's left leg, looking for a takedown. Haze pushes down on Brown's head and hops out.
That's three failed takedown attempts in the round for Tyson Brown. That's going to take a lot out of him.
Brown keeping his hands up high there, blocking the jab from Haze.
Brown takes a jab right on the nose. That must have hurt but he shrugs his shoulders and looks to return the favor.
Haze throws an uppercut from half a mile away. Brown sees it coming and avoids it easily.
Haze ducks under a wild hook from Brown.
Sloppy strikes from Haze. Those never looked like landing.
A really sloppy takedown attempt there from Brown.
Brown fails with a takedown attempt from distance.
Brown tries to close the distance and clinch up but Haze swats him away and circles back towards the center.
Haze looked like he wanted to counter with a punch but didn't throw it.
Brown connects with a good right hand that stumbles Haze. Haze circles away out of range and recomposes himself.
That's two minutes gone in the round.
Brown is looking to clinch.
Nice uppercut there from Brown.
Brown throws a lazy uppercut
and Haze counters with a stiff right hand.
Wooooo! Give it up for these two warriors! They are putting on a show!
Brown takes a nice looking leg kick right on the meat of his thigh there.
Haze takes a shot to the eye socket. That's gotta hurt.
Brown loads up on a big right hand but Haze slips the punch.
Brown connects with a body shot.
Haze moves out of range as Brown strikes.
Brown throws a body punch but Haze moves out of range.
Darryl Haze has stepped it up - he knows he needs a finish here!
A really sloppy takedown attempt there from Brown.
Haze looked like he wanted to counter with a punch but didn't throw it.
Brown thows a left - swing and a miss!
Brown swings away with a body shot that misses
and Haze makes him pay by landing a nice hook to the body before moving out of range.
Both fighters are breathing heavily.
That's three minutes gone in the round.
Brown checks the leg kick.
Brown gets his head snapped back by a nice shot there.

It looks like Tyson Brown has been cut.
Brown slips under a jab from Haze.
Haze uses good footwork to get in and out and land a nice right hand before Brown has time to react.
Haze misses with a half-hearted attempt at a head kick.
Brown changes levels looking for a counter takedown but doesn't commit.
Haze avoids the clinch attempt nicely.
It seemed like Haze was going to counter with the hook but didn't fully commit to it.
Brown is looking to clinch.
Brown connects with a leg kick. He turned his hip over nicely there.
Haze scores with a leg kick.
No joy there for Haze, who threw a few shots but didn't land.
Brown shoots and misses
and Haze counters with a good right hand that lands right on the jaw.
Brown fails with an attempt to clinch.
A swing and a miss from Haze.
Brown closes the distance and clinches.
That's four minutes gone in the round.
Brown's head jolts backwards as he takes an uppercut right on the button!
The crowd cheering loudly, showing their appreciation for the quality fight we're seeing here.
Brown prevents Haze from breaking the clinch.
Haze swings wildly with an uppercut but Brown uses good head movement to avoid it.
Brown tries to jump guard but he falls flat on his backside. Haze smiles and moves away.
Brown is looking to clinch.
Brown uses good head movement to avoid the hook from Haze.
Brown dodges the punch combination from Haze.
Brown tries to counter with a takedown but Haze is quick to defend against it.
Brown misses with an uppercut
and Haze counters with a three punch combo that has Brown backing up. Brown nods at Haze to acknowledge the strikes.

Brown is rocked!
Haze connects with a leg kick. Brown looked like he was expecting something else and didn't defend it.
Oh Brown is still all over the place! His legs are completely gone! Will he be able to recover?!!
Haze wobbles Brown with a right hand and the left hook that follows puts him on his rear! Haze dives in with a huge flying punch that connects right on the button and puts Brown to sleep! - What a violent and spectacular finish!
Ladies and gentlemen, after 4:51 of round 3, we have a winner by way of KO (Punches). Darryl Haze!
After the big win, Darryl Haze made sure to do all the important stuff like thanking his sponsors Hellbent and telling the interviewer how much he loves him.
|
|
|
|
|
|
|
|
|
|
|
|
|
|
|
|
|
|
|
|
|
|
|
| S |
C
A |
G |
S |
C
B |
G |
|
S |
C |
G |
|
energy
A | B |
|
hype
A | B |
|
pop
A | B |
|
mgr
A | B |
|
FIGHT
RATING
55% |
|
|
|
|
|
|
