|
|
PBP Commentary |
Coming up we have a featherweight MMA rules bout between Rad Dood (ranked 3789 p4p, 364 weight class) and Max Tauer (ranked 4055 p4p, 384 weight class). Max Tauer will no doubt be looking to use his reach advantage to good effect.
 |
|
 |
| 168 cm
29
152 lbs
5 - 2 - 0 |
|
182 cm
33
156 lbs
13 - 10 - 0 |
Powerful takedowns
Excellent boxer
Granite chin |
|
Good wrestler
Excellent MT
Heavy handed |
|
| |
|
Ladies and gentlemen. This fight is 3 rounds, in the featherweight division.
Introducing the fighter to my left, fighting out of the red corner.
With a record of
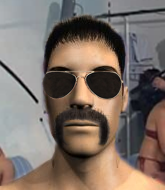
5 - 2 - 0, fighting out of Los Angeles, Rad Dood!
And introducing the fighter to my right, fighting out of the blue corner.
With a record of
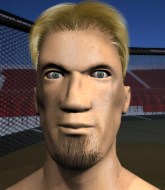
13 - 10 - 0, fighting out of St Petersburg, Max Tauer!
The judges for this bout are Seu Braga, Daniel Cesar and Matheus Silva.

The bell rings for round one and we are underway!
The fighters circling - Tauer throws out the jab but it was never going to land.
Dood swings for the body but Tauer moves out of range.
And an attempted straight right on the counter from Tauer! But no joy.
Tauer throws a sloppy head kick and Dood moves out of range easily.
Tauer misses with a head kick.
Tauer slips under a jab from Dood.
Tauer listening to his corner there, landing a nice uppercut.
Dood scores with a body shot.

Dood shoots in for a takedown! He's got it and he's managed to land in side control! That's better than Dood was expecting from the takedown attempt, I'm sure!
Dood misses with an attempted head punch from side control.
Tauer pushes Dood away and creates a bit of space to escape. He's almost out here... but no, Dood gets a good hold of his legs and remains firmly in side control.

Dood tries for an arm triangle. That looks pretty tight to me. Is this one over!?! Possibly, maybe, no Dood has let go of the choke. Obviously it wasn't as tight as we thought!
Tauer tries to improve position but can't.

That's one minute gone in the round.
Dood tries for a kimura but Tauer is defending well.
The ref warns both fighters not to hold the cage as they work up against the meshing.
Tauer dodges the ground and pound from Dood.
Dood tries for a kimura. Not really close to a finish though.
Dood is trying to get an arm triangle but Tauer is defending well.
Dood is working Tauer over with some ground and pound from side control.
Dood has been looking to land a fair amount of strikes on the ground. He might be looking to soften his opponent up in order to work for a submission.
Dood misses with an attempted head punch from side control.
Dood landing a few strikes.

Tauer sneaks out the side door and pushes Dood away - he's back to his feet. The crowd show their appreciation for the escape.

That's two minutes gone in the round.
Tauer throws a hook but Dood avoids it easily.
Dood ducks under an overhand right and circles away with a smile on his face.
Tauer throws a body shot but no joy.
Tauer misses with a looping left.
Tauer misses with a straight left.
Tauer misses with a left hand
and Dood counters with a nice double leg into side control. Tauer won't be happy with that.
Wooooo! Give it up for these two warriors! They are putting on a show!
Tauer is working to avoid the ground and pound but Dood connects with a decent elbow.
Dood tries for a kimura but Tauer is defending well.
Dood fails to land a wild elbow strike.
Dood tries to move into full mount but can't pass Tauer's legs.
Tauer really doesn't want to stay on the ground with Dood. If he can't get it back to his feet, it's only a matter of time before he'll be tapping out.
Tauer tries to bench press Dood off him but Dood keeps the position.

That's three minutes gone in the round.
Tauer is trying to control Dood's posture but Dood avoids it.
Dood misses with an attempted head punch from side control.
Tauer is trying to improve his position.
Dood working the ground and pound.
Dood wants to work for a kimura but he's foiled early by Tauer, who protects the arm well.
Dood tries for a kimura but Tauer is defending well.
Dood is trying to land an Americana. He has the arm isolated but Tauer is keeping cool and he's avoided the danger for now.
Tauer is trying to stand back up. He's worked his way up against the cage but Dood has just dragged him back down to the mat.

That's four minutes gone in the round.
Tauer gets one leg under and gets the fight to half guard.
Dood is trying to control. Tauer wants to improve his position but can't escape this time.
Dood wants to pass the guard but Tauer is defending well.
Tauer wants to get back to his feet.
Tauer is trying to control but can't.
Dood seems to be looking for submissions.
Dood is thinking about going for an arm triangle but he can't free his leg.
Well, if Dood is going to just lie there, perhaps we should talk about what we're having for dinner tonight
I'm having a ham and pineapple pizza
Yum. Can't wait.
And thats the end of the round the fighters go back to their corners.
Rad Dood dominated that round.
OK. That's time! The bell goes and we're back to the action.

Tauer throws a head kick that misses.
Tauer throws a series of punches but Dood avoids them all with ease.
Dood moves out of range as Tauer strikes.
A head kick from Tauer lands but Dood takes it in his stride.
Dood scores with a hook to the body. Tauer takes a step back and tries to catch his breath.
Tauer jabbing away but nothing is landing.
Tauer uses good footwork to avoid the strikes from Dood.
Dood throws an overhand right that lands on Tauer's shoulder, as Tauer tries to avoid the shot.
Dood looking to shoot here. He's gone for it and he's landed a takedown into side control! Oh, that's bad for Tauer!
Rad Dood overall seems to be getting the better of the ground position in the fight so far.
Tauer is looking to work his way out of this bad position but Dood is controlling him well.
Dood trying to control the action but Tauer is working from the bottom.
Dood throws an elbow but Tauer slips to the side and avoids it well.
That's one minute gone in the round.
Tauer tries to get back to half guard but can't.
Tauer is trying to escape and get back to his feet.
Dood lands a knee to the body and a forearm to the face.
You can see the frustration on Tauer's face, being in this tough position on the bottom.
Dood working the ground and pound.
Dood moving around in side mount but really he's just happy to control for now.
Dood is looking to take a break and control but Tauer is keeping him honest, looking to work from the bottom.
Tauer is not in a great position here, taking some shots.
That's two minutes gone in the round.
Tauer is working to avoid the ground and pound but Dood connects with a decent elbow.
Dood working the ground and pound but Tauer is defending the strikes.
Dood looking to punish the body of his opponent here but Tauer is avoiding damage well.
Tauer wants to control but Dood postures up.
This fight is sponsored by Chainsaw 7. More blood and guts and stuff like that, in cinemas everywhere now!
Tauer wants to get back to his feet.
Tauer is looking for a sweep.
Tauer struggling a bit here.
Tauer is pushing Dood's head away, looking to escape. Dood manages to hold on to the position though.
That's three minutes gone in the round.
Dood lands some shots froms side control.
Dood has knee on belly and moves into mount.
Dood lands a nice shot to the head.
Dood looking to control but Tauer is working nicely, looking to advance position himself.
Tauer tries to hold on but Dood postures up.
Dood thowing strikes but they're hitting the gloves, not doing any damage.
Dood is really dominating this fight. Is there anything that Tauer can do to turn this around?
Tauer is trying desperately to improve position.
Dood looking to control but Tauer is working nicely, looking to advance position himself.
Dood is going to have to think about doing something other than just controlling because Tauer is managing to avoid having the position dictated to him.
That's four minutes gone in the round.
Dood looking to secure an arm triangle but Tauer defends it well.
Tauer is writhing around trying to get back to his feet.
Tauer is hanging on here. He's in a desperate position.
Dood scores with a couple of good head shots there.
Dood lands a big shot there that rocks Tauer but he's holding on and managing to survive for now.
Dood working Tauer over with strikes here.

Tauer is rocked!
The crowd cheering loudly, showing their appreciation for the quality fight we're seeing here.
Dood postures up and throws a couple of big shots that have Tauer in real trouble here! The ref calls for Tauer to improve his position which he doesn't do, so the referee has no choice but to end the fight due to the strikes!
Ladies and gentlemen, after 4:58 of round 2, we have a winner by way of TKO (Strikes). Rad Dood!
|
|
|
|
|
|
|
|
|
|
|
|
|
|
|
|
|
|
|
|
|
|
|
| S |
C
A |
G |
S |
C
B |
G |
|
S |
C |
G |
|
energy
A | B |
|
hype
A | B |
|
pop
A | B |
|
mgr
A | B |
|
FIGHT
RATING
47% |
|
|
|
|
|
|
