|
|
PBP Commentary |
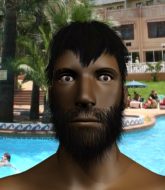
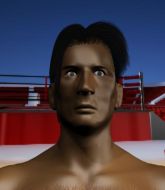
Coming up we have a light heavyweight MMA rules bout between Boa Link (ranked 4688 p4p, 0 weight class) and Steve Humphries (ranked 5242 p4p, 0 weight class). Buckle up people - heeeeeeeeeere we go!
 |
|
 |
| 200 cm
25
205 lbs
2 - 0 - 0 |
|
190 cm
25
200 lbs
1 - 0 - 0 |
BJJ Purple Belt
Solid Muay Thai
Granite chin |
|
BJJ Blue Belt
Decent boxing
Determined |
|
| |
|
Ladies and gentlemen. This fight is 3 rounds, in the light heavyweight division.
Introducing the fighter to my left, fighting out of the red corner.
With a record of
2 - 0 - 0, fighting out of The Island, Boa Link!
And introducing the fighter to my right, fighting out of the blue corner.
With a record of
1 - 0 - 0, fighting out of The Island, Steve Humphries!
The judges for this bout are Daniel Franklin, Winston Alpacca and Peter Branson.

The bell rings for round one and we are underway!
Link feints with a shoulder and throws a nice leg kick to Humphries's calf.
Humphries moves out of range of the body kick.
The crowd cheers as Humphries lands an impressive looking overhand right. Link doesn't seem phased though.

Humphries shoots in from a long way out. He's driving through with the takedown attempt and he eventually gets it, landing in Link's guard.
Humphries controlling from the guard. I say controlling but really, he's stalling.
A real slowdown in the pace of the fight for a moment, as Link holds on and takes a little breather.
Link is working an open guard here, looking to improve his position. No doubt that will leave him open to counters but at least he's being more offensive.
We've had a slow start to the round here - hopefully the action picks up.
Humphries seems content to control from guard here. He's going to have to remain active though if he doesn't want to get stood back up.

Link pushes Humphries off and scrambles back to his feet.

That's one minute gone in the round.
Link throws a half hearted mid kick.
Humphries doesn't fully commit to the body shot counter.
Link stuffs the takedown attempt from Humphries. Humphries gets slowly back to his feet.
We've been hearing reports that Link has been drilling takedowns in recent sessions so let's see if that has an impact on the result of this fight.
Link wants to clinch
and Humphries counters with a crisp hook to the side of the head.
Link looking to take his opponent's legs away with the low kicks.

Humphries moves into the clinch.
Humphries is looking for a takedown up against the cage. Link gets underhooks though and prevents the takedown attempt.

Humphries escapes the clinch and we're back to striking.
Link attempts a leg kick but it's missed by a good margin.
Link looking to take his opponent's legs away with the low kicks.
Link misses with a leg kick
and Humphries counters with a three punch combination, finished off with a leg kick. Nice work.

That's two minutes gone in the round.
Humphries misses with a takedown
and Link makes the exchange count by landing a cracking kick to the body. Humphries really felt that one!
Boa Link has stuffed three takedown attempts in the round now. That's going to take a lot out of Steve Humphries.
Link scores with a head kick.
This is a great period of action - very entertaining stuff!
Link lands a nice looking body kick.
Humphries looks winded!
Humphries moves to clinch but Link breaks away
and Link counters with an outside leg kick.
A telegraphed takedown attempt from Humphries is defended easily by Link.
Humphries takes a nice looking leg kick right on the meat of his thigh there.

That's three minutes gone in the round.

Link gets a double leg takedown into Humphries's guard.

Link is trying to work a guillotine from the top, or something like that? Don't know how he thinks he's going to get a finish from there.
Link content to stall in guard here.
The ref warns both fighters not to hold the cage as they work up against the meshing.
Link stands and throws Humphries's legs to the side, diving into side control.
Link is looking to take a break and control but Humphries is keeping him honest, looking to work from the bottom.
Link tries to advance to mount but Humphries denies him.
Link wants to work for a kimura but he's foiled early by Humphries, who protects the arm well.

That's four minutes gone in the round.

Humphries throws Link to one side and escapes!
Humphries has done a lot of speed work in the buildup to this fight.
Humphries is looking to clinch.
Link looked to counter that last move with a leg kick but didn't pull the trigger.
Link shoots in and drives through. Humphries sprawls well.
Humphries shoots in but Link avoids the takedown attempt easily.
Humphries thuds his right hand into Link's forehead from close range. That could be painful for both fighters.
We've seen a great period of action over the last minute or so - credit to both fighters for going all out!
Humphries darts in and clinches Link up against the cage.
Humphries stalling in the clinch.

Link breaks the clinch and we're back to striking at distance.
And thats the end of the round the fighters go back to their corners.
That was a close round but I would say that Boa Link will probably get the nod.
The corners get their ten second warning. Both fighters stand from their stools and stare eachother down, ready to get back to the action.

Link lands with a nice low kick. That'll leave a bruise.
Humphries stumbles momentarily as he takes a strong leg kick from Link.
Link chopping away at his opponent's legs.
Link throws a body kick that misses.
Humphries takes a step back and watches a body kick go sailing past his mid section.
Humphries is loading up here, looking for a big counter of his own.
Link lands with a nice low kick. That'll leave a bruise.
Humphries clinches up against the cage.
Humphries breaks the clinch.
We've had a slow start to the round here - hopefully the action picks up.
Link throws a nice inside leg kick.
Link is trying hard to land a takedown here. Humphries sprawls well and keeps this one on the feet.
Link shoots in looking for a takedown but Humphries manages to keep the fight standing, pushing Link's face into the canvas for good measure before circling away.
Humphries is looking for the big counter here.
Humphries lands three nice shots there - that looked like it hurt!

It looks like Boa Link has been cut.
That's one minute gone in the round.
Link avoids the body shot from Humphries.
Humphries rushes Link and presses him up against the cage.
Link misses with an elbow strike.
Link lands an elbow that stopped Humphries in his tracks for a moment.

It looks like Steve Humphries has been cut.
Link is looking to take this one to the mat.
That's three failed takedown attempts in the round for Boa Link. That's going to take a lot out of him.
Link has Humphries pressed up against the cage and is working for takedown. Humphries manages to improve position though and keeps the fight standing.
Humphries tries to throw a body punch but Link avoids it by throwing Humphries back against the cage.
Humphries stalling against the cage.
Link is looking for a takedown up against the cage. Humphries gets underhooks though and prevents the takedown attempt.
Humphries's leg has a nasty welt from taking a succession of leg kicks. That must be slowing him down.
With the two fighters working up against the cage, Humphries just misses with a elbow thrown towards Link's brow.
Humphries tries for a takedown but Link manages to get underhooks.
Link drops down for a takedown but doesn't get it.
That's two minutes gone in the round.
Humphries is trying to pull guard but Link has him pressed against the cage.
Humphries makes some space for himself and lands an uppercut.
Link lands a body shot.
Humphries breaks the clinch.
Humphries sees a low kick coming and goes to check it, but it's actually a body kick and it thuds into his unprotected ribs.
Humphries shoots and misses
enabling Link to counter with a crisp jab.
Humphries is breathing heavily.
Link scores with a nice body kick.
We've seen a great period of action over the last minute or so - credit to both fighters for going all out!
Link shoots in with a takedown attempt and he has Humphries pinned against the cage. Humphries gets the underhooks and manages to circle away.
That's three minutes gone in the round.
Link throws a lazy body kick
and Humphries counters with a takedown into side control.
Link is moving his hips around well on the bottom and has managed to get back to half guard.
Link tries to roll over but Humphries keeps him under control.
Link is trying to stand.
Link has managed to escape just enough to sneak back to his feet but Humphries is on him like a limpet, forcing Link back against the cage.
Link breaks the clinch.
A bone on bone clash there as Humphries blocks the leg kick.
Humphries on the wrong end of a nice low kick. He's acting like it's no big deal but he doesn't want to take many more of those.
Humphries closes the distance and presses his opponent up against the cage.
This is a great period of action - very entertaining stuff!
Link's corner calls for him to break the clinch, which he does.
Link avoids the head kick by Humphries.
That's four minutes gone in the round.
Humphries tries to clinch but is not successful on this occasion.
Humphries throws a nice looking combination but Link bobs and weaves to avoid any damage.
Link throws a leg kick which misses Humphries's front leg but catches the back leg as Humphries tries to avoid it.
Steve Humphries seems to be the more aggressive standup fighter in this bout.
Link throws a wild combination but nothing lands.
Humphries checks the leg kick nicely there.
A really sloppy takedown attempt there from Humphries.
Boa Link is winning the standup battle so far.
Link scores with a takedown into Humphries's guard.
Link wants to control from the top but Humphries keeps moving.
And thats the end of the round the fighters go back to their corners.
Boa Link dominated that second round.
Both fighters have cut men working on them during the interval.
Well, the break between rounds is over. Let's get back to the scrappin! This is the final round!

Humphries wants to clinch
and Link counters with a leg kick.
Link fakes the leg kick and cracks Humphries in the body.
Boa Link is looking to throw some combinations by the looks of things.
Humphries tries to close the distance and clinch but Link swats him to one side with an open hand palm strike and circles away.
Link pulls out of a head kick attempt.
Link tries to clinch but is not successful on this occasion.
Humphries wants to clinch.
Link is looking to counter the offense by Humphries and move into the clinch.
We've had a slow start to the round here - hopefully the action picks up.
Link motions for Humphries to come forward. Link throws a leg kick but it misses it's target.
Link moves away from the strike by Humphries.
Link attempts a counter takedown but Humphries avoids it well and moves away.
That's one minute gone in the round.
Humphries blocks the body kick.
Link throws a feint and then finishes with a kick to the body.
Link scores with a push kick.
Humphries lunges in with swinging rights and lefts but Link circles away quickly and effectively.
Humphries takes a big intake of breath there - he's definitely tired.
Humphries takes a thudding leg kick, right into the meat of the thigh.
Link is looking to land body kicks.
Link will have to do better than that with his takedown attempts.
Humphries steps in looking to clinch after the strikes miss from Link.
Link throws a head kick but Humphries moves out of range.
A slapping leg kick lands for Link.
Link pushes forward with a 1-2 combination that forces Humphries back to the cage. Link follows up with a solid lead hook to the liver.
That's two minutes gone in the round.
Humphries uses good footwork to get in and out and land a nice right hand before Link has time to react.
Humphries looks to land a combination but Link avoids it well.
Link is really dominating this fight. Is there anything that Humphries can do to turn this around?
Link throws a decent looking leg kick but it doesn't land clean.
Humphries keeps the fight standing with a nice sprawl.
Humphries is definitely looking for the counter takedowns here.
Fantastic stuff here - a very entertaining period of action, which has drawn cheers from the crowd.
Humphries shoots in for a takedown but doesn't get it.
Link blocks a head kick by Humphries.
Link lands with a head kick! That's gotta hurt.
Link goes for a double leg but Humphries avoids the attempt and the two fighters end up clinched against the cage as Humphries continues to drive forward.
That's three failed takedown attempts in the round for Boa Link. That's going to take a lot out of him.
Humphries has a nice red mark on his side after a thudding body kick by Link.
That's three minutes gone in the round.
Humphries moves out of range of the body kick from Link.
Humphries looks to land a left hand but Link moved out of range nicely.
Link ducks under a wild hook from Humphries.
Link feinted with a counter takedown.
Link connects with a leg kick. Humphries looked like he was expecting something else and didn't defend it.
Link has his takedown stuffed
and Humphries counters with a nice low kick that buckles Link's knee momentarily.
Humphries defends well against a solid takedown attempt from Link.
Humphries has developed a nice purple lump on his ribcage, as a result of some heavy body kicks from Link.
Link throws a body kick but he was well out of range there.
And Humphries tries to counter it with a takedown but Link pushes his down on his head and steps out.
Link tries to score with a leg kick but it misses it's target.
Humphries takes the fight into the clinch.
That's four minutes gone in the round.
Humphries utilising his Muay Thai to score with a knee to the body.
Link managing to block the knees to the body from Humphries.
Humphries jumps guard but Link turns him against the cage and keeps the fight standing.
Humphries lands a shoulder strike that jolts his opponent's head backwards.
Link breaks from the clinch.
Humphries tries to clinch but Link moves out of range.
Humphries moves out of range as Link throws a body kick.
Humphries tries to clinch but Link moves out of range.
Steve Humphries has stepped it up - he knows he needs a finish here!
Boa Link is fighting for a decision here - he's started to take the cautious approach.
Link walks into a left hand.
And that's the end of the fight!
Boa Link showed his dominance in that final round.
Well I reckon that's a shut out for Link, winning every round. Will the judges agree? They are the ones who matter, even if they are often depressingly incompetent. Over to the ring announcer for the scorecards.
Ladies and gentlemen, after 3 rounds of action, we go to the scorecards for a decision.
Judge Daniel Franklin scores the fight 30:27
Judge Winston Alpacca scores the fight 30:27
Judge Peter Branson scores the fight 30:27
In favor of your winner, by unanimous decision... Boa Link!
Our winner, Boa Link, made sure he spent some time buttering up the crowd during his post fight interview, which will no doubt bring him a few more fans.
|
|
|
|
|
|
|
|
|
|
|
|
|
|
|
|
|
|
|
|
|
|
|
| S |
C
A |
G |
S |
C
B |
G |
|
S |
C |
G |
|
energy
A | B |
|
hype
A | B |
|
pop
A | B |
|
mgr
A | B |
|
FIGHT
RATING
48% |
|
|
|
|
|
|
