|
|
PBP Commentary |
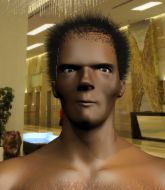
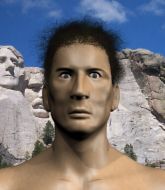
Coming up we have a light heavyweight MMA rules bout between Type Here (ranked 7211 p4p, 0 weight class) and Gilmar Mendes (ranked 7023 p4p, 0 weight class). Type Here has the better chin. Will he look to stand and bang today?
 |
|
 |
| 182 cm
26
205 lbs
3 - 2 - 0 |
|
190 cm
25
210 lbs
0 - 1 - 0 |
Decent wrestler
Brawler
Experienced |
|
BJJ White Belt
Excellent MT
Powerful |
|
| |
|
Ladies and gentlemen. This fight is 3 rounds, in the light heavyweight division.
Introducing the fighter to my left, fighting out of the red corner.
With a record of
3 - 2 - 0, fighting out of Sydney, Type Here!
And introducing the fighter to my right, fighting out of the blue corner.
With a record of
0 - 1 - 0, fighting out of Sydney, Gilmar Mendes!
The judges for this bout are Hugh Johnson, Topper Green and Francis DeMontford.

The bell rings for round one and we are underway!
Mendes lands with a kick to the temple. Here shrugs as if to say "is that all you've got?"
Here shoots in but Mendes avoids the takedown attempt easily.
Mendes plants his feet and lands a nice head kick!

Here clinches with his opponent.
Mendes keeps the fight in the clinch, despite Here's efforts to push away.

Here pulls guard.

Mendes stands up from Here's guard - Mendes perhaps looking for a knockout.
Mendes tries a switch kick but it misses it's target.
Here appears to be looking for a big counter.
We've had a slow start to the round here - hopefully the action picks up.
Here blocks a head kick by Mendes.
Mendes pulls out of a head kick attempt.
Mendes lunges in with swinging rights and lefts but Here circles away quickly and effectively.
Here chopped to the floor by a nice leg kick but he springs right back up before Mendes can pounce on him.
Here closes the distance and clinches.

That's one minute gone in the round.
Here prevents Mendes from breaking the clinch.

Here breaks the clinch.
Here blocks a head kick by Mendes.
Here shoots in and bounces Mendes off the cage to secure the takedown into guard.
The ref warns both fighters not to hold the cage as they work up against the meshing.

Here drops back looking for a leg! Mendes is in trouble here! The fighters roll with the hold and Mendes manages to kick Here off! Here jumps back into Mendes's guard.
Here engaging in some classic timewasting tactics.
Here slips nicely into half guard.

That's two minutes gone in the round.
Here stops Mendes from getting back to his feet.
The fighters are pressed up against the cage, both looking to find a bit of space to work.
Here is trying for a guillotine from the top but the pressure isn't in the right place so Mendes is just riding it out for now. Here eventually gives up the hold.
The referee calls for the fighters to work.
Mendes pushes Here off but Here dives into side control.
Here in side control, just content to control the action for now.
Here scores with a couple of short elbows.

That's three minutes gone in the round.
Mendes being controlled for a moment.
Here scores with punches from side control.
Here tries for an arm triangle. That looks pretty tight to me. Is this one over!?! Possibly, maybe, no Here has let go of the choke. Obviously it wasn't as tight as we thought!
Mendes really doesn't want to stay on the ground with Here. If he can't get it back to his feet, it's only a matter of time before he'll be tapping out.
The referee tells the fighters to keep busy.

That's four minutes gone in the round.
There's not a lot going on here and the crowd are letting the fighters know they're not willing to tolerate a lack of action.
Here working hard here to secure a kimura but he's not really in the right position for it.
Here working the body and head with strikes.
Here tries for a kimura. Not really close to a finish though.
Here trying to control the position but Mendes is working away.
The crowd thankful this round is nearly over.
And thats the end of the round the fighters go back to their corners.
Type Here dominated that round.
That's the end of the round. The referee orders the cornermen out of the cage so we can get back down to business.

Here blocks a head kick by Mendes.
Here shoots in for a takedown but Mendes shows good takedown defense there and keeps this one on the feet.
Type Here is looking to throw some combinations by the looks of things.
Mendes throws a head kick that connects with a bit of head and a bit of hand.
Here takes a head kick and shrugs it off.
Nice sprawl there from Mendes as Here shoots in.
Mendes is clearly looking to counter with head kicks.
Mendes blocks a head kick by Here.
Mendes now looks to counter with a shot at the body.
Here tries to score a power double leg takedown but Mendes sees that one coming and sprawls well. That will dishearten Here somewhat.
That's three failed takedown attempts in the round for Type Here. That's going to take a lot out of him.
Mendes throws a head kick that Here semi-blocks.
We've had a slow start to the round here - hopefully the action picks up.
Mendes misses with a head kick.
Here swings away with a leg kick that misses.
Mendes throws a shot to the body.
That's one minute gone in the round.
Here misses with a two punch combination.
Here avoids the head kick by Mendes.
Here appears to be looking for a counter takedown.
Mendes misses with a head kick.
Mendes is breathing heavily.
Here misses with a takedown attempt - Mendes sprawls well and throws a nice strike on the way out which just misses.
Here closes the distance and clinches.
Here pulls guard.
Here controlling Mendes's posture.
Here looking to control.
Mendes won't allow Here to get back to his feet.
That's two minutes gone in the round.
There's a bit of a scramble here and now Here is on top in guard.

Here is just sitting in guard, looking to avoid any submissions.
Mendes wants to stand and escape but Here is having none of it.
Here is just sitting in guard, looking to avoid any submissions.
Mendes wants to get back to his feet but Here passes into half guard.
Here keeping composed on the top, looking to control the action.
That's three minutes gone in the round.
Mendes tries to kick Here off in order to stand up. Here Avoids the leg push though and dives into side control.
Here working hard here to secure a kimura but he's not really in the right position for it.
Here wants to work for a kimura but he's foiled early by Mendes, who protects the arm well.
Here controls the position.
That's four minutes gone in the round.
Here seems to have a rather negative gameplan on the ground. He seems keen to just score the takedown and hold down Mendes for as long as he can get away with.
Here advances to mount.
Here with some aggressive grappling here. He's looking for submissions here, rather than waiting for the opportunity to counter.
The crowd thankful this round is nearly over.
Here controlling the pace for now.
And thats the end of the round the fighters go back to their corners.
That was a close second round but I would say that Type Here will probably get the nod.
The corners get their ten second warning. Both fighters stand from their stools and stare eachother down, ready to get back to the action. So, we enter the final round. Let's see if either fighter can bring us a finish, or whether we're going to the judges scorecards.

A slapping body kick lands there for Mendes.
Mendes pulls out of a head kick attempt.
Mendes throws a sloppy head kick and Here moves out of range easily.
Here tries to counter by clinching up but Mendes breaks away and moves out of range.
Mendes fails to land with the punch combination there - jab, cross, hook, miss, miss, miss.
Here has taken the fight to the clinch.
Here with the Thai clinch. He's looking to land a big knee but he's not managed it this time.
Here has Mendes pressed against the cage, preventing Mendes from circling away and getting back to striking at range.
Mendes misses the knee to the body. Nice hip positioning from Here.
We've had a slow start to the round here - hopefully the action picks up.
Here breaks from the clinch.
Gilmar Mendes seems to be the more aggressive standup fighter in this bout.
Mendes throws a head kick that misses.
Here attempts a counter takedown but Mendes avoids it well and moves away.
Here looks for a takedown here. Will he get it? Mendes is fending him off so far but Here persists. Nope, Mendes circles away and we're back to standing.
Mendes is loading up here, looking for a big counter of his own.
Mendes lands a straight punch to the body, keeping Here at a distance.
Mendes takes a big intake of breath there - he's definitely tired.
That's one minute gone in the round.
Here bobs and weaves into range and then changes levels and scores with a nice takedown into side control.
Mendes is looking to get back to his feet here but Here is keeping cool and he's managed to take Mendes's back.
Here is riding his opponent, not letting Mendes buck him off.
Mendes is trying to stand back up.
Here lands a punch that was close to the back of the head but the ref thinks it's OK.
Here lands with a big left hand that may well have hurt his opponent. Can Mendes hold on?!
Here is looking for the choke from the back position but Mendes is controlling his hands well.
That's two minutes gone in the round.
So, who will make the next big move? In this position it could be crucial.
Here looking for the choke but no joy.
We've seen a great period of action over the last minute or so - credit to both fighters for going all out!
Here has the hooks sunk in and you can see the will to fight slowly draining out of Mendes's body.
Here lands a punch to the side of the head from the back.
That's three minutes gone in the round.
Mendes is staying cool under pressure, defending well against the rear naked choke attempt from his opponent.
Here working for a choke but Mendes is defending well.
Mendes covers up after that shot from Here.
Mendes is trying to get back to his feet but he's not managed it yet.
Here just keeping the dominant position. He can't wait too long though, otherwise the referee will stand them back up.
That's four minutes gone in the round.
Mendes wants to get back to his feet.
A bit of a pause in the action here. Here controlling the positon.
Here is looking to finish with some ground and pound!
Here controlling the position well here. Mendes rolled but Here kept the hooks locked in and stayed in the dominant position.
The crowd thankful this round is nearly over.
Here is working for a rear naked choke. Mendes is not defending it well and Here has tightened it up quickly! This could be all over! Mendes refuses to tap and goes to sleep, forcing the referee to intervene. A little trickle of blood came out of Mendes's nose as his head slumped to the floor. That is naaaasty!
Ladies and gentlemen, after 4:58 of round 3, we have a winner by way of Submission (RNC). Type Here!
|
|
|
|
|
|
|
|
|
|
|
|
|
|
|
|
|
|
|
|
|
|
|
| S |
C
A |
G |
S |
C
B |
G |
|
S |
C |
G |
|
energy
A | B |
|
hype
A | B |
|
pop
A | B |
|
mgr
A | B |
|
FIGHT
RATING
46% |
|
|
|
|
|
|
