|
|
PBP Commentary |
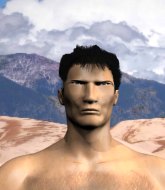
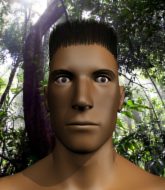
Coming up we have a heavyweight MMA rules bout between Gunji Koizumi (ranked 18088 p4p, 774 weight class) and Simon Phoenix (ranked 17523 p4p, 760 weight class). Both fighter's entrance songs getting the crowd jumping here.
 |
|
 |
| 176 cm
36
193 lbs
12 - 9 - 0 |
|
195 cm
30
275 lbs
7 - 16 - 0 |
Good wrestling
Excellent boxer
Cardio machine |
|
Good wrestler
World class MT
Good gas tank |
|
| |
|
Ladies and gentlemen. This fight is 3 rounds, in the heavyweight division.
Introducing the fighter to my left, fighting out of the red corner.
With a record of
12 - 9 - 0, fighting out of New York, Gunji Koizumi!
And introducing the fighter to my right, fighting out of the blue corner.
With a record of
7 - 16 - 0, fighting out of New York, Simon Phoenix!
The judges for this bout are Shigeki Fujiwara, Yuuki Gou and Shigeki Sano.

The bell rings for round one and we are underway!
Phoenix is looking to take this fight into the clinch.
Wow, both these guys are really going for it!

Koizumi gets tackled into the cage by Phoenix. Phoenix maintains the clinch.
Koizumi just leaning against Phoenix, taking a breather.
Koizumi taking a break, stalling in the clinch.
Phoenix throws a punch but it's blocked by Koizumi.
Koizumi blocking some punches.
Phoenix misses with the head strike.
Phoenix is pressed up against the cage. Koizumi has hold of a leg and is looking to drag Phoenix down to the mat. Phoenix avoids the attempt though and has circled away. We're back to striking at a distance.
Phoenix clinches up with Koizumi and pushes him back against the cage.
The pace really dropping off here, momentarily.
Phoenix tries a shoulder strike but it doesn't do any damage.
We've had a slow start to the round here - hopefully the action picks up.
Koizumi drops down looking for an ankle pick but Phoenix pulls his leg out and moves away.

Phoenix gets caught napping as Koizumi dives in and scores a takedown. Phoenix manages to retain guard.
Phoenix striking off his back but it's not causing Koizumi any problems.
Phoenix throwing strikes off his back to little effect.
Phoenix has a butterfly guard looking to sweep but Koizumi has passed into side control.

That's one minute gone in the round.
Phoenix tries to strike but it doesn't land.
Koizumi working the head and body with strikes.
Phoenix tries to bench press Koizumi off him but Koizumi keeps the position.

Koizumi wants to work for a kimura but he's foiled early by Phoenix, who protects the arm well.
Phoenix takes a nasty elbow to the side of the head.
Koizumi avoids the strikes from the bottom by Phoenix.
Phoenix has the superior BJJ but he's also working some ground strikes into his gameplan.
Koizumi wants to control but Phoenix is keeping him busy.
Phoenix is letting Koizumi control him for a moment.
Koizumi trying to control the position but Phoenix is working away.
Koizumi landing with strikes to the head and body from side control.
Phoenix is looking to reverse the position.
The ref warns both fighters not to hold the cage as they work up against the meshing.
Koizumi wants to lay and pray for a moment but Phoenix keeps working.
Phoenix misses with a strike from the bottom.

That's two minutes gone in the round.
Phoenix throws an elbow to the body but it doesn't land.
Phoenix is trying to improve his position.
Koizumi is trying to land an Americana. He has the arm isolated but Phoenix is keeping cool and he's avoided the danger for now.
Phoenix throws a couple of punches but he's in a bad position and they don't land.
Phoenix throws a couple of strikes from the bottom.
Phoenix misses with an elbow from the bottom.
Phoenix misses with a strike from the bottom.
The fighters are pressed up against the cage, both looking to find a bit of space to work.
Phoenix is looking for a sweep.
Koizumi tries for a kimura. Not really close to a finish though.
Koizumi is looking to take a break and control but Phoenix is keeping him honest, looking to work from the bottom.
Phoenix is positioning himself to get back to half guard.

That's three minutes gone in the round.
Koizumi is looking to take a break and control but Phoenix is keeping him honest, looking to work from the bottom.
Koizumi is trying to land an Americana. He has the arm isolated but Phoenix is keeping cool and he's avoided the danger for now.
Koizumi blocks the strikes from Phoenix.
Phoenix is trying to strike from the bottom but Koizumi has passed into full mount.
Koizumi pushing the pace here, looking to move to his opponents back and work for a finish.
Phoenix is squirming around, avoiding Koizumi's attempts to control the action.
Phoenix sneaks a leg back under and regains half guard and is working straight away to try and get back to guard. He hasn't managed just yet though.
Phoenix landing a few short strikes.
Koizumi is trying to control. Phoenix wants to improve his position but can't escape this time.

That's four minutes gone in the round.
Phoenix gets full guard.
Phoenix trying to strike from the bottom but really, it's not the best position to be doing that from!
Phoenix looking to hit a scissor sweep but Koizumi is one step ahead there.
Phoenix throwing some rather feeble looking strikes off his back.
Phoenix throws some sloppy strikes off his back.
Phoenix throws a couple of weedy looking strikes off his back.
Phoenix throwing strikes off his back to little effect.
Phoenix trying to strike off his back.
Phoenix doesn't do any damage with a couple of strikes from the bottom.
Koizumi trying to control the position from guard on top but Phoenix is wriggling around, looking for whatever he can.
Phoenix striking off his back but it's not causing Koizumi any problems.
The crowd thankful this round is nearly over.
Koizumi scoring with some ground and pound.
Phoenix trying to punch from his back but it's not doing any damage.
Koizumi lands a nice shot whilst sitting in his opponent's guard.
Phoenix has momentary wrist control but Koizumi slips an elbow through the middle.
Phoenix throwing some rather feeble looking strikes off his back.
And thats the end of the round the fighters go back to their corners.
Gunji Koizumi dominated that round.
The corners get their ten second warning. Both fighters stand from their stools and stare eachother down, ready to get back to the action.

Phoenix moves out of range of the body kick.
Phoenix moves into the clinch.
Phoenix throws a punch but it's blocked by Koizumi.
Koizumi fails to pull the fight into his guard.
Phoenix throws a blind hook that connects with the side of Koizumis head.
Koizumi blocks an uppercut.
Phoenix gets underhooks to prevent Koizumi's takedown attempt.
Phoenix is fighting off a takedown attempt but Koizumi is just too persistent for him and manages to trip Phoenix to the mat. Phoenix regains guard as soon as the fighters hit the mat.
Koizumi might be looking to lock onto one of his opponent's long limbs for a submission, whilst we're on the ground.
Phoenix lands a decent shot there.
Koizumi trying to control but Phoenix is working from the bottom.
Koizumi wants to pass the guard but Phoenix is keeping the position.
Gunji Koizumi overall seems to be getting the better of the ground position in the fight so far.
Koizumi is working hard here to advance position.
We've had a slow start to the round here - hopefully the action picks up.
Phoenix striking off his back, scoring a few points.
Phoenix trying to punch from his back but it's not doing any damage.
Phoenix trying to strike off his back.
Koizumi landing with the ground and pound.
That's one minute gone in the round.
Koizumi pressing down on his opponent's thigh, looking to pass guard. Phoenix is keeping the position for now.
Phoenix tries to land a sweep but no joy.
Phoenix throws a couple of heel strikes.
Phoenix keeping moving, preventing Koizumi from controlling successfully.
Phoenix tries to strike from the bottom.
Phoenix trying to punch from his back but it's not doing any damage.
Phoenix striking off his back but it's not causing Koizumi any problems.
Phoenix trying to strike off his back.
Phoenix throws a couple of weedy looking strikes off his back.
Phoenix will have to put a bit more behind his punches if he's going to do any damage from this position.

The referee decides to stand the fighters back up.
Phoenix gets to the clinch - let's see what his plan is here.
Koizumi blocks a punch to the side of the head.
Koizumi pulls guard.
Phoenix content to strike from guard, landing some decent shots.
Phoenix postures up to throw the ground and pound strikes but they don't connect.
That's two minutes gone in the round.
Koizumi is trying to control the position from the bottom.
Phoenix working from the guard for now, landing some ground and pound.
Phoenix working some strikes from top position.
Phoenix avoids a guillotine attempt easily.
Koizumi is working the butterfly guard. He manages to land a nice scissor sweep and is now in half guard on the top. Nice move.

Phoenix misses with some strikes from the bottom.
Koizumi blocks the strikes from Phoenix.
Phoenix is working for an escape here. He's hooked one of Koizumi's legs and he's managed to sneak out and take Koizumi's back!
Fantastic stuff here - a very entertaining period of action, which has drawn cheers from the crowd.
Phoenix scores with punches from the back.
Phoenix is scoring with a succession of shots from the back. Koizumi is covering up - he's had enough and the ref steps in to end the fight!
Ladies and gentlemen, after 3:56 of round 2, we have a winner by way of TKO (Strikes). Simon Phoenix!
Simon Phoenix made sure to mention his sponsor, Sully's Bar & Grill in his post fight interview.
|
|
|
|
|
|
|
|
|
|
|
|
|
|
|
|
|
|
|
|
|
|
|
| S |
C
A |
G |
S |
C
B |
G |
|
S |
C |
G |
|
energy
A | B |
|
hype
A | B |
|
pop
A | B |
|
mgr
A | B |
|
FIGHT
RATING
41% |
|
|
|
|
|
|
