|
|
PBP Commentary |
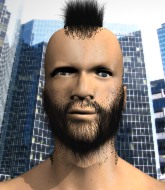
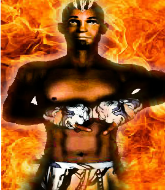
Coming up we have a middleweight MMA rules bout between Joey Hatton (ranked 1957 p4p, 252 weight class) and Kalmin Maltusuri (ranked 1646 p4p, 223 weight class). Kalmin Maltusuri is staring across the cage at his opponent, tweaking his nipples.
 |
|
 |
| 190 cm
26
190 lbs
7 - 1 - 0 |
|
186 cm
26
195 lbs
4 - 1 - 0 |
Good takedowns
Brawler
Experienced |
|
BJJ White Belt
Excellent MT
Heavy handed |
|
| |
|
Ladies and gentlemen. This fight is 3 rounds, in the middleweight division.
Introducing the fighter to my left, fighting out of the red corner.
With a record of
7 - 1 - 0, fighting out of New York, Joey Hatton!
And introducing the fighter to my right, fighting out of the blue corner.
With a record of
4 - 1 - 0, fighting out of New York, Kalmin Maltusuri!
The judges for this bout are Steve Montenegro, Bruno Lombardi and Dean Styles.

The bell rings for round one and we are underway!
Hatton takes one on the chin but keeps coming.
Maltusuri connects with a single shot there.
Maltusuri connects with the punch.
Jab from Hatton.

It looks like Kalmin Maltusuri has been cut.
Hatton takes a jab right on the nose. That must have hurt but he shrugs his shoulders and looks to return the favor.
Hatton shoots in looking for a takedown but Maltusuri manages to keep the fight standing, pushing Hatton's face into the canvas for good measure before circling away.
Maltusuri let fly with a counter punch to the body but it didn't land.
Hatton shoots in and drives through. Maltusuri sprawls well.
Hatton tries to land with a swinging hook to the body but Maltusuri was well out of range. Poor timing from Hatton.
A looping hook to the body misses from Hatton. Maltusuri does a little dance to reset his feet.
Hatton will have to do better than that with his takedown attempts.
That's three failed takedown attempts in the round for Joey Hatton. That's going to take a lot out of him.
Maltusuri fakes a jab and then connects with a hook.
The crowd cheering loudly, showing their appreciation for the quality fight we're seeing here.
Maltusuri keeps the fight standing with a nice sprawl.
Maltusuri throws an uppercut from half a mile away. Hatton sees it coming and avoids it easily.
Maltusuri looks more muscular than last time we saw him. He must have been on the weights.
The crowd cheers as Maltusuri lands an impressive looking overhand right. Hatton doesn't seem phased though.
Hatton shoots in looking for a double leg takedown. Maltusuri defends it nicely.

That's one minute gone in the round.
Hatton goes for a double leg but Maltusuri avoids the attempt and the two fighters end up clinched against the cage as Maltusuri continues to drive forward.
Hatton takes one on the chin but seems OK.
A shot to the liver by Maltusuri. Beautiful body shot.
Hatton walks into a straight right hand from Maltusuri.
Maltusuri pushing out the jab but it's not landing.
Maltusuri moving in and out of range nicely, whilst landing the scoring shot.
Maltusuri with a nice cross.

Hatton is rocked!
Maltusuri misses with an uppercut.
Oh Hatton is still all over the place! His legs are completely gone! Will he be able to recover?!!
Maltusuri takes a swing at Hatton's ribcage but misses.
Hatton seems to have got his legs back now.

Maltusuri lands a big uppercut and Hatton crumbles to the floor! The ref thinks about stopping the fight but Hatton looks OK. Maltusuri waves Hatton back to his feet!
This has been an exciting period of action!

Hatton shoots in with a lovely double leg takedown. Maltusuri manages to land in full guard to minimise the damage.
Maltusuri keeping full guard, as Hatton tries to pass.

That's two minutes gone in the round.
Maltusuri keeping moving, preventing Hatton from controlling successfully.
Maltusuri keeping full guard, as Hatton tries to pass.
Hatton wants to control from the top but Maltusuri keeps moving.
Maltusuri really doesn't want to stay on the ground with Hatton. If he can't get it back to his feet, it's only a matter of time before he'll be tapping out.
Hatton controlling from the top position.
Hatton trying to control but Maltusuri is working from the bottom.
If this pace continues, the referee will definitely step in and force a standup.

That's three minutes gone in the round.

The referee has motioned to the fighters to stand back up. He just wasn't happy with the level of activity.
Hatton tries to shoot in for a takedown. He's got hold of a leg but Maltusuri swivels and escapes.
Maltusuri looks like he wants to counter punch here.
Kalmin Maltusuri is looking to keep the fight on the feet at all costs.
A big left from Hatton misses.
Hatton slips under a jab.
Maltusuri ducks down and throws a hook to the body.
Hatton shoots in from a long way out. He's driving through with the takedown attempt and he eventually gets it, landing in Maltusuri's guard.

Maltusuri is edging up against the cage. He's using the cage to get back to his feet. Nice work there - the fighters are clinched.
I was talking to Hatton's coach per-fight and he was telling me that they'd been working on the clinch in the runup to this fight.
Maltusuri is leaning against Hatton and scores with a nice uppercut to the body.
Hatton is breathing heavily.
Maltusuri throws a hook to the body. More of an arm punch but it's all scoring with the judges.

That's four minutes gone in the round.
The fighters are pressed against the cage, as the pace of the fight slows.
Stalling in the clinch from Maltusuri.
The fans in attendance giving it up for the two fighters, who have really let it all hang out in the last minute or so!
Maltusuri makes some space for himself and lands an uppercut.
Maltusuri lands punches inside but they're not really causing much damage.
Maltusuri prevents a takedown attempt there.

Maltusuri breaks the clinch.
Maltusuri scores with a nice head shot.
Hatton lands a right hook to the body.
Maltusuri slips in close and lands a nice hook before moving back out of range.
Maltusuri scores with a body shot.
Maltusuri is landing a lot of head punches in this opening round! Hatton had better start moving his head a bit unless he wants his face to turn into pâté.
Hatton gets his takedown attempt stuffed easily
and Maltusuri counters with a lovely shot to the body.
And thats the end of the round the fighters go back to their corners.
Kalmin Maltusuri dominated that round.
The cut man is working on Kalmin Maltusuri's cut.
That's the end of the interval. I'm sure that seemed a lot quicker than a minute for our two fighters! Back to the action.

Maltusuri lands a nice hook to Hatton's body. Hatton takes it in his stride and looks to land his own strikes.
Hatton swings and misses with a hook to the body.
Hatton closes the distance and scores a nice trip takedown into half guard. Maltusuri did well to prevent Hatton getting side control.
Maltusuri tries to kick Hatton off in order to stand up. Hatton Avoids the leg push though and dives into side control.
Hatton trying to control the position but Maltusuri is working away.

Hatton working hard here to secure a kimura but he's not really in the right position for it.
Maltusuri has been the more effective fighter overall so far.
Hatton working hard here to secure a kimura but he's not really in the right position for it.
We've had a slow start to the round here - hopefully the action picks up.
Hatton wants to lay and pray for a moment but Maltusuri keeps working.
That's one minute gone in the round.
The fighters are pressed up against the cage, both looking to find a bit of space to work.
Hatton is looking to finish here, going for an Americana. Maltusuri knows the correct defense though, so he's OK.
Hatton is looking to take a break and control but Maltusuri is keeping him honest, looking to work from the bottom.
That's two minutes gone in the round.
There's not a lot going on here and the crowd are letting the fighters know they're not willing to tolerate a lack of action.
Hatton looking for an arm triangle but it's way too loose to do anything.
Hatton trying to control the position but Maltusuri is working away.
Hatton looking for an arm triangle but it's way too loose to do anything.
That's three minutes gone in the round.
Hatton tries for an arm triangle. That looks pretty tight to me. Is this one over!?! Possibly, maybe, no Hatton has let go of the choke. Obviously it wasn't as tight as we thought!
Hatton is trying to get an arm triangle but Maltusuri is defending well.
Joey Hatton overall seems to be getting the better of the ground position in the fight so far.
Hatton looking for an arm triangle but it's way too loose to do anything.
Maltusuri tries to improve position but can't.
That's four minutes gone in the round.
The crowd are getting on the fighters' backs, as the pace has dropped off in the last minute or so.
Maltusuri is not content to let Hatton control the position.
Hatton is looking for a kimura. He might have it! No, Maltusuri has escaped the position, nice work there.
We get told so often about how wrestlers don't like to be on their backs. Let's see if Maltusuri can do anything to dispel that myth.
Hatton trying to control the position but Maltusuri is working away.
Boooooooooooooooooooo!!! God, this has been a terrible round. Come on you two, sort yourselves out!
Hatton working hard here to secure a kimura but he's not really in the right position for it.
And thats the end of the round the fighters go back to their corners.
Joey Hatton dominated that second round.
The cut man is working on Kalmin Maltusuri's cut.
That's time! Back to the action! And we move into the final round!

Hatton takes a shot to the eye socket. That's gotta hurt.
Maltusuri lands with a right hand.
Hatton takes a shot right to the liver - Bas would have been proud of that punch.
Nice jab there from Maltusuri.
A decent looking cross lands there for Maltusuri.
Hatton shoots in and gets a takedown into half guard. Hatton showed some decent athleticism there.
Maltusuri moves his hips nicely and gets into full guard.
We've seen a great period of action over the last minute or so - credit to both fighters for going all out!
Hatton being controlled here momentarily.
The ref warns both fighters not to hold the cage as they work up against the meshing.
That's one minute gone in the round.
Hatton pressing down on his opponent's thigh, looking to pass guard. Maltusuri is keeping the position for now.
Hatton wants to control from the top but Maltusuri keeps moving.
Hatton is fighting to break Maltusuri's control of his arms but Maltusuri is doing a good job of controlling the position at the moment.
Hatton trying to control the position from guard on top but Maltusuri is wriggling around, looking for whatever he can.
Hatton pressing down on his opponent's thigh, looking to pass guard. Maltusuri is keeping the position for now.
That's two minutes gone in the round.
My god... these two guys really need to pick up the pace or everyone will leave to go get a beer.
Hatton is working hard here to advance position.
The referee has decided to stand the fighters back up, so we'll restart on the feet.
Hatton takes a body punch but keeps moving.
Hatton fails with the takedown.
Maltusuri throws a monster uppercut resembling something out of street fighter but it doesn't land.
Maltusuri works his jab well there, keeping his opponent at a distance.
Hatton fails miserably with a takedown attempt.
Hatton looks frustrated there after his takedown attempt is stuffed easily.
That's three failed takedown attempts in the round for Joey Hatton. That's going to take a lot out of him.
Both fighters are breathing heavily.
Hatton closes the distance and takes a jab right on the nose as he does so.
That's three minutes gone in the round.
Hatton's hands are dropping dangerously low here and Maltusuri connects clean with a right hook that sends him down to one knee! Hatton scrambles back to his feet.
Hatton scores with a jab to the jaw.
Hatton scores with a nice takedown into half guard. Let's see what he's got on the ground.
Hatton is looking to advance position but Maltusuri won't allow it.
Hatton trying to control the action but Maltusuri is working from the bottom.
Hatton is really struggling to control Maltusuri but he's trying to hold on to the position.
Hatton in half guard on the top. He's looking for a kimura... He's got it locked and he's managed to free his trapped foot. Maltusuri tries to escape but it's on too tight and he has to tap! Great BJJ skills there from Hatton!
Ladies and gentlemen, after 4:57 of round 3, we have a winner by way of Submission (Kimura). Joey Hatton!
Joey Hatton gave a mention to Revenge Clothing in his post fight interview. That will please them (and hopefully generate some sales).
|
|
|
|
|
|
|
|
|
|
|
|
|
|
|
|
|
|
|
|
|
|
|
| S |
C
A |
G |
S |
C
B |
G |
|
S |
C |
G |
|
energy
A | B |
|
hype
A | B |
|
pop
A | B |
|
mgr
A | B |
|
FIGHT
RATING
58% |
|
|
|
|
|
|
