|
|
PBP Commentary |
Coming up we have a heavyweight MMA rules bout between Adan Mendoza (ranked 25183 p4p, 0 weight class) and Ross Hawkins (ranked 5705 p4p, 0 weight class). Both fighters will be looking to make this an exciting fight for the fans, I'm sure!
 |
|
 |
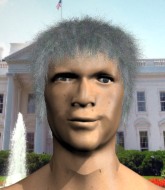
| 183 cm
18
278 lbs
1 - 2 - 0 |
|
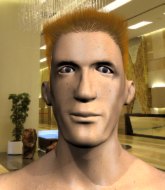
188 cm
18
280 lbs
0 - 0 - 0 |
BJJ Blue Belt
Counter fighter
Cuts easily |
|
BJJ Blue Belt
Brawler
Tends to cut |
|
| |
|
Ladies and gentlemen. This fight is 3 rounds, in the heavyweight division.
Introducing the fighter to my left, fighting out of the red corner.
With a record of
1 - 2 - 0, fighting out of Sydney, Adan Mendoza!
And introducing the fighter to my right, fighting out of the blue corner.
With a record of
0 - 0 - 0, fighting out of Sydney, Ross Hawkins!
The judges for this bout are Winston Howard, John Mangel and Chris Dean.

The bell rings for round one and we are underway!
Nice takedown defense from Hawkins. No joy for Mendoza on that attempt.
Hawkins pushes forward with a 1-2 combination that forces Mendoza back to the cage. Hawkins follows up with a solid lead hook to the liver.
Hawkins shoots in looking for a takedown but Mendoza manages to keep the fight standing, pushing Hawkins's face into the canvas for good measure before circling away.
Mendoza seem to be loading up, looking for a big counter.

Hawkins clinches up with Mendoza and pushes him back against the cage.
Mendoza is trying to wear down his opponent with knees to the body.
Hawkins tries to break the clinch but Mendoza is controlling the position.
Hawkins tries for a takedown. No joy.
We've had a slow start to the round here - hopefully the action picks up.
Hawkins is trying to pull guard but Mendoza has him pressed against the cage.
Adan Mendoza has stuffed three takedown attempts in the round now. That's going to take a lot out of Ross Hawkins.

Mendoza drags the fight down to the ground.
Hawkins tries to free his leg and advance position but Mendoza is retaining full guard.

Hawkins is holding a leg here, probably looking for an ankle lock - he drops back and goes for it! Mendoza is in trouble! Is it all over??? No! Mendoza has escaped and now he's on top!


That's one minute gone in the round.
Hawkins is controlling Mendoza's posture.
Mendoza in full guard, throwing the ground and pound. No damage this time.
Mendoza being controlled here momentarily.
Hawkins is working from a closed guard but he's struggling to control his opponent.
Hawkins wants to get back to his feet but Mendoza is in a dominant position and won't allow it.
Mendoza wants to control from the top but Hawkins keeps moving.

Mendoza has gone for a leg lock! Hawkins slips out almost immediately though and dives into Mendoza's guard.


That's two minutes gone in the round.
The crowd are getting on the fighters' backs, as the pace has dropped off in the last minute or so.
Hawkins content to stall in guard here.
Hawkins trying to control the position from guard on top but Mendoza is wriggling around, looking for whatever he can.
Hawkins is looking to advance position but Mendoza has hit a scissor sweep - now he's on top in mount!
Mendoza avoids the attempt from Hawkins to control.
Hawkins can't escape the position.

That's three minutes gone in the round.
Mendoza punching from mount but Hawkins doing a good job of avoiding damage.
Mendoza looking to control but Hawkins is working nicely, looking to advance position himself.
The fighters are starting to perspire pretty heavily.
Mendoza scoring with strikes but Hawkins is staying in there.
Mendoza with good strikes from the mount here!
Mendoza controlling the pace for now.
Hawkins really trying hard to get back to half guard here.
The ref warns both fighters not to hold the cage as they work up against the meshing.
Mendoza working for a guillotine from mount but Hawkins is in no mood to give up.
Mendoza controlling the position easily from mount.
Mendoza seems to have a rather negative gameplan on the ground. He seems keen to just score the takedown and hold down Hawkins for as long as he can get away with.

That's four minutes gone in the round.
Hawkins tries to hold on but Mendoza postures up.
Mendoza goes for an armbar but Hawkins turns quickly into his guard - lovely anticipation from Hawkins.
Mendoza escapes his hips to the side and looks to be working for an armbar. Hawkins gives him a little smile and shakes his head. No chance.
Mendoza really is a fat lump.
The crowd thankful this round is nearly over.
Hawkins wants to stand but Mendoza is controlling his posture from full guard.
And thats the end of the round the fighters go back to their corners.
Adan Mendoza dominated that round.
The fighters' corners scream their final instructions, as the referee calls time. Here we go, back to the action!

Hawkins tries to shoot in for a takedown. He's got hold of a leg but Mendoza swivels and escapes.
Mendoza half committed to a counter leg kick.
Hawkins fails with a takedown attempt.
Mendoza slaps away a takedown attempt from Hawkins, before circling back to the center of the mat.
Mendoza thinks about countering with a body kick.
Adan Mendoza has stuffed three takedown attempts in the round now. That's going to take a lot out of Ross Hawkins.
Hawkins pushes Mendoza up against the cage in a clinch.
We've had a slow start to the round here - hopefully the action picks up.
Hawkins throws an elbow but it misses.
Mendoza fails to pull the fight into his guard.
That's one minute gone in the round.

Hawkins drags the fight down to the ground.
Mendoza pushing down on Hawkins's thigh, trying to pass to half guard. He's managed it... Nice work.
Mendoza is pressing down on Hawkins's thigh, looking to free his foot. Hawkins is holding on for now.
Hawkins is concentrating on defense, preventing Mendoza from advancing position.
Hawkins wants to get back to full guard.
Hawkins wants to control but Mendoza is keeping busy and won't allow it.
Mendoza takes a deep breath and rests his weight momentarily on top of his opponent, to control the position.
Mendoza looking for a kimura but he'll have to free his other leg if he wants to finish that. Perhaps he's just using it as a distraction technique.
Mendoza is looking for a kimura. It's pretty deep but Hawkins still has the half guard so he's probably OK. Oh, Hawkins has exploded into a beautiful escape there and after a quick scramble, he's ended up in side control on top! Nice work!
That's two minutes gone in the round.
Mendoza takes an elbow right on the bridge of the nose and winces in pain.
The fighters are pressed up against the cage, both looking to find a bit of space to work.
You can see the frustration on Mendoza's face, being in this tough position on the bottom.
Mendoza manages to work his way to half guard, despite Hawkins's best efforts.
That's three minutes gone in the round.
Hawkins wants to free his trapped foot but Mendoza is holding on for dear life with his legs.
Hawkins is looking for a kimura here.
Hawkins looks over to his corner - he wants some instructions but his corner are not responding.
Hawkins thows a wild elbow that connects with the canvas.
That's four minutes gone in the round.
The crowd are getting on the fighters' backs, as the pace has dropped off in the last minute or so.
Hawkins content to sit in half guard and control for a moment.
Mendoza is looking to control Hawkins's leg but it's slowly edging free. Can Mendoza avoid being mounted?
Hawkins is looking for an arm triangle, whilst trying to pass to side control. Mendoza doesn't seem that keen to cooperate though. No luck this time Hawkins.
Hawkins performing his best blanket impression for a moment.
We must be close to a standup if these guys don't pick up the pace.
And thats the end of the round the fighters go back to their corners.
Ross Hawkins showed his class in that round. I'd imagine he'll take it on all the scorecards.
That's time! Mendoza's corner gives him a slap on the ass as he gets ready to fight. This is the final round!

Hawkins fails with a rather predictable takedown attempt.
Mendoza quickly followed up with a counter body kick but doesn't connect.
Mendoza will have to do better than that with his takedown attempts.
Mendoza fails with an attempt to clinch.
Hawkins closes the distance and clinches up with Mendoza, looking for a takedown. Hawkins pushes Mendoza against the cage but Mendoza circles to the side and manages to break the clinch.
Mendoza was looking to counter that move with a punch but didn't quite pull the trigger.
Hawkins tries to clinch up against the cage, rushing in to close the distance. Mendoza manages to break the clinch and circles back to the middle of the mat.
Mendoza is trying to close the distance and clinch up, after that failed offence from Hawkins.
We've had a slow start to the round here - hopefully the action picks up.
Mendoza looks frustrated there after his takedown attempt is stuffed easily.
A head kick misses from Hawkins.
That's one minute gone in the round.
Hawkins shoots in looking for a takedown. Mendoza tries to sprawl out of it but Hawkins keeps driving through. The fighters are pinned against the cage. Mendoza manages to get underhooks and after a bit of a struggle, circles away and we're back to standing.
And Mendoza counters with a quick kick to the body but Hawkins blocks it.
Adan Mendoza has stuffed three takedown attempts in the round now. That's going to take a lot out of Ross Hawkins.
Some bone on bone action there as Mendoza checks a low kick. Luckily it wasn't a particularly hard one.
Mendoza appears to be looking for a counter punch to the body.
Hawkins misses with a wild combination.
Mendoza feinted with a counter takedown.
Mendoza tries to clinch up against the cage, rushing in to close the distance. Hawkins manages to break the clinch and circles back to the middle of the mat.
Hawkins keeps the fight on the outside.
As Mendoza backs off Hawkins throws a huge counter combo but Mendoza manages to avoid it all.
Mendoza tries to shoot in for a takedown. He's got hold of a leg but Hawkins swivels and escapes.
Adan Mendoza is looking to throw some combinations by the looks of things.
That's two minutes gone in the round.
Mendoza avoids the clinch attempt nicely.
Hawkins tries to close the distance and clinch but Mendoza swats him to one side with an open hand palm strike and circles away.
Hawkins looks for a takedown but Mendoza sprawls well.
Mendoza went nuts there looking for a big combo counter but none of the flurry connected.
Hawkins takes a big intake of breath there - he's definitely tired.
Hawkins tries to close the distance and clinch up against the cage but Mendoza paws at him with a jab and circles away.
Hawkins misses with a body shot. Nice footwork from Mendoza.
Hawkins shoots in looking for a double leg takedown. Mendoza defends it nicely.
That's three minutes gone in the round.
Hawkins shoots and misses
and Mendoza counters with a single leg into guard. Hawkins didn't expect that.
Hawkins not looking particularly offensive just at the moment.

Mendoza decides he's had enough of playing guard and decides to stand. Come on Hawkins, up you get!

Mendoza clinches with his opponent.
Mendoza has Hawkins pressed up against the cage and is working for takedown. Hawkins manages to improve position though and keeps the fight standing.
Mendoza scores a nice knee to the body.
Mendoza fails to pull the fight into his guard.
Hawkins changes levels and goes for a takedown here. Mendoza fights it off and pushes away nicely.
Mendoza fails with a takedown attempt.
That's four minutes gone in the round.
Hawkins changes levels and looks for a double leg takedown. Mendoza tries to avoid it but Hawkins manages to keep hold of a leg and drag Mendoza to the ground. Mendoza escapes though and pops straight back up to his feet.
Mendoza tries to clinch up against the cage, rushing in to close the distance. Hawkins manages to break the clinch and circles back to the middle of the mat.
The fighters circle momentarily. Hawkins darts into range and connects with a nice straight punch.
Hawkins misses with a few strikes there.
As Hawkins looks to move away, Mendoza throws a big counter combo but Hawkins just gets out of the way.
Mendoza drives through and clinches with Hawkins against the cage.
The crowd cheering loudly, showing their appreciation for the quality fight we're seeing here.
Mendoza tries to jump guard but he falls flat on his backside. Hawkins smiles and moves away.
Boooooooooooooooooooo!!! God, this has been a terrible round. Come on you two, sort yourselves out!
Horrible takedown attempt by Hawkins or perhaps it was just good defense by Mendoza, which made it look bad.
And that's the end of the fight!
Adan Mendoza showed his dominance in that final round.
I think Mendoza has won this one but let's see what the judges have to say. Over to the ring announcer for the scorecards.
Ladies and gentlemen, after 3 rounds of action, we go to the scorecards for a decision.
Judge Winston Howard scores the fight 29:28
Judge John Mangel scores the fight 29:28
Judge Chris Dean scores the fight 29:28
In favor of your winner, by unanimous decision... Adan Mendoza!
|
|
|
|
|
|
|
|
|
|
|
|
|
|
|
|
|
|
|
|
|
|
|
| S |
C
A |
G |
S |
C
B |
G |
|
S |
C |
G |
|
energy
A | B |
|
hype
A | B |
|
pop
A | B |
|
mgr
A | B |
|
FIGHT
RATING
26% |
|
|
|
|
|
|
