|
|
PBP Commentary |
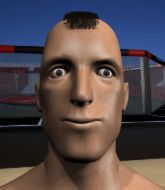
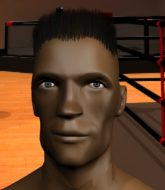
Coming up we have a welterweight MMA rules bout between Cal Robbins (ranked 4714 p4p, 464 weight class) and Jack Holer (ranked 1938 p4p, 235 weight class). Cal Robbins could well score a knockout today. He has the power to get to Jack Holer's chin.
 |
|
 |
| 185 cm
22
185 lbs
4 - 3 - 0 |
|
184 cm
22
182 lbs
6 - 1 - 0 |
Powerful takedowns
Basic striking
Very strong |
|
BJJ Blue Belt
Excellent MT
Good gas tank |
|
| |
|
Ladies and gentlemen. This fight is 3 rounds, in the welterweight division.
Introducing the fighter to my left, fighting out of the red corner.
With a record of
4 - 3 - 0, fighting out of London, Cal Robbins!
And introducing the fighter to my right, fighting out of the blue corner.
With a record of
6 - 1 - 0, fighting out of Las Vegas, Jack Holer!
The judges for this bout are Roosa Järviläinen, Ben Zyskovitsi and Arvi Lind.

The bell rings for round one and we are underway!
Robbins fails with a takedown attempt from distance.

Robbins closes the distance, clinches up and gets a nice trip takedown into side control. Very smooth.
Robbins trying to control the position but Holer is working away.
Robbins throws an elbow but Holer slips to the side and avoids it well.
Robbins has been looking to land a fair amount of strikes on the ground. He might be looking to soften his opponent up in order to work for a submission.

Robbins working hard here to secure a kimura but he's not really in the right position for it.
Holer regains half guard there - taking advantage of Robbins's attempt to lay and pray for a moment.
We've had a slow start to the round here - hopefully the action picks up.
Robbins tries to pass the half guard into mount. Holer knows what he's doing though and prevents the attempt.

That's one minute gone in the round.
Holer is defending against the submission attempts here by Robbins.
Robbins tries to pass to full mount but Holer defends it.
Holer avoiding damage under a succession of punches from Robbins.

That's two minutes gone in the round.
Well. There's a bit of a lull in the action here and the crowd are starting to get restless.
Robbins passes to full mount!
Robbins looking to control but Holer is working nicely, looking to advance position himself.
Holer really doesn't want to stay on the ground with Robbins. If he can't get it back to his feet, it's only a matter of time before he'll be tapping out.
Robbins throws some wild stikes that Holer manages to avoid easily.
Holer regains half guard.
Robbins has freed up his trapped foot and advances to mount.
Robbins takes his opponent's back. Perhaps a chance to lock up a rear naked choke here.
Holer preventing the rear naked choke attempt from Robbins.

That's three minutes gone in the round.
Robbins patiently working for the choke. Which fighter will keep their nerve here?
Robbins has his hand under the chin of his opponent looking for the choke. He's nearly got it! This one could be all over! But no, Holer has freed his hand and lives to survive another
well, another couple of seconds at least!
Robbins patiently working for the choke. Which fighter will keep their nerve here?
Robbins working for a RNC but it's not happening just yet.
Robbins cracks Holer with a big shot to body and one to the head - really punishing Holer from the back mount here, looking to soften him up.
Robbins is working for the rear naked choke. He has one arm under the chin but Holer has hold of the other arm. A bit of a stalemate here.
Robbins working for a choke but Holer is defending well.

That's four minutes gone in the round.
Robbins looking for the choke from the back.
Holer defending nicely against the rear naked choke attempt.
Holer trying to control the hands but Robbins breaks the grip.
The crowd thankful this round is nearly over.
Robbins is trying to control but Holer is trying to escape here - he's now mounted.
Holer prevents Robbins from taking his back.
Robbins is working for a guillotine from mount but Holer frees his head quite easily.
And thats the end of the round the fighters go back to their corners.
Cal Robbins dominated that round.
The minute break is over - no more time for sponges and pep talks - back to the action!

Robbins decides to change it up a bit and drives through with a nice takedown into half guard.
Robbins is looking to take a break and control but Holer is keeping him honest, looking to work from the bottom.
Robbins passes to full mount!
Robbins wants to take his opponent's back but he's not managed it.
Robbins looking to secure an arm triangle but Holer defends it well.
We've had a slow start to the round here - hopefully the action picks up.
Robbins working for a guillotine from mount but Holer is in no mood to give up.
Robbins wants to control the pace but Holer is squirming around nicely.
That's one minute gone in the round.
Robbins takes his opponent's back. Perhaps a chance to lock up a rear naked choke here.
Holer is in bad spot here.
Holer showing good submission defense here.
Holer is displaying good submission defense - not really looking in danger of submitting to the rear naked choke at the moment. That could change in an instant of course if Robbins gets his way!
Robbins looking for the choke but no joy.
That's two minutes gone in the round.
Robbins working for the choke.
The ref warns both fighters not to hold the cage as they work up against the meshing.
Robbins somehow managing to miss with a strike from the back.
Holer preventing the rear naked choke attempt from Robbins.
Robbins looking for the choke but no joy.
Robbins throws a big right hand but he misses and hits the mat. Ouch.
That's three minutes gone in the round.
Holer takes a big shot to the side of the head.
Robbins is remaining active here, looking for the choke. The more discerning members of the crowd will appreciate his efforts.
Robbins tightening his grip on Holer, looking for the choke.
Holer is displaying good submission defense - not really looking in danger of submitting to the rear naked choke at the moment. That could change in an instant of course if Robbins gets his way!
Holer showing good submission defense here.
That's four minutes gone in the round.
Holer is staying cool under pressure, defending well against the rear naked choke attempt from his opponent.
Robbins has his opponent's back and is working for the choke.
Robbins looking to break Holer's wrist control so he can sink in the choke. Holer remaining controlled and patient though - he really has to keep calm otherwise Robbins will wrap this one up with the rear naked choke!
The crowd thankful this round is nearly over.
Robbins patiently working for the choke. Which fighter will keep their nerve here?
Holer defends a rear naked choke attempt by controlling one of Robbins's arms.
And thats the end of the round the fighters go back to their corners.
Cal Robbins dominated that second round.
That's the end of the round. The referee orders the cornermen out of the cage so we can get back down to business. Ladies and gentlemen, this is the final round!

Robbins is trying hard to land a takedown here. Holer sprawls well and keeps this one on the feet.
Robbins shoots in for a takedown but doesn't get it.
Holer is clearly trying to counter these attacks from Robbins with a body shot.

Holer fakes with an overhand right and moves in to clinch with Robbins, pushing him back against the cage.
Holer lands an uppercut.
Holer gets double underhooks to prevent a takedown attempt from Robbins.
That's three failed takedown attempts in the round for Cal Robbins. That's going to take a lot out of him.
Robbins is looking to take this one to the mat.
Robbins is trying to drag Holer to the mat but Holer just about manages to keep his footing. He used the cage to his advantage there.
Robbins is looking to take this one to the mat.
Holer lands with a good tight uppercut to the head.
Robbins jumps guard but Holer turns him against the cage and keeps the fight standing.
Holer lands a shoulder strike.
We've had a slow start to the round here - hopefully the action picks up.
Holer lands with a short head shot on the inside.
Holer is leaning against Robbins and scores with a nice uppercut to the body.
Holer lands with a good tight uppercut to the head.
Holer throws a big uppercut that drops Robbins! More strikes from Holer and the referee jumps in to stop the fight! Robbins lies dazed against the cage as Holer celebrates with his cornermen!
Ladies and gentlemen, after 0:59 of round 3, we have a winner by way of TKO (Strikes). Jack Holer!
Jack Holer took to the microphone after his victory and thanked his sponsors, Riner Clothing for their support in the buildup to the fight.
|
|
|
|
|
|
|
|
|
|
|
|
|
|
|
|
|
|
|
|
|
|
|
| S |
C
A |
G |
S |
C
B |
G |
|
S |
C |
G |
|
energy
A | B |
|
hype
A | B |
|
pop
A | B |
|
mgr
A | B |
|
FIGHT
RATING
42% |
|
|
|
|
|
|

