|
|
PBP Commentary |
Coming up we have a bantamweight MMA rules bout between Connor Joieson (ranked 3496 p4p, 169 weight class) and Dax Baxter (ranked 2914 p4p, 147 weight class). Fingers crossed for an exciting fight - I'm sure both fighters are looking for a nice under the table bonus!
 |
|
 |
| 168 cm
19
145 lbs
2 - 0 - 0 |
|
188 cm
26
135 lbs
3 - 1 - 0 |
Powerful takedowns
Brawler
Cardio machine |
|
BJJ Blue Belt
Basic striking
Tends to cut |
|
| |
|
Ladies and gentlemen. This fight is 3 rounds, in the bantamweight division.
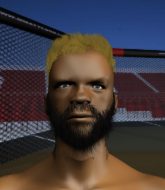
Introducing the fighter to my left, fighting out of the red corner.
With a record of
2 - 0 - 0, fighting out of Sydney, Connor Joieson!
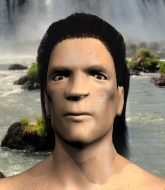
And introducing the fighter to my right, fighting out of the blue corner.
With a record of
3 - 1 - 0, fighting out of Sydney, Dax Baxter!
The judges for this bout are Ben Watson, Chris Dean and Skip Squint.

The bell rings for round one and we are underway!
Joieson will have to do better than that with his takedown attempts.
Baxter slaps away a takedown attempt from Joieson, before circling back to the center of the mat.

Joieson looks for a takedown. He's got it. We're now in half guard.
Baxter is looking to control Joieson's leg but it's slowly edging free. Can Baxter avoid being mounted?
Baxter blocking the ground and pound attempt from Joieson.
Baxter tries to get to full guard but Joieson has control of the leg.
Baxter keeps trying to improve his position.
We've had a slow start to the round here - hopefully the action picks up.
Joieson missing with the ground and pound from half guard.
Baxter regains full guard. Nicely done.

That's one minute gone in the round.
Joieson is stalling in the full guard.
Baxter bucks up whilst keeping hold of a body lock, managing to reverse the position. Now he's in top in Joieson's guard.

Baxter trying to control but Joieson is working from the bottom.
My spies in Sydney Combat Method inform me that Baxter has been getting involved in the gym's BJJ sparring sessions. Let's see whether that pays dividends!
Joieson working a defensive guard here.
Joieson pulls Baxter in close to prevent any damage.
Baxter tries to free his leg and advance position but Joieson is retaining full guard.

That's two minutes gone in the round.
Well. There's a bit of a lull in the action here and the crowd are starting to get restless.
Joieson is trying to control the position from the bottom.
Joieson tries to land a sweep but no joy.
Baxter trying to control but Joieson is working from the bottom.
Joieson looking to control.
Baxter sitting in guard, not really doing much.

The referee has motioned to the fighters to stand back up. He just wasn't happy with the level of activity.
Baxter misses with a body shot.
Baxter is a painfully thin specimen of a man. You do wonder whether a good body kick would snap him clean in two.
Baxter just misses with a punch to the body.
Joieson fails with a takedown attempt from distance.
That's three failed takedown attempts in the round for Connor Joieson. That's going to take a lot out of him.
Joieson tries to score a power double leg takedown but Baxter sees that one coming and sprawls well. That will dishearten Joieson somewhat.

That's three minutes gone in the round.
Joieson takes one on the chin but keeps coming.
Joieson changes levels and drives through with a really nice takedown into side control. Baxter looks really pissed at himself for not defending that better.
Joieson trying to control the action but Baxter is working from the bottom.
Joieson creates some space and throws a big elbow, but Baxter sees it coming and moves his head just enough to avoid the strike.
Baxter regains half guard.
Baxter avoiding damage under a succession of punches from Joieson.
Baxter is holding on to half guard well.
Joieson thows a wild elbow that connects with the canvas.
Joieson is looking to stall here but Baxter recovers full guard.
Baxter looking to control.

That's four minutes gone in the round.
Joieson cracks Baxter with a solid left hand.
Joieson is working the ground and pound from guard. He might want to try advancing position though to get more of an impact.
Baxter keeping moving, preventing Joieson from controlling successfully.
Joieson looking to sit in guard and control but Baxter gets the butterfly guard and sweeps. He's now in the guard on the top.
Baxter trying to control but Joieson is working from the bottom.
Baxter controlling from the top position.
The crowd thankful this round is nearly over.
Baxter postures up.
And thats the end of the round the fighters go back to their corners.
That was a close round but I would say that Connor Joieson will probably get the nod.
Well, the break between rounds is over. Let's get back to the scrappin!

Baxter displays good takedown defense there as he swats away a double leg from Joieson.
Baxter lands a nice looking body shot.
Baxter fakes high and swings low for a body shot but Joieson manages to avoid it.
Joieson shoots in for a takedown but doesn't get it.
Joieson shoots in with a takedown attempt and he has Baxter pinned against the cage. Baxter gets the underhooks and manages to circle away.
Baxter tries a counter takedown but it's more of a dummy move, and he uses it to push himself away.
That's three failed takedown attempts in the round for Connor Joieson. That's going to take a lot out of him.
No luck with that takedown attempt from Joieson.
We've had a slow start to the round here - hopefully the action picks up.
Joieson fails with a rather predictable takedown attempt.
Connor Joieson seems to be the more aggressive standup fighter in this bout.
Sloppy strikes from Baxter. Those never looked like landing.
Joieson shoots in for a takedown but Baxter shows good takedown defense.
Joieson shoots in looking for a takedown but Baxter manages to keep the fight standing, pushing Joieson's face into the canvas for good measure before circling away.
A jab from Baxter does it's job there.
That's one minute gone in the round.
Baxter lands an overhand right.
Joieson fails to land the takedown.
Baxter throws a head kick but Joieson moves out of range.
Joieson is trying hard to land a takedown here. Baxter sprawls well and keeps this one on the feet.
Joieson doesn't succeed with the takedown

and Baxter counters with a nice double leg into half guard.
Both fighters are absolutely exhausted here.
Joieson is controlling Baxter's trapped leg to prevent Baxter from advancing to side control.
Baxter wants to lay and pray for a moment but Joieson keeps working.
Baxter works his way into full mount!
Joieson tries to hold on but Baxter postures up.
That's two minutes gone in the round.
Baxter trying to control but he's not successful this time.
Joieson tries to hold on but Baxter postures up.
Joieson really trying hard to get back to half guard here.
Baxter tries to control but Joieson wriggling away.
Joieson tries to get back to half guard but can't.
That's three minutes gone in the round.
Joieson tries to lock up and control but Baxter gives him a forearm to the face and pushes him away.
Baxter controlling from the full mount.
Joieson tries to lock up and control but Baxter gives him a forearm to the face and pushes him away.
Baxter can't quite control the action as he would like just now, as Joieson is looking to escape.
Baxter sitting in mount, just looking to control for the moment.
Joieson working to try and regain half guard.
That's four minutes gone in the round.
The crowd are hurling abuse towards the fighters... You can hardly blame them though because there isn't a lot going on in the fight.
Baxter avoids the attempt from Joieson to control.
Baxter with the ground and pound from mount.
Joieson is writhing around trying to get back to his feet.
Baxter controlling the position easily from mount.
Baxter has been the more effective fighter overall so far.
The crowd thankful this round is nearly over.
Baxter trying to control but he's not successful this time.
And thats the end of the round the fighters go back to their corners.
Dax Baxter showed his class in that round. I'd imagine he'll take it on all the scorecards.
The minute break is over - no more time for sponges and pep talks - back to the action! This is the final round!

Joieson looking to score a takedown here. Baxter is defending well but Joieson drives through and ends up in Baxter's guard.
Joieson throws a strike but Baxter rolls with it and manages to sweep. Now he's in guard on top.
Joieson trying to strike off his back.
Baxter trying to control but Joieson is working from the bottom.
Dax Baxter has got the better of the ground game so far.
Joieson bucks up whilst keeping hold of a body lock, managing to reverse the position. Now he's in top in Baxter's guard.

Joieson throwing elbows and punches but not connecting, as Baxter works some decent striking defense from the bottom.
Joieson in full guard, throwing the ground and pound. No damage this time.
We've had a slow start to the round here - hopefully the action picks up.
Joieson postures up and scores with a shot to the body and a follow up elbow to the head.
Baxter not looking particularly offensive just at the moment.
Baxter wants to sweep but no luck.
Joieson working some ground and pound from guard but it's not doing any damage.
Joieson pressing down on his opponent's thigh, looking to pass guard. Baxter is keeping the position for now.
That's one minute gone in the round.
Baxter has his hands on Joieson's head, controlling the position.
Joieson lands a couple of decent looking shots.
Joieson stands up over Baxter, holding his feet. He dives back in and lands a decent shot to the head.
Joieson connects with a couple of short punches.
The ref warns both fighters not to hold the cage as they work up against the meshing.
Joieson trying to control the position from guard on top but Baxter is wriggling around, looking for whatever he can.
Joieson throwing shots from guard but he's hitting more mat than opponent.
Joieson is working the ground and pound from guard. He might want to try advancing position though to get more of an impact.

Baxter is rocked!
Baxter has momentary wrist control but Joieson slips an elbow through the middle.
Baxter is still in real trouble! Can Joieson finish him?
Joieson loads up on a big left hand. Baxter felt that one! He's just covering up now, not defending himself intelligently - Joieson looks towards the ref and unloads with 3 more big shots and the ref has no choice but to stop the fight! Baxter can't hide his disappointment, as Joieson celebrates the victory.
Ladies and gentlemen, after 2:56 of round 3, we have a winner by way of TKO (Strikes). Connor Joieson!
After the big win, Connor Joieson made sure to do all the important stuff like thanking his sponsors Forge Clothing Co. and telling the interviewer how much he loves him.
Dax Baxter was interviewed post fight and said 'Congratulations to my opponent. He was the better fighter tonight.'.
|
|
|
|
|
|
|
|
|
|
|
|
|
|
|
|
|
|
|
|
|
|
|
| S |
C
A |
G |
S |
C
B |
G |
|
S |
C |
G |
|
energy
A | B |
|
hype
A | B |
|
pop
A | B |
|
mgr
A | B |
|
FIGHT
RATING
41% |
|
|
|
|
|
|
