|
|
PBP Commentary |
Coming up we have a featherweight MMA rules bout between Because I Can (ranked 4710 p4p, 370 weight class) and Khal Stark (ranked 2303 p4p, 228 weight class). Stark has chosen The River Dragon by Nevermore as his entrance music. Both these guys have really solid chins. Will we see a standup war or will they both decide that a knockout is unlikely and try to win the fight elsewhere?
 |
|
 |
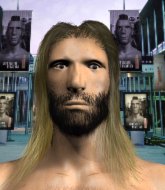
| 155 cm
29
145 lbs
17 - 25 - 0 |
|
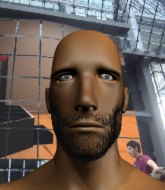
174 cm
34
158 lbs
21 - 18 - 2 |
Abu Dhabi Champ
World class boxer
Granite chin |
|
Good wrestler
Excellent boxer
Granite chin |
|
| |
|
Ladies and gentlemen. This fight is 3 rounds, in the featherweight division.
Introducing the fighter to my left, fighting out of the red corner.
With a record of
17 - 25 - 0, fighting out of Helsinki, Because I Can!
And introducing the fighter to my right, fighting out of the blue corner.
With a record of
21 - 18 - 2, fighting out of New York, Khal Stark!
The judges for this bout are Roosa Järviläinen, Marco Blurström and Arvi Lind.

The bell rings for round one and we are underway!
Stark thows a left - swing and a miss!

I Can looks for a takedown. He's got it. We're now in half guard.
Stark trying to control here.
Stark controlling the position for now.

I Can is trying for a guillotine from the top but the pressure isn't in the right place so Stark is just riding it out for now. I Can eventually gives up the hold.
Stark is trying is best to control the position here.
We've had a slow start to the round here - hopefully the action picks up.
I Can throwing shots but they're hitting the canvas more than the man.
Stark wants to control but I Can is keeping busy.
I Can is looking for an arm triangle, whilst trying to pass to side control. Stark doesn't seem that keen to cooperate though. No luck this time I Can.
The ref warns both fighters not to hold the cage as they work up against the meshing.

That's one minute gone in the round.
Stark keeps control of the position for the meantime.
Stark tries to get to full guard but I Can has control of the leg.
Stark trying to control but I Can postures up.
Stark is looking to regain full guard. Not this time though.
Stark is not content to let I Can control the position.
Stark keeping control of the position.

That's two minutes gone in the round.
The crowd are hurling abuse towards the fighters... You can hardly blame them though because there isn't a lot going on in the fight.
Let's hope that Stark has the urge to step up the pace any second now because for the last 15 or 20 seconds he's just been holding on tight.
I Can is pressing down on Stark's thigh, looking to free his foot. Stark is holding on for now.
Neither fighter is being very active at the moment, with I Can in particular looking to stall.
We must be close to a standup if these guys don't pick up the pace.
The fighters are starting to get a bit slippery now, which will make submissions a bit more difficult.
I Can trying to pass the guard but Stark defending well.
I Can trying to control from half guard but Stark is working away.

The referee has decided to stand the fighters back up, so we'll restart on the feet.
I Can shoots in but no luck this time.
Stark gets caught napping as I Can dives in and scores a takedown. Stark manages to retain guard.
I Can trying to control the position from guard on top but Stark is wriggling around, looking for whatever he can.

That's three minutes gone in the round.
I Can looking to pass the guard.
Stark is trying to control the position from the bottom.
Stark seems keen to control I Can's posture.
Stark is trying to control the position but I Can postures up.
Stark looking for a sweep. Not yet Stark, not yet.
Stark is pulling down on I Can's head. It's preventing any offense from I Can, at least for the moment.
I Can is just sitting in guard, looking to avoid any submissions.
Stark wants to sweep but no luck.
I Can slows down the pace of the fight for a moment. He'll need to remain active if he doesn't want to see the fight stood back up.
The referee has stepped in and called for a break in the action. We'll restart on the feet.

That's four minutes gone in the round.
Well. There's a bit of a lull in the action here and the crowd are starting to get restless.
Stark scores with a shot to the body.
Stark stuffs the takedown.
Stark slips a straight right by I Can.
Stark misses the jab.
I Can looks for a takedown. He's got it. We're now in half guard.
Stark is doing well to avoid being mounted. He's controlling the position at the moment.
I Can not doing much here.
Stark is looking to regain full guard. Not this time though.
Boooooooooooooooooooo!!! God, this has been a terrible round. Come on you two, sort yourselves out!
I Can controlling the action here.
Stark trying to control here.
And thats the end of the round the fighters go back to their corners.
Because I Can dominated that round.
That's the end of the interval. I'm sure that seemed a lot quicker than a minute for our two fighters! Back to the action.

A head kick misses from Stark.
Stark wings a very wild body shot but it does the job and lands to the midsection.
I Can closes the distance and after a bit of a stuggle, scores a takedown into Stark's guard.
Stark pulls I Can in close to his closed guard and prevents I Can from doing any damage or advancing position.
I Can preventing the sweep.
The fighters are pressed up against the cage, both looking to find a bit of space to work.
Stark trying to control the position.
We've had a slow start to the round here - hopefully the action picks up.
I Can trying to control the position from guard on top but Stark is wriggling around, looking for whatever he can.
I Can might be looking to lock onto one of his opponent's long limbs for a submission, whilst we're on the ground.

Stark had isolated an arm as going for a kimura. I Can defends it easily.
That's one minute gone in the round.
I Can tries to free his leg and advance position but Stark is retaining full guard.
Stark is working an open guard here, looking to improve his position. No doubt that will leave him open to counters but at least he's being more offensive.
Stark seems keen to control I Can's posture.
Stark keeping moving, preventing I Can from controlling successfully.
I Can wants to pass the guard but Stark is keeping the position.
I Can looking to sit in guard and control but Stark gets the butterfly guard and sweeps. He's now in the guard on the top.

I Can controlling the position.
That's two minutes gone in the round.
Stark is frustrating his opponent with some stalling tactics from top position.
Stark trying to control the position from guard on top but I Can is wriggling around, looking for whatever he can.
I Can is really dominating this fight. Is there anything that Stark can do to turn this around?
I Can controls Stark momentarily but Stark frees himself.
Stark won't allow I Can to sweep him here.
Stark controlling from the guard. I say controlling but really, he's stalling.
Stark wants to control from the top but I Can keeps moving.
Stark chips away with some ground and pound.
I Can wants to sweep but no luck.
I Can preventing the ground and pound from doing any damage.
That's three minutes gone in the round.
I Can trying to control the position here.
Stark controls the pace of the fight for a moment.
Stark pressing down on his opponent's thigh, looking to pass guard. I Can is keeping the position for now.
I Can pulls Stark in to control the position.
The referee decides to stand the fighters back up.
Stark moves out of range of the strikes.
Stark lands with an overhand left.
Good standup being displayed there by Stark as he connects with a hook.
Stark throws a head kick that misses and slips in the process. He scrambles back to his feet and the fighters circle.
A little feinted left hand from I Can on the counter but he doesn't commit to it.
I Can fails with a takedown attempt from distance.
Stark lands with a nice body punch.
I Can is trying hard to land a takedown here. Stark sprawls well and keeps this one on the feet.
Stark tries to land with a swinging hook to the body but I Can was well out of range. Poor timing from Stark.
I Can fails with a takedown attempt from distance.
That's three failed takedown attempts in the round for Because I Can. That's going to take a lot out of him.
I Can shoots in for a takedown but Stark shows good takedown defense.
That's four minutes gone in the round.
Stark throws a hook but I Can avoids it easily.
Stark stuffs the takedown attempt from I Can. I Can gets slowly back to his feet.
Stark connects with a good right hand that stumbles I Can. I Can circles away out of range and recomposes himself.
I Can goes for a double leg but Stark avoids the attempt and the two fighters end up clinched against the cage as Stark continues to drive forward.
I Can fails with the takedown.
Stark lands a nice shot to the body.
This is a great period of action - very entertaining stuff!
I Can staying out of range there.
Stark throws a sloppy head kick and I Can moves out of range easily.
I Can staying out of range there.
Khal Stark seems to be getting the better of the standup.
Stark lands with an uppercut that bounces I Can off the cage and back into range.
The crowd thankful this round is nearly over.
Stark pulls out of a head kick attempt.
I Can fails with a rather predictable takedown attempt.
Khal Stark seems to be the more aggressive standup fighter in this bout.
Stark blocks a jab.
And thats the end of the round the fighters go back to their corners.
Khal Stark showed his class in that round. I'd imagine he'll take it on all the scorecards.
The fighters' corners scream their final instructions, as the referee calls time. Here we go, back to the action! Ladies and gentlemen, this is the final round!

I Can slips a jab and a cross from Stark.
I Can avoids the head kick by Stark.
I Can was looking to counter that last move with a shot to the body but he didn't commit.
Stark connects with a looping right hand.
Stark stuffs the takedown attempt from I Can. I Can gets slowly back to his feet.
I Can misses with a takedown attempt - Stark sprawls well and throws a nice strike on the way out which just misses.
A left lands for Stark.
Stark tries a switch kick but it misses it's target.
Stark throws a leg kick but I Can sees it coming and checks it nicely.
I Can walks into a stiff left hand from Stark.
We've had a slow start to the round here - hopefully the action picks up.
Stark misses with an uppercut. I Can saw that one coming.
Stark waving his hands out in front of him, looking to distract I Can.
I Can fails miserably with a takedown attempt.
That's three failed takedown attempts in the round for Because I Can. That's going to take a lot out of him.
Stark connects with a lovely right hand, straight down the pipe.
That's one minute gone in the round.
I Can blocks a head kick by Stark.
Stark misses with a head kick.
I Can dodges the punch combination from Stark.
Stark throws a head kick that misses.
An attempted straight right counter from I Can misses the target.
Stark misses with a hook
and I Can counters with a stiff right hand.
Stark displays good takedown defense there as he swats away a double leg from I Can.
Stark moves away from the strike by I Can.
Nice defenses there by I Can.
Stark misses with a half-hearted attempt at a head kick.
I Can is looking for a counter combo.
Stark is using his reach advantage to land shots from outside his opponent's range.
I Can shoots in and scores a nice double leg takedown into half guard.
Because I Can overall seems to be getting the better of the ground position in the fight so far.
I Can sitting in half guard, looking to land shots. Stark defending well though.
I Can wants to free his trapped foot but Stark is holding on for dear life with his legs.
That's two minutes gone in the round.
Stark trying to control from the bottom.
I Can is trying to work for a kimura but Stark is defending well.
I Can is looking for an arm triangle, whilst trying to pass to side control. Stark doesn't seem that keen to cooperate though. No luck this time I Can.
I Can is thinking about going for an arm triangle but he can't free his leg.
I Can is keen to just control but Stark is a slippery customer.
I Can is working for a kimura but Stark is defending it quite comfortably.
Wooooo! Give it up for these two warriors! They are putting on a show!
I Can trying to control the action but Stark is working from the bottom.
That's three minutes gone in the round.
I Can is sneakily working for an arm triangle but Stark sees it coming and defends easily.
Stark is doing well to control the position and prevent I Can from advancing to side control.
Stark gets back to full guard.
Stark controlling I Can's posture.
We're seeing a lot of stalling here from Stark.
Stark isolates an arm and boxes in a triangle. I Can stacks Stark on his neck as he steps over and passes to the side. He's now in a much more dominant position where he can look to do some serious damage. Nice move by I Can!
That's four minutes gone in the round.
The crowd are getting on the fighters' backs, as the pace has dropped off in the last minute or so.
I Can is maintaining the dominant position - no doubt Stark will start to get frustrated soon if he's not already.
Stark tries to work a leg under to get back to half guard but I Can wriggles his own leg back out and remains in side control.
Stark is trying to control I Can's posture but I Can avoids it.
Stark is not content to let I Can control the position.
The crowd thankful this round is nearly over.
Stark manages to get one leg in to regain half guard.
I Can is trying a forearm choke
I don't think that's going to do much at this level of the game.
And that's the end of the fight!
Khal Stark comfortably won the final round on my scorecard.
I think Stark has won this one but let's see whether the judges agree with me. Over to the ring announcer for the scorecards.
Ladies and gentlemen, after 3 rounds of action, we go to the scorecards for a decision.
Judge Roosa Järviläinen scores the fight 28:29
Judge Marco Blurström scores the fight 28:29
Judge Arvi Lind scores the fight 28:29
In favor of your winner, by unanimous decision... Khal Stark!
Khal Stark managed to slip a mention for his sponsors, Zenith Nutrition (160q/$200), into his post fight interview.
The defeated Because I Can had this to say: 'I'm so handsome i'm not surprised this guy was all over me the way he was!'.
|
|
|
|
|
|
|
|
|
|
|
|
|
|
|
|
|
|
|
|
|
|
|
| S |
C
A |
G |
S |
C
B |
G |
|
S |
C |
G |
|
energy
A | B |
|
hype
A | B |
|
pop
A | B |
|
mgr
A | B |
|
FIGHT
RATING
31% |
|
|
|
|
|
|
