|
|
PBP Commentary |
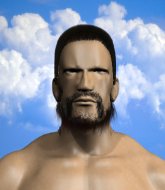
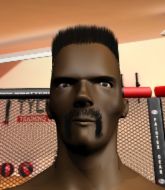
Coming up we have a welterweight MMA rules bout between Alex Riley (ranked 6056 p4p, 0 weight class) and Mark Bahaghari (ranked 5516 p4p, 0 weight class). Bahaghari has chosen Broken as his entrance music. Fingers crossed for an exciting fight - I'm sure both fighters are looking for a nice under the table bonus!
 |
|
 |
| 187 cm
26
185 lbs
6 - 1 - 0 |
|
185 cm
28
175 lbs
5 - 3 - 0 |
BJJ White Belt
Excellent boxer
Experienced |
|
BJJ Blue Belt
Decent boxing
Determined |
|
| |
|
Ladies and gentlemen. This fight is 3 rounds, in the welterweight division.
Introducing the fighter to my left, fighting out of the red corner.
With a record of
6 - 1 - 0, fighting out of Sydney, Alex Riley!
And introducing the fighter to my right, fighting out of the blue corner.
With a record of
5 - 3 - 0, fighting out of Sydney, Mark Bahaghari!
The judges for this bout are Darius Henderson, Eliza Hachem and John Mangel.

The bell rings for round one and we are underway!
Bahaghari doesn't react quick enough there as he takes a shot to the body.
Bahaghari blocks a jab.

Bahaghari forces Riley back against the cage and clinches.
Riley working hard to break the clinch.

Bahaghari breaks from the clinch.
Bahaghari ducks under a wild hook from Riley.
Bahaghari throws a body kick but he was well out of range there.
Riley misses with a hook. Bahaghari ducked under it nicely.
Riley closes the distance but Bahaghari moves to the side
and Bahaghari counters with a quick right hand to the jaw.
Bahaghari slips a straight right by Riley.
We've had a slow start to the round here - hopefully the action picks up.
Bahaghari rushes forward with a series of wild hooks but Riley moves out of range and avoids them all easily.
Bahaghari scores with a head kick. Riley tried to block it but didn't get his arm up in time.

Riley is rocked!
Bahaghari bobs and weaves well there to avoid the strikes.
Oh Riley is still all over the place! His legs are completely gone! Will he be able to recover?!!
Bahaghari ducks under a wild hook from Riley.
Mark Bahaghari seems to be the more aggressive standup fighter in this bout.
Riley looking to throw a kick but he's pulled out of it.
Bahaghari looks like he wants to counter punch here.
The crowd cheering loudly, showing their appreciation for the quality fight we're seeing here.
Bahaghari pushes Riley up against the cage in a clinch.
Riley wants to break free but Bahaghari has control.
Riley seems to have got his legs back now.

That's one minute gone in the round.
Bahaghari tries to land a knee to the body but he is off balance and Riley avoids it.
Riley has had enough of the clinch but Bahaghari keeps him there for the moment.
Bahaghari pushes off and circles away, back to the middle of the mat.
Riley wants to clinch.
Bahaghari rushes Riley and pushes him back against the cage in a clinch.

Bahaghari jumps guard and drags Riley to the mat. He's obviously going to be looking for submissions off his back.
Riley looking to sit in guard and control but Bahaghari gets the butterfly guard and sweeps. He's now in the guard on the top.


That's two minutes gone in the round.
Riley not looking particularly offensive just at the moment.
Riley on his back here. We all know that wrestlers don't like being on their back so let's see if Riley tries to get out of the position.

Bahaghari stands up from guard. Let's bang!
Bahaghari throws a left and a right that both miss
and Riley counters with a quick right hand to the jaw.
Riley will need to tighten up his combinations if he doesn't want to gas himself out, swinging at thin air.
A little jabbing left from Bahaghari on the counter but it doesn't find it's target.
Bahaghari looks for a takedown but Riley sprawls well.
Riley throws a hook but Bahaghari avoids it easily.
Some wild striking there from Bahaghari.
Bahaghari darts in and clinches Riley up against the cage.
The crowd cheering loudly, showing their appreciation for the quality fight we're seeing here.
Riley wants to break free but Bahaghari has control.

That's three minutes gone in the round.
Riley working hard to break the clinch.
Riley working hard to break the clinch.
Bahaghari breaks the clinch and we're back to striking at distance.
A slapping body kick lands there for Bahaghari.
Bahaghari shoots in for a double leg but Riley sprawls well. That's going to sap some energy.
Bahaghari throws a combination but it was largely blocked by Riley.
Riley takes a swing at Bahaghari's ribcage but misses.
Alex Riley is looking to keep the fight on the feet at all costs.
Bahaghari blocks a jab.
Bahaghari throws a counter combo.
Bahaghari lands with a nice combination. Riley backs away looking to recover.
Bahaghari shoots in for a takedown. "I don't think so" says Riley as he avoids it easily.
Alex Riley has stuffed three takedown attempts in the round now. That's going to take a lot out of Mark Bahaghari.
A head kick misses from Bahaghari.
Riley fails in his attempt to clinch.

That's four minutes gone in the round.
Riley throws a body shot but no joy.
Riley gets cracked there but stands up to it.
Riley swings away but doesn't land with a series of punches.
The fans in attendance giving it up for the two fighters, who have really let it all hang out in the last minute or so!
Bahaghari takes the fight into the clinch.
Riley is fighting off a takedown attempt but Bahaghari is just too persistent for him and manages to trip Riley to the mat. Riley regains guard as soon as the fighters hit the mat.
Riley is working an open guard here, looking to improve his position. No doubt that will leave him open to counters but at least he's being more offensive.
Riley knows he needs to get back to his feet asap. He's simply no match for Bahaghari on the ground.
Riley is working an open guard so Bahaghari takes the opportunity to get back to his feet.
Bahaghari staying out of range there.
Riley takes a step towards his opponent and connects with a left hand, before circling away.
Riley showing good head movement there, avoiding the strikes from Bahaghari.
And thats the end of the round the fighters go back to their corners.
Mark Bahaghari dominated that round.
The fighters get back to their feet, the hooter sounds and we're back to the action!

Bahaghari shoots in looking for a takedown but Riley manages to keep the fight standing, pushing Bahaghari's face into the canvas for good measure before circling away.
A quick step to the side and Riley tries to counter with a shot to the body but it doesn't connect.
Riley looks to score with a combo but nothing lands.
Bahaghari gets a clinch.
Bahaghari breaks the clinch and we're back to striking at distance.
Bahaghari pushes Riley up against the cage in a clinch.
Riley tries to break free but Bahaghari pushes him back against the cage.
Bahaghari drops down for a takedown but doesn't get it.
Bahaghari has been the more effective fighter overall so far.
Riley wants to break free but Bahaghari has control.
That's one minute gone in the round.
We've had a slow start to the round here - hopefully the action picks up.
Bahaghari leaning against his opponent.
Bahaghari manages to get underhooks and slows down the pace for a moment.
Riley is trying to force a seperation but Bahaghari has the dominant position.
Bahaghari is looking for a takedown.
Alex Riley has stuffed three takedown attempts in the round now. That's going to take a lot out of Mark Bahaghari.
Bahaghari escapes the clinch and we're back to striking.
Riley misses with a body shot.
That's two minutes gone in the round.
The crowd are getting on the fighters' backs, as the pace has dropped off in the last minute or so.
Riley is looking to chop away at Bahaghari's legs.
Bahaghari moves out of range as Riley strikes.
Riley stuffs the takedown.
Riley tries to clinch up.
Bahaghari has Riley up against the cage in a clinch.
Bahaghari escapes the clinch and we're back to striking.
Bahaghari has a takedown stuffed.
Bahaghari tries a switch kick but it misses it's target.
Riley slaps away a takedown attempt from Bahaghari, before circling back to the center of the mat.
A counter left hand to the body from Riley misses its target.
Riley throws a quick inside leg kick.
That's three minutes gone in the round.
Bahaghari on the wrong end of a decent looking cross there.
The fighters circling - Bahaghari throws out the jab but it was never going to land.

Riley gets a clinch.
Bahaghari tries to jump guard but he falls flat on his backside. Riley smiles and moves away.
Riley takes a shot to the nose. Hopefully that hasn't broken it.
Bahaghari misses with a hook.
Bahaghari shoots for a takedown but Riley saw that one coming a mile off and avoided it easily.
Bahaghari ducks under an overhand right and circles away with a smile on his face.
Bahaghari takes a shot to the body in his stride.
Riley misses the jab.
Riley pushing out the jab but it's not landing.
Riley connects with a lovely jab that went straight through the gap between Bahaghari's hands.
Bahaghari throws a combination but comes up with nothing but fresh air.
Riley swung with a counter right hand that didn't connect.
That's four minutes gone in the round.
This fight brought to you by 5M nutrition - it's mmmmm tasty. Nice jab by Riley.

It looks like Mark Bahaghari has been cut.
This has been an exciting period of action!
Bahaghari looking to score a takedown here. Riley is defending well but Bahaghari drives through and ends up in Riley's guard.
Bahaghari is breathing heavily.
Riley avoiding any damage from the ground and pound.
Bahaghari working some ground and pound from guard but it's not doing any damage.
Bahaghari stands up from guard. Let's bang!
Riley misses with a hook.
Mark Bahaghari is looking to throw some combinations by the looks of things.
Riley slaps away a takedown attempt from Bahaghari, before circling back to the center of the mat.
Riley lands a nice shot to the body.
Riley bobbing and weaving, closes the distance and lands a hook to the side of Bahaghari's head.
Riley thows a left - swing and a miss!
Bahaghari shoots in but Riley avoids the takedown attempt easily.
And thats the end of the round the fighters go back to their corners.
Alex Riley dominated that second round.
The cut man is working on Mark Bahaghari's cut.
That's the end of the round. The referee orders the cornermen out of the cage so we can get back down to business. This is the final round!

Riley throws a right and a left that Bahaghari avoids nicely.
Bahaghari lets it all go there with a big combo counter but none of the punches connected.
Bahaghari lands a two punch combo.
A lazy left from Riley finds it's target.
Riley misses with a looping right.
Riley misses with a jab and misses with a cross straight after too.
Bahaghari closes this distance looking for a takedown but Riley circles away.
The fighters circle, before Bahaghari throws a beautiful high kick that crashes into Riley's neck, sending him stumbling to the floor! Bahaghari lands more strikes and forces a referee stoppage! That one ended in an instant!
Ladies and gentlemen, after 0:29 of round 3, we have a winner by way of TKO (Kick & Punches). Mark Bahaghari!
Our winner, Mark Bahaghari, made sure he spent some time buttering up the crowd during his post fight interview, which will no doubt bring him a few more fans.
|
|
|
|
|
|
|
|
|
|
|
|
|
|
|
|
|
|
|
|
|
|
|
| S |
C
A |
G |
S |
C
B |
G |
|
S |
C |
G |
|
energy
A | B |
|
hype
A | B |
|
pop
A | B |
|
mgr
A | B |
|
FIGHT
RATING
56% |
|
|
|
|
|
|

