|
|
PBP Commentary |
Coming up we have a light heavyweight MMA rules bout between Nicholas Hatfield (ranked 8702 p4p, 0 weight class) and Top Shagger (ranked 5817 p4p, 0 weight class). Over to our ring announcer for the fighter introductions!
 |
|
 |
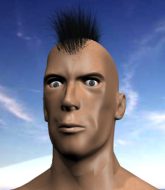
| 218 cm
21
214 lbs
1 - 2 - 0 |
|
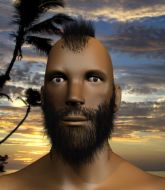
188 cm
18
200 lbs
0 - 0 - 0 |
BJJ Blue Belt
Counter fighter
Hates pizza |
|
BJJ Blue Belt
Brawler
Granite chin |
|
| |
|
Ladies and gentlemen. This fight is 3 rounds, in the light heavyweight division.
Introducing the fighter to my left, fighting out of the red corner.
With a record of
1 - 2 - 0, fighting out of Hilo, Nicholas Hatfield!
And introducing the fighter to my right, fighting out of the blue corner.
With a record of
0 - 0 - 0, fighting out of Hilo, Top Shagger!
The judges for this bout are Colin Fray, Paul Gruel and Roger Salmon.

The bell rings for round one and we are underway!
Shagger throws a hook to the body but it doesn't connect.

Shagger feints and then dives in with a takedown. That was a long way out but the feint bought him enough time to close the distance and complete the takedown. Now we'll play guard for a bit and see who can get the better of that position.
Shagger trying to control the position from guard on top but Hatfield is wriggling around, looking for whatever he can.

Hatfield working for a triangle but Shagger defends it easily.
Shagger missing there with some ground and pound from the guard.
Hatfield has a closed guard, preventing anything of note from happening. Perhaps he's looking to stall.
We've had a slow start to the round here - hopefully the action picks up.
Hatfield had isolated an arm as going for a kimura. Shagger defends it easily.
Hatfield tries to land a sweep but no joy.

That's one minute gone in the round.
Hatfield had isolated an arm as going for a kimura. Shagger defends it easily.
Hatfield throwing his legs up looking for a triangle.
Shagger trying to pass the guard but can't manage it just yet.

Shagger stands up from guard. Let's bang!
Shagger shoots in looking for a single leg takedown. Hatfield is trying to defend but Shagger finishes it well and ends up in half guard. Let's see if he can advance position further.

Hatfield manages to escape and get back to his feet!
Hatfield really does look like a pencil wearing a pair of gloves. Let's hope he has a gameplan to suit that ridiculous body shape.
Shagger closes the distance and gets a trip takedown into side control. Hatfield quickly recovers to half guard.
Hatfield wants to stand back up but Shagger manages to pass into side control.

That's two minutes gone in the round.
Fantastic stuff here - a very entertaining period of action, which has drawn cheers from the crowd.
Shagger decides to stand back up. Shagger steps back and let's Hatfield get back to his feet.

Shagger closes the distance and clinches.
An uppercut to the body lands inside from Shagger.
Hatfield looks like he'd prefer to be striking at range right now.

Shagger escapes the clinch and we're back to striking.
Shagger rushes forward with a series of wild hooks but Hatfield moves out of range and avoids them all easily.
Hatfield throws a big counter combination but Shagger scrambles out of danger and avoids any damage.
Shagger throws a leg kick but Hatfield moved away.
Hatfield appears to be looking for a counter takedown.
Shagger misses with a kick to the body

and Hatfield decides to take the opportunity to score a takedown. He's landed in Shagger's guard.

Shagger has scooted to the edge of the canvas and used the cage to get back to his feet. Hatfield has stuck on his opponent and is forcing him back against the cage.
Hatfield is trying to work for a single leg takedown but Shagger pulls him back up using the underhooks.
Hatfield is breathing heavily.

That's three minutes gone in the round.
Shagger pulls Hatfield into guard.
Shagger looking to control but Hatfield passes into half guard.
Shagger keeping his head moving to avoid the ground and pound.
Hatfield is trying to work for a kimura but Shagger is defending well.
Hatfield thumps the canvas. Not on purpose obviously - he just missed Shagger's head.
Shagger has no desire to be mounted, so is trying to control. Hatfield is working away from the top position though.
Shagger preventing any damage for now, controlling his opponent's head.
Shagger punching from the bottom.

That's four minutes gone in the round.
Hatfield is taking a breather. Shagger says something to him but it's hard to make out. Perhaps he's telling him to get on with it and actually do something.
Hatfield sitting in half guard, looking to land shots. Shagger defending well though.
Shagger trying to hold on to Hatfield's head to control him but Hatfield postures up.

The referee decides to stand the fighters back up.
Shagger forces Hatfield back against the cage and clinches.
And thats the end of the round the fighters go back to their corners.
Top Shagger dominated that round.
That's time! Hatfield's corner gives him a slap on the ass as he gets ready to fight.

Hatfield tries to keep at a distance but Shagger has taken the fight into the clinch.
Shagger is pressed up against the cage. Hatfield has hold of a leg and is looking to drag Shagger down to the mat. Shagger avoids the attempt though and has circled away. We're back to striking at a distance.
Hatfield will have to do better than that with his takedown attempts.
Shagger looks for a takedown. He's got it. We're now in half guard.
Shagger wants to take a breather but Hatfield is having none of it.
We've had a slow start to the round here - hopefully the action picks up.
Hatfield is looking to improve his position.
The fighters are pressed up against the cage, both looking to find a bit of space to work.
Shagger is controlling the pace.
Hatfield looking for submissions off his back.
That's one minute gone in the round.
Shagger throwing punches and elbows but they're not doing any damage.
Shagger decides to stand and escape the position.
Shagger throws a shot to the body.
Shagger dives in and scores a takedown into Hatfield's guard.
Hatfield looking for submissions off his back, moving his hips, looking for an opening.
Both fighters are absolutely exhausted here.
Hatfield trying to control the position.
Shagger has been the more effective fighter overall so far.
That's two minutes gone in the round.
Shagger throwing elbows and punches but not connecting, as Hatfield works some decent striking defense from the bottom.
Shagger wants to control from the top but Hatfield keeps moving.
Hatfield will need to keep those long limbs tucked in whilst he's on the ground, to prevent any submissions.
Shagger looking to pass the guard.
Hatfield is doing well to control the posture of his opponent and prevent any damage.
Hatfield working for a triangle but Shagger defends it easily.
Shagger stays in close to Hatfield's body and controls the position.
That's three minutes gone in the round.
Shagger decides to stand up and beckons his opponent to follow.
Shagger moves into range and clinches up with Hatfield.
Shagger has Hatfield pressed against the cage, preventing Hatfield from circling away and getting back to striking at range.
A frustrated look appears on Hatfield's face as he tries to break the clinch.
Shagger breaks the clinch and we return to the middle of the mat.
A shot to the liver by Shagger. Beautiful body shot.
Shagger throws a head kick that misses.
That's four minutes gone in the round.
Shagger pushes Hatfield up against the cage in a clinch.
Shagger gets underhooks to prevent Hatfield's takedown attempt.
That's three failed takedown attempts in the round for Nicholas Hatfield. That's going to take a lot out of him.

Hatfield breaks the clinch and we return to the middle of the mat.
Hatfield closes the distance and clinches up with Shagger, looking for a takedown. Hatfield pushes Shagger against the cage but Shagger circles to the side and manages to break the clinch.
Shagger gets a double leg takedown into Hatfield's guard.
Hatfield has butterfly guard. He's looking to stand up here. He pushes Shagger off him and springs to his feet nicely. The crowd applauds.
We've seen a great period of action over the last minute or so - credit to both fighters for going all out!
Shagger gets a clinch.
The crowd thankful this round is nearly over.
Shagger's corner calls for him to break the clinch, which he does.
Shagger shoots in and scores a nice double leg takedown into half guard.
And thats the end of the round the fighters go back to their corners.
Top Shagger showed his class in that round. I'd imagine he'll take it on all the scorecards.
That's time! Hatfield's corner gives him a slap on the ass as he gets ready to fight. Let's hear some noise people - this is the final round!

Shagger shoots in for a takedown and gets it. Let's see what he's got on the mat.
Shagger trying to pass the guard but can't manage it just yet.
Hatfield is throwing his legs up, looking for submissions. Shagger is aware though and is defending well.
Hatfield keeping moving, preventing Shagger from controlling successfully.
Hatfield trying to keep a closed guard but Shagger is proving a slippery customer.
We've had a slow start to the round here - hopefully the action picks up.
Hatfield is active off his back here, looking for submissions.
Both fighters are breathing heavily.
Shagger wants to pass the guard but Hatfield is keeping the position.
That's one minute gone in the round.

Shagger is trying to work a guillotine from the top, or something like that? Don't know how he thinks he's going to get a finish from there.
Hatfield not looking particularly offensive just at the moment.
Hatfield is working actively off his back, looking to secure an arm or perhaps work for a triangle.
Shagger postures up.
The referee decides to stand the fighters back up.
Shagger chopping away at his opponent's legs.
That's two minutes gone in the round.
My god... these two guys really need to pick up the pace or everyone will leave to go get a beer.
Hatfield tries to clinch but Shagger is having none of it.
Top Shagger seems to be the more aggressive standup fighter in this bout.
Shagger shoots in and gets a takedown into half guard. Shagger showed some decent athleticism there.
Hatfield blocking the ground and pound attempt from Shagger.
Hatfield is pressing down on Shagger's left leg trying to get back to full guard. He's managed it.
Shagger advances position into side control!
Hatfield is moving his hips around well on the bottom and has managed to get back to half guard.
Hatfield is looking to control Shagger's leg but it's slowly edging free. Can Hatfield avoid being mounted?
Shagger thows a huge punch but Hatfield dodges it nicely.
That's three minutes gone in the round.
Hatfield makes his way to full guard. A much better position for Hatfield.
Hatfield looking for submissions from the bottom but instead Shagger passes into side control.
Hatfield is looking for a sweep.
Hatfield struggling a bit here.
Shagger is chipping away with strikes.
The referee asks Shagger politely if he wouldn't mind getting on with it and actually doing something. Shagger prefers to stall for the moment though.
Shagger avoids the strikes from the bottom by Hatfield.
Shagger trying to control the position but Hatfield is working away.
That's four minutes gone in the round.
Shagger fails to land a wild elbow strike.
Shagger wants to control for a moment but Hatfield uses the opportunity to move back to half guard.
Hatfield tries to get to full guard but Shagger has control of the leg.
Hatfield flails away from the bottom but he's not doing any damage.
Shagger is thwarting Hatfield's attempts to control the position.
Shagger is trying to work for a kimura. This could be trouble! No, Hatfield has managed to free his arm - good work.
Boooooooooooooooooooo!!! God, this has been a terrible round. Come on you two, sort yourselves out!
Hatfield blocking the ground and pound attempt from Shagger.
And that's the end of the fight!
Top Shagger comfortably won the final round on my scorecard.
Well Shagger has outworked and out performed his opponent in all aspects of the game today. He was simply too good and the decision should be no more than a formality. Over to the ring announcer for the scorecards.
Ladies and gentlemen, after 3 rounds of action, we go to the scorecards for a decision.
Judge Colin Fray scores the fight 27:30
Judge Paul Gruel scores the fight 27:30
Judge Roger Salmon scores the fight 27:30
In favor of your winner, by unanimous decision... Top Shagger!
|
|
|
|
|
|
|
|
|
|
|
|
|
|
|
|
|
|
|
|
|
|
|
| S |
C
A |
G |
S |
C
B |
G |
|
S |
C |
G |
|
energy
A | B |
|
hype
A | B |
|
pop
A | B |
|
mgr
A | B |
|
FIGHT
RATING
37% |
|
|
|
|
|
|
