|
|
PBP Commentary |
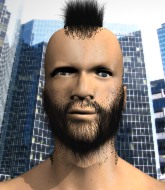
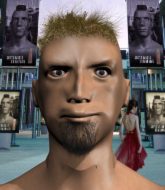
Coming up we have a middleweight MMA rules bout between Joey Hatton (ranked 834 p4p, 105 weight class) and Man Itizer (ranked 2342 p4p, 259 weight class). Hatton comes to the cage accompanied by deadman. Man Itizer told me before the fight that he's been watching a lot of DVDs so let's see if that helps him in this one! I can't wait to find out!
 |
|
 |
| 190 cm
28
190 lbs
13 - 4 - 0 |
|
185 cm
28
185 lbs
10 - 8 - 0 |
Good wrestling
Solid boxing
Cardio machine |
|
BJJ Blue Belt
Excellent MT
Heavy handed |
|
| |
|
Ladies and gentlemen. This fight is 3 rounds, in the middleweight division.
Introducing the fighter to my left, fighting out of the red corner.
With a record of
13 - 4 - 0, fighting out of Las Vegas, Joey Hatton!
And introducing the fighter to my right, fighting out of the blue corner.
With a record of
10 - 8 - 0, fighting out of London, Man Itizer!
The judges for this bout are Chris Dean, Summer Carpenter and Ron Honeybunn.

The bell rings for round one and we are underway!
Itizer tries to clinch but Hatton moves out of range.
Itizer has been spending a lot of time sparring his boxing in the run up to the fight, trying to sharpen up those hands and look for a knockout.
Itizer tries to clinch up.
Hatton appears to be looking for a big counter.
Man Itizer seems to be the more aggressive standup fighter in this bout.
Itizer scores with a jab to the body.
Itizer moves in looking to clinch but Hatton pushes him off.
Itizer tries to clinch up but Hatton circles away and keeps his distance.
Itizer throws a series of punches but Hatton avoids them all with ease.

Hatton moves into the clinch.
Hatton can't get the takedown.
Itizer scores a nice knee to the body.
Hatton has been talking about how he's improved his wrestling in the run up to the fight so let's see if that's enough to sway the balance.
Hatton blocks an uppercut.
Hatton has a body lock and is looking for a takedown. Itizer is bouncing around trying to prevent the takedown and somehow he has indeed managed to stay on his feet.
We've had a slow start to the round here - hopefully the action picks up.
Itizer misses with some punches.
Hatton tries to work over Itizer's body with a swooping hook but it only glances the target.
Itizer struggles to land a body shot inside as Hatton controls his hands.
Itizer cracks Hatton with a nice body shot.
With the two fighters working up against the cage, Itizer just misses with a elbow thrown towards Hatton's brow.
Hatton tries for a takedown but Itizer manages to get underhooks.
That's three failed takedown attempts in the round for Joey Hatton. That's going to take a lot out of him.
Hatton is trying to pull guard but Itizer has him pressed against the cage.

That's one minute gone in the round.
Hatton tries to pull guard but Itizer forces him back to his feet, against the cage.
A head punch on the inside from Itizer fails to land.

Hatton gets a nice trip takedown into half guard.
Itizer wants to stand back up but Hatton manages to pass into side control.
Hatton trying to control the position but Itizer is working away.
Hatton remains in side control and seems content to stay there. It's a versatile position from which he can work both strikes and submissions, whilst maintaining that control, so maybe he'll sit here for a while.

Hatton is trying to get an arm triangle but Itizer is defending well.
Itizer is putting a lot of effort into getting back to his feet here.
Itizer really doesn't want to stay on the ground with Hatton. If he can't get it back to his feet, it's only a matter of time before he'll be tapping out.

Hatton decides to take the fight back to the feet.
Hatton circles away from the clinch attempt.
Hatton slips a jab and a cross from Itizer.
Hatton connects with a body shot that sends Itizer's belly button to the back.

That's two minutes gone in the round.
Hatton avoids the clinch attempt nicely.
Itizer swings away but doesn't land with a series of punches.
Hatton tries to counter by moving into the clinch but Itizer manages to circle out of the way.
This is a great period of action - very entertaining stuff!
Itizer is looking to clinch.
Hatton gets the takedown into side control.
Itizer tries to escape but Hatton is in control.

Itizer throws Hatton to one side and escapes!
Hatton lands a powerful looking uppercut that connected with his opponent's jaw.
Hatton throws a hook but Itizer avoids it easily.
Itizer tries to counter by closing the distance.
Hatton circles away from the clinch attempt.
Itizer tries to clinch but Hatton moves out of range.
Hatton circles away from the clinch attempt
and Hatton counters with a crisp hook to the side of the head.

That's three minutes gone in the round.
Hatton forces Itizer back against the cage and clinches.
Itizer prevents the takedown attempt.
Itizer swings away with an uppercut that misses.
Itizer is leaning against Hatton and scores with a nice uppercut to the body.
Hatton tries for a takedown. No joy.
Itizer misses with a short punch on the inside.
Hatton looking for a takedown.
Hatton wants the takedown. Itizer is fighting it off but Hatton persists and manages to bring the fight to the ground, ending up in Itizer's guard against the cage.
Hatton won't allow Itizer to get back to his feet.
Itizer scrambles and gets back to his feet.
Itizer tries to close the distance and clinch but Hatton swats him to one side with an open hand palm strike and circles away.
Hatton changes levels looking for a counter takedown but doesn't commit.
Itizer wants to clinch.
A quick step to the side and Hatton tries to counter with a shot to the body but it doesn't connect.
Itizer will need to tighten up his combinations if he doesn't want to gas himself out, swinging at thin air.

That's four minutes gone in the round.
Hatton scores with a punch to the head.
Fantastic stuff here - a very entertaining period of action, which has drawn cheers from the crowd.
Hatton looks for a takedown but Itizer sprawls well.
Itizer tries to close the distance and clinch up against the cage but Hatton paws at him with a jab and circles away.
A little feinted left hand from Hatton on the counter but he doesn't commit to it.

Itizer gets a clinch.
The fighters are pressed against the cage, as the pace of the fight slows.
Hatton tries to score a body lock takedown but Itizer shows good agility there to stay on his feet.
Itizer stalling in the clinch but Hatton improves position.
Hatton is trying to pull guard but Itizer turns him against the cage and we stay in the clinch.
Hatton wants a takedown.
A head punch on the inside from Itizer fails to land.
Hatton blocking some punches.
And thats the end of the round the fighters go back to their corners.
A close round but Man Itizer will probably get the nod.
The fighters get back to their feet, the hooter sounds and we're back to the action!

The fight moves into the clinch position.
Hatton drops to a knee looking for a takedown but Itizer gets the underhooks and prevents it.
Still in the clinch, Itizer scores with a nice short uppercut.
Itizer tried to land a shot to the body but connects with Hatton's elbow.
Good anti-grappling being displayed by Hatton as Itizer tries to tie him up.
Itizer lands a hook to the side of the head.
Itizer stalling in the clinch but Hatton improves position.
Itizer is trying to stall.
Hatton wants a takedown but no success here.
Man Itizer seems to be working more effectively in the clinch in the fight so far.
We've had a slow start to the round here - hopefully the action picks up.
Hatton jumps guard but Itizer turns him against the cage and keeps the fight standing.
That's three failed takedown attempts in the round for Joey Hatton. That's going to take a lot out of him.
Hatton has Itizer pressed up against the cage and is working for takedown. Itizer manages to improve position though and keeps the fight standing.
Hatton has Itizer pressed up against the cage and is working for takedown. Itizer manages to improve position though and keeps the fight standing.
Itizer lands a body shot in the clinch.
Hatton blocks a couple of punches on the inside.
Itizer gets double underhooks to prevent a takedown attempt from Hatton.
Hatton is looking to control Itizer's arms but Itizer gets an underhook and turns him. Now Hatton has his back to the cage.
That's one minute gone in the round.
Hatton is looking for a takedown.
Hatton is trying to push Itizer away but Itizer has him pressed against the cage, so he's going nowhere.
Hatton wants a takedown.
Itizer prevents the takedown attempt.
Both fighters are absolutely exhausted here.
Itizer working aggressively here.
Itizer pushes Hatton back against the cage and lands a hook to the side of the head.
Hatton is working for a takedown up against the cage. He can't get it on this occasion though.
Hatton tries to jump guard but he falls flat on his backside. Itizer smiles and moves away.
Hatton gets tackled into the cage by Itizer. Itizer maintains the clinch.
Hatton blocks a body shot from Itizer.
Itizer wants to stall.
Hatton fails to pull the fight into his guard.
Hatton has picked Itizer up - he's going for a ride! Hatton dumps his opponent to the mat with a thud and settles into half guard.
Itizer is looking to escape.
Man Itizer has got the better of the ground game so far.
That's two minutes gone in the round.
Itizer has one foot on Hatton's thigh - he pushes off and manages to get back to his feet.
Wooooo! Give it up for these two warriors! They are putting on a show!
Hatton misses with a hook. Itizer ducked under it nicely.
Itizer pivots as if he's going to throw a leg kick but stops half way.
Itizer misses with a jab to the body
and Hatton counters with a nice shoot takedown that brings the fighters to the ground.
Itizer wants to stand up but Hatton is controlling him.
Itizer is using up a lot of energy trying to get back to his feet. Perhaps he should improve his position first.
The fighters are pressed up against the cage, both looking to find a bit of space to work.
Itizer is looking to stand back up but Hatton counters by passing into half guard. Oops... bit sloppy there by Itizer.
Hatton content to sit in half guard and control for a moment.
Hatton trying to control the action but Itizer is working from the bottom.
That's three minutes gone in the round.
Itizer is trying to stand back up but Hatton is controlling him
Hatton decides he's had enough of the ground and stands up.
Itizer pulls out of a head kick attempt.
Hatton fails with the takedown.
Hatton takes a head kick and shrugs it off.
Itizer tries a head kick but it misses.
Hatton keeps the fight standing with a nice sprawl.
Itizer is looking to take this fight into the clinch.
Hatton half commits to a counter takedown before pushing away, out of range.
That's four minutes gone in the round.
Itizer fails to land with a series of punches.
Itizer falls off balance throwing a combination
and Hatton decides to take the opportunity to score a takedown. He's landed in Itizer's guard.
Hatton slows down the pace of the fight for a moment. He'll need to remain active if he doesn't want to see the fight stood back up.
Itizer wants to get back to his feet but Hatton passes into half guard.
Hatton stalling.
Itizer is refusing to be controlled, as Hatton sits in half guard.
Hatton uses his free foot to push down on Itizer's thigh. Eventually he works his other foot free and he's advanced to mount - this is trouble for Itizer.
This is a great period of action - very entertaining stuff!
Itizer wants to try and get back to his feet.
And thats the end of the round the fighters go back to their corners.
Man Itizer showed his class in that round. I'd imagine he'll take it on all the scorecards.
The fighters' corners scream their final instructions, as the referee calls time. Here we go, back to the action! Let's hear some noise people - this is the final round!

The fight stays on the outside here - Itizer looks like he's thinking about clinching though.
Itizer tries to clinch but Hatton is having none of it.
Itizer tries to clinch but Hatton moves out of range.
Hatton swats away the attempt to clinch by Itizer.
Hatton half commits to a counter takedown before pushing away, out of range.
Itizer moves in looking to clinch but Hatton pushes him off.
Hatton ducks low and lands a nice hook to the body of his opponent.
Itizer fails with an attempt to clinch.
We've had a slow start to the round here - hopefully the action picks up.
Hatton avoids the clinch attempt nicely.
Itizer tries to clinch but Hatton moves away
and Hatton counters with a crisp hook to the side of the head.
Itizer is looking to clinch but Hatton is avoiding it.
That's one minute gone in the round.
Itizer fails in his attempt to clinch.
Itizer drops his hands and takes a jab to the jaw for his troubles.
Itizer tries to close the distance and clinch up but Hatton swats him away and circles back towards the center.
A telegraphed takedown attempt from Hatton is defended easily by Itizer.
Itizer pulls out of a head kick attempt.
Itizer tries to close the distance and clinch but Hatton swats him to one side with an open hand palm strike and circles away.
Hatton fakes a head shot and lands one to the body.
Itizer moves in looking to clinch but Hatton pushes him off.
Itizer takes a punch to the jaw and another one to the bread basket.
Hatton throws a looping left and ducks down for a takedown. He's got his arms around Itizer's waist but Itizer gets an underhook and avoids the takedown by throwing Hatton off to one side.
That's two minutes gone in the round.
Itizer tries to close the distance and clinch up against the cage but Hatton paws at him with a jab and circles away.
Hatton is looking to counter punch.
Hatton swats away the attempt to clinch by Itizer.
Itizer fails to land the takedown.
Hatton fails miserably with a takedown attempt.
That's three failed takedown attempts in the round for Joey Hatton. That's going to take a lot out of him.
Hatton keeps the fight on the outside.
Itizer uses decent footwork to sidestep a right hand from Hatton.
Itizer tries to clinch but is not successful on this occasion.
Hatton circles away from the clinch attempt.
Hatton is looking to counter punch.
Hatton scores with a jab to the jaw of his opponent.
That's three minutes gone in the round.
Itizer is looking to take this fight into the clinch.
Itizer doesn't manage to clinch there - Hatton circles away.
Man Itizer is looking to throw some combinations by the looks of things.
Itizer doesn't manage to clinch there - Hatton circles away.
Hatton scores with a nice right hand.

Itizer is rocked!
A low kick from Itizer is predictable there
letting Hatton counter with a right hand.
Itizer is still on wobbly legs! Can Hatton finish him?
Itizer wants to clinch up but Hatton keeps it at a distance.
Itizer wants to clinch up but Hatton keeps it at a distance.
Itizer tries to clinch but Hatton is having none of it.
Itizer tries to clinch but is not successful on this occasion.
Itizer tries to clinch up but Hatton circles away and keeps his distance.
A little feinted left hand from Hatton on the counter but he doesn't commit to it.
Hatton feints and then dives in with a takedown. That was a long way out but the feint bought him enough time to close the distance and complete the takedown. Now we'll play guard for a bit and see who can get the better of that position.
Hatton trying to control the position from guard on top but Itizer is wriggling around, looking for whatever he can.
We get told so often about how wrestlers don't like to be on their backs. Let's see if Itizer can do anything to dispel that myth.
Itizer is trying to stand and escape. In the scramble, Hatton has locked hold of an arm and he's managed to lock on an armbar - Itizer taps out instantly and this one is all over!
Ladies and gentlemen, after 4:56 of round 3, we have a winner by way of Submission (Armbar). Joey Hatton!
|
|
|
|
|
|
|
|
|
|
|
|
|
|
|
|
|
|
|
|
|
|
|
| S |
C
A |
G |
S |
C
B |
G |
|
S |
C |
G |
|
energy
A | B |
|
hype
A | B |
|
pop
A | B |
|
mgr
A | B |
|
FIGHT
RATING
65% |
|
|
|
|
|
|
