|
|
PBP Commentary |
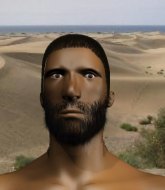
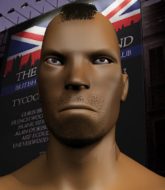
Coming up we have a lightweight MMA rules bout between John Wall (ranked 1961 p4p, 232 weight class) and John Blitz (ranked 3260 p4p, 353 weight class). Wall comes to the cage accompanied by Metallica - Enter Sandman. Both these guys have solid standup skills and neither is particularly fantastic on the ground, so let's hope for a nice standup war!
 |
|
 |
| 193 cm
21
165 lbs
6 - 6 - 0 |
|
175 cm
31
161 lbs
18 - 24 - 0 |
Good wrestling
Great elbows
Cardio machine |
|
BJJ Purple Belt
Excellent MT
Good gas tank |
|
| |
|
Ladies and gentlemen. This fight is 3 rounds, in the lightweight division.
Introducing the fighter to my left, fighting out of the red corner.
With a record of
6 - 6 - 0, fighting out of Sydney, John Wall!
And introducing the fighter to my right, fighting out of the blue corner.
With a record of
18 - 24 - 0, fighting out of Los Angeles, John Blitz!
The judges for this bout are Dean Styles, Columbo Gatti and Steve Montenegro.

The bell rings for round one and we are underway!
Wall connects with a body shot.
Blitz shoots in looking for a takedown but Wall manages to keep the fight standing, pushing Blitz's face into the canvas for good measure before circling away.
A looping hook to the body misses from Wall. Blitz does a little dance to reset his feet.
Blitz misses with a takedown attempt. He shot from a bit too far out.
A telegraphed takedown attempt from Blitz is defended easily by Wall.
John Wall has stuffed three takedown attempts in the round now. That's going to take a lot out of John Blitz.
Blitz tries for a takedown but Wall circles away easily
and Wall counters with a straight punch to the midsection.
We've had a slow start to the round here - hopefully the action picks up.
Blitz wants to clinch up but Wall keeps it at a distance.
Wall really does look like a pencil wearing a pair of gloves. Let's hope he has a gameplan to suit that ridiculous body shape.
Wall displays some good footwork, moving neatly out of range as Blitz throws out the jab.
Blitz throws a combination. Wall tries to block but a couple of punches get through.
Blitz dives in and grabs Wall's left leg, looking for a takedown. Wall pushes down on Blitz's head and hops out.
Wall is looking to counter punch.
Blitz with a poor takedown
and Wall counters with a straight right hand.

That's one minute gone in the round.
Wall dips to his left and cracks Blitz with an uppercut!
John Blitz seems to be the more aggressive standup fighter in this bout.
Blitz fails with an attempt to clinch.
Blitz throws a head kick that misses.
Blitz throws a combination that misses
and Wall counters with a stiff right hand.
Blitz takes a shot to the body in his stride.
Wall connects with a good right hand that stumbles Blitz. Blitz circles away out of range and recomposes himself.
Nice sprawl there from Wall as Blitz shoots in.
Blitz is looking to take this fight into the clinch.
Blitz tries to grapple but his opponent circles
and Wall counters with a straight right hand.
Blitz tries for a takedown but Wall circles away easily
and Wall counters with a nice body shot.

That's two minutes gone in the round.

Blitz closes the distance and gets a trip takedown into side control. Wall quickly recovers to half guard.
Wall's coaches at Doherty's Gym have been working on his defensive grappling in preparation for this fight so let's see if he can get out of this tricky position.
Fantastic stuff here - a very entertaining period of action, which has drawn cheers from the crowd.
Wall is trying to control but can't.
Wall tries to roll over but Blitz keeps him under control.
Blitz wants to control but Wall is keeping him busy.

Blitz is looking for a kimura but he's never going to get it from there.
Blitz trying to control the action but Wall is working from the bottom.
Wall avoiding damage under a succession of punches from Blitz.

That's three minutes gone in the round.
Wall avoiding damage under a succession of punches from Blitz.
Blitz trying to control from half guard but Wall is working away.
Blitz not throwing his punches with enough precision this time.
Blitz has the superior BJJ but he's also working some ground strikes into his gameplan.
Wall wants to improve his position but Blitz is controlling well.
The fighters are pressed up against the cage, both looking to find a bit of space to work.
Blitz not throwing his punches with enough precision this time.
Blitz throwing punches and elbows but they're not doing any damage.

That's four minutes gone in the round.
My god... these two guys really need to pick up the pace or everyone will leave to go get a beer.
Blitz thows a wild elbow that connects with the canvas.
Wall is staying active underneath Blitz, who seems content to just control the action from this position.

The referee has decided to stand the fighters back up, so we'll restart on the feet.
A really sloppy takedown attempt there from Blitz.
Wall throwing a counter right hand but Blitz manages to avoid it.
Blitz with a poor takedown
and Wall counters with a straight right hand.
Blitz throws a combination but it was largely blocked by Wall.
Wall jabs Blitz right on the nose. Blitz blinks but takes it well.
Wall scores with a hook to the body. Blitz takes a step back and tries to catch his breath.
Blitz moves away from the strike by Wall.
Wall connects with a single shot there.
Wall swings and misses with a hook to the body.

Blitz has managed to clinch.
And thats the end of the round the fighters go back to their corners.
John Wall dominated that round.
That's time! Back to the action!

Wall on the wrong end of a nice jab.
Blitz has his hands up protecting his head but a hook from Wall finds it's way round the side to connect with Blitz's head.
Wall looks to land a right hand but Blitz moved out of range.
Despite the aggression on Blitz's face he doesn't fully commit to the counter.
Blitz fails miserably with a takedown attempt.
Wall jabs Blitz to the body, keeping him at a distance.
Wall bobs and weaves and throws out a fast jab that snaps Blitz's head backwards.
Blitz fails miserably with a takedown attempt.
We've had a slow start to the round here - hopefully the action picks up.
Blitz fails with a takedown attempt from distance.
John Wall has stuffed three takedown attempts in the round now. That's going to take a lot out of John Blitz.
Blitz fails with a takedown attempt from distance.
Wall darts in and out, connecting with a jab.
That's one minute gone in the round.
Blitz misses with a takedown attempt - Wall sprawls well and throws a nice strike on the way out which just misses.
Wall is using his height advantage well here, landing a good percentage of his punches.
Blitz tries to close the distance and clinch but Wall swats him to one side with an open hand palm strike and circles away.
John Wall is winning the standup battle so far.
Blitz shoots and misses
and Wall cracks him with a counter punch right on the button.
Blitz bobs and weaves well there to avoid the strikes.
Blitz tries to score a power double leg takedown but Wall sees that one coming and sprawls well. That will dishearten Blitz somewhat.
Blitz moves to clinch but Wall breaks away
and Wall counters with a left to the body.
Blitz shoots and misses
and Wall counters with a lovely straight right hand!
Blitz closes the distance and clinches up with Wall, looking for a takedown. Blitz pushes Wall against the cage but Wall circles to the side and manages to break the clinch.
That's two minutes gone in the round.
A big left from Wall misses.
Blitz fails with the takedown
letting Wall counter with a right hand.
Blitz is breathing heavily.
Wall misses with a straight left.
John Wall is looking to keep the fight on the feet at all costs.
Blitz tries to clinch there but Wall circles away.
Blitz uses some good footwork to avoid the body shot by Wall.
Wall is moving around nicely and scores here with a single head shot.
A big right from Wall misses.
The crowd are loving this. Great action here.
Wall scores with a body shot.
The crowd cheers as Blitz lands an impressive looking overhand right. Wall doesn't seem phased though.
Blitz tries for a takedown but Wall sees it coming a mile off and avoids it easily.
Wall is looking to counter punch.
Wall is really dominating this fight. Is there anything that Blitz can do to turn this around?
A punch combination from Blitz misses.
Blitz gets cracked with a nice right hand there by Wall.
That's three minutes gone in the round.
Wall digs a good body shot into Blitz's ribs.
No luck for Blitz with that takedown attempt.
John Blitz is looking to throw some combinations by the looks of things.
Blitz takes a big uppercut there. He seems a bit wobbly but no, he's OK.
Blitz gets cracked there but stands up to it.
Blitz gets his takedown attempt stuffed easily
and Wall counters with a left to the body.
Wall slaps away a takedown attempt from Blitz, before circling back to the center of the mat.
Blitz fails to land the takedown.
That's four minutes gone in the round.
Blitz tries to clinch up but Wall circles away and keeps his distance.
Wall fakes and then throws a beautiful body shot. Blitz looks a bit winded and takes a step backwards to take a breath.
Wall stuffs a takedown. It's all about dictating where the fight takes place and Wall wants it to stay on the feet.
A lazy left from Wall finds it's target.

Blitz is rocked!
Wall is using his reach advantage well here, landing the more effective single shots from range.
Wall throws a looping overhand right but Blitz ducks down to avoid it.
Blitz keeping a good distance there, avoiding the body shot.
Nice sprawl there from Wall as Blitz shoots in.
Wooooo! Give it up for these two warriors! They are putting on a show!
Blitz bobs and weaves well there to avoid the strikes.
Blitz with a poor takedown
and Wall counters nicely by changing levels and landing a hook to the body.
A punch lands to the side of Blitz 's head but he takes it in his stride.
Wall scores with the left hand. Blitz knows he should have avoided that one.
Wall ducks down and throws a hook to the body.
And thats the end of the round the fighters go back to their corners.
John Wall dominated that second round.
The minute break is over - no more time for sponges and pep talks - back to the action! This is the final round!

Blitz closes this distance looking for a takedown but Wall circles away.
Wall throws a big shot that misses.
Blitz ducks right into an uppercut from Wall.
Blitz is still on wobbly legs! Can Wall finish him?
Blitz gets to the clinch - let's see what his plan is here.
Blitz seems to have recovered his senses.

Wall manages to break the clinch.
Wall tests Blitz's chin there with a solid looking shot.
Blitz throws a looping left and ducks down for a takedown. He's got his arms around Wall's waist but Wall gets an underhook and avoids the takedown by throwing Blitz off to one side.
Wall appears to be looking for a big counter.
Wall swings and misses with a hook to the body.
We've had a slow start to the round here - hopefully the action picks up.
Wall looks to land a left hand but Blitz moved out of range nicely.
Sloppy strikes from Wall. Those never looked like landing.
Wall connects with a good straight punch right through the guard and follows up with a right hook and a left hook! That last one sent Blitz tumbling to the canvas! Wall pours on the pressure with more strikes and the referee has no hesitation diving in to stop the fight! Blitz was done - good stoppage!
Ladies and gentlemen, after 0:57 of round 3, we have a winner by way of TKO (Punches). John Wall!
A less than humble John Wall misjudged his post fight interview somewhat and came across a little too arrogant whilst trying to hype up his own abilities.
John Blitz was interviewed post fight and said 'Have to train my wrestling'.
|
|
|
|
|
|
|
|
|
|
|
|
|
|
|
|
|
|
|
|
|
|
|
| S |
C
A |
G |
S |
C
B |
G |
|
S |
C |
G |
|
energy
A | B |
|
hype
A | B |
|
pop
A | B |
|
mgr
A | B |
|
FIGHT
RATING
57% |
|
|
|
|
|
|
