|
|
PBP Commentary |
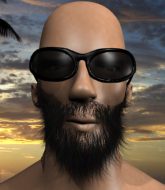
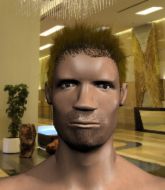
Coming up we have a super heavyweight MMA rules bout between King Murhaa (ranked 3477 p4p, 66 weight class) and Johnny Walker (ranked 3663 p4p, 75 weight class). Both fighters look fresh as a daisy as they make their way towards the cage.
 |
|
 |
| 188 cm
25
210 lbs
8 - 7 - 0 |
|
175 cm
26
170 lbs
12 - 8 - 1 |
Great wrestler
Excellent MT
Granite chin |
|
BJJ Purple Belt
World class boxer
Good gas tank |
|
| |
|
Ladies and gentlemen. This fight is 3 rounds, in the super heavyweight division.
Introducing the fighter to my left, fighting out of the red corner.
With a record of
8 - 7 - 0, fighting out of Las Vegas, King Murhaa!
And introducing the fighter to my right, fighting out of the blue corner.
With a record of
12 - 8 - 1, fighting out of Hilo, Johnny Walker!
The judges for this bout are Don Winkell, Timothy Bukovac and .

The bell rings for round one and we are underway!
Murhaa gets his takedown attempt stuffed easily
and Walker counters with a straight right hand.
Murhaa shoots for a double leg takedown but Walker sprawls well. He's pushed Murhaa's face into the mat and manages to get back to his feet relatively easily.
Murhaa shoots in looking for a takedown. Walker tries to sprawl out of it but Murhaa keeps driving through. The fighters are pinned against the cage. Walker manages to get underhooks and after a bit of a struggle, circles away and we're back to standing.
That's three failed takedown attempts in the round for King Murhaa. That's going to take a lot out of him.
Murhaa goes for a double leg but Walker avoids the attempt and the two fighters end up clinched against the cage as Walker continues to drive forward.

Walker has managed to clinch.
Murhaa is trying to work for a single leg takedown but Walker pulls him back up using the underhooks.
Murhaa goes for a takedown in the clinch but Walker prevents it.
Walker has had enough of the clinch but Murhaa keeps him there for the moment.
A short right hand to the side of the head by Walker.
Murhaa can't get the takedown.
Murhaa drops down for a takedown but doesn't get it.
We've had a slow start to the round here - hopefully the action picks up.
Murhaa tries for a takedown. No joy.
Murhaa tries to score a body lock takedown but Walker shows good agility there to stay on his feet.
Murhaa drops down for a takedown but doesn't get it.
A short right from Walker on the inside.

That's one minute gone in the round.
Murhaa has dropped down and is looking to force the takedown but it's defended by Walker after a bit of a struggle.
Murhaa prevents a body shot from Walker.
Walker tries a shoulder strike but it doesn't do any damage.
Murhaa has a body lock and is looking for a takedown. Walker is bouncing around trying to prevent the takedown and somehow he has indeed managed to stay on his feet.
Murhaa is looking to take this one to the mat.
Murhaa goes for a takedown attempt but Walker pushes him away and we're back to fighting at a distance.
Walker lands a jab. Then a cross. Then finally a nice hook to the body. Good work there by Walker.
Walker tests Murhaa's chin there with a solid looking shot.
Nice takedown defense from Walker. No joy for Murhaa on that attempt.
And an attempted straight right on the counter from Walker! But no joy.
Johnny Walker is looking to keep the fight on the feet at all costs.
Walker instigates a clinch.

Walker breaks the clinch.
Murhaa shoots in for a takedown. He's persisting with it as Walker sprawls well. Walker wins this battle and keeps the fight standing. Murhaa gets slowly back to his feet.
Murhaa misses with a takedown attempt. He shot from a bit too far out.
Walker scores with a hook to the body. Murhaa takes a step back and tries to catch his breath.
A solid leg kick lands there for Walker.

That's two minutes gone in the round.
Fantastic stuff here - a very entertaining period of action, which has drawn cheers from the crowd.
Murhaa with a poor takedown
and Walker counters with a right hand to the body.
Murhaa is breathing heavily.
Murhaa fails with the takedown.
Walker flicks out a counter leg kick but Murhaa steps away.
Walker scores with a one two! Murhaa had his feet all tangled up there and couldn't avoid the strikes.
Walker fakes a head punch and goes low to the body. Nicely done.
Walker connects with a solid leg kick.
Walker connects with a slap. Keep your fist closed son.
Walker lands a nice looking body shot.
Horrible takedown attempt by Murhaa or perhaps it was just good defense by Walker, which made it look bad.
Walker throws a right and a left that both miss.
Murhaa misses with a takedown
and Walker moves into the clinch.
Walker breaks the clinch and we return to the middle of the mat.
Walker throws a combination. Murhaa tries to block but a couple of punches get through.
Walker scores with a reasonable looking shot to the body. Murhaa doesn't seem bothered though.
Murhaa has his head snapped back a nice jab. A little nod from Murhaa there as he acknowledges the shot.
Walker darts in and clinches Murhaa up against the cage.
Walker is pressed up against the cage. Murhaa has hold of a leg and is looking to drag Walker down to the mat. Walker avoids the attempt though and has circled away. We're back to striking at a distance.

That's three minutes gone in the round.
Walker fakes a head punch and goes low to the body. Nicely done.
Walker stuffs the takedown.
A right-left combo lands from Walker.
Murhaa on the wrong end of a nice jab.
Murhaa darts in looking for a takedown but Walker gets double underhooks and turns Murhaa into the cage.
Murhaa dives in for a single leg takedown but Walker sprawls and the fighters end up clinched against the cage.
Walker shapes to counter with a head kick.
Walker throws a shot to the body.
Walker connects with a looping right hand.
Walker takes a step towards his opponent and connects with a left hand, before circling away.
Murhaa tries for a takedown but Walker circles away easily
letting Walker counter with a right hand.
This has been an exciting period of action!
Walker fakes a head shot and lands one to the body.
Walker closes the distance and presses his opponent up against the cage.
Murhaa has Walker pressed up against the cage and is working for takedown. Walker manages to improve position though and keeps the fight standing.
Murhaa drops to a knee looking for a takedown but Walker gets the underhooks and prevents it.
Walker is trying to work out of this bad position, with his back against the cage.
Murhaa wants a takedown but no success here.

That's four minutes gone in the round.
Walker wants to get back to striking at distance but Murhaa won't allow it.
I was talking to Murhaa's coach per-fight and he was telling me that they'd been working on the clinch in the runup to this fight.
Murhaa drops to a knee looking for a takedown but Walker gets the underhooks and prevents it.
Walker can't break the clinch.
Walker lands a hook that snaps the head of Murhaa backwards.
Murhaa has dropped down and is looking to force the takedown but it's defended by Walker after a bit of a struggle.
Murhaa keeps control of Walker as he tries to wriggle out of the double underhooks.
Walker tries to circle away but Murhaa has him pinned against the cage.
Murhaa is trying to work for a single leg takedown but Walker pulls him back up using the underhooks.
Walker breaks the clinch and we return to the middle of the mat.
Murhaa fakes high and shoots in for a takedown but Walker avoids it really well and circles away.
The fighters circle momentarily. Walker darts into range and connects with a nice straight punch.
The crowd applaud the fighters' efforts here as the round comes to an end.
Murhaa with a lazy takedown attempt
and Walker cracks him with a counter punch right on the button.
Walker scores with a reasonable looking shot to the body. Murhaa doesn't seem bothered though.
Some wild striking there from Walker.
And thats the end of the round the fighters go back to their corners.
Johnny Walker dominated that round.
That's the end of the round. The referee orders the cornermen out of the cage so we can get back down to business.

Walker catches Murhaa with a nice straight right. He seems pissed - ooooh, it's on now! On like donkey kong!
Walker stuffs a takedown. It's all about dictating where the fight takes place and Walker wants it to stay on the feet.
A punch combination from Walker misses.

Murhaa gets the takedown into side control.
Murhaa wants to control but Walker is keeping him busy.
Walker is working to avoid the ground and pound but Murhaa connects with a decent elbow.
Walker is trying to stand back up. He's worked his way up against the cage but Murhaa has just dragged him back down to the mat.
Walker is using up a lot of energy trying to get back to his feet. Perhaps he should improve his position first.
Murhaa has been looking to land a fair amount of strikes on the ground. He might be looking to soften his opponent up in order to work for a submission.
We've had a slow start to the round here - hopefully the action picks up.
The ref warns both fighters not to hold the cage as they work up against the meshing.
Walker has been the more effective fighter overall so far.
That's one minute gone in the round.
Walker avoids any damage from the ground and pound of Murhaa.
Walker is putting a lot of effort into getting back to his feet here.
Murhaa advances to full mount.
Murhaa trying to control but he's not successful this time.
Walker is trying to stand.
Murhaa sitting in mount, just looking to control for the moment.
Walker really wants to buck Murhaa off and get back to his feet.
That's two minutes gone in the round.
Neither fighter has done anything of merit for a good minute or two here and the crowd are not happy about it.
The referee warns Walker that he has to improve his position here as he takes two more clean shots to the head.
Murhaa wants to control the pace but Walker is squirming around nicely.
Murhaa controlling the pace for now.
Walker tries to buck Murhaa off but he can't manage it.
Murhaa controlling from mount.
Murhaa looking to control but Walker is working nicely, looking to advance position himself.
Murhaa will need to keep those long limbs tucked in whilst he's on the ground, to prevent any submissions.
Walker is trying to escape but when you're mounted that's not too easy.
Walker is trying to stand but he's not in a good position to be doing that! Murhaa has taken his back!
Murhaa throwing lazy shots from the back mount that aren't doing any damage.
The fighters are pressed up against the cage, both looking to find a bit of space to work.
That's three minutes gone in the round.
Walker is trying to stand back up.
Murhaa scores with some strikes to the side of the head there. Good, points scoring shots.

Walker is staying cool under pressure, defending well against the rear naked choke attempt from his opponent.
Walker trying to get back to his feet but Murhaa is in full control for now.
Walker covering up well and avoiding damage.
Murhaa softening up his opponent with strikes here.
Walker is trying to stand back up.
That's four minutes gone in the round.
Walker staying busy and making it hard for Murhaa to control.
Walker is trying to get back to his feet but he's not managed it yet.
Murhaa is working for the rear naked choke. He has one arm under the chin but Walker has hold of the other arm. A bit of a stalemate here.
Walker trying to get back to his feet but Murhaa is in full control for now.
The crowd thankful this round is nearly over.
Walker is staying cool under pressure, defending well against the rear naked choke attempt from his opponent.
And thats the end of the round the fighters go back to their corners.
King Murhaa dominated that second round.
Well, the break between rounds is over. Let's get back to the scrappin! This is the final round!

Murhaa shoots in for a takedown from distance. He catches Walker napping and manages to drive through into side control!
We get told so often about how wrestlers don't like to be on their backs. Let's see if Walker can do anything to dispel that myth.
Walker is trying to escape and get back to his feet.
Walker is being controlled here.
Walker wants to escape from the position here - easier said than done!
Murhaa works a knee to the body and follows up with a nice elbow to the head.
We've had a slow start to the round here - hopefully the action picks up.
Walker is working hard to escape and get back to his feet. After a battle for position, Murhaa asserts his dominance and retains side control.
King Murhaa overall seems to be getting the better of the ground position in the fight so far.
That's one minute gone in the round.
Murhaa scores with punches from side control.
Walker tries to escape but Murhaa is in control.
Murhaa works to advance to full mount. Walker defends for a few seconds but eventually he succumbs.
Murhaa is thinking about an arm triangle here, looking to tighten it up before moving to side control. Walker can see it coming though and defends well with a couple of strikes to the head and some good arm positioning.
Murhaa looking to control but Walker is working nicely, looking to advance position himself.
Murhaa controlling the position easily from mount.
Walker is not a happy chappy
he wants out of there.
That's two minutes gone in the round.
Murhaa wants to control the pace but Walker is squirming around nicely.
Walker is bucking up trying to escape but Murhaa cracks him with another couple of good strikes.
Walker tries to buck Murhaa off but he can't manage it.
Murhaa takes a little breather and maintains the position. The referee will be looking for him to stay active from such a dominant position though.
Murhaa tries to control but Walker wriggling away.
Murhaa is still in mount, landing shots to his trapped opponent. Walker can't stay in a position like this for much longer.
Murhaa working for a submission but Walker is keeping him at bay.
Murhaa trying to control but Walker is having none of it.
Walker is trying to stand but he's just given Murhaa his back.
That's three minutes gone in the round.
What can Walker do to escape this position? He's going to have to figure it out pretty quick if he wants to stay in the fight!
Murhaa cracks Walker with a big shot to body and one to the head - really punishing Walker from the back mount here, looking to soften him up.
Walker is trying to get back to his feet but he's not managed it yet.
Murhaa keeps control of the position easily here as Walker tries to buck him off.
That's four minutes gone in the round.
Murhaa has his hand under the chin of his opponent looking for the choke. He's nearly got it! This one could be all over! But no, Walker has freed his hand and lives to survive another
well, another couple of seconds at least!
Walker is trying to get back to his feet but Murhaa has full control of the position and if anything, Walker has just worked his way into a worse spot.
Boooooooooooooooooooo!!! God, this has been a terrible round. Come on you two, sort yourselves out!
Murhaa has good solid back control here.
And that's the end of the fight!
King Murhaa showed his dominance in that final round.
I think Murhaa has won this one but let's see what the judges have to say. Over to the ring announcer for the scorecards.
Ladies and gentlemen, after 3 rounds of action, we go to the scorecards for a decision.
Judge Don Winkell scores the fight 28:28
Judge Timothy Bukovac scores the fight 28:28
Judge Percy O'Donnell scores the fight 28:28
The fight is ruled a draw!
|
|
|
|
|
|
|
|
|
|
|
|
|
|
|
|
|
|
|
|
|
|
|
| S |
C
A |
G |
S |
C
B |
G |
|
S |
C |
G |
|
energy
A | B |
|
hype
A | B |
|
pop
A | B |
|
mgr
A | B |
|
FIGHT
RATING
47% |
|
|
|
|
|
|
