|
|
PBP Commentary |
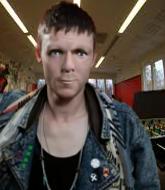
Coming up we have a featherweight MMA rules bout between David Paddington (ranked 500 p4p, 56 weight class) and Kendo Hirigushi (ranked 480 p4p, 53 weight class). Paddington comes into the arena with Broken - Next time around blaring out of the sound system. David Paddington has the better chin. Will he look to stand and bang today?
 |
|
 |
| 167 cm
25
153 lbs
15 - 8 - 0 |
|
181 cm
28
160 lbs
16 - 7 - 0 |
Good wrestling
Excellent boxer
Cardio machine |
|
Good wrestler
World class boxer
Good gas tank |
|
| |
|
Ladies and gentlemen. This fight is 3 rounds, in the featherweight division.
Introducing the fighter to my left, fighting out of the red corner.
With a record of
15 - 8 - 0, fighting out of Helsinki, David Paddington!
And introducing the fighter to my right, fighting out of the blue corner.
With a record of
16 - 7 - 0, fighting out of London, Kendo Hirigushi!
The judges for this bout are , Timothy Bukovac and Don Winkell.

The bell rings for round one and we are underway!
Paddington throws a series of punches but Hirigushi avoids them all with ease.
Hirigushi slips a straight right by Paddington.
Paddington moves to clinch but Hirigushi breaks away
and Hirigushi counters with a stiff right hand.
Paddington looks to have improved his striking defense since last time we saw him fight.
Paddington throws out a loose jab but Hirigushi uses good head movement to avoid it.
Hirigushi is the aggressor but that punch slipped nicely by Paddington.
Paddington throws an overhand right that lands on Hirigushi's shoulder, as Hirigushi tries to avoid the shot.
The fight stays on the outside here - Paddington looks like he's thinking about clinching though.
We've had a slow start to the round here - hopefully the action picks up.
Hirigushi throws a series of strikes that have Paddington backpedaling.
Paddington steps to the side to avoid the strikes from Hirigushi.
Paddington stuns Hirigushi with a nice body shot, before stepping back out of range.

That's one minute gone in the round.
Paddington closes the distance looking to clinch
and Paddington takes a counter punch right on the button for his troubles.
Paddington scores with a nice one two combo and darts back out of range to avoid anything coming in the opposite direction.
Hirigushi scores with a nice strike.
Hirigushi thuds a left hand into Paddington's body.
A shot to the liver by Paddington. Beautiful body shot.
Hirigushi on the wrong end of a nice jab.
Hirigushi digs a good hook to Paddington's body.
Hirigushi takes a shot right to the bread basket.
Kendo Hirigushi is looking to keep the fight on the feet at all costs.
Fantastic stuff here - a very entertaining period of action, which has drawn cheers from the crowd.
Paddington tries to bum rush Hirigushi with a series of wild strikes but Hirigushi uses good footwork to avoid the assault.
Hirigushi is loading up here, looking for a big counter of his own.
Paddington throws out a token jab with nothing on it.
It seemed like Hirigushi was going to counter with the hook but didn't fully commit to it.

That's two minutes gone in the round.
Hirigushi lands a pitter patter jab to the forehead of his opponent.
Paddington tests Hirigushi's chin there with a solid looking shot.
Paddington takes a punch to the jaw and another one to the bread basket.
Hirigushi has used his reach advantage pretty well so far tonight.
Paddington throws an off balance right hand
and Hirigushi counters with a nice uppercut.
Paddington takes a shot to the nose. Hopefully that hasn't broken it.
Paddington throws a right hand that misses
and Hirigushi connects with a straight left hand counter down the middle.
Nice takedown defense from Hirigushi. No joy for Paddington on that attempt.
Hirigushi ducks down and throws a hook to the body but Paddington moves away.
Paddington lands with a cross to side of his opponent's head.
Hirigushi cracks Paddington with a good jab.
Hirigushi is landing a lot of head punches in this opening round! Paddington had better start moving his head a bit unless he wants his face to turn into pâté.

That's three minutes gone in the round.
Hirigushi scores with a decent looking hook.
Nice defenses there by Hirigushi.
Hirigushi scores with a punch to the head.
A slow jab from Hirigushi misses its intended target.
Paddington rushes in with a sloppy looking punch
and Hirigushi counters with a good right hand that lands right on the jaw.
Paddington misses with a straight right.
Paddington cracks Hirigushi with a good jab.
Paddington waving his hands out in front of him, looking to distract Hirigushi.
Paddington throws a lazy uppercut
enabling Hirigushi to counter with a crisp jab.
Paddington steps to the side to avoid the strikes from Hirigushi.
It looked like Paddington wanted to counter with a hook but didn't fully commit.
Paddington lands a slapping body shot.
Paddington tries to close the distance and clinch up but Hirigushi swats him away and circles back towards the center.

That's four minutes gone in the round.
Hirigushi connects with a body shot.
Fantastic stuff here - a very entertaining period of action, which has drawn cheers from the crowd.
Nice defenses there by Hirigushi.
David Paddington seems to be the more aggressive standup fighter in this bout.
Paddington scores with a punch to the head.
Paddington displays some good footwork, moving neatly out of range as Hirigushi throws out the jab.
Paddington steps to the side to avoid the strikes from Hirigushi.
Hirigushi uses decent footwork to sidestep a right hand from Paddington.
It seemed like Hirigushi was going to counter with the hook but didn't fully commit to it.
Paddington lands a jab.

Hirigushi is rocked!

Paddington closes the distance and pushes Hirigushi back into the cage.
Hirigushi goes for a body shot but it's blocked.
Hirigushi working some nice short punches in the clinch.
And thats the end of the round the fighters go back to their corners.
Kendo Hirigushi dominated that round.
That's the end of the round. The referee orders the cornermen out of the cage so we can get back down to business.

Hirigushi lands a jab.
Paddington swings widly with a right hand
and Hirigushi counters with a lovely straight right hand!
Paddington lands with a nice combination. Hirigushi backs away looking to recover.
Hirigushi is still on wobbly legs! Can Paddington finish him?
Paddington misses with a body punch
and Hirigushi counters with a quick right hand to the jaw.
Hirigushi might want to mix his strikes up a bit more. He's just going for head shots at the moment and that can become a bit predictable.
Hirigushi circles away from the clinch attempt
letting Hirigushi counter with a right hand.
Nice uppercut lands for Hirigushi. That snapped Paddington's head back.
Hirigushi seems to have recovered his senses.
Hirigushi steps to the side to avoid the strikes from Paddington.
Hirigushi is looking for the big counter here.
Paddington looks to score with a jab to the body but Hirigushi is just out of range.
Hirigushi looked like he wanted to counter with a punch but didn't throw it.
Paddington throws a poor cross that misses
and Hirigushi counters with a stiff right hand.
The fans in attendance giving it up for the two fighters, who have really let it all hang out in the last minute or so!
Hirigushi shuffles to his left behind two crisp jabs. Paddington eats them both and turns towards Hirigushi to reposition himself and eats a stinging right hand-left hook combo.
Paddington bobs and weaves well there to avoid the strikes.
That's one minute gone in the round.
Hirigushi walks into a jab.
Hirigushi throws the left hand but Paddington avoids the punch easily.
Paddington uses good footwork to avoid the strikes from Hirigushi.
Good standup being displayed there by Hirigushi as he connects with a hook.
Hirigushi ducks under a wild hook from Paddington.
Paddington swings widly with a right hand
and Hirigushi counters with a good right hand that lands right on the jaw.
Hirigushi is using his reach advantage to land shots from outside his opponent's range.
Paddington tries to close the distance and clinch up against the cage but Hirigushi paws at him with a jab and circles away.
Paddington looks like he's developed a pretty tasty lump over his left eye. He'll need to avoid taking much more damage to that.
Nice uppercut lands for Paddington. That snapped Hirigushi's head back.
Hirigushi takes a solid shot to the body. That one hurt him but he's trying not to show it.
Paddington looks for a takedown here. Will he get it? Hirigushi is fending him off so far but Paddington persists. Nope, Hirigushi circles away and we're back to standing.
Hirigushi listening to his corner there, landing a nice uppercut.
That's two minutes gone in the round.
The fighters circling - Paddington throws out the jab but it was never going to land.
Hirigushi misses with a straight right.
Fantastic stuff here - a very entertaining period of action, which has drawn cheers from the crowd.
Paddington tests Hirigushi's chin there with a solid looking shot.
Paddington throws a shot from downtown. Hirigushi moves away and avoids it.
Hirigushi looked like he wanted to counter with a punch but didn't throw it.
Hirigushi swats away the attempt to clinch by Paddington.
Hirigushi looked like he wanted to counter with a punch but didn't throw it.
A big left from Paddington misses.
And an attempted straight right on the counter from Hirigushi! But no joy.
Paddington throws a poor cross that misses
and Hirigushi counters with a quick right hand to the jaw.
Paddington throws a nice looking combination but Hirigushi bobs and weaves to avoid any damage.
Hirigushi swings wildly with a right hand that was never going to find it's target.
Hirigushi slips under a jab from Paddington.
That's three minutes gone in the round.
Paddington fails to land with the punch combination there - jab, cross, hook, miss, miss, miss.
Hirigushi slips a jab from Paddington.
Hirigushi swings away with a counter right hand but no contact made.
Paddington closes this distance looking for a takedown but Hirigushi circles away.
Hirigushi swings away with a counter right hand but no contact made.
Paddington throws a jab when Hirigushi was well out of range.
Paddington throws a wild combination but nothing lands.
Paddington keeping his hands up high there, blocking the jab from Hirigushi.
Paddington looks to land a combination but Hirigushi avoids it well.
Hirigushi misses with a jab and misses with a cross straight after too.
Paddington misses with a body shot. Nice footwork from Hirigushi.
Paddington has Hirigushi up against the cage in a clinch.
Paddington's head jolts backwards as he takes an uppercut right on the button!
That's four minutes gone in the round.

Hirigushi's corner calls for him to break the clinch, which he does.
Paddington lands with a shot to the body.
A slow jab from Paddington misses its intended target.
Hirigushi lands a really nice looking cross but Paddington seems unphased.
Wooooo! Give it up for these two warriors! They are putting on a show!
Paddington takes a swing at Hirigushi's ribcage but misses.
Hirigushi wings a very wild body shot but it does the job and lands to the midsection.
Good exchange - Hirigushi coming out on top.
Hirigushi displaying good standup as he scores with a three punch combination.
Paddington dips down and scores with a jab to the body.
Hirigushi throws a jab when Paddington was well out of range.
Paddington is looking for a counter combo.
Hirigushi is pinned up against the cage taking some big shots here. The referee is looking closely deciding whether he should stop the fight.
Paddington misses with a lunging right hand
and Hirigushi counters with a straight right hand.
And thats the end of the round the fighters go back to their corners.
Kendo Hirigushi showed his class in that round. I'd imagine he'll take it on all the scorecards.
The referee calls time. The cornermen exit stage left and we're back to business. The crowd applaud as we get ready to start the final round!

Jab by Paddington.
Paddington swings and misses with a hook to the body.
Hirigushi leaves Paddington with his face pressed against the mat as he sprawls beautifully, defending against a solid takedown attempt.
Hirigushi throws a body shot but no joy.
Paddington half commits to a counter takedown before pushing away, out of range.
Paddington just misses with a punch to the body.
Paddington takes a jab on the nose. He smiles like he loves it and keeps coming.
Paddington throws a left and a right that both miss
and Hirigushi counters with a quick right hand to the jaw.
We've had a slow start to the round here - hopefully the action picks up.
Paddington rushes in with a sloppy looking punch
and Hirigushi counters with a straight right hand.
Hirigushi has been the more effective fighter overall so far.
Paddington uses decent footwork to sidestep a right hand from Hirigushi.
Hirigushi avoids a punch combination nicely.
That's one minute gone in the round.
Paddington fails with a rather predictable takedown attempt.
Hirigushi now looks to counter with a shot at the body.
Hirigushi throws a series of punches but Paddington moves out of range.
Paddington doesn't succeed with the takedown
letting Hirigushi counter with a right hand.
That's three failed takedown attempts in the round for David Paddington. That's going to take a lot out of him.
Hirigushi lands with a shot to the body.
Hirigushi ducks down and throws a hook to the body.
Hirigushi throws an uppercut from half a mile away. Paddington sees it coming and avoids it easily.
Paddington bobs and weaves and unloads with a good uppercut.
Paddington cracks Hirigushi with a right hand to the side of the head.
That's two minutes gone in the round.
Paddington throws a lazy uppercut
and Hirigushi counters with a nice body shot.
Paddington misses with a lunging right hand
and Hirigushi counters with a good right hand that lands right on the jaw.
Hirigushi punishes Paddington's body with a nice straight punch.
The crowd cheering loudly, showing their appreciation for the quality fight we're seeing here.
Paddington swings wildly with a hook that is half blocked by Hirigushi.
Paddington needs to keep his hands up - Hirigushi had a free shot at his head there.
Paddington uses good footwork to avoid the strikes from Hirigushi.
Paddington swings wildly with a couple of big hooks
and Hirigushi counters with a crisp hook to the side of the head.
Nice uppercut there from Paddington.
Paddington takes a shot to the eye socket. That's gotta hurt.
Hirigushi has been working his punching technique in the buildup to the fight and it appears to be paying off.
Paddington ducks under a wild hook from Hirigushi.
Paddington misses the shot to the body.
That's three minutes gone in the round.
Paddington misses with a right hand
and Hirigushi cracks him with a counter punch right on the button.
David Paddington has stepped it up - he knows he needs a finish here!
Paddington walks into a left hand.
Paddington connects with a body shot that sends Hirigushi's belly button to the back.
Paddington jabs. That one connects to the head of his opponent.
Paddington gets his takedown attempt stuffed easily
and Hirigushi counters with a straight right hand.
Hirigushi defending well as Paddington loads up on a big left hand.
The fighters are starting to perspire pretty heavily.
Kendo Hirigushi is fighting for a decision - hopefully he's judged it right and he's actually winning the fight.
A looping hook to the body misses from Hirigushi. Paddington does a little dance to reset his feet.
Hirigushi moves out of range as Paddington strikes.
A nice combination there by Hirigushi.
Hirigushi takes a really solid shot there but just smiles back and shrugs his shoulders.
That's four minutes gone in the round.
Wooooo! Give it up for these two warriors! They are putting on a show!
Paddington gets his takedown attempt stuffed easily
letting Hirigushi counter with a right hand.
Hirigushi fails to land with the punch combination there - jab, cross, hook, miss, miss, miss.
Paddington tries to counter by moving into the clinch but Hirigushi manages to circle out of the way.
Kendo Hirigushi seems to be getting the better of the standup.
Hirigushi throws a couple of head shots and lands with the final one - a decent hook, which struck Paddington on the side of the head.
Paddington tests Hirigushi's chin there with a solid looking shot.
Paddington misses with an uppercut
and Hirigushi counters with a stiff right hand.
Paddington falls off balance throwing a combination
and Hirigushi connects with a straight left hand counter down the middle.
A head kick by Paddington misses
and Hirigushi counters with a lovely straight right hand!
Hirigushi stuns Paddington with a nice body shot, before stepping back out of range.
A shot to the body from Paddington misses
and Hirigushi counters with a nice uppercut.
And that's the end of the fight!
Kendo Hirigushi comfortably won the final round on my scorecard.
Well Hirigushi has outworked and out performed his opponent in all aspects of the game today. He was simply too good and the decision should be no more than a formality. Over to the ring announcer for the scorecards.
Ladies and gentlemen, after 3 rounds of action, we go to the scorecards for a decision.
Judge Percy O'Donnell scores the fight 27:30
Judge Timothy Bukovac scores the fight 27:30
Judge Don Winkell scores the fight 27:30
In favor of your winner, by unanimous decision... Kendo Hirigushi!
Kendo Hirigushi spent the whole post fight interview bigging himself up. It didn't go down that well with the fans after a while as they thought it was a bit arrogant.
|
|
|
|
|
|
|
|
|
|
|
|
|
|
|
|
|
|
|
|
|
|
|
| S |
C
A |
G |
S |
C
B |
G |
|
S |
C |
G |
|
energy
A | B |
|
hype
A | B |
|
pop
A | B |
|
mgr
A | B |
|
FIGHT
RATING
70% |
|
|
|
|
|
|
