 |
MHCR: Shiny Metal II PBP Commentary |
Undercard bout
|
|
|
|
Undercard bout
|
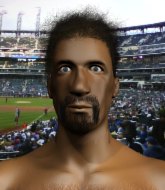
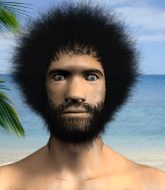
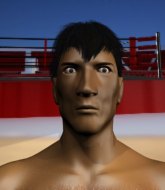
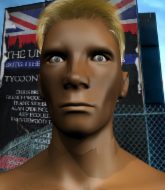
Coming up we have a lightweight MMA rules bout between Strath More (ranked 0 p4p, 0 weight class) and Yuri Boyka (ranked 0 p4p, 0 weight class). More comes to the ring accompanied by Reign in Blood. Strath More had a look across the ring there at his opponent. He definitely means business
 |
|
 |
| 169 cm
22
155 lbs
0 - 3 - 1 |
|
182 cm
18
165 lbs
0 - 2 - 0 |
BJJ Purple Belt
Counter striker
KO power |
|
BJJ White Belt
Dangerous knees
Prefers standup |
|
| |
|
Ladies and gentlemen. This fight is 2 rounds, in the lightweight division.
Introducing the fighter to my left, fighting out of the red corner.
With a record of
0 - 3 - 1, fighting out of Tokyo, Strath More!
And introducing the fighter to my right, fighting out of the blue corner.
With a record of
0 - 2 - 0, fighting out of Tokyo, Yuri Boyka!
The judges for this bout are Kenichi Hosakawa, Ren Mimura and Yukihiro Yamamoto.

The bell rings for round one and we are underway!
More blocks a head kick by Boyka.
Boyka throws a body kick but he wasn't in range.
More on the wrong end of a kick to the body.
More tries to land a leg kick but Boyka saw it coming and moves away.
Boyka swings and misses with a hook to the body.

More changes levels and drives through with a really nice takedown into side control. Boyka looks really pissed at himself for not defending that better.
More is moving around in side control but his primary objective seems to be to maintain the position.
Boyka tries to get back to half guard but can't.
Boyka seems a little lost for a moment, as More dominates the positioning.

More is trying to land an Americana. He has the arm isolated but Boyka is keeping cool and he's avoided the danger for now.
More prevents Boyka from escaping the position.

That's one minute gone in the round.
Boyka struggling a bit here.
More has hold of Boyka's arm. He's looking for a kimura. Boyka seems comfortable defending it but More has shifted his position slighty and is cranking on the arm! Boyka is real pain and he's forced to tap out! Boyka is disgusted with himself for not defending it better but More couldn't care less - he's delighted!
Ladies and gentlemen, after 1:15 of round 1, we have a winner by way of Submission (Kimura). Strath More!
|
|
|
|
|
|
|
|
|
|
|
|
|
|
|
|
|
|
|
|
|
|
|
| S |
C
A |
G |
S |
C
B |
G |
|
S |
C |
G |
|
energy
A | B |
|
hype
A | B |
|
pop
A | B |
|
mgr
A | B |
|
FIGHT
RATING
54% |
|
|
|
|
|
|
|
Undercard bout
|
|
|
|
Undercard bout
|
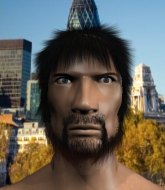
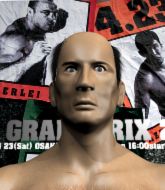
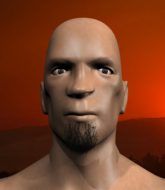
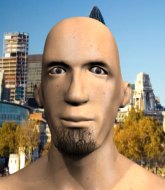
Coming up we have a lightweight MMA rules bout between Tahei Uchido (ranked 0 p4p, 0 weight class) and Roronoa Zoro (ranked 0 p4p, 0 weight class). Uchido kept the crowd waiting but all that was forgotten when his ring entrance music started. The incomparable musical genius that is The Final Battle. Roronoa Zoro has the better chin. Will he look to stand and bang today?
 |
|
 |
| 173 cm
22
163 lbs
4 - 6 - 0 |
|
185 cm
20
162 lbs
0 - 1 - 0 |
BJJ Blue Belt
Solid boxing
KO power |
|
BJJ Brown Belt
Counter striker
Enjoys gardening |
|
| |
|
Ladies and gentlemen. This fight is 2 rounds, in the lightweight division.
Introducing the fighter to my left, fighting out of the red corner.
With a record of
4 - 6 - 0, fighting out of Tokyo, Tahei Uchido!
And introducing the fighter to my right, fighting out of the blue corner.
With a record of
0 - 1 - 0, fighting out of Tokyo, Roronoa Zoro!
The judges for this bout are Shigeki Sano, Yuuki Gou and Shirou Masuda.
The bell rings for round one and we are underway!
Zoro thows a body shot but no joy.
Uchido looks to land a combination but Zoro avoids it well.
Uchido tries to close the distance and clinch but Zoro swats him to one side with an open hand palm strike and circles away.
Uchido gets taken down but at least he's managed to land in guard.
Uchido looking for a sweep. Not yet Uchido, not yet.
Uchido avoiding any damage from the ground and pound.
Uchido wants to stand and escape but Zoro is having none of it.
The fighters are tangled up in the ropes here. We might need a restart if the fighters can't break free themselves.
Zoro wants to control from the top but Uchido keeps moving.
Zoro advances to half guard.
Zoro wants to free his trapped foot but Uchido is holding on for dear life with his legs.
Zoro content to control rather than advance.
That's one minute gone in the round.
Uchido avoiding damage under a succession of punches from Zoro.
Uchido might be looking to lock onto one of his opponent's long limbs for a submission, whilst we're on the ground.
Uchido is in trouble now - Zoro has advanced to mount!
Zoro misses with a series of strikes from mount. He'll no doubt be working on his ground and pound when he gets back to the gym.
Zoro misses with a head shot.
Uchido wriggling around on the bottom manages to avoid the strikes thrown by Zoro.
Zoro throwing sloppy strikes, which aren't doing any damage.
Zoro controlling the pace for now.
Uchido holding onto his opponent's waist for dear life, as Zoro tries to land some strikes to get him to release his grip.

That's two minutes gone in the round.
A few boos can be heard. I'm sure they will multiply if the fighters don't pick up the pace.
Zoro controlling his opponent.
Zoro is going oldschool here, as he tries to force Uchido to tap using a forearm choke. This isn't 1993 though, so Uchido shrugs it off.

Zoro get's back to his feet.
Uchido will need to tighten up his combinations if he doesn't want to gas himself out, swinging at thin air.
Zoro throws a looping left and ducks down for a takedown. He's got his arms around Uchido's waist but Uchido gets an underhook and avoids the takedown by throwing Zoro off to one side.
Tahei Uchido seems to be the more aggressive standup fighter in this bout.
Uchido throws a series of punches but Zoro moves out of range.
Uchido is breathing heavily.
Uchido fails to land with the punch combination there - jab, cross, hook, miss, miss, miss.

That's three minutes gone in the round.
Uchido tries to clinch up.
Uchido misses with a jab and misses with a cross straight after too.
Zoro ducks down and throws a hook to the body but Uchido moves away.
Zoro tries to score a power double leg takedown but Uchido sees that one coming and sprawls well. That will dishearten Zoro somewhat.
Uchido throws a right and a left that Zoro avoids nicely.
Zoro throws a body punch but Uchido moves out of range.
Uchido rushes forward with a series of wild hooks but Zoro moves out of range and avoids them all easily.
Uchido wants to clinch up but Zoro keeps it at a distance.
Zoro slips a jab and a cross from Uchido.
Uchido misses with a two punch combination.
Zoro throws a push kick but Uchido slaps the foot to one side.
Uchido throws a shot from downtown. Zoro moves away and avoids it.

That's four minutes gone in the round.
Neither fighter has done anything of merit for a good minute or two here and the crowd are not happy about it.
Zoro throws the overhand right but ducks down into a quick takedown attempt. Uchido was covering up waiting for the punch and Zoro finishes the takedown easily into guard.
Zoro throwing strikes from guard but Uchido blocks nicely.
Zoro trying to control but Uchido is working from the bottom.
Zoro lands a couple of decent looking shots.
Uchido has momentary wrist control but Zoro slips an elbow through the middle.
Zoro trying to control the position from guard on top but Uchido is wriggling around, looking for whatever he can.
Zoro throwing strikes but missing.

That's five minutes gone in the round.
Zoro working some ground and pound from guard but it's not doing any damage.
Zoro trying to control the position from guard on top but Uchido is wriggling around, looking for whatever he can.
Zoro's corner is telling him to maintain position.
Zoro has the superior BJJ but he's also working some ground strikes into his gameplan.
Zoro gets to his feet - Uchido follows without any prompting.
Zoro looks to land a right hand but Uchido moved out of range.
Zoro will need to tighten up his combinations if he doesn't want to gas himself out, swinging at thin air.

Zoro instigates a clinch.
Zoro tries for a takedown. No joy.
Tahei Uchido has stuffed three takedown attempts in the round now. That's going to take a lot out of Roronoa Zoro.
Zoro stops a takedown attempt from Uchido.

Zoro breaks the clinch and we return to the middle of the mat.
Zoro closes the distance, clinches up and gets a nice trip takedown into side control. Very smooth.

That's six minutes gone in the round.
Zoro moving around in side mount but really he's just happy to control for now.
Sloppy strikes there by Zoro.
Zoro has hold of Uchido's arm. He's looking for a kimura. Uchido seems comfortable defending it but Zoro has shifted his position slighty and is cranking on the arm! Uchido is real pain and he's forced to tap out! Uchido is disgusted with himself for not defending it better but Zoro couldn't care less - he's delighted!
Ladies and gentlemen, after 6:27 of round 1, we have a winner by way of Submission (Kimura). Roronoa Zoro!
|
|
|
|
|
|
|
|
|
|
|
|
|
|
|
|
|
|
|
|
|
|
|
| S |
C
A |
G |
S |
C
B |
G |
|
S |
C |
G |
|
energy
A | B |
|
hype
A | B |
|
pop
A | B |
|
mgr
A | B |
|
FIGHT
RATING
41% |
|
|
|
|
|
|
|
Undercard bout
|
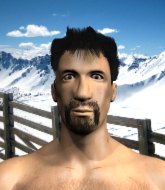
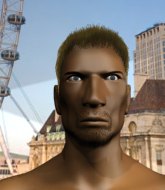
Coming up we have a welterweight MMA rules bout between Leandro Alves (ranked 0 p4p, 0 weight class) and Dom Marshall (ranked 0 p4p, 0 weight class). Alves comes to the ring accompanied by Damian Marley - Welcome To Jamrock. Dom Marshall has the power to score a knockout today if he connects clean with Leandro Alves's chin.
 |
|
 |
| 195 cm
20
179 lbs
3 - 1 - 0 |
|
175 cm
21
173 lbs
1 - 0 - 0 |
Abu Dhabi Champ
Solid boxing
Very strong |
|
BJJ Blue Belt
Brawler
Determined |
|
| |
|
Ladies and gentlemen. This fight is 2 rounds, in the welterweight division.
Introducing the fighter to my left, fighting out of the red corner.
With a record of
3 - 1 - 0, fighting out of Tokyo, Leandro Alves!
And introducing the fighter to my right, fighting out of the blue corner.
With a record of
1 - 0 - 0, fighting out of Tokyo, Dom Marshall!
The judges for this bout are Tatsuya Matsuyama, Shirou Masuda and Yuuki Gou.
The bell rings for round one and we are underway!
Alves fakes an overhand right and shoots for a takedown. Marshall sprawls well initially but Alves persists and gets the takedown into half guard.
Marshall is trying to maintain the position but Alves is very close to passing his half guard.
Alves slips a nice elbow through Marshall's hands, connecting with Marshall's forehead.
The fighters are trapped in the ropes so we're going to have a reposition here. The ref calls for a break and repositions the fighters in the center of the ring.
Alves looks to score some points with some ground and pound.
Alves moves into full mount! Marshall won't be happy about that!
The crowd growing excited in anticipation of a finish here! Right on cue, Alves cracks his opponent with a massive right hand that draws loud cheers!
Marshall really trying hard to get back to half guard here.
Alves lands a nice shot to the head.

Marshall is rocked!
The crowd are loving this. Great action here.
Alves with a couple of short strikes.
Marshall is still in real trouble! Can Alves finish him?
Marshall trying desperately to get to his feet.
Alves working Marshall over with strikes here.
Marshall looks gassed!
Alves postures up and throws a couple of big shots that have Marshall in real trouble here! The ref calls for Marshall to improve his position which he doesn't do, so the referee has no choice but to end the fight due to the strikes!
Ladies and gentlemen, after 1:01 of round 1, we have a winner by way of TKO (Strikes). Leandro Alves!
|
|
|
|
|
|
|
|
|
|
|
|
|
|
|
|
|
|
|
|
|
|
|
| S |
C
A |
G |
S |
C
B |
G |
|
S |
C |
G |
|
energy
A | B |
|
hype
A | B |
|
pop
A | B |
|
mgr
A | B |
|
FIGHT
RATING
100% |
|
|
|
|
|
|
|
Undercard bout
|
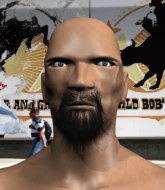
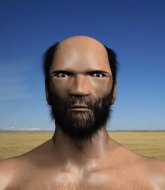
Coming up we have a light heavyweight MMA rules bout between ben mans (ranked 0 p4p, 0 weight class) and Ronnie Carlton (ranked 0 p4p, 0 weight class). I'm sure you'll be fascinated to know that I was talking to some pointless Z list celebrity before the fight and he thought that Ronnie Carlton was going to win. Let's see if he was right.
 |
|
 |
| 178 cm
25
208 lbs
1 - 1 - 0 |
|
180 cm
29
205 lbs
12 - 9 - 0 |
Good takedowns
Brawler
Very quick |
|
BJJ Brown Belt
Decent boxing
Powerful |
|
| |
|
Ladies and gentlemen. This fight is 2 rounds, in the light heavyweight division.
Introducing the fighter to my left, fighting out of the red corner.
With a record of
1 - 1 - 0, fighting out of Tokyo, ben mans!
And introducing the fighter to my right, fighting out of the blue corner.
With a record of
12 - 9 - 0, fighting out of Tokyo, Ronnie Carlton!
The judges for this bout are Sosuke Kotani, Ren Mimura and Shigeki Fujiwara.
The bell rings for round one and we are underway!
Carlton stuns mans with a nice body shot, before stepping back out of range.
Carlton scores with a nice one two combo and darts back out of range to avoid anything coming in the opposite direction.

It looks like ben mans has been cut.
Carlton slaps away a takedown attempt from mans, before circling back to the center of the mat.
Carlton keeps the fight on the outside.
Carlton scores with a shot to the body.
Carlton scores with a crisp jab that stopped mans in his tracks.
Wow, both these guys are really going for it!
Wooooo! Give it up for these two warriors! They are putting on a show!
The fight stays on the outside here - mans looks like he's thinking about clinching though.
Carlton digs a good hook to mans's body.
Carlton scores with a nice right hand.
mans on the wrong end of a decent looking cross there.
mans is breathing heavily.
Carlton dips to his left and cracks mans with an uppercut!
mans is rocked!
Carlton sees an opening and throws a straight punch right through mans's defenses. It connects perfectly with mans's jaw and knocks him out cold! Wow - that's a contender for knockout of the year - absolutely brutal!
Ladies and gentlemen, after 0:32 of round 1, we have a winner by way of KO (Punch). Ronnie Carlton!
|
|
|
|
|
|
|
|
|
|
|
|
|
|
|
|
|
|
|
|
|
|
|
| S |
C
A |
G |
S |
C
B |
G |
|
S |
C |
G |
|
energy
A | B |
|
hype
A | B |
|
pop
A | B |
|
mgr
A | B |
|
FIGHT
RATING
100% |
|
|
|
|
|
|
|
Undercard bout
|
Coming up we have a welterweight MMA rules bout between Marco Rudirez (ranked 0 p4p, 0 weight class) and Tazz Stevens (ranked 0 p4p, 0 weight class). Rudirez comes to the ring accompanied by "Bulls on parade" Rage Against The Machine. Both fighters will be looking to make this an exciting fight for the fans, I'm sure!
 |
|
 |
| 178 cm
24
183 lbs
12 - 10 - 0 |
|
183 cm
27
182 lbs
8 - 6 - 0 |
BJJ Brown Belt
Excellent MT
Cardio machine |
|
Good wrestler
Decent boxing
Powerful |
|
| |
|
Ladies and gentlemen. This fight is 3 rounds, for the welterweight championship of the world!
Introducing the champion to my left, fighting out of the red corner.
With a record of
12 - 10 - 0, fighting out of Tokyo, Marco Rudirez!
And introducing the challenger to my right, fighting out of the blue corner.
With a record of
8 - 6 - 0, fighting out of Tokyo, Tazz Stevens!
The judges for this bout are Tatsuya Matsuyama, Yukihiro Yamamoto and Taro Takaoka.
The bell rings for round one and we are underway!
Stevens pushing out the jab but it's not landing.
Stevens stuns Rudirez with a nice body shot, before stepping back out of range.
Rudirez avoids the body shot from Stevens.
Rudirez fakes a couple of low kicks, before throwing one on the third attempt. It connects and Stevens has to reset his feet before getting ready to engage.
A solid body kick from Rudirez.
Stevens displaying good standup as he scores with a three punch combination.
Stevens throws a jab to the body, straight down the pipe. Boom. That sent Rudirez stumbling backwards but he manages to regain his composure quickly.
The crowd are loving this. Great action here.
Rudirez takes a jab on the nose there. A little bit of blood seems to be coming out. Hopefully that won't affect his breathing.
Rudirez throws a hard body shot but it just misses.
Stevens throws a two punch combo that lands nicely.
Stevens thows a body shot but no joy.
Stevens lunges in with swinging rights and lefts but Rudirez circles away quickly and effectively.
Stevens displays good takedown defense there as he swats away a double leg from Rudirez.
Stevens misses with a takedown
and Rudirez counters with a nice body kick.
Stevens looks gassed!
Stevens looks to score with a jab to the body but Rudirez is just out of range.
Rudirez throws a body kick but he was well out of range there.
Stevens shoots for a takedown but Rudirez saw that one coming a mile off and avoided it easily.
That's one minute gone in the round.
A jab from Rudirez does it's job there.
Stevens chopped to the floor by a nice leg kick but he springs right back up before Rudirez can pounce on him.
Rudirez tries to land with a swinging hook to the body but Stevens was well out of range. Poor timing from Rudirez.
Rudirez with a nice looking leg kick. You could hear that one land in a back row.
Stevens shoots in but doesn't get the takedown
and Rudirez counters with a lovely shot to the body.
Marco Rudirez has stuffed three takedown attempts in the round now. That's going to take a lot out of Tazz Stevens.
Rudirez connects with a slap. Keep your fist closed son.
Rudirez uses good footwork to get in and out, landing a nice hook.
This has been an exciting period of action!
Rudirez tries a head kick but it misses.
Rudirez has taken the fight to the clinch.
Rudirez lands with a good tight uppercut to the head.
Stevens avoids the elbow strike from Rudirez, against the ropes.
Rudirez putting his Muay Thai to good use. He has Stevens in a tight clinch and is doing some damage with knees to the body.
Rudirez putting his Muay Thai to good use. He has Stevens in a tight clinch and is doing some damage with knees to the body.
Stevens avoiding damage as Rudirez throws knees to the body.
Rudirez tightens his grip and picks Stevens up, before dumping him to the ground. Stevens manages to land in guard.
That's two minutes gone in the round.
Rudirez sneaks a leg through and gets to half guard. That was like a knife through butter how easily he passed Stevens's guard.
Rudirez is keen to just control but Stevens is a slippery customer.
Stevens is trying to get back to full guard.
Stevens is looking to regain full guard. He's left an arm up in the air though and Rudirez has latched onto it... Big trouble! Rudirez pivots for an armbar - it's in tight and it Stevens is tapping in no time flat! Great counter grappling there from Rudirez!
Ladies and gentlemen, after 2:33 of round 1, we have a winner by way of Submission (Armbar). Marco Rudirez!
Marco Rudirez is the new welterweight champion!
|
|
|
|
|
|
|
|
|
|
|
|
|
|
|
|
|
|
|
|
|
|
|
| S |
C
A |
G |
S |
C
B |
G |
|
S |
C |
G |
|
energy
A | B |
|
hype
A | B |
|
pop
A | B |
|
mgr
A | B |
|
FIGHT
RATING
0% |
|
|
|
|
|
|
|
Co-main event
|
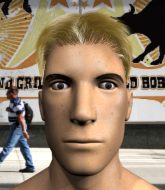
Coming up we have a light heavyweight MMA rules bout between Rampage Jockson (ranked 0 p4p, 0 weight class) and Lyoto Okudaira (ranked 0 p4p, 0 weight class). Jockson's ring entrance music is that housewives' favourite, Can't Be Touched. Okudaira has chosen Doctor P - Sweet Shop as his entrance music. These two fighters really are very evenly matched on the feet - it will be fascinating to see who can assert themselves in that aspect of the fight.
 |
|
 |
| 178 cm
24
211 lbs
2 - 0 - 0 |
|
184 cm
25
205 lbs
1 - 1 - 0 |
BJJ White Belt
Counter striker
Granite chin |
|
BJJ White Belt
Good kicks
Determined |
|
| |
|
Ladies and gentlemen. This fight is 3 rounds, for the light heavyweight championship of the world!
Introducing the champion to my left, fighting out of the red corner.
With a record of
2 - 0 - 0, fighting out of Tokyo, Rampage Jockson!
And introducing the challenger to my right, fighting out of the blue corner.
With a record of
1 - 1 - 0, fighting out of Tokyo, Lyoto Okudaira!
The judges for this bout are Kenichi Hosakawa, Hirohito Nitta and Ren Mimura.
The bell rings for round one and we are underway!
Jockson moves out of range as Okudaira strikes.
Okudaira throws a push kick but Jockson slaps the foot to one side.
Okudaira blocks the body kick.
Okudaira fails to land with a series of punches.
Jockson closes the distance and clinches up with Okudaira, looking for a takedown. Jockson pushes Okudaira against the ropes but Okudaira circles to the side and manages to break the clinch.
Okudaira is looking to score with low kicks.
Okudaira throws a body kick but he wasn't in range.
Okudaira lands a nice looking kick to the body. Jockson takes a step back to recover.
Jockson shoots in for a takedown. He's persisting with it as Okudaira sprawls well. Okudaira wins this battle and keeps the fight standing. Jockson gets slowly back to his feet.
Okudaira fails to land with the punch combination there - jab, cross, hook, miss, miss, miss.
That's one minute gone in the round.
A head kick misses from Okudaira.
Jockson avoids the head kick by Okudaira.
Okudaira looks to land a combination but Jockson avoids it well.
Okudaira throws a lazy right hand but Jockson sees it coming a mile off and sidesteps it easily.
Okudaira throws a right and a left that Jockson avoids nicely.
Okudaira slips in close and lands a nice hook before moving back out of range.
Okudaira will need to close the distance a bit before he attacks - that leg kick was thrown from too far away.
Lyoto Okudaira seems to be the more aggressive standup fighter in this bout.
Okudaira throws a monster uppercut resembling something out of street fighter but it doesn't land.
Okudaira throws a sloppy head kick and Jockson moves out of range easily.
Jockson shoots in looking for a takedown. Okudaira tries to sprawl out of it but Jockson keeps driving through. The fighters are pinned against the ropes. Okudaira manages to get underhooks and after a bit of a struggle, circles away and we're back to standing.
That's three failed takedown attempts in the round for Rampage Jockson. That's going to take a lot out of him.
That's two minutes gone in the round.
Well. There's a bit of a lull in the action here and the crowd are starting to get restless.
Jockson looks for a takedown. He's got it. We're now in half guard.
Okudaira is looking to regain full guard. Not this time though.
Jockson thows a huge punch but Okudaira dodges it nicely.
Okudaira tries to kick Jockson off but Jockson keeps his base steady and stays in half guard.
Okudaira is in trouble now - Jockson has advanced to mount!
We get told so often about how wrestlers don't like to be on their backs. Let's see if Okudaira can do anything to dispel that myth.
Jockson with good strikes from the mount here!
It looks like Lyoto Okudaira has been cut.
That's three minutes gone in the round.
Okudaira tries to hold on but Jockson postures up.
Jockson working the ground and pound effectively.
That has opened up Lyoto Okudaira's cut even more.
Jockson avoids the attempt from Okudaira to control.
Okudaira is in all sorts of trouble here.
Okudaira is in a horrible position here. Jockson smacks him with another shot as he tries to escape the position.
Lyoto Okudaira's cut is absolute horrible now. This looks like something out of a horror film with blood covering both fighters.
The referee calls the doctor in to look at Lyoto Okudaira's cut. Oh no, the doctor has called an end to the bout!
Ladies and gentlemen, after 4:03 of round 1, we have a winner by way of TKO (Cut). Rampage Jockson!
Rampage Jockson is the new light heavyweight champion!
|
|
|
|
|
|
|
|
|
|
|
|
|
|
|
|
|
|
|
|
|
|
|
| S |
C
A |
G |
S |
C
B |
G |
|
S |
C |
G |
|
energy
A | B |
|
hype
A | B |
|
pop
A | B |
|
mgr
A | B |
|
FIGHT
RATING
39% |
|
|
|
|
|
|
|
Main event
|
Coming up we have a bantamweight MMA rules bout between Jamie Poppenstuff (ranked 0 p4p, 0 weight class) and Nao Sakumichi (ranked 0 p4p, 0 weight class). The key to victory for Jamie Poppenstuff has got to be keeping the fight on the feet.
 |
|
 |
| 177 cm
28
138 lbs
14 - 7 - 0 |
|
179 cm
20
145 lbs
1 - 0 - 0 |
Decent wrestler
World class boxer
Big right hand |
|
Good wrestler
Brawler
Determined |
|
| |
|
Ladies and gentlemen. This fight is 3 rounds, for the bantamweight championship of the world!
Introducing the champion to my left, fighting out of the red corner.
With a record of
14 - 7 - 0, fighting out of Tokyo, Jamie Poppenstuff!
And introducing the challenger to my right, fighting out of the blue corner.
With a record of
1 - 0 - 0, fighting out of Tokyo, Nao Sakumichi!
The judges for this bout are Taro Takaoka, Sosuke Kotani and Yukihiro Shimada.
The bell rings for round one and we are underway!
Sakumichi is trying hard to land a takedown here. Poppenstuff sprawls well and keeps this one on the feet.
Sakumichi gets the takedown into side control.
The fighters are trapped in the ropes so we're going to have a reposition here. The ref calls for a break and repositions the fighters in the center of the ring.
Poppenstuff pushes Sakumichi away and creates a bit of space to escape. He's almost out here... but no, Sakumichi gets a good hold of his legs and remains firmly in side control.
Sakumichi in side control, trying to ground and pound but not landing this time.
Sakumichi postures up a little and throws a couple of hammerfists but they don't connect properly.
The fighters are tangled up in the ropes here. We might need a restart if the fighters can't break free themselves.
Poppenstuff tries to escape but Sakumichi is in control.
Sakumichi in side control, throwing shots but Poppenstuff defends.
Sakumichi throwing strikes but missing, from side control.
Sakumichi throwing shots but missing, from side control.
Poppenstuff wants to get back to his feet but Sakumichi drags him back down.
Sakumichi advances to mount.
Poppenstuff trying desperately to get to his feet.
That's one minute gone in the round.
Sakumichi looking to finish with strikes here!
Sakumichi thowing strikes but they're hitting the gloves, not doing any damage.
Sakumichi can't quite control the action as he would like just now, as Poppenstuff is looking to escape.
Poppenstuff holding onto his opponent's waist for dear life, as Sakumichi tries to land some strikes to get him to release his grip.
Poppenstuff is looking to get back to his feet - it's going to be hard from this position.
Poppenstuff blocking the ground and pound.
Sakumichi throws a strike there. Poppenstuff manages to avoid it well and slips a leg under to get to half guard.
Sakumichi is looking to pass Poppenstuff's guard but actually Poppenstuff recovers to full guard.
That's two minutes gone in the round.
The crowd are showing their displeasure at the lack of action as loud boos ring out around the arena.
Sakumichi sneaks a leg through and gets to half guard. That was like a knife through butter how easily he passed Poppenstuff's guard.
Sakumichi stops Poppenstuff from getting back to his feet.
Poppenstuff is staying active underneath Sakumichi, who seems content to just control the action from this position.
Poppenstuff blocking the ground and pound attempt from Sakumichi.
Poppenstuff looks like he's trying to stand up.
Sakumichi sitting in half guard, looking to land shots. Poppenstuff defending well though.
Poppenstuff avoiding damage under a succession of punches from Sakumichi.
Sakumichi passes the guard and advances to mount!
Sakumichi misses with a head shot.
Poppenstuff on his back here. We all know that wrestlers don't like being on their back so let's see if Poppenstuff tries to get out of the position.
That's three minutes gone in the round.
Sakumichi can't quite control the action as he would like just now, as Poppenstuff is looking to escape.
Poppenstuff somehow manages to escape the mount and get back to his feet!
Poppenstuff lands a beauty of a right hand that gets the crowd cheering.
Poppenstuff throws a one two combo.
Poppenstuff moves into range and throws a lovely three punch combination.
Jamie Poppenstuff is looking to keep the fight on the feet at all costs.
Sakumichi shoots for a double leg takedown but Poppenstuff sprawls well. He's pushed Sakumichi's face into the mat and manages to get back to his feet relatively easily.
Poppenstuff scores with a body shot.
Poppenstuff lands with a right hand.
Poppenstuff lands a body shot.
Sakumichi tries for a takedown but Poppenstuff sees it coming a mile off and avoids it easily.
Jamie Poppenstuff has stuffed three takedown attempts in the round now. That's going to take a lot out of Nao Sakumichi.
Sakumichi looks gassed!
Poppenstuff punishes Sakumichi's body with a nice straight punch.
Sakumichi fails with a takedown attempt from distance.
That's four minutes gone in the round.
A left and a right from Poppenstuff both land. Nice combination.
It looks like Nao Sakumichi has been cut.
Sakumichi gets cracked there but stands up to it.
Poppenstuff lands a two punch combo.
Sakumichi is rocked!
This has been an exciting period of action!
The fighters circle momentarily. Poppenstuff darts into range and connects with a nice straight punch.
Sakumichi is still on wobbly legs! Can Poppenstuff finish him?
Poppenstuff lands with a big left! Sakumichi is wobbled badly! Poppenstuff comes in with a flurry of punches and drops Sakumichi to the floor. The ref jumps in to save him from unneccessary punishment.
Ladies and gentlemen, after 4:21 of round 1, we have a winner by way of TKO (Punches). Jamie Poppenstuff!
Jamie Poppenstuff is the new bantamweight champion!
|
|
|
|
|
|
|
|
|
|
|
|
|
|
|
|
|
|
|
|
|
|
|
| S |
C
A |
G |
S |
C
B |
G |
|
S |
C |
G |
|
energy
A | B |
|
hype
A | B |
|
pop
A | B |
|
mgr
A | B |
|
FIGHT
RATING
60% |
|
|
|
|
|
|
|
|
|
|

