 |
XFC: Down Bleed PBP Commentary |
Undercard bout
|
|
|
|
Undercard bout
|
|
|
|
Undercard bout
|
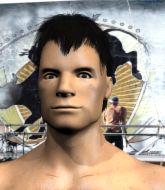
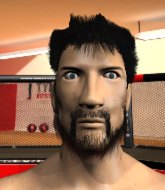
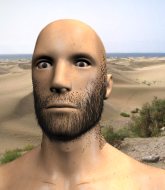
Coming up we have a featherweight MMA rules bout between Kid Koala (ranked 0 p4p, 0 weight class) and Mick Dundee (ranked 0 p4p, 0 weight class). Mick Dundee acknowledges the crowd's support as he enters the cage.
 |
|
 |
| 170 cm
20
150 lbs
1 - 1 - 0 |
|
179 cm
18
150 lbs
1 - 1 - 0 |
BJJ Blue Belt
Improved boxing
Cuts easily |
|
BJJ White Belt
Excellent boxer
Solid chin |
|
| |
|
Ladies and gentlemen. This fight is 3 rounds, in the featherweight division.
Introducing the fighter to my left, fighting out of the red corner.
With a record of
1 - 1 - 0, fighting out of Sydney, Kid Koala!
And introducing the fighter to my right, fighting out of the blue corner.
With a record of
1 - 1 - 0, fighting out of Sydney, Mick Dundee!
The judges for this bout are Hugh Johnson, Summer Carpenter and Damien Edna.

The bell rings for round one and we are underway!
Dundee takes an uppercut right on the jaw but it doesn't phase him.

Dundee gets taken down but at least he's managed to land in guard.
Koala won't allow Dundee to get back to his feet.
Koala postures up.
Dundee tries to strike from the bottom.
Dundee wants to control but Koala passes easily into half guard.
Dundee wants to get back to full guard.
Dundee is trying to stand back up but Koala is controlling him
Dundee is looking to improve his position.

Koala decides he's had enough of the ground and stands up.

That's one minute gone in the round.
Koala swings away but doesn't land with a series of punches.
Dundee takes a jab right on the nose. That must have hurt but he shrugs his shoulders and looks to return the favor.
Dundee tries to bum rush Koala with a series of wild strikes but Koala uses good footwork to avoid the assault.
Koala swinging wilding here.
Dundee dodges the punch combination from Koala.
Dundee stuffs the takedown.
Dundee is looking to clinch but Koala is avoiding it.

Koala moves into the clinch successfully.
Koala takes a shot to the head.

Koala breaks from the clinch.
Dundee dodges the punch combination from Koala.
Dundee tries to close the distance and clinch up against the cage but Koala paws at him with a jab and circles away.
Koala closes the distance and clinches.
Dundee lands an uppercut.
Dundee wants to break the clinch but can't.
Koala wants to break free. God knows he wants to breaaaak freeee.
Koala escapes the clinch and we're back to striking.
Koala throws a nice looking combination but Dundee bobs and weaves to avoid any damage.
Koala throws a series of punches but Dundee avoids them all with ease.
Some wild striking there from Koala.
Koala is breathing heavily.
Dundee takes a punch to the jaw and another one to the bread basket.

That's two minutes gone in the round.
Koala throws a front kick that sends Dundee stumbling back into the cage.
Dundee tries to clinch but Koala moves out of range.
Koala has managed to clinch.
Koala is trying to break the clinch but Dundee has him pressed against the cage.
Dundee prevents Koala from breaking the clinch.
Dundee lands with a right to the head.
Koala breaks from the clinch.
Dundee tries to close the distance and clinch but Koala swats him to one side with an open hand palm strike and circles away.
Dundee tries to close the distance and clinch up but Koala swats him away and circles back towards the center.
Dundee has a nice red mark on his side after a thudding body kick by Koala.
Koala lands a glancing blow to the side of Dundee's head.
A jab from Koala misses.
Koala is looking to take this fight into the clinch.
Koala misses with a few strikes there.
Koala misses with a two punch combination.
Dundee closes the distance and lands a one-two.

It looks like Kid Koala has been cut.
Dundee scores with a nice looking left hook and follows it up with an uppercut!
Koala lands with a cross to side of his opponent's head.
Wow, both these guys are really going for it!
Koala throws a series of punches but Dundee avoids them all with ease.
Koala misses with a combination
and Dundee counters into the clinch. Nicely done.
Koala breaks from the clinch.
Fantastic stuff here - a very entertaining period of action, which has drawn cheers from the crowd.
Dundee tries to move into range but Koala moves to the side and lands with a nice right hand.
Nice jab there from Koala.

Dundee is rocked!
It looks like Mick Dundee has been cut.
Koala has managed to clinch.
Dundee is still on wobbly legs! Can Koala finish him?
Koala manages to break the clinch.
Dundee seems to have recovered his senses.
Koala misses with a series of wild punches.

That's three minutes gone in the round.
Koala looks to land a combination but Dundee avoids it well.
The fight stays on the outside here - Dundee looks like he's thinking about clinching though.
Koala throws a left that rocks Dundee and follows with a right that sends him tumbling to the canvas! Koala dives into side control, looking to finish! Can Dundee regain composure!
Koala stands up.
Dundee tries to shoot in for a takedown. He's got hold of a leg but Koala swivels and escapes.
Koala rushes Dundee and pushes him back against the cage in a clinch.
Dundee gets underhooks to prevent Koala's takedown attempt.
Dundee lands punches inside but they're not really causing much damage.
Koala is using his height advantage well here, landing a good percentage of his punches.
A right handed body shot lands from Dundee.
Dundee breaks from the clinch.
Koala closes the distance and presses his opponent up against the cage.
Koala wants to strike at distance but he can't break free of the clinch.
Dundee looking to slow down the pace here.
Koala blocks a punch to the side of the head.
Koala misses with a knee to the head.
Koala wants to get back to striking at distance but Dundee won't allow it.
A short right from Dundee.
Dundee avoiding damage.
Still in the clinch, Dundee scores with a nice short uppercut.
Dundee prevents Koala from breaking the clinch.
Dundee keeps control of Koala as he tries to wriggle out of the double underhooks.
Dundee tries to pull guard but Koala won't allow it.

That's four minutes gone in the round.
A body shot lands from Dundee.
Koala working aggressively here.
A short right hand to the side of the head by Dundee.
Koala wants to break the clinch but can't.
Dundee lands with a short shot to the head.
Nice body punch from Dundee - that landed with a thud.
Wooooo! Give it up for these two warriors! They are putting on a show!
Dundee escapes the clinch and we're back to striking.
Koala tries to keep at a distance but Dundee has taken the fight into the clinch.
Koala takes a shot to the head.
Nice body punch from Dundee.
Koala is looking to break free of the clinch but Dundee has double underhooks.
Dundee lands a body shot.
Dundee breaks the clinch and we're back to striking at distance.
Koala throws a right and a left that both miss.
Koala throws a combination. Dundee tries to block but a couple of punches get through.
Koala misses with a jab, cross combination.
Dundee tries to clinch up but Koala circles away and keeps his distance.
Koala misses with the combination.
Koala thuds his right hand into Dundee's forehead from close range. That could be painful for both fighters.
The crowd are going absolutely nuts as the round comes to an end - what a fantastic round of action!
Dundee is looking to take this fight into the clinch.
Koala scores with a one two! Dundee had his feet all tangled up there and couldn't avoid the strikes.
Dundee slips a jab and a cross from Koala.
Koala Rushes Dundee and starts throwing punches like they are going out of style! Dundee is up against the cage and has nowhere to go. Koala Piles on the pressure and Dundee crumples to the floor! This one is all over!
Ladies and gentlemen, after 5:05 of round 1, we have a winner by way of TKO (Strikes). Kid Koala!
|
|
|
|
|
|
|
|
|
|
|
|
|
|
|
|
|
|
|
|
|
|
|
| S |
C
A |
G |
S |
C
B |
G |
|
S |
C |
G |
|
energy
A | B |
|
hype
A | B |
|
pop
A | B |
|
mgr
A | B |
|
FIGHT
RATING
0% |
|
|
|
|
|
|
|
Undercard bout
|
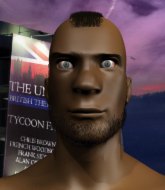
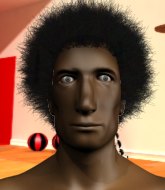
Coming up we have a middleweight MMA rules bout between Han Solo (ranked 0 p4p, 0 weight class) and Bob Saget (ranked 0 p4p, 0 weight class). Both fighter's entrance songs getting the crowd jumping here.
 |
|
 |
| 185 cm
20
180 lbs
1 - 1 - 0 |
|
188 cm
22
191 lbs
1 - 1 - 0 |
BJJ Blue Belt
Brawler
Granite chin |
|
BJJ White Belt
Basic striking
Determined |
|
| |
|
Ladies and gentlemen. This fight is 3 rounds, in the middleweight division.
Introducing the fighter to my left, fighting out of the red corner.
With a record of
1 - 1 - 0, fighting out of Sydney, Han Solo!
And introducing the fighter to my right, fighting out of the blue corner.
With a record of
1 - 1 - 0, fighting out of Sydney, Bob Saget!
The judges for this bout are John Mangel, Hugh Johnson and Skip Squint.
The bell rings for round one and we are underway!
Saget tries to clinch but Solo is having none of it.
Saget shoots in with a takedown attempt and he has Solo pinned against the cage. Solo gets the underhooks and manages to circle away.
Solo doesn't react quick enough there as he takes a shot to the body.
Saget tries for a takedown but Solo sees it coming a mile off and avoids it easily.
Solo shoots in but doesn't get the takedown
and Saget counters by moving into the clinch.
Saget manages to break the clinch.
Saget is looking to take this fight into the clinch.
A slapping body kick lands there for Saget.
Saget tries to keep at a distance but Solo has taken the fight into the clinch.
Saget has a body lock and is looking for a takedown. Solo is bouncing around trying to prevent the takedown and somehow he has indeed managed to stay on his feet.
Han Solo has stuffed three takedown attempts in the round now. That's going to take a lot out of Bob Saget.
Solo is working for a takedown up against the cage. He can't get it on this occasion though.
Saget stalling.
Saget on the defensive, avoiding the knees to the body.
Solo pressing his opponent against the cage.
Saget has hold of a leg and is looking for a trip takedown. Solo avoids it nicely though and we remain in the clinch.
Saget drops down for a takedown but doesn't get it.
Solo wants to break free but Saget has control.
That's one minute gone in the round.
Saget has Solo pressed up against the cage and is working for takedown. Solo manages to improve position though and keeps the fight standing.
Saget looks gassed!
Solo breaks the clinch.
Saget changes levels and drives through with a really nice takedown into side control. Solo looks really pissed at himself for not defending that better.
Solo is trying to control Saget's posture but Saget avoids it.
The fighters are pressed up against the cage, both looking to find a bit of space to work.
Both fighters take a look at the clock.
Solo is trying to get back to half guard. He's pushing on Saget's leg. He's managed it. Nice work.
Saget missing with the ground and pound from half guard.
Saget not landing any meaningful shots this time.
Solo wants to get back to full guard.
Saget seems to have lost interest with the ground game and is thinking about standing back up.
That's two minutes gone in the round.
Saget tries to pass to full mount but Solo defends it.
Solo moves into full guard.
Saget thows a big elbow that misses.

The referee has ruled that neither fighter is active enough on the ground and has stood them back up.
Saget closes the distance and clinches up, looking for a takedown. He shifts his weight and gets a nice trip into half guard.
Saget seems very keen to just sit and control from half guard but Solo does not like that idea so much and is remaining active off his back.
The ref warns both fighters not to hold the cage as they work up against the meshing.
Solo blocking the ground and pound attempt from Saget.
Saget looking to pass the half guard. Not this time.
Saget wants to take a breather but Solo is having none of it.
Solo wants to control but Saget is keeping busy.
Saget not doing much here.

Solo looking for submissions from an awkward position here.
That's three minutes gone in the round.
Solo is looking to control Saget's leg but it's slowly edging free. Can Solo avoid being mounted?
It looks like we're going to have a standup here. Neither fight is doing enough on the ground.
Saget changes levels and looks for a double leg takedown. Solo tries to avoid it but Saget manages to keep hold of a leg and drag Solo to the ground. Solo escapes though and pops straight back up to his feet.
Solo tries for a takedown but Saget circles away easily
and Saget counters with a nice single leg takedown and he's in Solo's guard now.
Saget would like to get this fight back to the feet but can't get free from the closed guard.
Solo had isolated an arm as going for an omaplata. Saget is defending the submission well but is in a very vulnerable position. Solo Is leaning forward trying to finish the omaplata but decides to abandon it, and take Saget's back instead.
Solo is landing with strikes from the back.
Solo has got one arm under Saget's chin. This could be trouble... Saget trying to control the other hand but Solo gets it free and sqeezes tight - just a matter of time now! Yep, Saget has tapped out! The fight is over!
Ladies and gentlemen, after 4:05 of round 1, we have a winner by way of Submission (RNC). Han Solo!
|
|
|
|
|
|
|
|
|
|
|
|
|
|
|
|
|
|
|
|
|
|
|
| S |
C
A |
G |
S |
C
B |
G |
|
S |
C |
G |
|
energy
A | B |
|
hype
A | B |
|
pop
A | B |
|
mgr
A | B |
|
FIGHT
RATING
55% |
|
|
|
|
|
|
|
Undercard bout
|
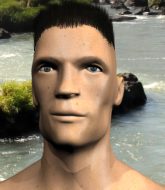
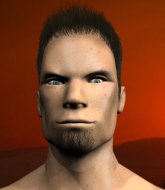
Coming up we have a heavyweight MMA rules bout between Andrew Kelly (ranked 0 p4p, 0 weight class) and Fred Ramon (ranked 0 p4p, 0 weight class). Fred Ramon has the power to score a knockout today if he connects clean with Andrew Kelly's chin.
 |
|
 |
| 186 cm
22
260 lbs
2 - 0 - 0 |
|
196 cm
22
245 lbs
2 - 1 - 0 |
BJJ Blue Belt
Counter striker
Self confident |
|
BJJ Blue Belt
Brawler
Solid chin |
|
| |
|
Ladies and gentlemen. This fight is 3 rounds, in the heavyweight division.
Introducing the fighter to my left, fighting out of the red corner.
With a record of
2 - 0 - 0, fighting out of Sydney, Andrew Kelly!
And introducing the fighter to my right, fighting out of the blue corner.
With a record of
2 - 1 - 0, fighting out of Sydney, Fred Ramon!
The judges for this bout are Steve Erwin, Skip Squint and Donatello Bradman.
The bell rings for round one and we are underway!
Ramon throws a series of punches but Kelly avoids them all with ease.
Kelly tries to clinch but Ramon is having none of it.
Ramon throws a right high kick that is partially blocked by Kelly.
Ramon closes the distance looking to clinch
and Kelly moves into the clinch.
Kelly is trying to work for a single leg takedown but Ramon pulls him back up using the underhooks.
A right hand to the body from Ramon.
Kelly blocks an uppercut.
Kelly manages to break the clinch.
Ramon misses with a left hand
and Kelly counters with a nice jab to the body that keeps Ramon thinking.
Ramon tries to clinch but Kelly is having none of it.
Ramon moves into range and clinches up with Kelly.
Kelly controlling the action here for a moment.
Kelly wants to push off and get back to the center of the mat but Ramon has him pressed against the cage.
Ramon tried to land a shot to the body but connects with Kelly's elbow.
Kelly looking for a takedown.
Ramon breaks the clinch.
Ramon misses with a hook
and Kelly counters with a head kick.
The crowd are loving this. Great action here.
Ramon showing good head movement there, avoiding the strikes from Kelly.
Ramon swings wildly with a right hand that was never going to find it's target.
Kelly shoots in from a long way out. He's driving through with the takedown attempt and he eventually gets it, landing in Ramon's guard.
Kelly is breathing heavily.
Ramon manages to sweep nicely, so he's now on top. Kelly manages to get himself to full guard.
That's one minute gone in the round.
Ramon slows down the pace of the fight for a moment. He'll need to remain active if he doesn't want to see the fight stood back up.
Ramon thows a big elbow that misses.
Ramon won't allow Kelly to get back to his feet.
Ramon is looking to work some ground and pound but Kelly has wrist control.
Ramon controls the pace of the fight for a moment.
Ramon is working Kelly over from the guard. He should look to pass the guard and do a little more damage with these strikes.
Ramon pushes down on Kelly's leg and manages to get into half guard.
Ramon with a momentary lay and pray from half guard.
Ramon sitting in half guard, looking to land shots. Kelly defending well though.
Kelly manages to escape and get back to his feet!
Ramon shapes like he's going to throw a leg kick but settles back down.
Ramon pulls out of a head kick attempt.
Kelly blocks a head kick by Ramon.
Ramon throws a combination but it was largely blocked by Kelly.
Kelly fakes with an overhand right and moves in to clinch with Ramon, pushing him back against the cage.
That's two minutes gone in the round.
Ramon wants to break free but Kelly has control.
Kelly lands a nice looking hook to the body, against the cage.
Ramon misses with a punch to the body.
Kelly tries to pull guard but Ramon holds him up against the cage and eventually Kelly drops back down to his feet.
That's three failed takedown attempts in the round for Andrew Kelly. That's going to take a lot out of him.
Kelly breaks the clinch.
Kelly moves out of range of the body kick.
Kelly swings away but doesn't land with a series of punches.
Ramon looks to clinch
and Kelly counters with a nice body kick.
Ramon with a body punch. A glancing blow.
The fans in attendance giving it up for the two fighters, who have really let it all hang out in the last minute or so!
Kelly looks up at the clock. Bad move! Ramon lands a right hand from hell, dropping Kelly. Ramon pounces and finishes the fight with a flurry of punches and elbows.
Ladies and gentlemen, after 2:30 of round 1, we have a winner by way of TKO (Strikes). Fred Ramon!
|
|
|
|
|
|
|
|
|
|
|
|
|
|
|
|
|
|
|
|
|
|
|
| S |
C
A |
G |
S |
C
B |
G |
|
S |
C |
G |
|
energy
A | B |
|
hype
A | B |
|
pop
A | B |
|
mgr
A | B |
|
FIGHT
RATING
87% |
|
|
|
|
|
|
|
Undercard bout
|
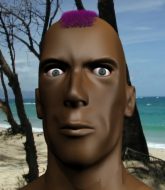
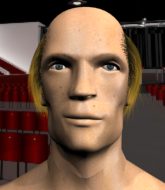
Coming up we have a light heavyweight MMA rules bout between Weppe Huilakko (ranked 0 p4p, 0 weight class) and Three Monts (ranked 0 p4p, 0 weight class). Huilakko comes to the cage accompanied by Byz - Do you wanna fuck?. Weppe Huilakko could well score a knockout today. He has the power to get to Three Monts's chin.
 |
|
 |
| 195 cm
18
214 lbs
2 - 1 - 0 |
|
190 cm
22
200 lbs
1 - 1 - 0 |
BJJ Purple Belt
Basic striking
Granite chin |
|
BJJ Purple Belt
Brawler
Very confident |
|
| |
|
Ladies and gentlemen. This fight is 3 rounds, in the light heavyweight division.
Introducing the fighter to my left, fighting out of the red corner.
With a record of
2 - 1 - 0, fighting out of Sydney, Weppe Huilakko!
And introducing the fighter to my right, fighting out of the blue corner.
With a record of
1 - 1 - 0, fighting out of Sydney, Three Monts!
The judges for this bout are Donatello Bradman, Winston Howard and Damien Edna.
The bell rings for round one and we are underway!
Huilakko fails with a rather predictable takedown attempt.
Monts looking to shoot here. He's gone for it and he's landed a takedown into mount! Oh, that's bad for Huilakko!
Monts landing strikes, looking to finish!
Monts with good strikes from the mount here!
Monts postures up and lands a whopping elbow - oh that's hurt Huilakko bigstyle! Two more strikes land for Monts and the fight is over!
Ladies and gentlemen, after 0:34 of round 1, we have a winner by way of TKO (Strikes). Three Monts!
|
|
|
|
|
|
|
|
|
|
|
|
|
|
|
|
|
|
|
|
|
|
|
| S |
C
A |
G |
S |
C
B |
G |
|
S |
C |
G |
|
energy
A | B |
|
hype
A | B |
|
pop
A | B |
|
mgr
A | B |
|
FIGHT
RATING
100% |
|
|
|
|
|
|
|
Co-main event
|
Coming up we have a welterweight MMA rules bout between Earnie Dingo (ranked 0 p4p, 0 weight class) and Konstantin Tszyu (ranked 0 p4p, 0 weight class). Tszyu has chosen X Japan - I'll Kill You as his entrance music. Over to our ring announcer for the fighter introductions!
 |
|
|
| 170 cm
22
170 lbs
2 - 0 - 0 |
|
175 cm
18
170 lbs
2 - 0 - 0 |
BJJ Blue Belt
Brawler
Granite chin |
|
BJJ Blue Belt
Decent boxing
Intelligent |
|
| |
|
Ladies and gentlemen. This fight is 3 rounds, in the welterweight division.
Introducing the fighter to my left, fighting out of the red corner.
With a record of
2 - 0 - 0, fighting out of Sydney, Earnie Dingo!
And introducing the fighter to my right, fighting out of the blue corner.
With a record of
2 - 0 - 0, fighting out of Sydney, Konstantin Tszyu!
The judges for this bout are Damien Edna, Bruno Hogan and John Mangel.
The bell rings for round one and we are underway!
Tszyu throws a combination. Dingo tries to block but a couple of punches get through.
Some wild striking there from Tszyu.
Dingo tries for a takedown but Tszyu sees it coming a mile off and avoids it easily.
Dingo shoots for a takedown but Tszyu saw that one coming a mile off and avoided it easily.
Tszyu smiles there as he lands a nice right hand right on the button.
Tszyu misses with a few strikes there.
Dingo shoots in with a takedown attempt and he has Tszyu pinned against the cage. Tszyu gets the underhooks and manages to circle away.
That's three failed takedown attempts in the round for Earnie Dingo. That's going to take a lot out of him.
Dingo has a takedown stuffed.
Tszyu gets to the clinch - let's see what his plan is here.
A quick uppercut on the inside from Tszyu.
Tszyu stalling in the clinch but Dingo improves position.
Tszyu lands a right uppercut that snaps the head of Dingo backwards.
Tszyu keeps control of Dingo as he tries to wriggle out of the double underhooks.
Tszyu lands with a left to the head.
Dingo tries to pull guard but Tszyu won't allow it.
Stalling in the clinch from Dingo.
with the fighters clinched against the cage, Tszyu creates a bit of distance for himself and scores with a nice uppercut.
Tszyu scores with a one two! Dingo had his feet all tangled up there and couldn't avoid the strikes.
Nice uppercut lands for Tszyu. That snapped Dingo's head back.
The fans in attendance giving it up for the two fighters, who have really let it all hang out in the last minute or so!
Dingo takes a really solid shot there but just smiles back and shrugs his shoulders.
Dingo shoots in and bounces Tszyu off the cage to secure the takedown into guard.
The fighters are pressed up against the cage, both looking to find a bit of space to work.
Tszyu trying to strike off his back.
That's one minute gone in the round.
Dingo drops back, looking for a kneebar! Tszyu looks panicked! The fighters roll across the mat, one looking to finish, one looking to escape. Tszyu looks to have wriggled free... Yes, he's got his leg free and he's dived into side control! Good work there from Tszyu!
Dingo is breathing heavily.
Dingo is looking to reverse the position.
Tszyu has had enough of the ground for now and decides to stand.
Dingo takes a solid shot to the body. That one hurt him but he's trying not to show it.
Tszyu rushes Dingo and presses him up against the cage.
Tszyu throws a blind hook that connects with the side of Dingos head.
Tszyu throws a blind hook that connects with the side of Dingos head.
A right handed body shot lands from Tszyu.
Dingo wants a takedown but no success here.
Dingo breaks the clinch and we return to the middle of the mat.
A right-left combo lands from Tszyu.
Dingo has a takedown stuffed.
Dingo shoots in but Tszyu avoids the takedown attempt easily.
Excellent takedown into side control there by Dingo.
We've seen a great period of action over the last minute or so - credit to both fighters for leaving it all in the cage!
Dingo looking for an arm triangle but it's way too loose to do anything.
The ref warns both fighters not to hold the cage as they work up against the meshing.
That's two minutes gone in the round.
Dingo in side control, just content to control the action for now.
The ground and pound from Dingo seems to be hitting the mat more than his opponent.
Tszyu tries to bench press Dingo off him but Dingo keeps the position.
Dingo working away.
Tszyu tries to slip a leg under to move to half guard but Dingo presses down on the leg and jumps into full mount!
Both fighters really going for it on the ground here!
Dingo prevents Tszyu from getting the reversal.
Dingo with good strikes from the mount here!
Dingo looking for an armbar but decides to keep the dominant position instead.
Dingo looking to land elbow strikes but Tszyu uses the position to regain half guard.
That's three minutes gone in the round.
The fighters are starting to perspire pretty heavily.
Tszyu is trying to defend against the ground and pound but Dingo scores with a couple of nice shots.
Tszyu works his way to full guard. Good work.
Dingo trying to control but Tszyu is working from the bottom.
Dingo won't allow Tszyu to sweep him here.
Dingo drops back for a leg! It's a sloppy attempt though and Dingo jumps back into guard quickly, to retain the dominant position.
Tszyu throws a couple of weedy looking strikes off his back.
Dingo preventing the sweep.
Tszyu is striking from the bottom but Dingo uses the opportunity to pass into half guard.
Dingo is looking for a kimura. It's going to be difficult to finish that from half guard though and Tszyu defends it well.
Tszyu manages to get to full guard.
Dingo preventing the sweep.
That's four minutes gone in the round.
There's not a lot going on here and the crowd are letting the fighters know they're not willing to tolerate a lack of action.
Dingo drops back for a leg! It's a sloppy attempt though and Dingo jumps back into guard quickly, to retain the dominant position.
Dingo wants to control from the top but Tszyu keeps moving.
Dingo advances position into side control!
Sloppy strikes there by Dingo.
An elbow from Dingo crashes against the mat.
Tszyu is not content to let Dingo control the position.
Dingo misses with a strike but at least he's keeping busy, looking to cause some damage - that will still help him when it comes to the judges scorecards.
As the round comes to an end the crowd are showing their appreciation for a great round of action.
The referee has ruled that neither fighter is active enough on the ground and has stood them back up.
Dingo gets the takedown into side control.
Tszyu tries to buck Dingo off but Dingo is having none of it.
Dingo passes to full mount! That's big trouble for Tszyu!
Dingo controlling from the full mount.
And thats the end of the round the fighters go back to their corners.
Konstantin Tszyu dominated that round.
Well, the break between rounds is over. Let's get back to the scrappin!

Dingo shoots in for a takedown but Tszyu shows good takedown defense.
Tszyu throws a series of punches but Dingo moves out of range.
Dingo closes the distance and clinches up, looking for a takedown. He shifts his weight and gets a nice trip into half guard.
Tszyu is staying active underneath Dingo, who seems content to just control the action from this position.
Dingo works his way into full mount!
Dingo throwing strikes here but Tszyu is writhing around nicely and avoiding any serious damage.
Tszyu is trying desperately to improve position.
Dingo jumps to side control looking for an arm triangle but Tszyu manages to avoid the submission attempt.
Tszyu takes an elbow right on the bridge of the nose and winces in pain.
Dingo stands up.
Konstantin Tszyu is looking to keep the fight on the feet at all costs.
That's one minute gone in the round.
Tszyu lets the fists fly and connects with a left straight followed by a right hook.
Both fighters are absolutely exhausted here.
Tszyu moves into range and throws a lovely three punch combination.
Dingo looks for a takedown. He's got it. We're now in half guard.
Tszyu slips a foot under and gets full guard. Nice work.
Dingo pressing down on his opponent's thigh, looking to pass guard. Tszyu is keeping the position for now.
Dingo loading up with the ground and pound but he's missing more than he's landing in this flurry.
Tszyu keeping moving, preventing Dingo from controlling successfully.
Tszyu looking to hit a scissor sweep but Dingo is one step ahead there.
That's two minutes gone in the round.
Dingo scoring with punches to the head and body.
Dingo in full guard, throwing the ground and pound. No damage this time.
Tszyu is trying to keep Dingo in close.
The referee decides to stand the fighters back up.
Dingo shoots in for a double leg but Tszyu sprawls well. That's going to sap some energy.
Dingo staying out of range there.
Dingo shoots in for a takedown but Tszyu shows good takedown defense.
That's three failed takedown attempts in the round for Earnie Dingo. That's going to take a lot out of him.
Tszyu ducks low and lands a nice hook to the body of his opponent.
Dingo shoots in looking for a takedown. Tszyu tries to sprawl out of it but Dingo keeps driving through. The fighters are pinned against the cage. Tszyu manages to get underhooks and after a bit of a struggle, circles away and we're back to standing.
Tszyu circles away from the clinch attempt
and Tszyu counters with a straight right hand.
Dingo misses with a takedown attempt
and Tszyu counters with a nice uppercut.
Dingo takes a shot to the eye socket. That's gotta hurt.
We've seen a great period of action over the last minute or so - credit to both fighters for leaving it all in the cage!
Dingo takes a jab right on the nose. That must have hurt but he shrugs his shoulders and looks to return the favor.
Dingo with a poor takedown
and Tszyu counters by clinching up.
Tszyu's corner are urging him to control the action in the clinch for a moment, rather than mount any serious offense. I'm sure the crowd appreciate those instructions... not.
Dingo is trying to work out of this bad position, with his back against the cage.
Dingo breaks the clinch and we're back to striking at distance.
Dingo slips under a jab from Tszyu.
That's three minutes gone in the round.
Tszyu is looking to clinch.
Earnie Dingo seems to be the more aggressive standup fighter in this bout.
A big left from Tszyu misses.
Dingo changes levels and drives through with a really nice takedown into side control. Tszyu looks really pissed at himself for not defending that better.
Dingo taking a breather here.
Dingo scoring with punches and elbows.
Tszyu is looking for a sweep.
Tszyu is persisting with the attempt to improve his position.
Dingo has had enough of the ground for now and decides to stand.
Dingo with a poor takedown
and Tszyu counters with a three punch combo that has Dingo backing up. Dingo nods at Tszyu to acknowledge the strikes.
Dingo has his takedown stuffed
and Tszyu counters with a lovely straight right hand!
Dingo fails with a rather predictable takedown attempt.
Dingo closes the distance and looks for a trip takedown... aaaand he's got it - Dingo lands in his opponent's guard.
That's four minutes gone in the round.
Tszyu is working the butterfly guard. He manages to land a nice scissor sweep and is now in half guard on the top. Nice move.
Tszyu prevents Dingo from improving his position.
Dingo gets full guard.
There's a bit of a scramble here and now Dingo is on top in guard.
Earnie Dingo overall seems to be getting the better of the ground position in the fight so far.
The crowd are loving this. Great action here.
Dingo gets to his feet - Tszyu follows without any prompting.
Dingo shoots in for a takedown but Tszyu shows good takedown defense.
Dingo darts in and lands a nice takedown into half guard.
Dingo wants to work for an arm triangle but Tszyu is really keeping half guard well and defending the submission attempt.
As the round comes to an end the crowd are showing their appreciation for a great round of action.
Tszyu missing with punches from the bottom.
Tszyu moves into full guard.
And thats the end of the round the fighters go back to their corners.
Earnie Dingo dominated that second round.
That's time! Dingo's corner gives him a slap on the ass as he gets ready to fight. This is the final round!

Tszyu lands a glancing blow to the side of Dingo's head.
Dingo with a lazy takedown attempt
and Tszyu counters with a left to the body.
Dingo fails miserably with a takedown attempt.
Dingo fails with the takedown
and Tszyu counters with a two punch combo.
That's three failed takedown attempts in the round for Earnie Dingo. That's going to take a lot out of him.
Tszyu ducks low and lands a nice hook to the body of his opponent.
Earnie Dingo is looking to throw some combinations by the looks of things.
Nice cross by Tszyu.
Dingo gets the takedown into side control.
The fans in attendance giving it up for the two fighters, who have really let it all hang out in the last minute or so!
Tszyu tries to control the position but he's not in luck - Dingo easily slips into full mount!
Dingo landing strikes from the mount.
Dingo content just to control the position here.
Dingo trying to control but he's not successful this time.
Tszyu sneaks a leg under to get to half guard.
Tszyu tries to roll over but Dingo keeps him under control.
Dingo has been looking to land a fair amount of strikes on the ground. He might be looking to soften his opponent up in order to work for a submission.
Tszyu takes a big intake of breath there - he's definitely tired.
That's one minute gone in the round.
Dingo is working for a kimura but Tszyu is defending it quite comfortably.
Tszyu tries to roll over but Dingo keeps him under control.
Dingo prevents Tszyu from standing back up.
Dingo wants to take a breather but Tszyu is having none of it.
Tszyu gets full guard.
Dingo slips effortlessly into side control - very nice.
Tszyu tries to get back to half guard but can't.
Dingo wants to work for a kimura but he's foiled early by Tszyu, who protects the arm well.
Tszyu manages to land a sweep and he's now on top! Lovely Jiu Jitsu!
That's two minutes gone in the round.
Dingo is trying to control but can't.
Dingo kicks Tszyu off and gets back to his feet.
Dingo gets a takedown into half guard.
Tszyu is not content to let Dingo control the position.
Tszyu missing with punches from the bottom.
The fighters are battling for position here. Tszyu manages to regain full guard. Nice work.
Tszyu bucks up whilst keeping hold of a body lock, managing to reverse the position. Now he's in top in Dingo's guard.
Dingo bucks up whilst keeping hold of a body lock, managing to reverse the position. Now he's in top in Tszyu's guard.
Dingo won't allow Tszyu to sweep him here.
Tszyu manages to land a sweep and now he's in mount on top!
Dingo is desperately trying to get back to half guard.
That's three minutes gone in the round.
Dingo is working hard here to advance position.
Tszyu postures up and cracks his opponent a couple of times before moving back into close ground control. Dingo looks a forlorn figure.
Tszyu landing strikes from the mount.
Dingo tries to hold on but Tszyu postures up.
Dingo is desperately trying to improve his position but Tszyu has a good base and remains in mount.
Dingo wants to control but Tszyu is having none of it.
Dingo manages to regain half guard. Good work.
Dingo wants to get back to his feet.
That's four minutes gone in the round.
Tszyu throwing punches and elbows but they're not doing any damage.
Dingo is looking to improve his position.
Dingo makes his way to full guard. A much better position for Dingo.
Tszyu stands up and looks to throw the legs aside to pass to side control. Dingo swivels though and keeps the full guard.
Dingo lands a beautiful switch and he's in full mount! That could spell trouble for Tszyu!
Tszyu tries to lock up and control but Dingo gives him a forearm to the face and pushes him away.
As the round comes to an end the crowd are showing their appreciation for a great round of action.
Dingo tries to control but Tszyu wriggling away.
Dingo misses with a head shot.
Tszyu is trying to escape the mount.
And that's the end of the fight!
I would just about give that final round to Konstantin Tszyu.
I think Tszyu has won this one but let's see whether the judges agree with me. Over to the ring announcer for the scorecards.
Ladies and gentlemen, after 3 rounds of action, we go to the scorecards for a decision.
Judge Damien Edna scores the fight for Konstantin Tszyu!
Judge Bruno Hogan scores the fight for Konstantin Tszyu!
Judge John Mangel scores the fight for Konstantin Tszyu!
Konstantin Tszyu wins by unanimous decision!
|
|
|
|
|
|
|
|
|
|
|
|
|
|
|
|
|
|
|
|
|
|
|
| S |
C
A |
G |
S |
C
B |
G |
|
S |
C |
G |
|
energy
A | B |
|
hype
A | B |
|
pop
A | B |
|
mgr
A | B |
|
FIGHT
RATING
100% |
|
|
|
|
|
|
|
Main event
|
Coming up we have a heavyweight MMA rules bout between Jim Beam (ranked 0 p4p, 0 weight class) and Scott Lawson (ranked 0 p4p, 0 weight class). Jim Beam has a significant reach advantage - let's see if he can make it count.
 |
|
 |
| 194 cm
22
245 lbs
2 - 0 - 0 |
|
178 cm
22
250 lbs
2 - 0 - 0 |
BJJ Blue Belt
Counter striker
Cuts easily |
|
BJJ Blue Belt
Basic striking
Likes ground |
|
| |
|
Ladies and gentlemen. This fight is 5 rounds, for the heavyweight championship of the world!
Introducing the champion to my left, fighting out of the red corner.
With a record of
2 - 0 - 0, fighting out of Sydney, Jim Beam!
And introducing the challenger to my right, fighting out of the blue corner.
With a record of
2 - 0 - 0, fighting out of Sydney, Scott Lawson!
The judges for this bout are Summer Carpenter, Eliza Hachem and Skip Squint.
The bell rings for round one and we are underway!
Beam stooping low to avoid any incoming strikes and then lunges in with an uppercut come cross that lands flush.
Lawson is rocked!
Beam shoots and scores a devastating slam takedown! Lawson is unconscious as Beam celebrates over his stricken foe!
Ladies and gentlemen, after 0:05 of round 1, we have a winner by way of KO (Slam). Jim Beam!
Jim Beam is the new heavyweight champion!
|
|
|
|
|
|
|
|
|
|
|
|
|
|
|
|
|
|
|
|
|
|
|
| S |
C
A |
G |
S |
C
B |
G |
|
S |
C |
G |
|
energy
A | B |
|
hype
A | B |
|
pop
A | B |
|
mgr
A | B |
|
FIGHT
RATING
100% |
|
|
|
|
|
|
|
|
|
|

