 |
NEFC 10: Habibin Vs. Bob PBP Commentary |
Undercard bout
|
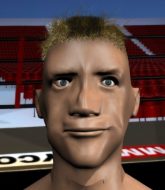
Coming up we have a heavyweight MMA rules bout between Mark Nielsen (ranked 0 p4p, 0 weight class) and Michael Jakson (ranked 0 p4p, 0 weight class). Both fighters look fresh as a daisy as they make their way towards the cage.
 |
|
 |
| 198 cm
18
263 lbs
2 - 4 - 0 |
|
191 cm
22
240 lbs
2 - 0 - 0 |
BJJ White Belt
Improved boxing
Very strong |
|
BJJ Blue Belt
Decent boxing
Intelligent |
|
| |
|
Ladies and gentlemen. This fight is 3 rounds, in the heavyweight division.
Introducing the fighter to my left, fighting out of the red corner.
With a record of
2 - 4 - 0, fighting out of Los Angeles, Mark Nielsen!
And introducing the fighter to my right, fighting out of the blue corner.
With a record of
2 - 0 - 0, fighting out of Las Vegas, Michael Jakson!
The judges for this bout are Timothy Bukovac, Jack Bonds and .

The bell rings for round one and we are underway!
Nielsen drops a shoulder and throws a monster hook that connects perfectly to the side of Jakson's head, knocking him out cold! Nielsen is extatic as he celebrates with his cornermen.
Ladies and gentlemen, after 0:05 of round 1, we have a winner by way of KO (Punch). Mark Nielsen!
|
|
|
|
|
|
|
|
|
|
|
|
|
|
|
|
|
|
|
|
|
|
|
| S |
C
A |
G |
S |
C
B |
G |
|
S |
C |
G |
|
energy
A | B |
|
hype
A | B |
|
pop
A | B |
|
mgr
A | B |
|
FIGHT
RATING
13% |
|
|
|
|
|
|
|
Undercard bout
|
Coming up we have a heavyweight MMA rules bout between Ricky Watson (ranked 0 p4p, 0 weight class) and Judah Benjamin (ranked 0 p4p, 0 weight class). Watson comes to the cage accompanied by "Hells Bells" by AC/DC. We have two fighters making their debuts here, so let's see who comes out of this one with their first professional victory.
 |
|
 |
| 185 cm
22
220 lbs
0 - 0 - 0 |
|
189 cm
22
276 lbs
0 - 0 - 0 |
BJJ Blue Belt
Brawler
Granite chin |
|
Good wrestler
Brawler
Heavy handed |
|
| |
|
Ladies and gentlemen. This fight is 3 rounds, in the heavyweight division.
Introducing the fighter to my left, fighting out of the red corner.
With a record of
0 - 0 - 0, fighting out of Los Angeles, Ricky Watson!
And introducing the fighter to my right, fighting out of the blue corner.
With a record of
0 - 0 - 0, fighting out of Los Angeles, Judah Benjamin!
The judges for this bout are Timothy Bukovac, Frank Antenori and Jack Bonds.
The bell rings for round one and we are underway!

Benjamin instigates a clinch.
A short uppercut from Benjamin.
Benjamin misses with the head strike.
Benjamin lands a body shot in the clinch.
A short right from Benjamin.
Watson looking for a takedown.
A short right hand to the side of the head by Benjamin.
Watson wants to break free. God knows he wants to breaaaak freeee.
Watson is clearly stalling here... Pick up the pace son.
Watson is trying to slow down the pace in the clinch, to catch his breath.
Benjamin lands a hook to the body. It's hard to tell if that hurt Watson or not.
Watson wants to break the clinch but can't.
Benjamin lands punches inside but they're not really causing much damage.
Watson wants to break the clinch but can't.
Benjamin lands a hook that snaps the head of Watson backwards.
Benjamin lands a shoulder strike that jolts his opponent's head backwards.
Watson can't get the takedown.
Watson is breathing heavily.
Watson tries to pull guard but Benjamin holds him up against the cage and eventually Watson drops back down to his feet.
That's three failed takedown attempts in the round for Ricky Watson. That's going to take a lot out of him.
Benjamin scores with an uppercut up the middle.
Watson tries to pull guard but can't drag his opponent to the mat. Benjamin just stands there and leans against the cage.
Benjamin lands a right hand.

Watson is rocked!
Benjamin creates a bit of space for himself and rocks Watson with a big uppercut! Watson tries to clinch up but Benjamin pushes him back against the cage and lands another moster strike that crumples Watson to the mat! Watson covers up and Benjamin unloads with more strikes until the referee steps in to end the bout!
Ladies and gentlemen, after 0:58 of round 1, we have a winner by way of TKO (Punches). Judah Benjamin!
|
|
|
|
|
|
|
|
|
|
|
|
|
|
|
|
|
|
|
|
|
|
|
| S |
C
A |
G |
S |
C
B |
G |
|
S |
C |
G |
|
energy
A | B |
|
hype
A | B |
|
pop
A | B |
|
mgr
A | B |
|
FIGHT
RATING
100% |
|
|
|
|
|
|
|
Undercard bout
|
|
|
|
Undercard bout
|
Coming up we have a lightweight MMA rules bout between Nick Nova (ranked 0 p4p, 0 weight class) and MAX SWAGGER (ranked 0 p4p, 0 weight class). Over to our ring announcer for the fighter introductions!
 |
|
 |
| 170 cm
19
155 lbs
2 - 0 - 0 |
|
178 cm
20
160 lbs
2 - 0 - 0 |
BJJ Blue Belt
Brawler
Prefers ground |
|
BJJ Blue Belt
Basic striking
Solid chin |
|
| |
|
Ladies and gentlemen. This fight is 3 rounds, in the lightweight division.
Introducing the fighter to my left, fighting out of the red corner.
With a record of
2 - 0 - 0, fighting out of Los Angeles, Nick Nova!
And introducing the fighter to my right, fighting out of the blue corner.
With a record of
2 - 0 - 0, fighting out of Los Angeles, MAX SWAGGER!
The judges for this bout are Jack Bonds, and Timothy Bukovac.
The bell rings for round one and we are underway!
A punch combination from SWAGGER misses.
Nova moves in looking to clinch but SWAGGER pushes him off.
Nova closes the distance and clinches up with SWAGGER, looking for a takedown. Nova pushes SWAGGER against the cage but SWAGGER circles to the side and manages to break the clinch.
SWAGGER fakes with an overhand right and moves in to clinch with Nova, pushing him back against the cage.

Nova breaks the clinch and we're back to striking at distance.
Nova closes the distance looking to clinch
and SWAGGER counters with a nice uppercut.
Nova tries to keep at a distance but SWAGGER has taken the fight into the clinch.
Nova tries to pull guard but can't drag his opponent to the mat. SWAGGER just stands there and leans against the cage.
SWAGGER breaks the clinch and we return to the middle of the mat.
Nova wants to clinch but SWAGGER slips to the side
and Nova takes a counter punch right on the button for his troubles.
Nova keeps the fight on the outside.
SWAGGER misses with a jab and misses with a cross straight after too.
SWAGGER darts in and clinches Nova up against the cage.
SWAGGER tries to break the clinch but Nova is controlling the position.
Nova keeps control of SWAGGER as he tries to wriggle out of the double underhooks.
SWAGGER has Nova pressed against the cage.
Nova wants to break the clinch but can't.
Nova wants to push off and get back to the center of the mat but SWAGGER has him pressed against the cage.

SWAGGER pulls Nova into guard.

That's one minute gone in the round.
Nova trying to control the position from guard on top but SWAGGER is wriggling around, looking for whatever he can.
Nova forces his way into half guard.
SWAGGER regains full guard. Nicely done.
Nova working some ground and pound from guard but it's not doing any damage.
Nova wants to stand and escape but instead SWAGGER has hit a sweep and he's now on top in guard.
Nova tries to land a sweep but no joy.
Nova keeping moving, preventing SWAGGER from controlling successfully.
SWAGGER is looking to stand up but Nova won't let him.

Nova throwing his legs up looking for a triangle.
SWAGGER trying to control but Nova is working from the bottom.

That's two minutes gone in the round.
Well. There's a bit of a lull in the action here and the crowd are starting to get restless.

Neither fighter is doing enough for the referee's liking and he's decided to stand them back up.
Nova fails with a takedown attempt from distance.
That's three failed takedown attempts in the round for Nick Nova. That's going to take a lot out of him.
SWAGGER throws a wild combination but nothing lands.
SWAGGER lands with a slapping head kick.
Nova wants to clinch but SWAGGER slips to the side
and SWAGGER holds on and brings the fighters into a clinch.
Nova pressing his opponent against the cage.
Nova is breathing heavily.
SWAGGER can't break the clinch.
Nova fails to pull the fight into his guard.
Nova with an attempt at a knee that misses.
SWAGGER stops a takedown attempt from Nova.
SWAGGER with a knee to the head.
Nova's head jolts backwards as he takes an uppercut right on the button!
Nova tries to pull guard but SWAGGER won't allow it.
Nova misses with a hook from the clinch.

That's three minutes gone in the round.
Nova tries to pull guard but SWAGGER holds him up against the cage and eventually Nova drops back down to his feet.
Nova tries to break the clinch but SWAGGER is controlling the position.
Nova drops to a knee looking for a takedown but SWAGGER gets the underhooks and prevents it.
Nova is looking for a takedown up against the cage. SWAGGER gets underhooks though and prevents the takedown attempt.
Nova tries to pull guard but SWAGGER holds him up against the cage and eventually Nova drops back down to his feet.
SWAGGER breaks from the clinch.
SWAGGER gets in close and instigates a clinch.
SWAGGER tries to land a knee to the head but misses.
Nova prevents SWAGGER from breaking the clinch.
Nova can't break the clinch.
Nova stalling in the clinch but SWAGGER improves position.
Nova avoiding damage as SWAGGER throws knees to the body.
Nova tries to take the fight to the ground by pulling guard but can't manage it.
Nova can't break the clinch.
Nova wants to break free. God knows he wants to breaaaak freeee.

That's four minutes gone in the round.
Well. There's a bit of a lull in the action here and the crowd are starting to get restless.
SWAGGER breaks the clinch.
SWAGGER pushes Nova up against the cage in a clinch.
Nova throws a vicious knee straight up the middle but SWAGGER blocks it with crossed arms.
Nova drops down for a takedown but doesn't get it.
A short right hand to the side of the head by SWAGGER.
Nova lands a knee to the head there! That was nasty!
Nova tries to land a knee to the head but SWAGGER blocks with his arms.
Nova wants to push off and get back to the center of the mat but SWAGGER has him pressed against the cage.
Nova tries to score a body lock takedown but SWAGGER shows good agility there to stay on his feet.
Nova looking for a takedown.
Nova is working for a takedown up against the cage. He can't get it on this occasion though.
Nova wants to break free but SWAGGER has control.
Nova breaks from the clinch.
SWAGGER clinches up against the cage.
Nova jumps guard but SWAGGER stands there with Nova around his waist. Nova gives up and drops back to his feet. We remain in the clinch.
Nova drops to a knee looking for a takedown but SWAGGER gets the underhooks and prevents it.
And thats the end of the round the fighters go back to their corners.
MAX SWAGGER dominated that round.
The fighters get back to their feet, the hooter sounds and we're back to the action!

The fight stays on the outside here - Nova looks like he's thinking about clinching though.
SWAGGER avoids the clinch attempt nicely.
Excellent takedown into side control there by Nova.
SWAGGER is not content to let Nova control the position.
The fighters are pressed up against the cage, both looking to find a bit of space to work.
Nova tries to advance to mount but SWAGGER denies him.
SWAGGER is looking to reverse the position.
You can see the frustration on SWAGGER's face, being in this tough position on the bottom.
SWAGGER is trying to improve his position.
SWAGGER is working to avoid the ground and pound but Nova connects with a decent elbow.
That's one minute gone in the round.
SWAGGER is not content to let Nova control the position.
Nova tries to score with some ground and pound. SWAGGER controls his posture well this time though and the shots don't do any damage.
Well, the referee has seen enough. Neither fighter is active enough on the ground so he's stood them back up.
Nova misses with a takedown attempt
and SWAGGER counters with a series of strikes. Nova will be more careful next time no doubt.
Both fighters are absolutely exhausted here.
A combination from SWAGGER does no damage.
SWAGGER bobs and weaves into range and then changes levels and scores with a nice takedown into side control.
Nova gives up the full mount - oops, sloppy defensive grappling there!
SWAGGER in mount throwing good strikes here, bouncing his opponent's head off the canvas.
Nova working to try and regain half guard.
The ref warns both fighters not to hold the cage as they work up against the meshing.
SWAGGER looking to control and managing it successfully.
SWAGGER landing strikes, looking to finish!
That's two minutes gone in the round.
Nova can't escape the position.
Nova is trying to get back to his feet but can't.
SWAGGER is still in mount, landing shots to his trapped opponent. Nova can't stay in a position like this for much longer.
Nova taking shots to the head.
SWAGGER scoring with strikes but Nova is staying in there.
You get the feeling that Nova really doesn't like being in this position too much.
SWAGGER tucks in and makes sure he doesn't lose the dominant position.
Nova regains half guard.
Nova tries to strike from the bottom but it doesn't land.
That's three minutes gone in the round.
SWAGGER trying to control from half guard but Nova is working away.
SWAGGER lands with an elbow from half guard - that looked like it hurt.
Nova tries to roll over but SWAGGER keeps him under control.
SWAGGER moves nicely into side control.
SWAGGER taking a breather here.
The strikes coming from SWAGGER are missing the target in this wave of attacks.
SWAGGER working the ground and pound but he's contacting the mat, not the fighter.
That's four minutes gone in the round.
Neither fighter has done anything of merit for a good minute or two here and the crowd are not happy about it.
SWAGGER creates some space and throws a big elbow, but Nova sees it coming and moves his head just enough to avoid the strike.
SWAGGER scores with punches from side control.
Nova tries to escape but SWAGGER is in control.
SWAGGER trying to control the action but Nova is working from the bottom.
SWAGGER working the body and head with strikes.
Well, the referee has seen enough. Neither fighter is active enough on the ground so he's stood them back up.
Nova closes the distance and clinches.
A head punch on the inside from Nova fails to land.
Nova changes levels and goes for a takedown here. SWAGGER fights it off and pushes away nicely.
Nice uppercut there from SWAGGER.
SWAGGER scores with a sloppy punch to the body. Not much technique there but it did the business.
SWAGGER looks for a takedown here. Will he get it? Nova is fending him off so far but SWAGGER persists. Nope, Nova circles away and we're back to standing.
And thats the end of the round the fighters go back to their corners.
MAX SWAGGER showed his class in that round. I'd imagine he'll take it on all the scorecards.
Well, the break between rounds is over. Let's get back to the scrappin! Let's hear some noise people - this is the final round!

Horrible takedown by Nova or perhaps it was just good defense by SWAGGER which made him look bad.
Nova closes the distance and clinches up with SWAGGER, looking for a takedown. Nova pushes SWAGGER against the cage but SWAGGER circles to the side and manages to break the clinch.
SWAGGER rushes Nova and pushes him back against the cage in a clinch.
Nova is trying to work out of this bad position, with his back against the cage.
Nova lands a right hand that snaps the head of SWAGGER backwards.
SWAGGER breaks the clinch and we return to the middle of the mat.
SWAGGER throws a head kick that looked like it stung.
SWAGGER avoids a low kick by using good footwork.
Nova tries to keep at a distance but SWAGGER has taken the fight into the clinch.
SWAGGER jumps guard.
SWAGGER manages to land a sweep and now he's in mount on top!
Nova is in all sorts of trouble here.
SWAGGER lands a shot to the body, followed up by a shot to the exposed head of his trapped opponent.
Both fighters are breathing heavily.
That's one minute gone in the round.
Nova is desperately trying to improve his position but SWAGGER has a good base and remains in mount.
Nova is in a horrible position here. SWAGGER smacks him with another shot as he tries to escape the position.
Nova can't escape the position.
The referee warns Nova that he has to improve his position here as he takes two more clean shots to the head.
SWAGGER unloading with bombs!
SWAGGER lands with some vicious ground and pound - can Nova hang on?
Nova is rocked!
SWAGGER lands a heavy elbow.
Oh Nova is still in real trouble! Will he be able to recover?!!
SWAGGER lands a big elbow.
SWAGGER lands with some vicious ground and pound - can Nova hang on?
SWAGGER unloading with bombs!
Nova tries to lock up and control but SWAGGER gives him a forearm to the face and pushes him away.
SWAGGER prevents Nova from getting the reversal.
SWAGGER is still in mount, landing shots to his trapped opponent. Nova can't stay in a position like this for much longer.
That's two minutes gone in the round.
Nova is trying to escape the mount.
Nova flailing away with punches but nothing is landing.
Nova is wriggling around trying to escape.
Nova is working hard here to advance position.
Nova seems to have got his legs back now.
Nova gets back to half guard.
Nova tries to roll over but SWAGGER keeps him under control.
Nova throws a strike from the bottom that misses.
SWAGGER is looking to advance position but Nova won't allow it.
That's three minutes gone in the round.
Nova is working for an escape here. He's hooked one of SWAGGER's legs and he's managed to sneak out and take SWAGGER's back!
SWAGGER covers up after that shot from Nova.
SWAGGER wants to control his opponent's hands but Nova gets his hands free.
SWAGGER avoids the strikes from Nova.
Nova working for the choke.
Nova missing with strikes from the back.
SWAGGER tries to escape the position - he's now mounted. Is that better or worse? Hard to tell!
Nova controlling the pace for now.
SWAGGER wants to improve position but instead he's given up his back.
That's four minutes gone in the round.
SWAGGER trying to control the position but Nova manages to sink in the hooks.
Nova trying to control.
Nova somehow managing to miss with a strike from the back.
Nova throwing wild punches that miss their target.
Nova has the hooks in. SWAGGER is trying to push off one leg but he has to do so cautiously to avoid being submitted.
Nova tries to keep control of the position but SWAGGER is staying busy.
Nova slows the pace down here. Having a little breather whilst he's in a dominant position, looking to rest and regain some energy, ready to go for the finish.
A lull in the action here.
Nova punches the canvas rather than the man.
Nick Nova has stepped it up - he knows he needs a finish here!
SWAGGER avoids the strikes from Nova.
And that's the end of the fight!
MAX SWAGGER comfortably won the final round on my scorecard.
Well SWAGGER has outworked and out performed his opponent in all aspects of the game today. He was simply too good and the decision should be no more than a formality. Over to the ring announcer for the scorecards.
Ladies and gentlemen, after 3 rounds of action, we go to the scorecards for a decision.
Judge Jack Bonds scores the fight 27:30
Judge Percy O'Donnell scores the fight 27:30
Judge Timothy Bukovac scores the fight 27:30
In favor of your winner, by unanimous decision... MAX SWAGGER!
|
|
|
|
|
|
|
|
|
|
|
|
|
|
|
|
|
|
|
|
|
|
|
| S |
C
A |
G |
S |
C
B |
G |
|
S |
C |
G |
|
energy
A | B |
|
hype
A | B |
|
pop
A | B |
|
mgr
A | B |
|
FIGHT
RATING
58% |
|
|
|
|
|
|
|
Undercard bout
|
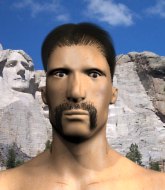
Coming up we have a lightweight MMA rules bout between Kabunyan Danglose (ranked 0 p4p, 0 weight class) and Rocky Estafire (ranked 0 p4p, 0 weight class). Danglose's ring entrance music is that housewives' favourite, Day And Night. These two fighters really are very evenly matched on the feet - it will be fascinating to see who can assert themselves in that aspect of the fight.
 |
|
 |
| 170 cm
19
150 lbs
4 - 1 - 0 |
|
173 cm
21
143 lbs
2 - 0 - 0 |
BJJ Blue Belt
Counter striker
Self confident |
|
BJJ Blue Belt
Basic striking
Granite chin |
|
| |
|
Ladies and gentlemen. This fight is 3 rounds, in the lightweight division.
Introducing the fighter to my left, fighting out of the red corner.
With a record of
4 - 1 - 0, fighting out of Los Angeles, Kabunyan Danglose!
And introducing the fighter to my right, fighting out of the blue corner.
With a record of
2 - 0 - 0, fighting out of Los Angeles, Rocky Estafire!
The judges for this bout are Jack Bonds, and .
The bell rings for round one and we are underway!
Estafire closes the distance and gets a double leg, slamming Danglose to the mat! Danglose manages to get full guard.
Danglose looks exhausted already! Oh dear, he should have come in in better shape than this!
Estafire controlling from the guard. I say controlling but really, he's stalling.
Estafire looking to pass the guard.
Estafire must be cautious of submissions here, given that his opponent has the superior Jiu Jitsu.
Estafire looking to control the position here, rather than advance.
Danglose striking off his back but it's not causing Estafire any problems.
That's one minute gone in the round.
Estafire throws a big right hand that misses.
Estafire postures up and lands a big shot to Danglose's brow.
Estafire wants to pass the guard but Danglose is keeping the position.
Estafire lands a couple of decent looking shots.
Estafire slows down the pace of the fight for a moment. He'll need to remain active if he doesn't want to see the fight stood back up.
Estafire looking to pass the guard.
That's two minutes gone in the round.
Well. There's a bit of a lull in the action here and the crowd are starting to get restless.
Estafire is taking a break and basically stalling. The referee will not allow him to do that for long.
Estafire postures up and lands a big shot to Danglose's brow.
Danglose keeping moving, preventing Estafire from controlling successfully.
Estafire missing there with some ground and pound from the guard.
Estafire looking to pass the guard.
Estafire passes easily into side control. Nice work.
Estafire in side control, just content to control the action for now.
Estafire prevents Danglose from escaping the position.
The ref warns both fighters not to hold the cage as they work up against the meshing.
That's three minutes gone in the round.
Estafire is looking for a kimura. He might have it! No, Danglose has escaped the position, nice work there.
The ground and pound from Estafire seems to be hitting the mat more than his opponent.
Danglose wants to control but Estafire postures up.
Danglose gets one leg under and gets the fight to half guard.
Danglose is looking to control Estafire's leg but it's slowly edging free. Can Danglose avoid being mounted?
Estafire prevents Danglose from improving his position.
That's four minutes gone in the round.
A few boos can be heard. I'm sure they will multiply if the fighters don't pick up the pace.
Danglose is working for an escape here. He's hooked one of Estafire's legs and he's managed to sneak out and take Estafire's back!
Danglose avoiding Estafire 's attempts to control his hands.
Danglose patiently working for the choke. Which fighter will keep their nerve here?
Estafire tries to escape the position.
The fighters are pressed up against the cage, both looking to find a bit of space to work.
The crowd thankful this round is nearly over.
Danglose is trying to stick to Estafire's back but Estafire is turning into Danglose. He's managed to reverse the position - now he's in Danglose's guard. Polite applause from the crowd in appreciation of some nice Jiu Jitsu by Estafire.
Estafire distracts Danglose with his right hand and drops a big elbow with his other arm.
Estafire trying to land body shots but he keeps hitting the mat.
And thats the end of the round the fighters go back to their corners.
Rocky Estafire dominated that round.
That's time! Back to the action!
Estafire clobbers Danglose with an overhand right that has the crowd gasping. That made a horrendous noise.
Estafire scores with a hook.
Estafire plants his feet and lands a nice head kick!
Estafire wants to clinch up but Danglose keeps it at a distance.
Estafire lands a brutal head kick. Danglose looks out on his feet and Estafire throws more strikes until the ref is forced to stop the fight!
Ladies and gentlemen, after 0:19 of round 2, we have a winner by way of TKO (Kick and Punches). Rocky Estafire!
|
|
|
|
|
|
|
|
|
|
|
|
|
|
|
|
|
|
|
|
|
|
|
| S |
C
A |
G |
S |
C
B |
G |
|
S |
C |
G |
|
energy
A | B |
|
hype
A | B |
|
pop
A | B |
|
mgr
A | B |
|
FIGHT
RATING
100% |
|
|
|
|
|
|
|
Undercard bout
|
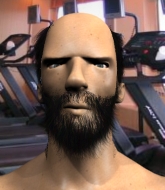
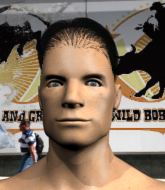
Coming up we have a light heavyweight MMA rules bout between Brock Holliday (ranked 0 p4p, 0 weight class) and Go Yamamoto (ranked 0 p4p, 0 weight class). Brock Holliday has the edge in experience - let's see if he can make that count tonight.
 |
|
 |
| 184 cm
20
209 lbs
3 - 2 - 0 |
|
187 cm
18
204 lbs
2 - 0 - 0 |
BJJ Blue Belt
Brawler
Cardio machine |
|
BJJ Purple Belt
Brawler
Very confident |
|
| |
|
Ladies and gentlemen. This fight is 3 rounds, in the light heavyweight division.
Introducing the fighter to my left, fighting out of the red corner.
With a record of
3 - 2 - 0, fighting out of Los Angeles, Brock Holliday!
And introducing the fighter to my right, fighting out of the blue corner.
With a record of
2 - 0 - 0, fighting out of Los Angeles, Go Yamamoto!
The judges for this bout are Timothy Bukovac, and Frank Antenori.
The bell rings for round one and we are underway!
Nice jab there from Yamamoto.
Yamamoto looks to land a right hand but Holliday moved out of range.
Good shot there by Holliday.
Yamamoto thows a body shot but no joy.
Yamamoto throws a nice hook to the body that draws an oooh from the crowd.
Holliday misses with a double jab.
Holliday throws a series of punches but Yamamoto moves out of range.
Brock Holliday seems to be the more aggressive standup fighter in this bout.
A left lands for Yamamoto.
Wow, both these guys are really going for it!
Yamamoto misses with a two punch combination.
Nice straight punches there by Yamamoto. You know Roy Jones Jr respects the hands of Yamamoto.
Boom, another hit is landed. "You're gunna get knocked out" taunts Yamamoto, as that shot connected.
Yamamoto moves into range and connects with a jab.
The fans in attendance giving it up for the two fighters, who have really let it all hang out in the last minute or so!
A swing and a miss from Yamamoto.
Holliday gets cracked there but stands up to it.
Holliday is rocked!
A punch combination from Holliday misses.
Holliday lands a hook that stumbles Yamamoto back into the cage. Holliday follows up with a straight and another hook that land right on the button, dropping Yamamoto to the canvas! Holliday pounces and lands several unanswered shots - Yamamoto has had enough and taps out! This one is all over!
Ladies and gentlemen, after 0:42 of round 1, we have a winner by way of Submission (Strikes). Brock Holliday!
|
|
|
|
|
|
|
|
|
|
|
|
|
|
|
|
|
|
|
|
|
|
|
| S |
C
A |
G |
S |
C
B |
G |
|
S |
C |
G |
|
energy
A | B |
|
hype
A | B |
|
pop
A | B |
|
mgr
A | B |
|
FIGHT
RATING
100% |
|
|
|
|
|
|
|
Undercard bout
|
Coming up we have a welterweight MMA rules bout between Tompa Hero (ranked 0 p4p, 0 weight class) and Robbie Ventura (ranked 0 p4p, 0 weight class). Robbie Ventura struggled to make weight for this fight. He only made it down to 171.7lbs at the first attempt and had to take the additional two hours to make the official bout weight. Let's see how much it's taken out of him. Rumors backstage are that the fighters have been paid to keep it standing but we know that would never happen in MMA!
 |
|
 |
| 182 cm
22
180 lbs
3 - 2 - 0 |
|
185 cm
22
183 lbs
2 - 1 - 0 |
BJJ Purple Belt
Counter striker
Cuts easily |
|
Decent wrestler
Brawler
Solid chin |
|
| |
|
Ladies and gentlemen. This fight is 3 rounds, in the welterweight division.
Introducing the fighter to my left, fighting out of the red corner.
With a record of
3 - 2 - 0, fighting out of Los Angeles, Tompa Hero!
And introducing the fighter to my right, fighting out of the blue corner.
With a record of
2 - 1 - 0, fighting out of Los Angeles, Robbie Ventura!
The judges for this bout are Jack Bonds, and Timothy Bukovac.
The bell rings for round one and we are underway!
Ventura changes levels and looks for a double leg takedown. Hero tries to avoid it but Ventura manages to keep hold of a leg and drag Hero to the ground. Hero escapes though and pops straight back up to his feet.
Ventura decides to change it up a bit and drives through with a nice takedown into half guard.
Ventura with the ground and pound but Hero uses the opportunity to regain guard.
Ventura must be cautious of submissions here, given that his opponent has the superior Jiu Jitsu.
Ventura trying to pass the guard but can't manage it just yet.
Ventura in full guard, throwing the ground and pound. No damage this time.
Hero pushes a forearm under Ventura's chin to create some space. He's escaped his hips and pivoted quickly for an armbar! Can he extend the arm? Yes, Ventura is tapping out! Damn, that was fast!
Ladies and gentlemen, after 0:32 of round 1, we have a winner by way of Submission (Armbar). Tompa Hero!
|
|
|
|
|
|
|
|
|
|
|
|
|
|
|
|
|
|
|
|
|
|
|
| S |
C
A |
G |
S |
C
B |
G |
|
S |
C |
G |
|
energy
A | B |
|
hype
A | B |
|
pop
A | B |
|
mgr
A | B |
|
FIGHT
RATING
63% |
|
|
|
|
|
|
|
Undercard bout
|
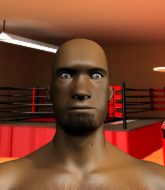
Coming up we have a light heavyweight MMA rules bout between Bob Chong (ranked 0 p4p, 0 weight class) and Black Caesar (ranked 0 p4p, 0 weight class). Both fighters look pumped up here. Let's hope this is a good fight!
 |
|
 |
| 187 cm
21
217 lbs
2 - 0 - 0 |
|
191 cm
20
199 lbs
4 - 4 - 0 |
BJJ Purple Belt
Improved boxing
Good chin |
|
BJJ Blue Belt
Brawler
Solid chin |
|
| |
|
Ladies and gentlemen. This fight is 3 rounds, in the light heavyweight division.
Introducing the fighter to my left, fighting out of the red corner.
With a record of
2 - 0 - 0, fighting out of Los Angeles, Bob Chong!
And introducing the fighter to my right, fighting out of the blue corner.
With a record of
4 - 4 - 0, fighting out of Los Angeles, Black Caesar!
The judges for this bout are , Jack Bonds and Frank Antenori.
The bell rings for round one and we are underway!
Chong keeps his opponent at a distance with a nice jab.
Chong digs a good hook to Caesar's body.
Caesar tries to close the distance and clinch up against the cage but Chong paws at him with a jab and circles away.
Chong scores to the head and body with a nice combination!
Caesar gets cracked there but stands up to it.
Caesar is rocked!

It looks like Black Caesar has been cut.
Chong ducks down and throws a hook to the body but Caesar moves away.
Boom, another hit is landed. "You're gunna get knocked out" taunts Chong, as that shot connected.
Caesar is still on wobbly legs! Can Chong finish him?
This is a great period of action - very entertaining stuff!
Caesar misses with the combination.
Caesar seems to have recovered his senses.
Chong lands a lovely overhand right.
Chong lands a jab followed by a vicious hook that sends Caesar sprawling to the canvas. Chong follows him down, looking for the kill. Can Caesar hang on?
Chong wants to free his trapped foot but Caesar is holding on for dear life with his legs.
Chong is thinking about going for an arm triangle but he can't free his leg.
Caesar is looking to improve his position.
It looks like Chong is going to stand back up.
Caesar moves into full guard.
That's one minute gone in the round.
Caesar keeping full guard, as Chong tries to pass.
Chong is pushing down on Caesar's leg trying to pass to half guard. Caesar is fighting to maintain full guard but Chong has managed to sneak the leg through.
Chong is trying to work for a kimura. He's got his hands clasped together - this could be trouble! No, Caesar has managed to free his arm - good work.
Chong is thwarting Caesar's attempts to control the position.
Caesar is trying to avoid being dragged into an even worse position than he's already in but Chong is staying active.
Chong trying to pass the guard but Caesar defending well.
Caesar trying to control here.
Chong is trying for a guillotine from the top but the pressure isn't in the right place so Caesar is just riding it out for now. Chong eventually gives up the hold.
The fighters are going at a pretty good pace and they're both starting to sweat now.
Caesar slips a foot under and gets full guard. Nice work.
Caesar looks gassed!
That's two minutes gone in the round.
Caesar is trying to control the position but Chong postures up.
Caesar looking to sweep here. No luck so far.
Chong thinks about going for a leg but decides against it, in order to maintain the position.
The ref warns both fighters not to hold the cage as they work up against the meshing.
Caesar wants to sweep but no luck.
Chong slips effortlessly into side control - very nice.
The fighters are pressed up against the cage, both looking to find a bit of space to work.
Chong is trying to land an Americana. He has the arm isolated but Caesar is keeping cool and he's avoided the danger for now.
That's three minutes gone in the round.
Chong tries for a kimura but Caesar is defending well.
Chong is trying to land an Americana. He has the arm isolated but Caesar is keeping cool and he's avoided the danger for now.
Caesar tries to work a leg under to get back to half guard but Chong wriggles his own leg back out and remains in side control.
Chong wants to work for a kimura but he's foiled early by Caesar, who protects the arm well.
Caesar really doesn't want to stay on the ground with Chong. If he can't get it back to his feet, it's only a matter of time before he'll be tapping out.
Chong tries for a kimura but Caesar is defending well.
Caesar tries to bench press Chong off him but Chong keeps the position.
That's four minutes gone in the round.
Chong advances to full mount.
Chong working for a submission but Caesar is keeping him at bay.
Chong looking for an armbar but decides to keep the dominant position instead.
The crowd cheering loudly, showing their appreciation for the quality fight we're seeing here.
Caesar is looking to improve his position but Chong isn't that keen on the idea.
Chong has hold of an arm here, looking to extend it. He's committed to the armbar attempt here! Will he get it?! Yes! Caesar is forced to tap!
Ladies and gentlemen, after 4:48 of round 1, we have a winner by way of Submission (Armbar). Bob Chong!
|
|
|
|
|
|
|
|
|
|
|
|
|
|
|
|
|
|
|
|
|
|
|
| S |
C
A |
G |
S |
C
B |
G |
|
S |
C |
G |
|
energy
A | B |
|
hype
A | B |
|
pop
A | B |
|
mgr
A | B |
|
FIGHT
RATING
83% |
|
|
|
|
|
|
|
Co-main event
|
Coming up we have a welterweight MMA rules bout between Cotton Hill (ranked 0 p4p, 0 weight class) and Brandon Loveladdy (ranked 0 p4p, 0 weight class). Both fighters look fresh as a daisy as they make their way towards the cage.
 |
|
 |
| 184 cm
20
182 lbs
4 - 2 - 0 |
|
185 cm
19
180 lbs
4 - 3 - 0 |
BJJ Blue Belt
Brawler
Experienced |
|
BJJ Blue Belt
Basic striking
Determined |
|
| |
|
Ladies and gentlemen. This fight is 5 rounds, for the welterweight championship of the world!
Introducing the champion to my left, fighting out of the red corner.
With a record of
4 - 2 - 0, fighting out of Los Angeles, Cotton Hill!
And introducing the challenger to my right, fighting out of the blue corner.
With a record of
4 - 3 - 0, fighting out of Los Angeles, Brandon Loveladdy!
The judges for this bout are Jack Bonds, Frank Antenori and .
The bell rings for round one and we are underway!
Hill has Loveladdy up against the cage in a clinch.
Loveladdy tries to break the clinch but Hill is controlling the position.
A short left from Hill.
Hill lands an elbow inside that Loveladdy shrugs off.
Hill lands an elbow that stopped Loveladdy in his tracks for a moment.
A short uppercut from Hill.
Hill scores with a knee to the head.
Hill escapes the clinch and we're back to striking.
Loveladdy avoids a lazy jab quite easily.
Ouch! a nice leg kick from Hill, right into the meat.
Wow, both these guys are really going for it!
Hill missing with a left hand there. Loveladdy was out of range so wasted energy throwing that one.
A thudding body kick lands there by Hill!
Hill throws a nice inside leg kick.
Hill comes forward and lands a shot to the body, then darts back out of range.
Loveladdy looks gassed!
The crowd are loving this. Great action here.
A big right from Hill misses.
Hill scores with a one two! Loveladdy had his feet all tangled up there and couldn't avoid the strikes.
Loveladdy is rocked!
Loveladdy tries to clinch but Hill moves out of range.
Loveladdy is still on wobbly legs! Can Hill finish him?
The sound of bone on bone echoes around the arena as Loveladdy checks a leg kick.
Loveladdy tries to grapple but his opponent circles

and Hill counters with a beautiful punch that sends Loveladdy to the canvas!
Hill slows down the pace of the fight for a moment. He'll need to remain active if he doesn't want to see the fight stood back up.
Hill wants to pass the guard but Loveladdy is keeping the position.
That's one minute gone in the round.
Hill stands up over Loveladdy, holding his feet. He dives back in and lands a decent shot to the head.
Loveladdy seems to have recovered his senses.
Loveladdy avoiding any damage from the ground and pound.
The ref warns both fighters not to hold the cage as they work up against the meshing.
Hill not doing a lot at the moment. He'll have to show some more aggression or the fight will get stood up.
Hill looking to pass the guard.
A big thud reverberates around the arena there as Hill accidentally thumps the mat. Hopefully he's not broken his hand.
Loveladdy thows some rabbit punches from the bottom but they don't do any damage.
The referee has ruled that neither fighter is active enough on the ground and has stood them back up.
Hill scores with a jab to the jaw.
Hill swats away the attempt to clinch by Loveladdy.
Loveladdy shoots in but doesn't get the takedown
and Hill counters with a nice right hand that sends Loveladdy toppling to the canvas! Loveladdy scrambles and gets back to his feet - can Hill finish him?!
Hill throws a right hand that Loveladdy ducks under and follows up with a left that Loveladdy also avoids with ease.
Loveladdy uses good head movement to avoid the hook from Hill.
Loveladdy rushes forward with a series of wild hooks but Hill moves out of range and avoids them all easily.
That's two minutes gone in the round.
Hill lands a lovely overhand right.
Cotton Hill is looking to keep the fight on the feet at all costs.
Hill throws a body kick that sends a sickening thudding noise reverberating around the arena.
Hill throws a combination but comes up with nothing but fresh air.
Hill misses with a body shot.
Loveladdy wants to clinch but Hill slips to the side
and Hill counters with a nice uppercut.
Loveladdy closes the distance and gets a double leg, slamming Hill to the mat! Hill manages to get full guard.
Loveladdy has the superior BJJ but he's also working some ground strikes into his gameplan.
This has been an exciting period of action!
Hill keeping moving, preventing Loveladdy from controlling successfully.
Loveladdy is trying to work a guillotine from the top, or something like that? Don't know how he thinks he's going to get a finish from there.
Hill managing to control the position.
Hill keeping moving, preventing Loveladdy from controlling successfully.
Hill tries to land a sweep but no joy.
That's three minutes gone in the round.
Hill wants to control here, rather than go for any submissions from the bottom. At least for now.
Hill has a closed guard, preventing Loveladdy from standing up.
Hill manages to land a sweep and now he's in mount on top!
Hill controlling the position easily from mount.
Loveladdy tries to hold on but Hill pushes him away.
Loveladdy is desperately trying to improve his position but Hill has a good base and remains in mount.
Loveladdy tries to hold on but Hill postures up.
Hill content just to control the position here.
That's four minutes gone in the round.
Neither fighter has done anything of merit for a good minute or two here and the crowd are not happy about it.
Hill has controlled the position for a good 20 seconds, which will no doubt be starting to frustrate his opponent.
Loveladdy is working to get back to half guard.
As the round comes to an end the crowd are showing their appreciation for a great round of action.
Loveladdy wants to control but Hill is having none of it.
And thats the end of the round the fighters go back to their corners.
Cotton Hill dominated that round.
The referee calls time. The cornermen exit stage left and we're back to business.
Hill lands with an uppercut that bounces Loveladdy off the cage and back into rage.
Hill lands with a straight right. Loveladdy didn't see that one coming.
Hill swings away but doesn't land with a series of punches.
Hill misses the jab.
A chopping leg kick lands by Hill.
Hill drops Loveladdy with a left right combo! Hill follows him down to the ground into side control.
Loveladdy is trying to improve his position.
Hill controls the position.
Hill's ground tactics aren't going to win him many fans. Let's hope he's got fireworks for us if he gets back to his feet because he's not doing much on the ground.
The fighters are pressed up against the cage, both looking to find a bit of space to work.
Both fighters are absolutely exhausted here.
Loveladdy is trying to control Hill's posture but Hill avoids it.
Hill controls the position.
That's one minute gone in the round.
The referee stands the fighters back up. Cotton Hill just wasn't active enough from the dominant position.
Hill swats away the attempt to clinch by Loveladdy.
Hill sees a low kick coming and goes to check it, but it's actually a body kick and it thuds into his unprotected ribs.
The fight stays on the outside here - Loveladdy looks like he's thinking about clinching though.
Hill scores with a jab to the head.
Loveladdy tries to clinch up.
Loveladdy misses with a few strikes there.
Hill feints with a shoulder and throws a nice leg kick to Loveladdy's calf.
Hill lands with a thumping leg kick.
Hill misses with a hook.
Hill throws a hook but Loveladdy blocks it.
Hill moves into range and throws a lovely three punch combination.
Hill gets in close and instigates a clinch.
Loveladdy manages to break the clinch.
That's two minutes gone in the round.
Hill stalks Loveladdy and leaps in with a furious combination of punches. Uppercuts and crosses smash into Loveladdy's face. Loveladdy staggers backwards, shaken.
A punch combination from Loveladdy misses.
Loveladdy on the wrong end of a nice hook.
Hill cracks Loveladdy with a good shot that sees him stumbling back into the cage.
Hill throws a head kick that misses.
Loveladdy uses good footwork to avoid the strikes from Hill.
Loveladdy fails in his attempt to clinch.
Loveladdy shoots in for a takedown but Hill shows good takedown defense.
A left and a right from Hill both land. Nice combination.
Hill dodges the punch combination from Loveladdy.
Hill drops Loveladdy with a straight left! Oh this is bad for Loveladdy! Hill dives in and starts dropping bombs - the referee has no choice but to step in and save him!
Ladies and gentlemen, after 2:39 of round 2, we have a winner by way of TKO (strikes). Cotton Hill!
Cotton Hill retains his welterweight title!
|
|
|
|
|
|
|
|
|
|
|
|
|
|
|
|
|
|
|
|
|
|
|
| S |
C
A |
G |
S |
C
B |
G |
|
S |
C |
G |
|
energy
A | B |
|
hype
A | B |
|
pop
A | B |
|
mgr
A | B |
|
FIGHT
RATING
79% |
|
|
|
|
|
|
|
Main event
|
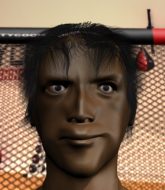
Coming up we have a middleweight MMA rules bout between Redknack Bob (ranked 0 p4p, 0 weight class) and Habib al Habibin (ranked 0 p4p, 0 weight class). Bob comes to the cage accompanied by Momma said knock you out. al Habibin has chosen Can't Be Touched as his entrance music. These two fighters really are very evenly matched on the feet - it will be fascinating to see who can assert themselves in that aspect of the fight.
 |
|
 |
| 185 cm
22
185 lbs
6 - 1 - 0 |
|
185 cm
19
194 lbs
4 - 1 - 0 |
BJJ Blue Belt
Brawler
Experienced |
|
BJJ Blue Belt
Counter striker
Solid chin |
|
| |
|
Ladies and gentlemen. This fight is 5 rounds, for the middleweight championship of the world!
Introducing the champion to my left, fighting out of the red corner.
With a record of
6 - 1 - 0, fighting out of Los Angeles, Redknack Bob!
And introducing the challenger to my right, fighting out of the blue corner.
With a record of
4 - 1 - 0, fighting out of Los Angeles, Habib al Habibin!
The judges for this bout are , Timothy Bukovac and Frank Antenori.
The bell rings for round one and we are underway!
The sound of bone on bone echoes around the arena as al Habibin checks a leg kick.
al Habibin lands with a head kick! That's gotta hurt.
Bob throws a right and a left that al Habibin avoids nicely.
al Habibin throws a hard body shot but it just misses.
Bob shoots in and gets a takedown into half guard. Bob showed some decent athleticism there.
al Habibin regains full guard, whilst avoiding punches from Bob.
al Habibin throwing his legs up looking for a triangle.
Bob working some strikes from top position.
Bob avoids a guillotine attempt easily.
al Habibin looking to control.
That's one minute gone in the round.
al Habibin wants to sweep here but Bob controlling him for the moment.
Bob is trying to work a guillotine from the top, or something like that? Don't know how he thinks he's going to get a finish from there.
Bob pressing down on his opponent's thigh, looking to pass guard. al Habibin is keeping the position for now.
al Habibin is working actively off his back, looking to secure an arm or perhaps work for a triangle.
Bob drops back for a leg! It's a sloppy attempt though and Bob jumps back into guard quickly, to retain the dominant position.
That's two minutes gone in the round.
Neither fighter has done anything of merit for a good minute or two here and the crowd are not happy about it.
Bob wants to control from the top but al Habibin keeps moving.
It looks like we're going to have a standup here. Neither fight is doing enough on the ground.
al Habibin takes one on the button.
al Habibin fails in his attempt to clinch.
A swing and a miss from Bob.
al Habibin attempts a leg kick but it's missed by a good margin.
Bob avoids the head kick by al Habibin.
Bob tries to shoot in for a takedown. He's got hold of a leg but al Habibin swivels and escapes.
Bob throws a right hand that al Habibin ducks under and follows up with a left that al Habibin also avoids with ease.
Bob is breathing heavily.
Danga de danga de dang - Bob scores with a four punch combination!
al Habibin shoots in for a takedown but doesn't get it.
Bob drives through with a takedown into guard.
That's three minutes gone in the round.
al Habibin is working from a closed guard but he's struggling to control his opponent.
Bob stops al Habibin from standing up.
The fighters are starting to perspire pretty heavily.
al Habibin looking for a guillotine here but Bob defends easily.
Bob tries to free his leg and advance position but al Habibin is retaining full guard.

Bob stands up from guard. Let's bang!
Bob keeping a good distance there, avoiding the body shot.
al Habibin wants to clinch up but Bob keeps it at a distance.
Bob throws a hook to the side of al Habibin's head but al Habibin sees it coming and ducks under it beautifully.
That's four minutes gone in the round.
The crowd are showing their displeasure at the lack of action as loud boos ring out around the arena.
al Habibin shoots in but Bob avoids the takedown attempt easily.
Bob fails to land with a series of punches.
Bob smiles there as he lands a nice right hand right on the button.
al Habibin ducks under a wild hook from Bob.
Bob thows a leg kick but al Habibin checks it
and al Habibin counters with a right hand to the body.
al Habibin stalks Bob and leaps in with a furious combination of punches. Uppercuts and crosses smash into Bob's face. Bob staggers backwards, shaken.
al Habibin looks to score with a combo but nothing lands.
Bob misses with an uppercut.
Bob connects with a slap. Keep your fist closed son.
Bob falls off balance throwing a combination
so al Habibin counters with a double leg into guard. Good agility.
And thats the end of the round the fighters go back to their corners.
That was a close round but I would say that Redknack Bob will probably get the nod.
That's time! Back to the action!
Bob gets taken down but at least he's managed to land in guard.
al Habibin won't allow Bob to sweep him here.
Bob trying to control the position.
Bob is working actively off his back, looking to secure an arm or perhaps work for a triangle.
Bob trying to keep a closed guard but al Habibin is proving a slippery customer.
Bob throwing some rather feeble looking strikes off his back.
Bob is trying to control the position from the bottom.
Bob tries to land a sweep but no joy.
Bob controls al Habibin momentarily but al Habibin frees himself.
The ref warns both fighters not to hold the cage as they work up against the meshing.
That's one minute gone in the round.
Well, the referee has seen enough. Neither fighter is active enough on the ground so he's stood them back up.
al Habibin takes a jab on the nose. He smiles like he loves it and keeps coming.
al Habibin is breathing heavily.
Bob misses with a body shot. Nice footwork from al Habibin.
al Habibin looks to score with a combo but nothing lands.
Bob rushes forward with a series of wild hooks but al Habibin moves out of range and avoids them all easily.
al Habibin displays some good footwork, moving neatly out of range as Bob throws out the jab.
A jab from Bob misses.
Bob shoots in but no luck this time.
al Habibin throws a wild combination but nothing lands.
Bob's corner calls for a 1,2 combination and Bob duly obliges.
Bob fails to land the takedown.
Bob misses with a wild combination.
That's two minutes gone in the round.
Bob throws a right and a left that al Habibin avoids nicely.
Bob misses with a looping right.
Bob avoids a punch combination nicely.
Bob throws a jab, cross combination which is slipped
and al Habibin cracks him with a counter punch right on the button.
al Habibin shoots in and drives through. Bob sprawls well.
al Habibin shoots in with a takedown attempt and he has Bob pinned against the cage. Bob gets the underhooks and manages to circle away.
al Habibin dodges the punch combination from Bob.
al Habibin clinches up against the cage.
That's three minutes gone in the round.
al Habibin throws a punch but it's blocked by Bob.
Bob breaks the clinch.
Bob misses with a looping left.
Bob has a nice red mark on his side after a thudding body kick by al Habibin.
al Habibin uses decent footwork to sidestep a right hand from Bob.
Bob takes a kick to the side of the head.
Bob misses with a double jab
and al Habibin counters with a nice body kick.
al Habibin scores with a nice body kick.
Bob looks to score with a combo but nothing lands.
Bob swings wildly with a couple of big hooks
and al Habibin counters with a nice double leg into guard.
Bob looking for a sweep. Not yet Bob, not yet.
Bob throwing his legs up looking for a triangle.
Bob looking to sweep here. No luck so far.
That's four minutes gone in the round.
Bob is working for submissions here. He's thrown up his legs looking for a tringle but al Habibin frees his head nicely. Oh but Bob has switched to an armbar! al Habibin is tapping furiously! Lovely submission there!
Ladies and gentlemen, after 4:32 of round 2, we have a winner by way of Submission (Triangle Armbar). Redknack Bob!
Redknack Bob is the new middleweight champion!
|
|
|
|
|
|
|
|
|
|
|
|
|
|
|
|
|
|
|
|
|
|
|
| S |
C
A |
G |
S |
C
B |
G |
|
S |
C |
G |
|
energy
A | B |
|
hype
A | B |
|
pop
A | B |
|
mgr
A | B |
|
FIGHT
RATING
41% |
|
|
|
|
|
|
|
|
|
|
