 |
Battleground Blitz 9/15 PBP Commentary |
Undercard bout
|
|
|
|
Undercard bout
|
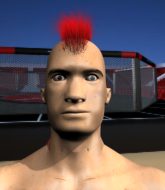
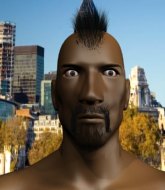
Coming up we have a heavyweight MMA rules bout between Steve Mezza (ranked 0 p4p, 0 weight class) and Umaro Kong (ranked 0 p4p, 0 weight class). Umaro Kong has the eye of the tiger tonight.
 |
|
 |
| 180 cm
18
220 lbs
1 - 2 - 0 |
|
191 cm
20
260 lbs
1 - 1 - 0 |
BJJ White Belt
Brawler
Cuts easily |
|
BJJ White Belt
Excellent boxer
Solid chin |
|
| |
|
Ladies and gentlemen. This fight is 3 rounds, in the heavyweight division.
Introducing the fighter to my left, fighting out of the red corner.
With a record of
1 - 2 - 0, fighting out of Montreal, Steve Mezza!
And introducing the fighter to my right, fighting out of the blue corner.
With a record of
1 - 1 - 0, fighting out of Montreal, Umaro Kong!
The judges for this bout are Dillan Fox, Yves DeLean and Ian Loll.

The bell rings for round one and we are underway!
Mezza looks to score with a combo but nothing lands.
Mezza fails in his attempt to clinch.

Mezza has closed the distance and engaged Kong in a clinch.
Kong wants to strike at distance but he can't break free of the clinch.
Kong lands punches inside but they're not really causing much damage.

Kong breaks the clinch.
Wow, both these guys are really going for it!
Mezza misses with a looping right.
Mezza throws a shot to the body.
Mezza throws a monster uppercut resembling something out of street fighter but it doesn't land.
Kong lands an overhand right.

Mezza is rocked!

It looks like Steve Mezza has been cut.
Kong misses with a looping left.
Mezza fails to land with the punch combination there - jab, cross, hook, miss, miss, miss.
Kong slips in close and lands a nice hook before moving back out of range.
Oh Mezza is still all over the place! His legs are completely gone! Will he be able to recover?!!
Mezza missing with a left hand there. Kong was out of range so wasted energy throwing that one.
Mezza connects with a looping right hand.
Kong instigates a clinch.
Kong scores with a shot to the side of Mezza's head.
with the fighters clinched against the cage, Kong creates a bit of distance for himself and scores with a nice uppercut.
Some wild striking there from Mezza.
Mezza throws a right and a left that both miss.
Mezza throws a right and a left that both miss.
Mezza seems to have got his legs back now.
Kong swings for the body but Mezza moves out of range.

That's one minute gone in the round.
Mezza looks to land a combination. Kong sees it coming but can only parry a couple of the shots.
Kong misses with a takedown attempt - Mezza sprawls well and throws a nice strike on the way out which just misses.
Kong lands with a shot to the body.
Kong wants to clinch.
Kong slips a jab and a cross from Mezza.
Kong lands a with a good body shot.
Kong tries to close the distance and clinch but Mezza swats him to one side with an open hand palm strike and circles away.
Mezza has Kong up against the cage in a clinch.
Kong breaks the clinch and we're back to striking at distance.
Kong lands a slapping body shot.
Mezza misses with a wild combination.
Kong lands a body shot.
Nice jab there from Kong.
Kong moves into the clinch.

That's two minutes gone in the round.
Mezza breaks the clinch and we're back to striking at distance.
Kong scores with a hook.
Mezza misses with a series of wild punches.
Kong takes a step towards his opponent and connects with a left hand, before circling away.
This is a great period of action - very entertaining stuff!
Kong feints and then winds up with a huge right hand that connects perfectly and sends Mezza sprawling to the canvas! Mezza rolls over backwards and springs off the cage and manages to regain his footing - how acrobatic! Oh, he's still wobbly - can Kong finish him?!
Mezza is breathing heavily.

Mezza shoots in for a takedown and gets it. Oh and he's advanced to full mount straight away.
Kong squirming around on the bottom, looking to escape.
Mezza looking to control but Kong is working nicely, looking to advance position himself.
Kong blocking the ground and pound.

That's three minutes gone in the round.
Mezza controlling the pace for now.
Kong trying desperately to get to his feet.
Mezza controlling from mount.
Kong is trying to get to the cage to help him get back to his feet.

That's four minutes gone in the round.
A lull in the action here being met with boos from the crowd.
Mezza throws some wild stikes that Kong manages to avoid easily.
The fighters are starting to perspire pretty heavily.
Mezza trying to control but he's not successful this time.
The crowd applaud the fighters efforts here as the round comes to an end.
Kong wants to get back to his feet.
And thats the end of the round the fighters go back to their corners.
Umaro Kong dominated that round.
The cut man is working on Steve Mezza's cut.
OK. That's time! The bell goes and we're back to the action.

Mezza swings away but doesn't land with a series of punches.
Kong is looking to clinch.
Mezza throws a jab when Kong was well out of range.
Mezza tries to clinch up
and Kong counters by moving into the clinch. Good anticipation by Kong.
Mezza misses with a punch on the inside.
Kong can't break the clinch.
Kong breaks from the clinch.
Kong keeping a good distance there, avoiding the body shot.
Steve Mezza is looking to throw some combinations by the looks of things.
Kong lands with a nice body punch.
Kong fails in his attempt to clinch.
We've had a slow start to the round here - hopefully the action picks up.
Kong tries to clinch
and Mezza counters with a driving takedown into guard. Nice work there by Mezza.
The fighters are pressed up against the cage, both looking to find a bit of space to work.
Mezza wants to control from the top but Kong keeps moving.
Kong really doesn't want to stay on the ground with Mezza. If he can't get it back to his feet, it's only a matter of time before he'll be tapping out.
Kong wants to get back to his feet but Mezza is in a dominant position and won't allow it.
Kong is breathing heavily.
That's one minute gone in the round.

Mezza stands up from guard. Let's bang!
Mezza tries to bum rush Kong with a series of wild strikes but Kong uses good footwork to avoid the assault.
Kong is using his reach advantage to land shots from outside his opponent's range.
Kong tries to clinch up but Mezza circles away and keeps his distance.
A punch combination from Mezza misses.
Mezza throws a nice looking combination but Kong bobs and weaves to avoid any damage.
A combination from Kong does no damage.
Mezza throws a hook but Kong avoids it easily.
Mezza gets to the clinch - let's see what his plan is here.
Mezza wants to break the clinch but can't.
Kong pushes Mezza back against the cage and unloads with a body punch.
Kong is trying to work out of this bad position, with his back against the cage.
That's two minutes gone in the round.
A short right from Mezza.
Kong lands a hook that snaps the head of Mezza backwards.
Mezza wants to push off and get back to the center of the mat but Kong has him pressed against the cage.
Kong lands with a short shot to the head.
Mezza struggles to land a body shot inside as Kong controls his hands.
Mezza prevents Kong from breaking the clinch.
Kong is looking for a takedown up against the cage. Mezza gets underhooks though and prevents the takedown attempt.
Mezza lands a body shot.
Mezza tries to throw a body punch but Kong avoids it by throwing Mezza back against the cage.
Mezza misses with a body punch.
Mezza breaks the clinch and we're back to striking at distance.
Mezza tries to close the distance and clinch up but Kong swats him away and circles back towards the center.
Mezza jabs at Kong's body.
Mezza misses with a double jab
and Kong holds on and brings the fighters into a clinch.
Mezza breaks the clinch and we're back to striking at distance.
Mezza misses with a two punch combination.
Kong misses with a two punch combination.
Kong swats away the attempt to clinch by Mezza.
Mezza throws a combination but it was largely blocked by Kong.
That's three minutes gone in the round.
Kong throws a looping overhand right but Mezza ducks down to avoid it.
Mezza doesn't manage to clinch there - Kong circles away.
Mezza has managed to clinch.
Kong gets through Mezza's defenses to land a nice punch to the side of the head.
Mezza misses the knee to the body. Nice hip positioning from Kong.
Kong is trying to break free.
Kong tries to pull guard but Mezza won't allow it.
Kong wants a takedown but no success here.
Steve Mezza has stuffed three takedown attempts in the round now. That's going to take a lot out of Umaro Kong.
Kong prevents a body shot from Mezza.
Mezza blocks an elbow strike.
Mezza tries to jump guard but he falls flat on his backside. Kong smiles and moves away.
Mezza misses with a looping left.
Mezza moves into the clinch successfully.
Kong lands a left hand.
Kong lands with a short shot to the head.
A quick uppercut on the inside from Kong.
Mezza is trying to break the clinch but Kong has him pressed against the cage.
Kong breaks the clinch and we return to the middle of the mat.
That's four minutes gone in the round.
Kong throws a jab, cross combination which is slipped
and Mezza counters with a straight right hand.
Umaro Kong seems to be getting the better of the standup.
Kong clinches up with Mezza and pushes him back against the cage.
Mezza keeps control of Kong as he tries to wriggle out of the double underhooks.
Kong fails to pull guard.
Kong ties up his opponent against the cage and manages to drag the fight down to the ground. Kong no doubt will be looking to work submissions from his guard.
Kong is working an open guard so Mezza takes the opportunity to get back to his feet.
Kong lands a nice shot to the body.
Kong digs a good hook to Mezza's body.
Kong closes the distance and clinches.
Kong taking a break, stalling in the clinch.
Mezza has had enough of the clinch but Kong keeps him there for the moment.
Kong makes some space for himself and lands an uppercut.
We've seen a great period of action over the last minute or so - credit to both fighters for leaving it all in the cage!
Kong pushes Mezza back against the cage and lands a hook to the side of the head.
Mezza can't break the clinch.
The crowd applaud the fighters efforts here as the round comes to an end.
Some stalling of biblical proportions here from Kong.
Kong tries to stall but Mezza uses the opportunity to gain a better position.
Mezza looking to slow down the pace here.
Kong is looking to control Mezza's arms but Mezza gets an underhook and turns him. Now Kong has his back to the cage.
Mezza lands a right hand.
And thats the end of the round the fighters go back to their corners.
That was a close second round but I would say that Steve Mezza will probably get the nod.
The cut man is working on Steve Mezza's cut.
The corners get their ten second warning. Both fighters stand from their stools and stare eachother down, ready to get back to the action. This is the final round!

Mezza tries to clinch up.
Mezza tries to close the distance and clinch but Kong swats him to one side with an open hand palm strike and circles away.
Mezza misses with a double jab.
Umaro Kong seems to be the more aggressive standup fighter in this bout.
Kong ducks down and throws a hook to the body but Mezza moves away.
Kong avoids a punch combination nicely.
Kong swats away the attempt to clinch by Mezza.
Kong fails with an attempt to clinch.
Kong misses with a series of wild punches.
Kong avoids the clinch attempt nicely.
A punch combination from Mezza misses.
We've had a slow start to the round here - hopefully the action picks up.
Mezza misses with a wild body shot.
Mezza is looking to take this fight into the clinch.
Mezza misses with a few strikes there.
Kong looks to score with a combo but nothing lands.
Mezza tries to bum rush Kong with a series of wild strikes but Kong uses good footwork to avoid the assault.
That's one minute gone in the round.
Mezza fakes a head shot and lands one to the body.
Kong takes a big intake of breath there - he's definitely tired.
Kong misses with an uppercut. Mezza saw that one coming.
Kong connects with the punch.
Kong shoots in for a takedown - he's clinched up with Mezza but Mezza pushes him off and we're back to square one.
Mezza scores with a jab. Kong acknowledges it with a nod of the head.
It looks like Umaro Kong has been cut.
Kong swats away the attempt to clinch by Mezza.
Kong will have to do better than that with his takedown attempts.
Mezza throws a shot from downtown. Kong moves away and avoids it.
Kong tries to close the distance and clinch up against the cage but Mezza paws at him with a jab and circles away.
Kong shoots in for a takedown. "Ole!" shouts Mezza as he jumps to the side.
Steve Mezza has stuffed three takedown attempts in the round now. That's going to take a lot out of Umaro Kong.
Kong cracks Mezza with a big right hand and Mezza goes down!
Mezza wants to stand up but Kong is controlling him.
That's two minutes gone in the round.
Kong has decided he wants to stand but the closed guard of Mezza is proving hard to escape from.
Mezza wants to stand but Kong is controlling the position.
That's three minutes gone in the round.
Kong wants to get up but he can't break Mezza's closed guard. He needs to be careful trying to break the legs open, as he's open to submissions here.
Mezza wants to stand and escape but Kong is having none of it.
Kong tries to stand but Mezza is controlling from the bottom.

It looks like we're going to have a standup here. Neither fight is doing enough on the ground.
Mezza looks to clinch
and Kong counters with a right hand to the body.
Kong misses with a takedown attempt - Mezza sprawls well and throws a nice strike on the way out which just misses.
Mezza throws a combination but it was largely blocked by Kong.
The fight moves into the clinch position.
Kong lands a body shot.
That's four minutes gone in the round.
Mezza tries to work over Kong's body with a swooping hook but it only glances the target.
Mezza is trying to break the clinch but Kong has him pressed against the cage.
Kong changes levels and goes for a takedown here. Mezza fights it off and pushes away nicely.
Kong shoots in for a takedown but doesn't get it.
Mezza throws a nice looking combination but Kong bobs and weaves to avoid any damage.
Kong fakes and then throws a beautiful body shot. Mezza looks a bit winded and takes a step backwards to take a breath.
Kong Rushes Mezza and starts throwing punches like they are going out of style! Mezza is up against the cage and has nowhere to go. Kong Piles on the pressure and Mezza crumples to the floor! This one is all over!
Ladies and gentlemen, after 4:37 of round 3, we have a winner by way of TKO (Strikes). Umaro Kong!
|
|
|
|
|
|
|
|
|
|
|
|
|
|
|
|
|
|
|
|
|
|
|
| S |
C
A |
G |
S |
C
B |
G |
|
S |
C |
G |
|
energy
A | B |
|
hype
A | B |
|
pop
A | B |
|
mgr
A | B |
|
FIGHT
RATING
87% |
|
|
|
|
|
|
|
Co-main event
|
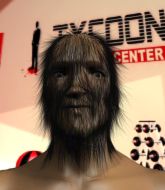
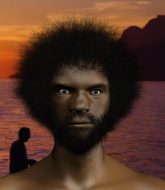
Coming up we have a middleweight MMA rules bout between Kyle Brown (ranked 0 p4p, 0 weight class) and Max Pac (ranked 0 p4p, 0 weight class). Man, I cannot wait for this one!
 |
|
 |
| 189 cm
19
193 lbs
1 - 2 - 0 |
|
180 cm
22
190 lbs
0 - 0 - 0 |
BJJ Blue Belt
Brawler
Self confident |
|
BJJ Blue Belt
Brawler
Solid chin |
|
| |
|
Ladies and gentlemen. This fight is 3 rounds, in the middleweight division.
Introducing the fighter to my left, fighting out of the red corner.
With a record of
1 - 2 - 0, fighting out of Montreal, Kyle Brown!
And introducing the fighter to my right, fighting out of the blue corner.
With a record of
0 - 0 - 0, fighting out of Montreal, Max Pac!
The judges for this bout are Dillan Fox, Ian Loll and Gregory Folan.
The bell rings for round one and we are underway!
Pac works over Brown's head and body with a nice combination.
Brown fails with the takedown.
Pac avoids the head kick by Brown.
Brown throws a body kick that misses.
Brown moves in looking to clinch but Pac pushes him off.
A head kick misses from Pac.
Brown throws a head kick but Pac moves out of range.
Brown throws the kick towards the body but Pac avoids it.
Pac just misses with a punch to the body.
Pac misses with a half-hearted attempt at a head kick.
Brown on the wrong end of a nice jab.
Pac shoots in and bounces Brown off the cage to secure the takedown into guard.
The ref warns both fighters not to hold the cage as they work up against the meshing.
Pac throwing strikes from guard but Brown blocks nicely.
Brown trying to keep a closed guard but Pac is proving a slippery customer.

Brown is looking for a triangle but Pac pushes his legs off easily.
That's one minute gone in the round.
Pac in full guard, throwing the ground and pound. No damage this time.
Brown working a defensive guard but Pac passes into half guard.
Pac is trying to work for a kimura but Brown is defending well.
Pac is trying to advance to mount but he's lost his balance and Brown reverses the position - he's now on top in Pac's guard.
Brown passes into half guard.
Brown looks over to his corner - he wants some instructions but his corner are not responding.
That's two minutes gone in the round.
The crowd are hurling abuse towards the fighters... You can hardly blame them though because there isn't a lot going on in the fight.
Brown wants to lay and pray for a moment but Pac keeps working.
Pac manages to get to full guard.
Brown slows down the pace of the fight, as he sits in guard.
That's three minutes gone in the round.
The fighters are pressed up against the cage, both looking to find a bit of space to work.
Brown drops back looking for a leg! Pac is in trouble here! The fighters roll with the hold and Pac manages to kick Brown off! Brown jumps back into Pac's guard.
Pac looking to sweep here. No luck so far.
Pac wants to control but Brown passes easily into half guard.
That's four minutes gone in the round.
Well. There's a bit of a lull in the action here and the crowd are starting to get restless.
Brown blocks the strikes from Pac.
Pac slips a foot under and gets full guard. Nice work.
Pac working from the bottom, still in full guard. He's managed to get a loose triangle. Brown doesn't seem to be doing much to defend here, obviously he feels comfortable in the position. Brown manages to throw the legs off his shoulder and he's back into guard - no problem.
Pac looks gassed!
Brown advances position into side control!
The crowd thankful this round is nearly over.
Pac is not content to let Brown control the position.
And thats the end of the round the fighters go back to their corners.
Max Pac dominated that round.
Well, the break between rounds is over. Let's get back to the scrappin!
A nice leg kick lands there from Brown.
Brown wants to clinch.
Pac on the receiving end of a decent leg kick there by Brown. Brown obviously looking to wear him down.
Brown throws a head kick but Pac moves out of range.
Kyle Brown is looking to throw some combinations by the looks of things.
Brown lands with a thumping leg kick.
Brown moves in looking to clinch but Pac pushes him off.
Brown circles away from the clinch attempt.
Brown uses good footwork to avoid the strikes from Pac.
Brown closes the distance looking to clinch
and Pac counters with a driving takedown into guard. Nice work there by Pac.
We've seen a great period of action over the last minute or so - credit to both fighters for leaving it all in the cage!
Brown working a defensive guard here.
Brown looking for a sweep. Not yet Brown, not yet.
That's one minute gone in the round.
Pac keeps in close for a moment and lands a decent shot to the side of Brown's head.
Pac stops Brown from standing up.
Both fighters are absolutely exhausted here.
Pac trying to pass the guard but can't manage it just yet.
Pac thows a big elbow that misses.
Pac gets to his feet and steps away from his opponent.
Brown tries a head kick but it misses.
Pac bobs and weaves into range and then changes levels and scores with a nice takedown into side control.
Pac in side control, trying to ground and pound but not landing this time.
Pac thinks about going for a far side armbar but bails out and retains the dominant position instead.
Brown struggling a bit here.
That's two minutes gone in the round.
Brown takes a nasty elbow to the side of the head.
Brown wants to control but Pac postures up.
Brown gets one leg under and gets the fight to half guard.
Pac with the ground and pound but Brown uses the opportunity to regain guard.
Pac is trying to work a guillotine from the top, or something like that? Don't know how he thinks he's going to get a finish from there.
Pac is looking to work some ground and pound but Brown has wrist control.
That's three minutes gone in the round.
Brown manages to land a sweep and now he's in mount on top!
Pac sneaks a leg under to get to half guard.
Pac trying to control here.
Pac is looking for a sweep. Brown is wise to his cunning plan and keeps the top position.
Pac is persisting with the attempt to improve his position.
Pac actively working from the bottom here.
That's four minutes gone in the round.
My god... these two guys really need to pick up the pace or everyone will leave to go get a beer.
Pac looking for submissions off his back.
Pac is pressing down on Brown's left leg trying to get back to full guard. He's managed it.
Brown won't allow Pac to get back to his feet.
Pac isolates an arm and boxes in a triangle. Brown stacks Pac on his neck as he steps over and passes to the side. He's now in a much more dominant position where he can look to do some serious damage. Nice move by Brown!
The crowd applaud the fighters efforts here as the round comes to an end.
Brown has knee on belly and now moves to full mount! Trouble for Pac!
And thats the end of the round the fighters go back to their corners.
A close second round but Max Pac will probably get the nod - 10:9.
That's time! Back to the action! This is the final round!
Brown doesn't manage to clinch there - Pac circles away.
Pac shoots in and bounces Brown off the cage to secure the takedown into guard.
Brown looking to control.
Brown has his foot on Pac's thigh. He's trying to push off and get in position for a triangle, I think. Pac works his way back into a safe position though.
Brown trying to keep a closed guard but Pac is proving a slippery customer.
Pac chips away with some ground and pound.
Pac tries to stand but Brown is controlling from the bottom.
Both fighters are breathing heavily.
Pac stands up and looks to throw the legs aside to pass to side control. Brown swivels though and keeps the full guard.
That's one minute gone in the round.
Brown is pulling down on Pac's head to control his posture.
The referee decides to stand the fighters back up.
Brown moves in looking to clinch but Pac pushes him off.
Pac moves out of range as Brown throws a body kick.
Brown misses with a takedown attempt
and Pac counters with a takedown into side control.
Brown tries to buck Pac off but Pac is having none of it.
Brown struggling a bit here.
I wouldn't like to be where Brown is right now.
That's two minutes gone in the round.
Pac working away.
Brown sneaks back into half guard.
Pac is working for a submission of some sort.
Brown is trying is best to control the position here.
Pac tries to pass to full mount but Brown defends it.
Pac thows a wild elbow that connects with the canvas.
That's three minutes gone in the round.
Brown is refusing to be controlled, as Pac sits in half guard.
Brown controlling the position for now.
Pac is looking for an arm triangle, whilst trying to pass to side control. Brown doesn't seem that keen to cooperate though. No luck this time Pac.
Pac is trying to control the action in half guard but Brown is working away on the bottom, looking perhaps to get back to full guard.
Max Pac has got the better of the ground game so far.
Neither fighter is doing enough for the referee's liking and he's decided to stand them back up.
Pac lands a jab followed by a nice looking cross.
That's four minutes gone in the round.
A few boos can be heard. I'm sure they will multiply if the fighters don't pick up the pace.
Brown lands a jab followed by a nice looking cross.
Kyle Brown has stepped it up - he knows he needs a finish here!
Brown lands with a slapping head kick.
Pac with a lazy takedown attempt
so Brown counters with a double leg into guard. Good agility.
Pac controls Brown momentarily but Brown frees himself.
Pac trying to strike off his back.
Pac is looking to get back to his feet but can't, whilst Brown is controlling him.
Brown trying to stand up but can't free himself from Pac's guard.
The crowd applaud the fighters efforts here as the round comes to an end.
Pac is looking for a triangle but Brown pushes his legs off easily.
Pac wants to sweep here but Brown controlling him for the moment.
And that's the end of the fight!
Kyle Brown showed his dominance in that final round.
I think Pac has won this one but let's see whether the judges agree with me. Over to the ring announcer for the scorecards.
Ladies and gentlemen, after 3 rounds of action, we go to the scorecards for a decision.
Judge Dillan Fox scores the fight 28:29
Judge Ian Loll scores the fight 28:29
Judge Gregory Folan scores the fight 28:29
In favor of your winner, by unanimous decision... Max Pac!
|
|
|
|
|
|
|
|
|
|
|
|
|
|
|
|
|
|
|
|
|
|
|
| S |
C
A |
G |
S |
C
B |
G |
|
S |
C |
G |
|
energy
A | B |
|
hype
A | B |
|
pop
A | B |
|
mgr
A | B |
|
FIGHT
RATING
62% |
|
|
|
|
|
|
|
Main event
|
Coming up we have a welterweight MMA rules bout between Emilie Lamont (ranked 0 p4p, 0 weight class) and Jermaine Howard (ranked 0 p4p, 0 weight class). Jermaine Howard is staring across the cage at his opponent, tweaking his nipples.
 |
|
 |
| 180 cm
21
170 lbs
1 - 2 - 0 |
|
177 cm
20
161 lbs
3 - 2 - 0 |
Decent wrestler
Basic striking
Prefers ground |
|
BJJ Blue Belt
Brawler
Tends to cut |
|
| |
|
Ladies and gentlemen. This fight is 3 rounds, in the welterweight division.
Introducing the fighter to my left, fighting out of the red corner.
With a record of
1 - 2 - 0, fighting out of Montreal, Emilie Lamont!
And introducing the fighter to my right, fighting out of the blue corner.
With a record of
3 - 2 - 0, fighting out of Montreal, Jermaine Howard!
The judges for this bout are Gregory Folan, Steve Smith and Ian Loll.
The bell rings for round one and we are underway!
Lamont scores with a nice takedown into half guard. Let's see what he's got on the ground.
Howard has no desire to be mounted, so is trying to control. Lamont is working away from the top position though.
Lamont prevents Howard from improving his position.
Still in half guard, Lamont seems content to control.
Howard wants to get back to full guard.
Lamont stalling.
Howard trying to control here.
That's one minute gone in the round.
The ref warns both fighters not to hold the cage as they work up against the meshing.
Howard is looking to regain full guard. Not this time though.
Lamont controlling the action here.
Lamont has controlled the position for a good 20 seconds, which will no doubt be starting to frustrate his opponent.
That's two minutes gone in the round.
A lull in the action here being met with boos from the crowd.
Lamont works his way into side control.
Howard tries to buck Lamont off but Lamont is having none of it.
Lamont just content to control the position.
The fighters are pressed up against the cage, both looking to find a bit of space to work.
Howard is looking for a sweep.
That's three minutes gone in the round.
Lamont controlling the position.
Howard tries to bench press Lamont off him but Lamont keeps the position.
Howard is trying to control Lamont's posture but Lamont avoids it.
Well, the referee has seen enough. Neither fighter is active enough on the ground so he's stood them back up.
Lamont clinches with his opponent.
Lamont decides to pull guard.
Howard trying to control the position from guard on top but Lamont is wriggling around, looking for whatever he can.
Lamont controlling Howard's posture.
That's four minutes gone in the round.
There's a bit of a scramble here and now Lamont is on top in guard.
Lamont controlling from the guard. I say controlling but really, he's stalling.
Lamont wants to control from the top but Howard keeps moving.
The crowd thankful this round is nearly over.
Lamont not doing a lot at the moment. He'll have to show some more aggression or the fight will get stood up.
Howard striking off his back but it's not causing Lamont any problems.
And thats the end of the round the fighters go back to their corners.
Emilie Lamont dominated that round.
That's time! Lamont's corner gives him a slap on the ass as he gets ready to fight.
Lamont is looking to clinch but Howard is avoiding it.
Howard throws a head kick that misses and slips in the process. He scrambles back to his feet and the fighters circle.
Howard gets taken down but at least he's managed to land in guard.
Howard not looking particularly offensive just at the moment.
Howard is edging up against the cage. He's using the cage to get back to his feet. Nice work there - the fighters are clinched.
Howard tries to pull guard but can't drag his opponent to the mat. Lamont just stands there and leans against the cage.
Howard missing with knees to the body.
Howard tries to take the fight to the ground by pulling guard but can't manage it.
Lamont tightens his grip and picks Howard up, before dumping him to the ground. Howard manages to land in guard.
Howard looking to control.
Howard is breathing heavily.
Lamont controls the pace of the fight for a moment.
That's one minute gone in the round.
Howard keeping busy on the bottom but Lamont has passed one foot through into half guard.
Howard tries to roll over but Lamont keeps him under control.
Lamont keeping composed on the top, looking to control the action.
Lamont frees up his trapped foot and advances to mount.
Lamont takes a little breather and maintains the position. The referee will be looking for him to stay active from such a dominant position though.
That's two minutes gone in the round.
Howard bucks up and manages to get a nice reversal! He's in guard on the top - nicely done!
Lamont is controlling Howard's posture.
Howard wants to control from the top but Lamont keeps moving.
That's three minutes gone in the round.
Lamont working for a triangle but Howard defends it easily.
Lamont keeping full guard, as Howard tries to pass.
Lamont has a closed guard, preventing anything of note from happening. Perhaps he's looking to stall.
Lamont on his back here. We all know that wrestlers don't like being on their back so let's see if Lamont tries to get out of the position.
That's four minutes gone in the round.
A lull in the action here being met with boos from the crowd.
The referee stands the fighters back up. Emilie Lamont just wasn't active enough from the dominant position.
Lamont feints and as Howard raises his hands in defense, Lamont changes levels and drives through with a takedown into guard.
Howard is trying to control the position but Lamont postures up.
Lamont looking to control the position here, rather than advance.
And thats the end of the round the fighters go back to their corners.
Emilie Lamont dominated that second round.
That's the end of the round. The referee orders the cornermen out of the cage so we can get back down to business. This is the final round!
Lamont drives through with a really nice takedown into side control.
Howard tries to bench press Lamont off him but Lamont keeps the position.
Howard is trying to get back to his feet.
Lamont controls the position from side control.
Howard takes a big intake of breath there - he's definitely tired.
Howard wants to control but Lamont postures up.
That's one minute gone in the round.
A lull in the action here.
Lamont scores with a couple of short elbows.
Howard trying to remain calm as Lamont controls from the top position.
Howard prevents Lamont from improving position.
Emilie Lamont overall seems to be getting the better of the ground position in the fight so far.
Howard holding on.
That's two minutes gone in the round.
The crowd are showing their displeasure at the lack of action as loud boos ring out around the arena.
Howard is being controlled here.
Howard is looking for a sweep.
Howard looking for a sweep but Lamont has passed into full mount! Oh no!
Lamont controlling his opponent.
The referee stands the fighters back up. Emilie Lamont just wasn't active enough from the dominant position.
Lamont looks for a takedown. He's got it. We're now in half guard.
Howard wants to get back to his feet.
That's three minutes gone in the round.
Still in half guard, Lamont seems content to control.
Howard tries to strike from the bottom but it doesn't land.
Howard keeping his head moving to avoid the ground and pound.
The referee calls for the fighters to work.
Howard punching from the bottom.
Howard trying to control here.
Lamont is pressing down on Howard's thigh, looking to free his foot. Howard is holding on for now.
Well, the referee has seen enough. Neither fighter is active enough on the ground so he's stood them back up.
Lamont tries to check the leg kick but that clearly hurt him.
Lamont shoots in for a takedown and gets it. Let's see what he's got on the mat.
Jermaine Howard has stepped it up - he knows he needs a finish here!
That's four minutes gone in the round.
Lamont controlling from the guard. I say controlling but really, he's stalling.
Howard throws a couple of weedy looking strikes off his back.
Lamont slows down the pace of the fight for a moment. He'll need to remain active if he doesn't want to see the fight stood back up.
Howard escapes his hips to the side and looks to be working for an armbar. Lamont gives him a little smile and shakes his head. No chance.
And that's the end of the fight!
Emilie Lamont showed his dominance in that final round.
Well I reckon that's a shut out for Lamont, winning every round. Will the judges agree? They are the ones who matter, even if they are often depressingly incompetent. Over to the ring announcer for the scorecards.
Ladies and gentlemen, after 3 rounds of action, we go to the scorecards for a decision.
Judge Gregory Folan scores the fight 30:27
Judge Steve Smith scores the fight 30:27
Judge Ian Loll scores the fight 30:27
In favor of your winner, by unanimous decision... Emilie Lamont!
|
|
|
|
|
|
|
|
|
|
|
|
|
|
|
|
|
|
|
|
|
|
|
| S |
C
A |
G |
S |
C
B |
G |
|
S |
C |
G |
|
energy
A | B |
|
hype
A | B |
|
pop
A | B |
|
mgr
A | B |
|
FIGHT
RATING
30% |
|
|
|
|
|
|
|
|
|
|
