 |
Legacy 21: Anarchy PBP Commentary |
Undercard bout
|
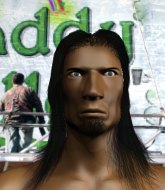
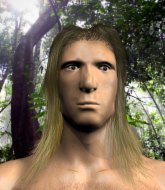
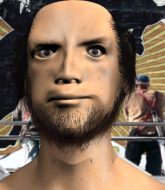
Coming up we have a lightweight MMA rules bout between Go Yamamoto (ranked 0 p4p, 0 weight class) and Ryan Bredemann (ranked 0 p4p, 0 weight class). Over to our ring announcer for the fighter introductions!
 |
|
 |
| 171 cm
20
152 lbs
1 - 1 - 0 |
|
176 cm
22
155 lbs
1 - 1 - 0 |
BJJ Blue Belt
Basic striking
Big heart |
|
BJJ Blue Belt
Counter striker
Tends to cut |
|
| |
|
Ladies and gentlemen. This fight is 3 rounds, in the lightweight division.
Introducing the fighter to my left, fighting out of the red corner.
With a record of
1 - 1 - 0, fighting out of Sydney, Go Yamamoto!
And introducing the fighter to my right, fighting out of the blue corner.
With a record of
1 - 1 - 0, fighting out of Sydney, Ryan Bredemann!
The judges for this bout are Winston Howard, Eliza Hachem and Bruno Hogan.

The bell rings for round one and we are underway!
Yamamoto looks for a takedown here. Will he get it? Bredemann is fending him off so far but Yamamoto persists. Nope, Bredemann circles away and we're back to standing.
Yamamoto fails with a rather predictable takedown attempt.
Bredemann shoots in for a double leg but Yamamoto sprawls well. That's going to sap some energy.

Yamamoto shoots in and bounces Bredemann off the cage to secure the takedown into guard.
Yamamoto trying to control the position from guard on top but Bredemann is wriggling around, looking for whatever he can.
Yamamoto stands up and looks to throw the legs aside to pass to side control. Bredemann swivels though and keeps the full guard.
Bredemann manages to land a sweep and now he's in mount on top!
Bredemann trying to control but Yamamoto is having none of it.

That's one minute gone in the round.
Yamamoto is looking to improve his position but Bredemann isn't that keen on the idea.
Yamamoto tries to lock up and control but Bredemann gives him a forearm to the face and pushes him away.
Bredemann looking to control and managing it successfully.
Yamamoto tries to get back to half guard but can't.
Yamamoto gets back to half guard.

That's two minutes gone in the round.
The crowd are starting to boo a lack of action.
Bredemann blocks the strikes from Yamamoto.
Bredemann blocks the strikes from Yamamoto.
Yamamoto trying to keep hold of his opponent's head but Bredemann manages to pass to mount!
Bredemann sitting in mount, just looking to control for the moment.
Yamamoto is trying to escape the mount.
Yamamoto is squirming around, avoiding Bredemann's attempts to control the action.
Yamamoto is looking to get to half guard.

That's three minutes gone in the round.
Bredemann controlling the pace for now.
Yamamoto is writhing around trying to get back to his feet.
Bredemann trying to control but he's not successful this time.

That's four minutes gone in the round.
Well. There's a bit of a lull in the action here and the crowd are starting to get restless.

Yamamoto defends a decent attempt at a guillotine from Bredemann.
Yamamoto is desperately trying to get back to half guard.
Bredemann manages to capitalize on a mistake by Yamamoto to take his back!
Bredemann is looking to control Yamamoto but Yamamoto is wriggling around and keeping busy.
Boooooooooooooooooooo!!! God, this has been a terrible round. Come on you two, sort yourselves out!
Yamamoto is defending well here and trying to improve his position.
Yamamoto staying busy and making it hard for Bredemann to control.
And thats the end of the round the fighters go back to their corners.
That was a close round but I would say that Go Yamamoto will probably get the nod.
The fighters' corners scream their final instructions, as the referee calls time. Here we go, back to the action!

Yamamoto has his takedown stuffed
and Bredemann counters with a nice double leg into half guard.
Yamamoto trying to control from the bottom.
Yamamoto tries to regain full guard. Instead though, Bredemann has advanced to mount. Uh oh.
Bredemann controlling the pace for now.
Yamamoto reaches up to try and control the position but Bredemann seems to have an arm triangle now! Uh oh! Yamamoto rolls and tries to escape and now Bredemann has his back!
Yamamoto breaks Bredemann's hooks off and manages to turn into his guard.
The fighters are pressed up against the cage, both looking to find a bit of space to work.
Yamamoto looking to sit in guard and control but Bredemann gets the butterfly guard and sweeps. He's now in the guard on the top.
That's one minute gone in the round.
Bredemann stands up and looks to throw the legs aside to pass to side control. Yamamoto swivels though and keeps the full guard.
Bredemann won't allow Yamamoto to sweep him here.
Yamamoto trying to strike from the bottom but really, it's not the best position to be doing that from!
Bredemann won't allow Yamamoto to sweep him here.
Both fighters are absolutely exhausted here.
Bredemann pressing down on his opponent's thigh, looking to pass guard. Yamamoto is keeping the position for now.
Yamamoto wants to sweep but no luck.

Neither fighter is doing enough for the referee's liking and he's decided to stand them back up.
Bredemann tries for a takedown but Yamamoto sees it coming a mile off and avoids it easily.
Yamamoto has his takedown stuffed
and Bredemann counters with a shoot takedown. Yamamoto fights it but they end up in guard.
That's two minutes gone in the round.
Bredemann avoids a guillotine attempt easily.
Bredemann not doing a lot at the moment. He'll have to show some more aggression or the fight will get stood up.
Yamamoto looking to hit a scissor sweep but Bredemann is one step ahead there.
Bredemann trying to control but Yamamoto is working from the bottom.
Bredemann sitting in guard here, content to control.
Yamamoto is working an open guard here, looking to improve his position. No doubt that will leave him open to counters but at least he's being more offensive.
That's three minutes gone in the round.
Yamamoto is trying to keep Bredemann in close.

Bredemann gets to his feet - Yamamoto follows without any prompting.
Yamamoto with a lazy takedown attempt
and Bredemann counters with a nice shoot takedown that brings the fighters to the ground.
That's three failed takedown attempts in the round for Go Yamamoto. That's going to take a lot out of him.
Bredemann sitting in guard here, content to control.
Yamamoto looking to hit a scissor sweep but Bredemann is one step ahead there.
Yamamoto pushes Bredemann off for just long enough to get back to his feet. Very athletic spring there.
That's four minutes gone in the round.
Bredemann gets taken down but at least he's managed to land in guard.
Bredemann is working from a closed guard but he's struggling to control his opponent.
Yamamoto cracks Bredemann with a solid left hand.
Bredemann keeping moving, preventing Yamamoto from controlling successfully.
Yamamoto keeps in close for a moment and lands a decent shot to the side of Bredemann's head.
Yamamoto trying to control the position from guard on top but Bredemann is wriggling around, looking for whatever he can.
Yamamoto with a flurry of punches that miss.
Yamamoto works over Bredemann with some ground and pound from guard.
And thats the end of the round the fighters go back to their corners.
Ryan Bredemann showed his class in that round. I'd imagine he'll take it on all the scorecards.
That's the end of the interval. I'm sure that seemed a lot quicker than a minute for our two fighters! Back to the action. This is the final round!

Yamamoto shoots in and gets a takedown into half guard. Yamamoto showed some decent athleticism there.
Yamamoto is just content to waste time from the top position. Bredemann takes advantage of the situation and regains full guard.
Yamamoto with a flurry of punches that miss.
Yamamoto trying to control but Bredemann is working from the bottom.
Yamamoto working from the guard for now, landing some ground and pound.
Ryan Bredemann has got the better of the ground game so far.
Bredemann working a defensive guard here.
Bredemann keeping moving, preventing Yamamoto from controlling successfully.
Yamamoto postures up to throw the ground and pound strikes but they don't connect.
That's one minute gone in the round.
A big thud reverberates around the arena there as Yamamoto accidentally thumps the mat. Hopefully he's not broken his hand.
Yamamoto content to stall in guard here.
Yamamoto throws and elbow that misses. Bredemann uses the momentum to reverse the position. He's now in Yamamoto's guard. Nice move by Bredemann!
Yamamoto trying to keep a closed guard but Bredemann is proving a slippery customer.
Yamamoto tries to land a sweep but no joy.
It looks like we're going to have a standup here. Neither fight is doing enough on the ground.
Bredemann with a poor takedown
and Yamamoto counters with a nice single leg takedown and he's in Bredemann's guard now.
Both fighters are breathing heavily.
Yamamoto wants to control from the top but Bredemann keeps moving.
That's two minutes gone in the round.
Yamamoto is looking to work some ground and pound but Bredemann has wrist control.
A big thud reverberates around the arena there as Yamamoto accidentally thumps the mat. Hopefully he's not broken his hand.
Bredemann looking to control.
Yamamoto postures up and scores with a shot to the body and a follow up elbow to the head.
Yamamoto thows a big elbow that misses.
Yamamoto controls the pace of the fight for a moment.
Yamamoto wants to pass the guard but Bredemann is keeping the position.
Neither fighter is doing enough for the referee's liking and he's decided to stand them back up.
Bredemann misses with a takedown attempt
so Yamamoto counters with a double leg into guard. Good agility.
Bredemann keeping full guard, as Yamamoto tries to pass.
Yamamoto trying to control but Bredemann is working from the bottom.
Yamamoto with a flurry of punches that miss.
That's three minutes gone in the round.
Yamamoto showing good wrestling skills to control the position.
Yamamoto is pushing down on Bredemann's leg trying to pass to half guard. Bredemann is fighting to maintain full guard but Yamamoto has managed to sneak the leg through.
Yamamoto is keeping good posture, landing some ground and pound.
Yamamoto working some ground and pound from close in. He's looking to maintain this position and strike for a while by the looks of things... although he'll probably advance to full mount in a minute now I've said that.

Bredemann is rocked!
The ref warns both fighters not to hold the cage as they work up against the meshing.
Yamamoto scores with a big shot! Bredemann's head bounced off the canvas with a huge thud! More strikes land and the referee has jumped in to save Bredemann! He was hurt real bad - good stoppage!
Ladies and gentlemen, after 3:58 of round 3, we have a winner by way of TKO (Strikes). Go Yamamoto!
|
|
|
|
|
|
|
|
|
|
|
|
|
|
|
|
|
|
|
|
|
|
|
| S |
C
A |
G |
S |
C
B |
G |
|
S |
C |
G |
|
energy
A | B |
|
hype
A | B |
|
pop
A | B |
|
mgr
A | B |
|
FIGHT
RATING
55% |
|
|
|
|
|
|
|
Undercard bout
|
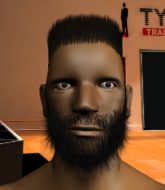
Coming up we have a middleweight MMA rules bout between Prince Melo Gapuz (ranked 0 p4p, 0 weight class) and Jake Tyler (ranked 0 p4p, 0 weight class). The key to victory for Prince Melo Gapuz has got to be keeping the fight on the feet.
 |
|
 |
| 190 cm
22
180 lbs
1 - 2 - 0 |
|
170 cm
18
195 lbs
1 - 0 - 0 |
BJJ White Belt
Brawler
Prefers ground |
|
BJJ Blue Belt
Basic striking
Determined |
|
| |
|
Ladies and gentlemen. This fight is 3 rounds, in the middleweight division.
Introducing the fighter to my left, fighting out of the red corner.
With a record of
1 - 2 - 0, fighting out of Sydney, Prince Melo Gapuz!
And introducing the fighter to my right, fighting out of the blue corner.
With a record of
1 - 0 - 0, fighting out of Sydney, Jake Tyler!
The judges for this bout are Hugh Johnson, Skip Squint and Damien Edna.
The bell rings for round one and we are underway!
Tyler darts in and lands a nice takedown into half guard.
Gapuz looks exhausted already! Oh dear, he should have come in in better shape than this!
Tyler is looking for a kimura but he's never going to get it from there.
Gapuz is refusing to be controlled, as Tyler sits in half guard.
Tyler is trying a forearm choke
I don't think that's going to do much at this level of the game.
Tyler wants to take a breather but Gapuz is having none of it.
Tyler working the head and body with strikes.
Tyler works his way into side control.
Tyler is maintaining the dominant position - no doubt Gapuz will start to get frustrated soon if he's not already.
Tyler working the ground and pound.
That's one minute gone in the round.
Tyler advances nicely into full mount.
Tyler scoring with some good ground and pound from mount here. Will he manage to finish Gapuz?
Gapuz knows he needs to get back to his feet asap. He's simply no match for Tyler on the ground.
Tyler wants to control the pace but Gapuz is squirming around nicely.
Tyler has the superior BJJ but he's also working some ground strikes into his gameplan.
Tyler is working close to his opponent, looking to work a submission by the looks of things. Oh, he's managed to get a guillotine from mount as his opponent reached up! That looks tiiiiight! Will he tap? YES, he's tapped! Impressive submission by Tyler!
Ladies and gentlemen, after 1:33 of round 1, we have a winner by way of Submission (Guillotine). Jake Tyler!
|
|
|
|
|
|
|
|
|
|
|
|
|
|
|
|
|
|
|
|
|
|
|
| S |
C
A |
G |
S |
C
B |
G |
|
S |
C |
G |
|
energy
A | B |
|
hype
A | B |
|
pop
A | B |
|
mgr
A | B |
|
FIGHT
RATING
0% |
|
|
|
|
|
|
|
Undercard bout
|
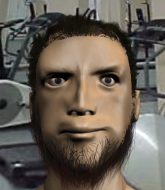
Coming up we have a middleweight MMA rules bout between Tyler Hellstrom (ranked 0 p4p, 0 weight class) and Mister Maki (ranked 0 p4p, 0 weight class). Chooooooooon! I think Hellstrom might be my favorite fighter, now he's come out to Firestarter. Maki has chosen Torukia as his entrance music. On his way into the cage it seems that Tyler Hellstrom has been attacked by a crazed fan! It looks like it might have been the just bleed guy! Luckily Tyler Hellstrom seems to be OK! I thought that lunatic was in prison!?
 |
|
 |
| 177 cm
20
185 lbs
0 - 1 - 0 |
|
181 cm
19
184 lbs
1 - 1 - 1 |
BJJ Blue Belt
Brawler
Big heart |
|
BJJ Purple Belt
Counter striker
Likes ground |
|
| |
|
Ladies and gentlemen. This fight is 3 rounds, in the middleweight division.
Introducing the fighter to my left, fighting out of the red corner.
With a record of
0 - 1 - 0, fighting out of Sydney, Tyler Hellstrom!
And introducing the fighter to my right, fighting out of the blue corner.
With a record of
1 - 1 - 1, fighting out of Sydney, Mister Maki!
The judges for this bout are Skip Squint, Winston Howard and Eliza Hachem.
The bell rings for round one and we are underway!
Hellstrom keeps the fight on the outside.
Hellstrom stuffs the takedown attempt from Maki. Maki gets slowly back to his feet.
A head kick misses from Maki.
Maki takes one on the chin but seems OK.
Tyler Hellstrom seems to be the more aggressive standup fighter in this bout.
Hellstrom throws an uppercut from half a mile away. Maki sees it coming and avoids it easily.
Maki uses some good footwork to avoid the body shot by Hellstrom.
Maki slips under a jab.
Hellstrom lands a nice hook to Maki's body. Maki takes it in his stride and looks to land his own strikes.
Maki tries to clinch there but Hellstrom circles away.
Maki tries to shoot in for a takedown. He's got hold of a leg but Hellstrom swivels and escapes.
Horrible takedown by Maki or perhaps it was just good defense by Hellstrom which made him look bad.
Tyler Hellstrom has stuffed three takedown attempts in the round now. That's going to take a lot out of Mister Maki.
Maki avoids the body shot from Hellstrom.
Hellstrom tries to clinch but fails miserably
and Maki counters with a nice kick to the body.
Hellstrom throws a leg kick but Maki sees it coming and checks it nicely.
Hellstrom throws a big overhand right that connects, sending Maki tumbling to the canvas!
Maki is rocked!

It looks like Mister Maki has been cut.
Hellstrom loads up on a big left hand. Maki felt that one! He's just covering up now, not defending himself intelligently - Hellstrom looks towards the ref and unloads with 3 more big shots and the ref has no choice but to stop the fight! Maki can't hide his disappointment, as Hellstrom celebrates the victory.
Ladies and gentlemen, after 1:04 of round 1, we have a winner by way of TKO (Strikes). Tyler Hellstrom!
|
|
|
|
|
|
|
|
|
|
|
|
|
|
|
|
|
|
|
|
|
|
|
| S |
C
A |
G |
S |
C
B |
G |
|
S |
C |
G |
|
energy
A | B |
|
hype
A | B |
|
pop
A | B |
|
mgr
A | B |
|
FIGHT
RATING
88% |
|
|
|
|
|
|
|
Undercard bout
|
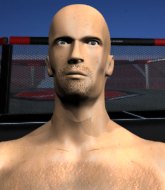
Coming up we have a light heavyweight MMA rules bout between Rio Ferdinant (ranked 0 p4p, 0 weight class) and Leo Bakelita (ranked 0 p4p, 0 weight class). Rio Ferdinant has the edge in experience - let's see if he can make that count tonight.
 |
|
 |
| 183 cm
20
200 lbs
0 - 6 - 0 |
|
186 cm
20
205 lbs
0 - 0 - 0 |
BJJ White Belt
Solid Muay Thai
Good chin |
|
BJJ Blue Belt
Brawler
Determined |
|
| |
|
Ladies and gentlemen. This fight is 3 rounds, in the light heavyweight division.
Introducing the fighter to my left, fighting out of the red corner.
With a record of
0 - 6 - 0, fighting out of Sydney, Rio Ferdinant!
And introducing the fighter to my right, fighting out of the blue corner.
With a record of
0 - 0 - 0, fighting out of Sydney, Leo Bakelita!
The judges for this bout are Hugh Johnson, Bruno Hogan and Damien Edna.
The bell rings for round one and we are underway!
Ferdinant throws a body kick but he wasn't in range.
Ferdinant misses with an attempted mid kick.
Bakelita lands with an uppercut that bounces Ferdinant off the cage and back into rage.

Bakelita has taken the fight to the clinch.
Ferdinant gets an overhook and lands an elbow to the side of the head.
Bakelita tries to land a knee to the head but misses.

Ferdinant manages to break the clinch.
Bakelita takes a nasty kick to the mid section... That should keep him thinking. Does he try and block and risk a head kick landing?
Bakelita closes this distance looking for a takedown but Ferdinant circles away.
Ferdinant has his takedown stuffed
and Bakelita counters into the clinch. Nicely done.
Ferdinant can't get the takedown.
Ferdinant prevents Bakelita from breaking the clinch.
Bakelita wants a takedown.
Ferdinant drops to a knee looking for a takedown but Bakelita gets the underhooks and prevents it.
That's three failed takedown attempts in the round for Rio Ferdinant. That's going to take a lot out of him.
Ferdinant manages to break the clinch.
Bakelita moves into range and clinches up with Ferdinant.
Ferdinant breaks the clinch and we're back to striking at distance.
Bakelita shoots in looking for a takedown. Ferdinant tries to sprawl out of it but Bakelita keeps driving through. The fighters are pinned against the cage. Ferdinant manages to get underhooks and after a bit of a struggle, circles away and we're back to standing.
Ferdinant misses with the combination.
Bakelita avoids a punch combination nicely.
Bakelita shoots in for a takedown - he's clinched up with Ferdinant but Ferdinant pushes him off and we're back to square one.
Bakelita looks gassed!
That's one minute gone in the round.
Bakelita blocks the body kick.
No luck for Bakelita with that takedown attempt.
Bakelita scores with a takedown into Ferdinant's guard.
Ferdinant wants to stand and escape but Bakelita is having none of it.
The ref warns both fighters not to hold the cage as they work up against the meshing.
Bakelita trying to land body shots but he keeps hitting the mat.
Ferdinant wants to stand but Bakelita is controlling the position.
The fighters are pressed up against the cage, both looking to find a bit of space to work.
Bakelita trying to control the position from guard on top but Ferdinant is wriggling around, looking for whatever he can.
Ferdinant wants to stand up but Bakelita is controlling him.
Bakelita slips nicely into half guard.
Bakelita seems to be taking a bit of a break to think of his next move. He lands a short punch in the meantime.
That's two minutes gone in the round.
Bakelita looks towards his corner to check for any instructions. The corner give him nothing to work with, so he cracks Ferdinant with a short hammerfist. I guess that's as good as any advice he could get in this position.
Bakelita is working hard to pass the guard. He's done it - he's now in full mount! Trouble for Ferdinant!
Bakelita controlling his opponent.
Bakelita punishing his opponent with strikes.
Bakelita is working close to his opponent, looking to work a submission by the looks of things. Oh, he's managed to get a guillotine from mount as his opponent reached up! That looks tiiiiight! Will he tap? YES, he's tapped! Impressive submission by Bakelita!
Ladies and gentlemen, after 2:46 of round 1, we have a winner by way of Submission (Guillotine). Leo Bakelita!
|
|
|
|
|
|
|
|
|
|
|
|
|
|
|
|
|
|
|
|
|
|
|
| S |
C
A |
G |
S |
C
B |
G |
|
S |
C |
G |
|
energy
A | B |
|
hype
A | B |
|
pop
A | B |
|
mgr
A | B |
|
FIGHT
RATING
69% |
|
|
|
|
|
|
|
Undercard bout
|
|
|
|
Undercard bout
|
Coming up we have a welterweight MMA rules bout between James VonBrunn (ranked 0 p4p, 0 weight class) and Harry Groove (ranked 0 p4p, 0 weight class). Buckle up people - heeeeeeeeeere we go!
 |
|
 |
| 175 cm
18
170 lbs
2 - 0 - 0 |
|
175 cm
21
160 lbs
2 - 1 - 1 |
BJJ Blue Belt
Brawler
Big heart |
|
BJJ Brown Belt
Brawler
Likes ground |
|
| |
|
Ladies and gentlemen. This fight is 3 rounds, in the welterweight division.
Introducing the fighter to my left, fighting out of the red corner.
With a record of
2 - 0 - 0, fighting out of Sydney, James VonBrunn!
And introducing the fighter to my right, fighting out of the blue corner.
With a record of
2 - 1 - 1, fighting out of Sydney, Harry Groove!
The judges for this bout are Steve Erwin, Winston Howard and Hugh Johnson.
The bell rings for round one and we are underway!
Groove bobs and weaves well there to avoid the strikes.
VonBrunn throws a leg kick which misses Groove's front leg but catches the back leg as Groove tries to avoid it.
VonBrunn lands with a nice low kick. That'll leave a bruise.
Groove is looking to clinch but VonBrunn is avoiding it.
VonBrunn throws an overhand right that lands on Groove's shoulder, as Groove tries to avoid the shot.
Groove blocks a low kick nicely.
VonBrunn ducks low and lands a nice hook to the body of his opponent.
Nice shot by VonBrunn.
Groove takes a body punch but keeps moving.
VonBrunn lands with a big left! Groove is wobbled badly! VonBrunn comes in with a flurry of punches and drops Groove to the floor. The ref jumps in to save him from unneccessary punishment.
Ladies and gentlemen, after 0:28 of round 1, we have a winner by way of TKO (Punches). James VonBrunn!
|
|
|
|
|
|
|
|
|
|
|
|
|
|
|
|
|
|
|
|
|
|
|
| S |
C
A |
G |
S |
C
B |
G |
|
S |
C |
G |
|
energy
A | B |
|
hype
A | B |
|
pop
A | B |
|
mgr
A | B |
|
FIGHT
RATING
100% |
|
|
|
|
|
|
|
Co-main event
|
Coming up we have a welterweight MMA rules bout between Mark Clifford (ranked 0 p4p, 0 weight class) and Jake Jordan (ranked 0 p4p, 0 weight class). Over to our ring announcer for the fighter introductions!
 |
|
 |
| 182 cm
22
169 lbs
3 - 3 - 0 |
|
182 cm
18
174 lbs
2 - 0 - 0 |
BJJ Blue Belt
Brawler
Cuts easily |
|
BJJ Blue Belt
Brawler
Intelligent |
|
| |
|
Ladies and gentlemen. This fight is 3 rounds, in the welterweight division.
Introducing the fighter to my left, fighting out of the red corner.
With a record of
3 - 3 - 0, fighting out of Sydney, Mark Clifford!
And introducing the fighter to my right, fighting out of the blue corner.
With a record of
2 - 0 - 0, fighting out of Sydney, Jake Jordan!
The judges for this bout are Eliza Hachem, Winston Howard and Bruno Hogan.
The bell rings for round one and we are underway!
Jordan looks to land a combination but Clifford avoids it well.
Jordan tries a head kick but it misses.
Clifford on the wrong end of a vicious looking body shot.
Jordan takes a shot to the eye socket. That's gotta hurt.
Clifford fails miserably with a takedown attempt.
Jordan slips under a jab.
Jordan cracks Clifford with a good shot that sees him stumbling back into the cage.
Clifford uses good footwork to get in and out and land a nice right hand before Jordan has time to react.
Jordan stuffs the takedown.
Clifford tries to clinch up but Jordan circles away and keeps his distance.
Clifford takes the fight into the clinch.
Jordan breaks from the clinch.
Clifford slips under a jab from Jordan.
Jordan wants to slow Clifford down by chopping away at his legs.
Jordan throws an uppercut from half a mile away. Clifford sees it coming and avoids it easily.
Clifford shoots in for a takedown - he's clinched up with Jordan but Jordan pushes him off and we're back to square one.
That's three failed takedown attempts in the round for Mark Clifford. That's going to take a lot out of him.
Clifford clinches.
Clifford escapes the clinch and we're back to striking.
That's one minute gone in the round.
Jordan throws a right hand that misses
and Clifford holds on and brings the fighters into a clinch.
Jordan tries to break the clinch but Clifford is controlling the position.
Jordan wants to break free but Clifford has control.
Clifford wants a takedown but no success here.
Jordan wants to break free. God knows he wants to breaaaak freeee.
Jordan manages to break the clinch.
Jordan bobs and weaves into range and then changes levels and scores with a nice takedown into side control.
Clifford is trying to get back to half guard.
Clifford is trying to work for a sweep but Jordan has mounted him!
Jordan controlling the pace for now.
Clifford tries to hold on but Jordan pushes him away.
Clifford is trying desperately to improve position.
Clifford is breathing heavily.
That's two minutes gone in the round.
Jordan scoring with strikes but Clifford is staying in there.
Clifford is rocked!
Jordan with good strikes from the mount here!
Oh Clifford is still in real trouble! Will he be able to recover?!!
Jordan loads up on a couple of big shots to the head that have Clifford scrambling to escape. He can't get free though and several more unanswered shots from Jordan land to the head. The referee has no choice but to stop the fight. Jordan stands and salutes the crowd.
Ladies and gentlemen, after 2:35 of round 1, we have a winner by way of TKO (Strikes). Jake Jordan!
|
|
|
|
|
|
|
|
|
|
|
|
|
|
|
|
|
|
|
|
|
|
|
| S |
C
A |
G |
S |
C
B |
G |
|
S |
C |
G |
|
energy
A | B |
|
hype
A | B |
|
pop
A | B |
|
mgr
A | B |
|
FIGHT
RATING
64% |
|
|
|
|
|
|
|
Main event
|
Coming up we have a heavyweight MMA rules bout between Gordon Hood (ranked 0 p4p, 0 weight class) and John Hayes (ranked 0 p4p, 0 weight class). Hayes is bouncing up and down as he enters the arena, backed by The Blood of Cuchulainn - Mychael & Jeff Danna. Both fighters look fresh as a daisy as they make their way towards the cage.
 |
|
 |
| 194 cm
18
230 lbs
3 - 1 - 0 |
|
193 cm
22
275 lbs
4 - 0 - 0 |
BJJ Blue Belt
Brawler
Granite chin |
|
BJJ White Belt
Excellent boxer
Solid chin |
|
| |
|
Ladies and gentlemen. This fight is 3 rounds, in the heavyweight division.
Introducing the fighter to my left, fighting out of the red corner.
With a record of
3 - 1 - 0, fighting out of Sydney, Gordon Hood!
And introducing the fighter to my right, fighting out of the blue corner.
With a record of
4 - 0 - 0, fighting out of Sydney, John Hayes!
The judges for this bout are Bruno Hogan, Hugh Johnson and Donatello Bradman.
The bell rings for round one and we are underway!
Hood dodges the punch combination from Hayes.
Hood shoots in for a double leg but Hayes sprawls well. That's going to sap some energy.
Hood tries for a takedown but Hayes sees it coming a mile off and avoids it easily.
Hood slips a jab and a cross from Hayes.
Hood shoots in for a takedown but doesn't get it.
That's three failed takedown attempts in the round for Gordon Hood. That's going to take a lot out of him.
Hayes lands a nice hook to Hood's body. Hood takes it in his stride and looks to land his own strikes.
Hayes throws a right hand that Hood ducks under and follows up with a left that Hood also avoids with ease.
Hayes throws an overhand right that has Hood reeling! Hayes follows up with a more punches and Hood is out cold! This one is all over!
Ladies and gentlemen, after 0:22 of round 1, we have a winner by way of KO (Punches). John Hayes!
|
|
|
|
|
|
|
|
|
|
|
|
|
|
|
|
|
|
|
|
|
|
|
| S |
C
A |
G |
S |
C
B |
G |
|
S |
C |
G |
|
energy
A | B |
|
hype
A | B |
|
pop
A | B |
|
mgr
A | B |
|
FIGHT
RATING
100% |
|
|
|
|
|
|
|
|
|
|

