 |
8: Kaboom! PBP Commentary |
Undercard bout
|
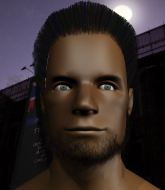
Coming up we have a welterweight MMA rules bout between Martin Lundblad (ranked 0 p4p, 0 weight class) and Lights Out (ranked 0 p4p, 0 weight class). We have two fighters making their debuts here, so let's see who comes out of this one with their first professional victory.
 |
|
 |
| 188 cm
22
180 lbs
0 - 0 - 0 |
|
178 cm
22
177 lbs
0 - 0 - 0 |
BJJ White Belt
Excellent boxer
Big right hand |
|
BJJ Blue Belt
Brawler
Granite chin |
|
| |
|
Ladies and gentlemen. This fight is 3 rounds, in the welterweight division.
Introducing the fighter to my left, fighting out of the red corner.
With a record of
0 - 0 - 0, fighting out of Tokyo, Martin Lundblad!
And introducing the fighter to my right, fighting out of the blue corner.
With a record of
0 - 0 - 0, fighting out of Tokyo, Lights Out!
The judges for this bout are Shigeki Sano, Tatsuya Matsuyama and Yukihiro Yamamoto.

The bell rings for round one and we are underway!
Lundblad misses with a body kick.

Out gets in close and instigates a clinch.

Out turns his hips and lands a very nice judo throw into side control!
Lundblad is not content to let Out control the position.
The ref warns both fighters not to hold the cage as they work up against the meshing.
Lundblad is positioning himself to get back to half guard.
Lundblad is looking to work his way out of this bad position but Out is controlling him well.
Lundblad knows he needs to get back to his feet asap. He's simply no match for Out on the ground.
Out taking a breather here.

That's one minute gone in the round.

Out working hard here to secure a kimura but he's not really in the right position for it.
Lundblad can't do much from the bottom here.

Neither fighter is doing enough for the referee's liking and he's decided to stand them back up.
Lundblad misses with a two punch combination.
Out has managed to clinch.
Lundblad is trying to break free.

Out breaks the clinch.

That's two minutes gone in the round.
The crowd are showing their displeasure at the lack of action as loud boos ring out around the arena.
Lundblad looks to land a combination but Out avoids it well.
Lundblad shoots in for a takedown but doesn't get it.
Out closes the distance and clinches.
Lundblad has had enough of the clinch but Out keeps him there for the moment.
Lundblad is clearly stalling here... Pick up the pace son.
Lundblad is working for a takedown up against the cage. He can't get it on this occasion though.
Lundblad is breathing heavily.
Out breaks the clinch.
Lundblad fails miserably with a takedown attempt.
That's three failed takedown attempts in the round for Martin Lundblad. That's going to take a lot out of him.
Out fakes an overhand right and shoots for a takedown. Lundblad sprawls well initially but Out persists and gets the takedown into half guard.
Lundblad tries to roll over but Out keeps him under control.
Out not throwing his punches with enough precision this time.

That's three minutes gone in the round.

Out decides to stand up.
Lundblad throws a wild combination but nothing lands.
Out rushes Lundblad and pushes him back against the cage in a clinch.
Out pulls guard effortlessly.
Out is actively looking for submissions from his back. He's worked himself a little space on the bottom and seems to be going for a triangle. No, he's switched into an armbar! That was slick! Lundblad rolls with it to try and escape but Out cranks on the arm and Lundblad is forced to tap out! This one is aaaaaaaaall over!
Ladies and gentlemen, after 3:45 of round 1, we have a winner by way of Submission (Armbar). Lights Out!
|
|
|
|
|
|
|
|
|
|
|
|
|
|
|
|
|
|
|
|
|
|
|
| S |
C
A |
G |
S |
C
B |
G |
|
S |
C |
G |
|
energy
A | B |
|
hype
A | B |
|
pop
A | B |
|
mgr
A | B |
|
FIGHT
RATING
40% |
|
|
|
|
|
|
|
Undercard bout
|
|
|
|
Undercard bout
|
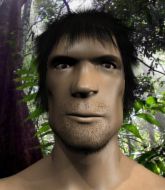
Coming up we have a light heavyweight MMA rules bout between Bubba Bistro (ranked 0 p4p, 0 weight class) and Niko Ruutikainen (ranked 0 p4p, 0 weight class). Over to our ring announcer for the fighter introductions!
 |
|
 |
| 188 cm
22
215 lbs
2 - 2 - 0 |
|
190 cm
22
220 lbs
1 - 0 - 0 |
BJJ Blue Belt
Solid Muay Thai
Big heart |
|
BJJ Blue Belt
Decent boxing
Solid chin |
|
| |
|
Ladies and gentlemen. This fight is 3 rounds, in the light heavyweight division.
Introducing the fighter to my left, fighting out of the red corner.
With a record of
2 - 2 - 0, fighting out of Tokyo, Bubba Bistro!
And introducing the fighter to my right, fighting out of the blue corner.
With a record of
1 - 0 - 0, fighting out of Tokyo, Niko Ruutikainen!
The judges for this bout are Yuuki Gou, Taro Takaoka and Shigeki Sano.
The bell rings for round one and we are underway!
Bistro misses with a body shot.
Bistro doesn't manage to clinch there - Ruutikainen circles away.
Bistro tries a head kick but it misses.
Ruutikainen is looking to clinch.
Ruutikainen decides to change it up a bit and drives through with a nice takedown into half guard.
Bistro wants to control but Ruutikainen is keeping busy and won't allow it.
Bistro makes his way to full guard. A much better position for Bistro.
Ruutikainen wants to control from the top but Bistro keeps moving.
Ruutikainen must be cautious of submissions here, given that his opponent has the superior Jiu Jitsu.
Bistro keeping full guard, as Ruutikainen tries to pass.
Bistro manages to escape and get back to his feet.
Bistro avoids a punch combination nicely.
Ruutikainen wants to clinch but Bistro slips to the side
and Bistro moves into the clinch.
Bistro lands a body punch in the clinch.
A right hand to the body from Bistro.
Bistro connects with a nasty looking knee right to Ruutikainen's face.

It looks like Niko Ruutikainen has been cut.
Ruutikainen looks gassed!
A right hand to the body from Bistro.
Bistro prevents the takedown attempt.
A head punch on the inside from Ruutikainen fails to land.
Knees in the clinch landing for Bistro.
Wooooo! Give it up for these two warriors! They are putting on a show!
Bistro working on landing some head shots here - that one got through nicely.
Ruutikainen misses with a hook from the clinch.
That's one minute gone in the round.
Bistro scores with a knee to the head.
Bistro with the Thai clinch, lands a knee to the head.
Knees to the body from Bistro.
Good body shot from Bistro.
Ruutikainen can't get the takedown.
Ruutikainen pushes Bistro back against the cage and lands a hook to the side of the head.
Bistro with the Thai clinch. He's looking to land a big knee but he's not managed it this time.
Ruutikainen goes for a takedown attempt but Bistro pushes him away and we're back to fighting at a distance.
Bubba Bistro has stuffed three takedown attempts in the round now. That's going to take a lot out of Niko Ruutikainen.
A swing and a miss from Ruutikainen.
Ruutikainen misses with a double jab
and Bistro counters with a head kick. That will keep Ruutikainen thinking before he tries any more sloppy attacks!
A clash of legs there as Bistro blocks the low kick.
Ruutikainen throws a jab, cross combination which is slipped
and Bistro counters with a big head kick but Ruutikainen shrugs it off.

Ruutikainen is rocked!
Bistro lands a brutal head kick. Ruutikainen looks out on his feet and Bistro throws more strikes until the ref is forced to stop the fight!
Ladies and gentlemen, after 1:47 of round 1, we have a winner by way of TKO (Kick and Punches). Bubba Bistro!
|
|
|
|
|
|
|
|
|
|
|
|
|
|
|
|
|
|
|
|
|
|
|
| S |
C
A |
G |
S |
C
B |
G |
|
S |
C |
G |
|
energy
A | B |
|
hype
A | B |
|
pop
A | B |
|
mgr
A | B |
|
FIGHT
RATING
0% |
|
|
|
|
|
|
|
Undercard bout
|
|
|
|
Undercard bout
|
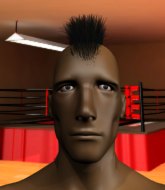
Coming up we have a light heavyweight MMA rules bout between Mark Mendez (ranked 0 p4p, 0 weight class) and dominickoy machida (ranked 0 p4p, 0 weight class). Mendez comes to the cage accompanied by Killswitch Engage - My Curse. machida comes into a darkened arena with his song building. the game kicks in, the lights come on and the crowd goes wild! What a showman! Both fighter's entrance songs getting the crowd jumping here.
 |
|
 |
| 183 cm
22
211 lbs
3 - 1 - 0 |
|
185 cm
18
205 lbs
2 - 1 - 0 |
Good takedowns
Counter striker
Prefers ground |
|
BJJ Blue Belt
Brawler
Determined |
|
| |
|
Ladies and gentlemen. This fight is 3 rounds, in the light heavyweight division.
Introducing the fighter to my left, fighting out of the red corner.
With a record of
3 - 1 - 0, fighting out of Tokyo, Mark Mendez!
And introducing the fighter to my right, fighting out of the blue corner.
With a record of
2 - 1 - 0, fighting out of Tokyo, dominickoy machida!
The judges for this bout are Shigeki Fujiwara, Yukihiro Shimada and Sosuke Kotani.
The bell rings for round one and we are underway!
machida doesn't manage to clinch there - Mendez circles away.
Mendez shoots in and bounces machida off the cage to secure the takedown into guard.
machida has his foot on Mendez's thigh. He's trying to push off and get in position for a triangle, I think. Mendez works his way back into a safe position though.
Mendez won't allow machida to get back to his feet.
machida looking for submissions off his back, moving his hips, looking for an opening.
machida has his foot on Mendez's thigh. He's trying to push off and get in position for a triangle, I think. Mendez works his way back into a safe position though.
machida looking for a sweep. Not yet machida, not yet.
Mendez trying to control but machida is working from the bottom.
Mendez won't allow machida to get back to his feet.
machida keeping busy on the bottom but Mendez has passed one foot through into half guard.
The fighters are pressed up against the cage, both looking to find a bit of space to work.
machida looks gassed!
Mendez slips a nice elbow through machida's hands, connecting with machida's forehead.
machida is not content to let Mendez control the position.
That's one minute gone in the round.
Mendez passes to full mount!
Mendez working the ground and pound effectively.
Mendez landing strikes, looking to finish!
machida wants to get back to his feet.
Mendez punishing his opponent with strikes.
machida is rocked!
machida squirming around on the bottom, looking to escape.
Mendez trying to control but machida is having none of it.
The fighters are starting to get a bit slippery now, which will make submissions a bit more difficult.
machida is trying to escape but when you're mounted that's not too easy.
Mendez landing shots from mount.
That's two minutes gone in the round.
Mendez has his opponent pinned against the cage, landing some nasty ground and pound that is really making a bit of a mess out of machida's face.
machida is still in real trouble! Can Mendez finish him?
machida tries to improve his position but instead Mendez has taken his back!
Mendez lands a shot to the head.
machida tries to roll but Mendez sticks to his back.
Mendez lands shots from the back.
Mendez is working for the rear naked choke. He has one arm under the chin but machida has hold of the other arm. A bit of a stalemate here.
This has been an exciting period of action!
machida showing good submission defense here.
machida seems to have recovered his senses.
Mendez is working hard for the rear naked choke here.
Mendez has been looking to land a fair amount of strikes on the ground. He might be looking to soften his opponent up in order to work for a submission.
That's three minutes gone in the round.
machida is trying to get back to his feet but Mendez has full control of the position and if anything, machida has just worked his way into a worse spot.
Mendez is working really hard to secure the rear naked choke. machida defends successfully for a significant amount of time. Both fighters are looking very determined.
Mendez connects with a series of strikes and the referee is calling for machida to escape the position.
Mendez is looking for the choke from the back position but machida is controlling his hands well.
This has been an exciting period of action!
Mendez scores with some strikes to the side of the head there. Good, points scoring shots.
Mendez scores with punches from the back.
machida trying to get back to his feet but Mendez is in full control for now.
machida is staying cool under pressure, defending well against the rear naked choke attempt from his opponent.
machida looking to stop the rear naked choke attempt by controlling the hands.

That's four minutes gone in the round.
Mendez is landing with strikes from the back.
machida is looking to escape here. Oh dear - Mendez has locked on a rear naked choke here! machida is tapping out! The fight is over!
Ladies and gentlemen, after 4:30 of round 1, we have a winner by way of Submission (RNC). Mark Mendez!
|
|
|
|
|
|
|
|
|
|
|
|
|
|
|
|
|
|
|
|
|
|
|
| S |
C
A |
G |
S |
C
B |
G |
|
S |
C |
G |
|
energy
A | B |
|
hype
A | B |
|
pop
A | B |
|
mgr
A | B |
|
FIGHT
RATING
93% |
|
|
|
|
|
|
|
Undercard bout
|
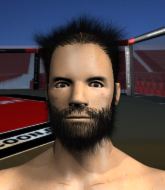
Coming up we have a welterweight MMA rules bout between Jouichirou Daisuke (ranked 0 p4p, 0 weight class) and Ran Sakamoto (ranked 0 p4p, 0 weight class). Daisuke comes to the cage accompanied by Ronald Jenkees - Stay Crunchy. Ran Sakamoto is the more experienced fighter, so let's see if that makes a difference tonight.
 |
|
 |
| 171 cm
19
176 lbs
2 - 1 - 0 |
|
173 cm
20
170 lbs
2 - 2 - 0 |
BJJ Blue Belt
Brawler
KO power |
|
BJJ Purple Belt
Counter striker
Solid chin |
|
| |
|
Ladies and gentlemen. This fight is 3 rounds, in the welterweight division.
Introducing the fighter to my left, fighting out of the red corner.
With a record of
2 - 1 - 0, fighting out of Tokyo, Jouichirou Daisuke!
And introducing the fighter to my right, fighting out of the blue corner.
With a record of
2 - 2 - 0, fighting out of Tokyo, Ran Sakamoto!
The judges for this bout are Kenichi Hosakawa, Sosuke Kotani and Yukihiro Yamamoto.
The bell rings for round one and we are underway!
Daisuke throws an uppercut from half a mile away. Sakamoto sees it coming and avoids it easily.
Sakamoto uses some good footwork to avoid the body shot by Daisuke.
Daisuke drops Sakamoto with a right and a left! Daisuke comes rushing in but Sakamoto regains his composure and manages to keep Daisuke in guard.
Daisuke advances position into side control!
Both fighters really going for it on the ground here!
Daisuke working hard here to secure a kimura but he's not really in the right position for it.
Daisuke lands a decent elbow from side control.
Daisuke working hard here to secure a kimura but he's not really in the right position for it.
The fans in attendance giving it up for the two fighters, who have really let it all hang out in the last minute or so!
Check out the look on Daisuke's face as he threw that strike - that's one determined fighter!
The fighters are pressed up against the cage, both looking to find a bit of space to work.
Sakamoto is trying to improve his position.
Sakamoto looks gassed!
Daisuke tries for a kimura but Sakamoto is defending well.
Daisuke tries to move to mount but Sakamoto blocks the move with his legs.
That's one minute gone in the round.
Daisuke thinks about going for a far side armbar but bails out and retains the dominant position instead.
Daisuke is looking to finish here, going for an Americana. Sakamoto knows the correct defense though, so he's OK.
Sakamoto on the wrong end of some ground and pound.
Daisuke thinks about going for a far side armbar but bails out and retains the dominant position instead.
The fighters are starting to get a bit slippery now, which will make submissions a bit more difficult.
Sakamoto prevents Daisuke from improving position.
Daisuke swings around for an armbar but Sakamoto sees it coming a mile off and turns beautifully into Daisuke's guard.
There's a bit of a scramble here and now Daisuke is on top in guard.
Daisuke wants to pass the guard but Sakamoto is keeping the position.
That's two minutes gone in the round.
Daisuke stopping the sweep attempt from Sakamoto.
Sakamoto working from the bottom, still in full guard. He's managed to get a loose triangle. Daisuke doesn't seem to be doing much to defend here, obviously he feels comfortable in the position. Daisuke manages to throw the legs off his shoulder and he's back into guard - no problem.
Sakamoto looking for a sweep. Not yet Sakamoto, not yet.
Daisuke is trying to work a guillotine from the top, or something like that? Don't know how he thinks he's going to get a finish from there.
Daisuke advances to half guard.
Daisuke is trying a forearm choke
I don't think that's going to do much at this level of the game.
Daisuke wants to work for an arm triangle but Sakamoto is really keeping half guard well and defending the submission attempt.
That's three minutes gone in the round.
Sakamoto is looking to sinch up a gullotine here but Daisuke pulls his head out easily.
The ref warns both fighters not to hold the cage as they work up against the meshing.
Sakamoto is defending against the submission attempts here by Daisuke.
Sakamoto on the receiving end of some nice ground and pound.
Daisuke is working for submissions here but there's nothing on.
Daisuke is nestled in close to Sakamoto, controlling him well. He's worked in a nice elbow to the side of the head as well, for good measure.
Daisuke moves nicely into side control.
Daisuke working away diligently from side control. Landing strikes effectively there - that will score him some points on the judges scorecards.
Daisuke tries for a kimura. Not really close to a finish though.
Sakamoto is trying to improve his position.
Daisuke tries for a kimura. Not really close to a finish though.
That's four minutes gone in the round.
Sakamoto is trying to get back to half guard. He's pushing on Daisuke's leg. He's managed it. Nice work.
Daisuke is nestled in close to Sakamoto, controlling him well. He's worked in a nice elbow to the side of the head as well, for good measure.
Daisuke is looking for a kimura. It's going to be difficult to finish that from half guard though and Sakamoto defends it well.
Daisuke lands with a punch from half guard.
Daisuke is thinking about going for an arm triangle but he can't free his leg.
Sakamoto is trying to get back to full guard.
As the round comes to an end the crowd are showing their appreciation for a great round of action.
Daisuke takes advantage of the dominant position to land a couple of big hammer fists.
Daisuke moves nicely into side control.
Daisuke is chipping away with strikes.
And thats the end of the round the fighters go back to their corners.
Jouichirou Daisuke dominated that round.
The referee calls time. The cornermen exit stage left and we're back to business.

Sakamoto avoids the body shot from Daisuke.
Nice defenses there by Sakamoto.
Daisuke drives through with a takedown into guard.
Sakamoto can't keep his opponent in guard - Daisuke advances to half guard, no doubt looking to mount.
Daisuke is working for a submission of some sort.
Sakamoto actively working from the bottom here.
Jouichirou Daisuke overall seems to be getting the better of the ground position in the fight so far.
Daisuke seems to be taking a bit of a break to think of his next move. He lands a short punch in the meantime.
Sakamoto is trying to defend against the ground and pound but Daisuke scores with a couple of nice shots.
Sakamoto is looking for a sweep. Daisuke is wise to his cunning plan and keeps the top position.
Sakamoto looking for submissions from an awkward position here.
Daisuke is looking for a kimura but Sakamoto is holding onto that half guard position, so it's hard for Daisuke to get the leverage.
Both fighters are absolutely exhausted here.
Daisuke slips a nice elbow through Sakamoto's hands, connecting with Sakamoto's forehead.
That's one minute gone in the round.
Sakamoto looking for submissions off his back.
Daisuke is looking for a kimura. It's going to be difficult to finish that from half guard though and Sakamoto defends it well.
Daisuke moves nicely into side control.
Daisuke scores with a couple of short elbows.
Sakamoto is moving his hips around well on the bottom and has managed to get back to half guard.
Daisuke is looking to pass the guard... He's managed it - he's now in full mount!
Sakamoto is desperately trying to improve his position but Daisuke has a good base and remains in mount.
Sakamoto manages to regain half guard. Good work.
Sakamoto looking to work for a kimura from the bottom.
Daisuke is trying for a guillotine from the top but the pressure isn't in the right place so Sakamoto is just riding it out for now. Daisuke eventually gives up the hold.
That's two minutes gone in the round.
Daisuke missing with the ground and pound from half guard.
Daisuke frees up his trapped foot and advances to mount.
Sakamoto gets back to half guard.
The fighters are battling for position here. Sakamoto manages to regain full guard. Nice work.
Sakamoto is active off his back here, looking for submissions.
Daisuke thinks about going for a leg but decides against it, in order to maintain the position.
Daisuke is trying to work a guillotine from the top, or something like that? Don't know how he thinks he's going to get a finish from there.
Sakamoto looking for submissions from the bottom here. Moving his hips around, possibly looking for an armbar.
That's three minutes gone in the round.
Daisuke forces his way into half guard.
Daisuke working Sakamoto over with strikes.
Daisuke working Sakamoto over with strikes.
Daisuke is trying for a guillotine from the top but the pressure isn't in the right place so Sakamoto is just riding it out for now. Daisuke eventually gives up the hold.
Daisuke is looking for a kimura but he's never going to get it from there.
Daisuke tries to pass the half guard into mount. Sakamoto knows what he's doing though and prevents the attempt.
Daisuke is working for a submission of some sort.
Daisuke is looking for an arm triangle, whilst trying to pass to side control. Sakamoto doesn't seem that keen to cooperate though. No luck this time Daisuke.
That's four minutes gone in the round.
Sakamoto actively working from the bottom here.
Daisuke passes the half guard and he's now in mount! Big trouble for Sakamoto!
Daisuke is in the full mount, landing strikes.
Daisuke looking for an armbar but decides to keep the dominant position instead.
Daisuke is in full mount, looking to secure a guillotine but Sakamoto is surviving well by controlling Daisuke's body position as best he can.
The crowd applaud the fighters efforts here as the round comes to an end.
Daisuke with some aggressive grappling here. He's looking for submissions here, rather than waiting for the opportunity to counter.
Sakamoto is wriggling around trying to escape.
And thats the end of the round the fighters go back to their corners.
Jouichirou Daisuke dominated that second round.
OK. That's time! The bell goes and we're back to the action. This is the final round!

Daisuke attempts a low kick but it misses it's target.
A bone on bone clash there as Sakamoto blocks the leg kick.
Jouichirou Daisuke is looking to throw some combinations by the looks of things.
Daisuke throws a hook to the body but it doesn't connect.
Daisuke waving his hands out infront of him, looking to distract Sakamoto.
Daisuke throws a monster uppercut resembling something out of street fighter but it doesn't land.
Sakamoto shoots in for a takedown but Daisuke shows good takedown defense.
Sakamoto uses some good footwork to avoid the body shot by Daisuke.
Sakamoto shoots for a double leg takedown but Daisuke sprawls well. He's pushed Sakamoto's face into the mat and manages to get back to his feet relatively easily.
Daisuke misses with a wild body shot.
Daisuke catches Sakamoto with a nice straight right. He seems pissed - ooooh, it's on now! On like donkey kong!
Daisuke gets a takedown into half guard.
The referee walks around the fighters to get a better view of the action. Daisuke lands a nice short elbow.
Sakamoto takes a big intake of breath there - he's definitely tired.
Daisuke is trying for a guillotine from the top but the pressure isn't in the right place so Sakamoto is just riding it out for now. Daisuke eventually gives up the hold.
Daisuke working some ground and pound from close in. He's looking to maintain this position and strike for a while by the looks of things... although he'll probably advance to full mount in a minute now I've said that.
That's one minute gone in the round.
Daisuke is thinking about going for an arm triangle but he can't free his leg.
Daisuke lands strikes from half guard.
Daisuke wants to pass the guard but Sakamoto is defending well.
Daisuke scoring with strikes to the body and head.
Daisuke wants to pass to mount but Sakamoto is defending the position.
Nice strikes from Daisuke there.
Sakamoto is looking for a sweep. Daisuke is wise to his cunning plan and keeps the top position.
Daisuke is trying to work for a kimura. He's got his hands clasped together - this could be trouble! No, Sakamoto has managed to free his arm - good work.
Sakamoto actively working from the bottom here.
Sakamoto is trying to get back to full guard.
That's two minutes gone in the round.
My god... these two guys really need to pick up the pace or everyone will leave to go get a beer.
Sakamoto looking for submissions from an awkward position here.
Daisuke is thinking about going for an arm triangle but he can't free his leg.
Daisuke is pressing down on Sakamoto's thigh, looking to free his foot. Sakamoto is holding on for now.
Sakamoto is looking for a sweep. Daisuke is wise to his cunning plan and keeps the top position.
Neither fighter is doing enough for the referee's liking and he's decided to stand them back up.
Daisuke connects with a crisp jab.
Daisuke tries to land a front kick but Sakamoto steps back. That was a bit too telegraphed.
Sakamoto is the more experienced fighter here and he's going to need to draw on some of that experience if he's going to pull this one out the bag.
Daisuke shoots in from a long way out. He's driving through with the takedown attempt and he eventually gets it, landing in Sakamoto's guard.
Daisuke passes Sakamoto's left leg - he's now in half guard.
Daisuke is scoring with some nice ground and pound from the dominant position.
Daisuke is trying a forearm choke
I don't think that's going to do much at this level of the game.
That's three minutes gone in the round.
Daisuke wants to pass the guard but Sakamoto is defending well.
Sakamoto is looking to sinch up a gullotine here but Daisuke pulls his head out easily.
Daisuke works his foot free and advances to mount.
Daisuke working for a submission but Sakamoto is keeping him at bay.
Sakamoto defends a decent attempt at a guillotine from Daisuke.
Daisuke lands a big shot there that rocks Sakamoto but he's holding on and managing to survive for now.
A nice elbow there by Daisuke.
That's four minutes gone in the round.
Sakamoto can't escape the position.
Daisuke lands a big elbow.
Daisuke with some aggressive grappling here. He's looking for submissions here, rather than waiting for the opportunity to counter.
Daisuke landing strikes from the mount and Sakamoto is in trouble!
Sakamoto working to try and regain half guard.
Daisuke pausing momentarily but resumes with a couple of decent strikes that do a bit of damage.
Sakamoto slips a leg in and gets back to half guard.
Daisuke trying to pass the guard but Sakamoto defending well.
The crowd applaud the fighters efforts here as the round comes to an end.
Sakamoto works his way to full guard. Good work.
Daisuke drops back for a leg! It's a sloppy attempt though and Daisuke jumps back into guard quickly, to retain the dominant position.
Ran Sakamoto has stepped it up - he knows he needs a finish here!
Daisuke passes into half guard.
And that's the end of the fight!
Jouichirou Daisuke showed his dominance in that final round.
Well Daisuke has outscored his opponent in every aspect of the fight today. Only a scarily incompetent judge or two will keep him from a well deserved win... Over to the ring announcer for the scorecards.
Ladies and gentlemen, after 3 rounds of action, we go to the scorecards for a decision.
Judge Kenichi Hosakawa scores the fight for Jouichirou Daisuke!
Judge Sosuke Kotani scores the fight for Jouichirou Daisuke!
Judge Yukihiro Yamamoto scores the fight for Jouichirou Daisuke!
Jouichirou Daisuke wins by unanimous decision!
|
|
|
|
|
|
|
|
|
|
|
|
|
|
|
|
|
|
|
|
|
|
|
| S |
C
A |
G |
S |
C
B |
G |
|
S |
C |
G |
|
energy
A | B |
|
hype
A | B |
|
pop
A | B |
|
mgr
A | B |
|
FIGHT
RATING
64% |
|
|
|
|
|
|
|
Undercard bout
|
Coming up we have a lightweight MMA rules bout between Jenji Ueda (ranked 0 p4p, 0 weight class) and Liu Kang (ranked 0 p4p, 0 weight class). Ueda comes into the arena with Requiem for a Dream blaring out of the sound system. Liu Kang has the eye of the tiger tonight.
 |
|
 |
| 172 cm
21
161 lbs
1 - 0 - 0 |
|
170 cm
20
163 lbs
1 - 0 - 0 |
BJJ Blue Belt
Basic striking
Granite chin |
|
BJJ Purple Belt
Brawler
Granite chin |
|
| |
|
Ladies and gentlemen. This fight is 3 rounds, in the lightweight division.
Introducing the fighter to my left, fighting out of the red corner.
With a record of
1 - 0 - 0, fighting out of Tokyo, Jenji Ueda!
And introducing the fighter to my right, fighting out of the blue corner.
With a record of
1 - 0 - 0, fighting out of Tokyo, Liu Kang!
The judges for this bout are Yukihiro Shimada, Yukihiro Yamamoto and Shirou Masuda.
The bell rings for round one and we are underway!
Ueda shoots in for a takedown and gets it.
Kang moves his hips nicely and gets into full guard.
Ueda knows he needs to get back to his feet asap. He's simply no match for Kang on the ground.
Ueda wants to control from the top but Kang keeps moving.
Kang throwing his legs up looking for a triangle.
Kang working from the bottom, still in full guard. He's managed to get a loose triangle. Ueda doesn't seem to be doing much to defend here, obviously he feels comfortable in the position. Ueda manages to throw the legs off his shoulder and he's back into guard - no problem.
Kang is working actively off his back, looking to secure an arm or perhaps work for a triangle.
Kang looks gassed!
Ueda throws a big right hand that misses.
Ueda has to be careful here, sitting in the guard of a superior BJJ player.
That's one minute gone in the round.
Kang looking to hit a scissor sweep but Ueda is one step ahead there.
Ueda is working the ground and pound from guard. He might want to try advancing position though to get more of an impact.
Kang keeping moving, preventing Ueda from controlling successfully.
Ueda scores with a decent looking elbow strike.
Ueda advances to half guard.
Ueda is keen to just control but Kang is a slippery customer.
Ueda looking to pass the half guard. Not this time.
The fighters are going at a pretty good pace and they're both starting to sweat now.
Kang is looking for a sweep. Ueda is wise to his cunning plan and keeps the top position.
That's two minutes gone in the round.
A few boos can be heard. I'm sure they will multiply if the fighters don't pick up the pace.
Kang looking for submissions from an awkward position here.
Ueda stands up and beckons Kang to join him on the feet.
Ueda gets in close and instigates a clinch.
Kang has Ueda pressed up against the cage and is working for takedown. Ueda manages to improve position though and keeps the fight standing.
Ueda stalls.
Ueda breaks from the clinch.
Ueda gets the takedown into side control.
Kang sneaks back into half guard.
Kang wants to control but Ueda is keeping busy.
That's three minutes gone in the round.
Kang works his way to full guard. Good work.
Kang is working an open guard here, looking to improve his position. No doubt that will leave him open to counters but at least he's being more offensive.
Kang lands a beautiful switch and he's in full mount! That could spell trouble for Ueda!
The ref warns both fighters not to hold the cage as they work up against the meshing.
Kang moves into side control, trying to work for a kimura. That looks painful! Will he finish!!?? No, Ueda has worked his arm free - good work by Ueda!
Kang has had enough of the ground for now and decides to stand.
Kang with a lazy takedown attempt
and Ueda counters with a nice double leg into half guard.
Ueda not throwing his punches with enough precision this time.
That's four minutes gone in the round.
Kang is looking to sinch up a gullotine here but Ueda pulls his head out easily.
Ueda wants to pass the guard but Kang is defending well.
Ueda trying to control the action but Kang is working from the bottom.
Ueda prevents Kang from improving his position.
Ueda is scoring with some nice ground and pound from the dominant position.
Kang has hold of Ueda's hands but Ueda slips his arm to the side and lands an elbow.
The crowd applaud the fighters efforts here as the round comes to an end.
Kang on the receiving end of some nice ground and pound.
Kang is looking to regain full guard. Not this time though.
The fighters are pressed up against the cage, both looking to find a bit of space to work.
Kang works his way to full guard. Good work.
And thats the end of the round the fighters go back to their corners.
Jenji Ueda dominated that round.
That's time! Back to the action!
Ueda looking to shoot here. He's gone for it and he's landed a takedown into mount! Oh, that's bad for Kang!
Kang keeping his composure momentarily, calmly looking to get back to half guard.
Ueda scoring with some good ground and pound from mount here. Will he manage to finish Kang?
Ueda can't quite control the action as he would like just now, as Kang is looking to escape.
Kang sneaks a leg under to get to half guard.
Ueda wants to free his trapped foot but Kang is holding on for dear life with his legs.
Both fighters are absolutely exhausted here.
Ueda wants to take a breather but Kang is having none of it.
That's one minute gone in the round.
Ueda drops an elbow to the side of Kang's head.
Ueda is looking for a kimura. It's going to be difficult to finish that from half guard though and Kang defends it well.
Kang looking for submissions from an awkward position here.
Kang manages to get to full guard.
Kang tries to land a sweep but no joy.
Ueda trying to pass the guard but can't manage it just yet.
Ueda wants to control from the top but Kang keeps moving.
That's two minutes gone in the round.
Neither fighter has done anything of merit for a good minute or two here and the crowd are not happy about it.
Kang looking for submissions off his back, moving his hips, looking for an opening.
Jenji Ueda overall seems to be getting the better of the ground position in the fight so far.
Kang has a loose triangle. He'll be looking to tighten that up but Ueda can see exactly what he's planning and manages to posture up and free himself.
Ueda slips effortlessly into side control - very nice.
Ueda prevents Kang from escaping the position.
Kang tries to improve position but can't.
Ueda is chipping away with strikes.
Kang prevents Ueda from improving position.
Ueda trying to control the position but Kang is working away.
That's three minutes gone in the round.
Kang is looking for a sweep.
Ueda taking a breather here.
Ueda lands a few punches from side control.
Ueda is looking to take a break and control but Kang is keeping him honest, looking to work from the bottom.
Kang is trying to get back to half guard. He's pushing on Ueda's leg. He's managed it. Nice work.
Ueda looks towards his corner to check for any instructions. The corner give him nothing to work with, so he cracks Kang with a short hammerfist. I guess that's as good as any advice he could get in this position.
That's four minutes gone in the round.
Ueda thows a huge punch but Kang dodges it nicely.
Kang wants to improve his position but Ueda is controlling well.
Ueda working over Kang with some ground and pound. Kang looks like he wants out of this position, which is understandable.
Ueda landing with strikes to the body and head, softening up his opponent.
Kang wants to get back to full guard.
Kang on the receiving end of some nice ground and pound.
Kang taking some punishment here, with Ueda in his half guard.
Kang on the receiving end of some nice ground and pound.
Ueda is looking for a kimura. It's going to be difficult to finish that from half guard though and Kang defends it well.
Kang gets full guard.
And thats the end of the round the fighters go back to their corners.
That was a close second round but I would say that Jenji Ueda will probably get the nod.
The referee calls time. The cornermen exit stage left and we're back to business. This is the final round!
Kang steps to his left, right into the path of a big body kick from Ueda. That one must have hurt.
Ueda fails in his attempt to clinch.
Ueda ducks down and throws a hook to the body but Kang moves away.
Ueda missing with a left hand there. Kang was out of range so wasted energy throwing that one.
Jenji Ueda seems to be the more aggressive standup fighter in this bout.
Kang tries to clinch there but Ueda circles away.
Ueda tries to clinch up but Kang circles away and keeps his distance.
Ueda shoots in for a takedown! He's got it and he's managed to land in full mount! That's better than Ueda was expecting from the takedown attempt, I'm sure!
Kang is looking to get to half guard.
Kang is persisting with the attempt to improve his position.
Ueda scoring with strikes but Kang is staying in there.
Both fighters are breathing heavily.
That's one minute gone in the round.
Ueda punishing his opponent with strikes.
Kang tries to lock up and control but Ueda gives him a forearm to the face and pushes him away.
Ueda lands with some strikes.
Kang is squirming around, avoiding Ueda's attempts to control the action.
Kang squirming around on the bottom, looking to escape.
Kang is trying desperately to improve position.
Ueda scoring with strikes but Kang is staying in there.
Ueda punishing his opponent with strikes.
Ueda has his opponent pinned against the cage, landing some nasty ground and pound that is really making a bit of a mess out of Kang's face.
Ueda breaks from Kang's wrist control and lands an elbow.
Kang is wriggling around trying to escape.
That's two minutes gone in the round.
Kang bucks up and manages to get a nice reversal! He's in guard on the top - nicely done!
Kang slips effortlessly into side control - very nice.
Ueda is trying to get back to half guard. He's pushing on Kang's leg. He's managed it. Nice work.
The fighters are battling for position here. Ueda manages to regain full guard. Nice work.
Kang stands up and looks to throw the legs aside to pass to side control. Ueda swivels though and keeps the full guard.
Kang is trying to work a guillotine from the top, or something like that? Don't know how he thinks he's going to get a finish from there.
That's three minutes gone in the round.
Kang trying to control the position from guard on top but Ueda is wriggling around, looking for whatever he can.
Kang preventing the sweep.
Kang tries to stand but Ueda is controlling from the bottom.
Kang trying to control the position from guard on top but Ueda is wriggling around, looking for whatever he can.
Neither fighter is doing enough for the referee's liking and he's decided to stand them back up.
Ueda moves into the clinch.
Stalling in the clinch from Ueda.
That's four minutes gone in the round.
The crowd are starting to boo a lack of action.
A bit of stalling here from Kang.
Kang has Ueda pressed up against the cage and is working for takedown. Ueda manages to improve position though and keeps the fight standing.
Kang tries to jump guard but he falls flat on his backside. Ueda smiles and moves away.
Ueda throws a head kick but Kang moves out of range.
Kang gets taken down but at least he's managed to land in guard.
Kang throwing his legs up looking for a triangle.
Kang manages to sweep nicely, so he's now on top. Ueda manages to get himself to full guard.
Kang is holding a leg here, probably looking for an ankle lock - he drops back and goes for it! Ueda is in trouble! Is it all over??? No! Ueda has escaped and now he's on top!
And that's the end of the fight!
Jenji Ueda showed his dominance in that final round.
Well Ueda has outscored his opponent in every aspect of the fight today. Only a scarily incompetent judge or two will keep him from a well deserved win... Over to the ring announcer for the scorecards.
Ladies and gentlemen, after 3 rounds of action, we go to the scorecards for a decision.
Judge Yukihiro Shimada scores the fight for Jenji Ueda!
Judge Yukihiro Yamamoto scores the fight for Jenji Ueda!
Judge Shirou Masuda scores the fight for Jenji Ueda!
Jenji Ueda wins by unanimous decision!
|
|
|
|
|
|
|
|
|
|
|
|
|
|
|
|
|
|
|
|
|
|
|
| S |
C
A |
G |
S |
C
B |
G |
|
S |
C |
G |
|
energy
A | B |
|
hype
A | B |
|
pop
A | B |
|
mgr
A | B |
|
FIGHT
RATING
55% |
|
|
|
|
|
|
|
Undercard bout
|
|
|
|
Co-main event
|
Coming up we have a middleweight MMA rules bout between Michael James (ranked 0 p4p, 0 weight class) and Dan a (ranked 0 p4p, 0 weight class). a is bouncing up and down as he enters the arena, backed by An extremely loud farting noise. Dan a has the power to score a knockout today if he connects clean with Michael James's chin.
 |
|
 |
| 190 cm
20
185 lbs
4 - 1 - 0 |
|
182 cm
22
185 lbs
3 - 0 - 0 |
BJJ Blue Belt
Basic striking
Self confident |
|
BJJ Purple Belt
Brawler
Granite chin |
|
| |
|
Ladies and gentlemen. This fight is 3 rounds, in the middleweight division.
Introducing the fighter to my left, fighting out of the red corner.
With a record of
4 - 1 - 0, fighting out of Tokyo, Michael James!
And introducing the fighter to my right, fighting out of the blue corner.
With a record of
3 - 0 - 0, fighting out of Tokyo, Dan a!
The judges for this bout are Yuuki Gou, Shirou Masuda and Tatsuya Matsuyama.
The bell rings for round one and we are underway!
a shoots in and gets a takedown into half guard. a showed some decent athleticism there.
James is trying to get back to full guard.
a is trying for a guillotine from the top but the pressure isn't in the right place so James is just riding it out for now. a eventually gives up the hold.
a seems very keen to just sit and control from half guard but James does not like that idea so much and is remaining active off his back.
James gets full guard.
a trying to control but James is working from the bottom.
James has his foot on a's thigh. He's trying to push off and get in position for a triangle, I think. a works his way back into a safe position though.
a looking to pass the guard.
James escapes his hips to the side and looks to be working for an armbar. a gives him a little smile and shakes his head. No chance.
a passes into half guard.
That's one minute gone in the round.
James is looking to regain full guard. Not this time though.
Both fighters really going for it on the ground here!
a trying to control the action but James is working from the bottom.
a is looking for an arm triangle, whilst trying to pass to side control. James doesn't seem that keen to cooperate though. No luck this time a.
James gets full guard.
James looking to hit a scissor sweep but a is one step ahead there.
James is breathing heavily.
The fighters are going at a pretty good pace and they're both starting to sweat now.
a trying to control the position from guard on top but James is wriggling around, looking for whatever he can.
James looks to be working for a triangle here. Oh, it looks like he might have it! a has picked James up and slammed him! James can't keep hold of the triangle and a manages to pass to side control!
That's two minutes gone in the round.
A lull in the action here being met with boos from the crowd.
James is looking to regain half guard here but a keeps moving and retains side control.
a tries for a kimura. Not really close to a finish though.
a tries for a kimura but James is defending well.
a scoring with punches and elbows.
James is sneaking out the side here. He's bucked a off and has taken his back!
James doesn't have the hooks in and a manages to turn into his guard.
a with a couple of shots to the head there. Not particularly brutal.
James keeping busy on the bottom but a has passed one foot through into half guard.
James looking for submissions off his back.
That's three minutes gone in the round.
James is looking to sinch up a gullotine here but a pulls his head out easily.
James tries to roll over but a keeps him under control.
a throwing shots but they're hitting the canvas more than the man.
James is looking to sinch up a gullotine here but a pulls his head out easily.
James moves his hips nicely and gets into full guard.
a trying to land body shots but he keeps hitting the mat.
James had isolated an arm as going for an omaplata. a is defending the submission well but is in a very vulnerable position. James Is leaning forward trying to finish the omaplata but decides to abandon it, and take a's back instead.
a defending nicely against the rear naked choke attempt.
That's four minutes gone in the round.
The crowd are getting on the fighters' backs, as the pace has dropped off in the last minute or so.
a trying to control the position but James manages to sink in the hooks.
The fighters are pressed up against the cage, both looking to find a bit of space to work.
a turns into James and is now in his guard.
a passes into half guard.
James is not content to let a control the position.
a is working for submissions here but there's nothing on.
James is trying to get back to full guard.
James looking for submissions off his back.
James is trying to stand up here but a is controlling him well.
James actively working from the bottom here.
And thats the end of the round the fighters go back to their corners.
Dan a dominated that round.
That's time! James's corner gives him a slap on the ass as he gets ready to fight.
a tries to shoot in for a takedown. He's got hold of a leg but James swivels and escapes.
James closes the distance and looks for a trip takedown... aaaand he's got it - James lands in his opponent's guard.
a keeping full guard, as James tries to pass.
James is holding a leg here, probably looking for an ankle lock - he drops back and goes for it! a is in trouble! Is it all over??? No! a has escaped and now he's on top!
a scoring with some ground and pound.
The ref warns both fighters not to hold the cage as they work up against the meshing.
a advances to half guard.
Both fighters are absolutely exhausted here.
The two fighters exchange a few words. I couldn't hear what they were saying but maybe it's more fun if you make it up yourself. a connects with a nice short shot to James's temple.
a wants to work for an arm triangle but James is really keeping half guard well and defending the submission attempt.
a prevents James from improving his position.
That's one minute gone in the round.
James is working hard here to advance position.
a is looking for a kimura but he's never going to get it from there.
a is trying to work for a kimura but James is defending well.
James gets full guard.
a lands a couple of decent looking shots.
a thinks about going for a leg but decides against it, in order to maintain the position.
a working some strikes from top position.
a trying to control but James is working from the bottom.
That's two minutes gone in the round.
a stands and throws James's legs to the side, diving into side control.
a creates a bit of distance and throws down some hard shots.
James is trying to escape the position but a is controlling the position.
a working the head and body with strikes.
a looking for an arm triangle but it's way too loose to do anything.
a wants to control but James is keeping him busy.
a working away diligently from side control. Landing strikes effectively there - that will score him some points on the judges scorecards.
a has knee on belly and now moves to full mount! Trouble for James!
James tries to get back to half guard but can't.
James looking to escape from mount but he's given up his back!
James is trying to break free.
Dan a has got the better of the ground game so far.
That's three minutes gone in the round.
James manages to reverse the position and now he's in a's guard. Nice work there by James.
a has the superior BJJ but he's also working some ground strikes into his gameplan.
James stands and throws a's legs to the side, diving into side control.
James decides to stand back up. James steps back and let's a get back to his feet.
a fails with an attempt to clinch.
James tries for a takedown but a circles away easily
and a counters with a right hand to the body.
James wants to clinch.
James shoots in and drives through. a sprawls well.
James tries for a takedown but a circles away easily
and a counters with a nice uppercut.
That's three failed takedown attempts in the round for Michael James. That's going to take a lot out of him.
a gets a takedown into half guard.
a is keeping good posture, landing some ground and pound.
That's four minutes gone in the round.
a is looking to take a break and control but James is keeping him honest, looking to work from the bottom.
James works his way to full guard. Good work.
James looking for submissions off his back, moving his hips, looking for an opening.
James looking for a sweep. Not yet James, not yet.
James has his foot on a's thigh. He's trying to push off and get in position for a triangle, I think. a works his way back into a safe position though.
a trying to control but James is working from the bottom.
James escapes his hips to the side and looks to be working for an armbar. a gives him a little smile and shakes his head. No chance.
a trying to control the position from guard on top but James is wriggling around, looking for whatever he can.
And thats the end of the round the fighters go back to their corners.
Dan a showed his class in that round. I'd imagine he'll take it on all the scorecards.
Well, the break between rounds is over. Let's get back to the scrappin! This is the final round!
James tries for a takedown but a circles away easily
and James takes a counter punch right on the button for his troubles.
James doesn't succeed with the takedown
and a counters with a takedown into side control.
a is looking to take a break and control but James is keeping him honest, looking to work from the bottom.
James is trying to get back to half guard. He's pushing on a's leg. He's managed it. Nice work.
James wants to get back to full guard.
a lands with an elbow from half guard - that looked like it hurt.
James gets full guard.
a working some ground and pound from guard but it's not doing any damage.
James has a loose triangle. He'll be looking to tighten that up but a can see exactly what he's planning and manages to posture up and free himself.
Both fighters are breathing heavily.
James throwing his legs up looking for a triangle.
That's one minute gone in the round.
James throws his legs up looking to secure a triangle. Oh, that looks pretty tight, I gotta say! a escapes and throws James's legs to the side, diving into side control!
James is looking for a sweep.
James manages to land a sweep and he's now on top! Lovely Jiu Jitsu!
James is looking for a kimura but he's never going to get it from there.
a looking for submissions off his back.
James is looking for a kimura. It's going to be difficult to finish that from half guard though and a defends it well.
That's two minutes gone in the round.
The crowd are hurling abuse towards the fighters... You can hardly blame them though because there isn't a lot going on in the fight.
James passes to side control.
a gets one leg under and gets the fight to half guard.
James trying to pass the guard but a defending well.
a moves his hips nicely and gets into full guard.
James stands up and looks to throw the legs aside to pass to side control. a swivels though and keeps the full guard.
a looking for a sweep. Not yet a, not yet.
James works a leg free and moves into half guard.
a wants to get back to full guard.
James is trying a forearm choke
I don't think that's going to do much at this level of the game.
That's three minutes gone in the round.
a is pressing down on James's left leg trying to get back to full guard. He's managed it.
James won't allow a to sweep him here.
A real slowdown in the pace of the fight for a moment, as a holds on and takes a little breather.
a thows some rabbit punches from the bottom but they don't do any damage.
a looking for submissions from the bottom here. Moving his hips around, possibly looking for an armbar.
James passes a's left leg - he's now in half guard.
James is trying to work for a kimura. He's got his hands clasped together - this could be trouble! No, a has managed to free his arm - good work.
a works his way to full guard. Good work.
That's four minutes gone in the round.
a bucks up whilst keeping hold of a body lock, managing to reverse the position. Now he's in top in James's guard.
James escapes his hips to the side and looks to be working for an armbar. a gives him a little smile and shakes his head. No chance.
James is active off his back here, looking for submissions.
James wants to sweep but no luck.
a passes easily into side control. Nice work.
James manages to get back to half guard.
a working the head and body with strikes.
a not landing any meaningful shots this time.
a is trying to control the action in half guard but James is working away on the bottom, looking perhaps to get back to full guard.
a passes to side control.
a passes to full mount! That's big trouble for James!
And that's the end of the fight!
Dan a comfortably won the final round on my scorecard.
Well a has outworked and out performed his opponent in all aspects of the game today. He was simply too good and the decision should be no more than a formality. Over to the ring announcer for the scorecards.
Ladies and gentlemen, after 3 rounds of action, we go to the scorecards for a decision.
Judge Yuuki Gou scores the fight for Dan a!
Judge Shirou Masuda scores the fight for Dan a!
Judge Tatsuya Matsuyama scores the fight for Dan a!
Dan a wins by unanimous decision!
|
|
|
|
|
|
|
|
|
|
|
|
|
|
|
|
|
|
|
|
|
|
|
| S |
C
A |
G |
S |
C
B |
G |
|
S |
C |
G |
|
energy
A | B |
|
hype
A | B |
|
pop
A | B |
|
mgr
A | B |
|
FIGHT
RATING
70% |
|
|
|
|
|
|
|
Main event
|
Coming up we have a welterweight MMA rules bout between Glenn Galloway (ranked 0 p4p, 0 weight class) and Rocky Taylor Gadd (ranked 0 p4p, 0 weight class). Galloway comes to the cage accompanied by Overcome by Creed. Rocky Taylor Gadd has the power to score a knockout today if he connects clean with Glenn Galloway's chin.
 |
|
 |
| 182 cm
19
170 lbs
3 - 0 - 0 |
|
183 cm
22
180 lbs
3 - 0 - 0 |
BJJ Blue Belt
Counter striker
Good chin |
|
BJJ Blue Belt
Decent boxing
Heavy handed |
|
| |
|
Ladies and gentlemen. This fight is 3 rounds, in the welterweight division.
Introducing the fighter to my left, fighting out of the red corner.
With a record of
3 - 0 - 0, fighting out of Tokyo, Glenn Galloway!
And introducing the fighter to my right, fighting out of the blue corner.
With a record of
3 - 0 - 0, fighting out of Tokyo, Rocky Taylor Gadd!
The judges for this bout are Ren Mimura, Sosuke Kotani and Kenichi Hosakawa.
The bell rings for round one and we are underway!
Taylor Gadd rushes forward with a series of wild hooks but Galloway moves out of range and avoids them all easily.
Galloway misses with the combination.
Galloway shoots for a double leg takedown but Taylor Gadd sprawls well. He's pushed Galloway's face into the mat and manages to get back to his feet relatively easily.
Taylor Gadd misses with a series of wild punches.
Galloway pushes Taylor Gadd up against the cage in a clinch.
Taylor Gadd is fighting off a takedown attempt but Galloway is just too persistent for him and manages to trip Taylor Gadd to the mat. Taylor Gadd regains guard as soon as the fighters hit the mat.
Galloway wants to control from the top but Taylor Gadd keeps moving.
Taylor Gadd looking to hit a scissor sweep but Galloway is one step ahead there.
Taylor Gadd looking for submissions off his back, moving his hips, looking for an opening.
Galloway wants to control from the top but Taylor Gadd keeps moving.
Galloway missing there with some ground and pound from the guard.
Taylor Gadd looking to sweep here. No luck so far.
That's one minute gone in the round.
Galloway looking to pass the guard.
Taylor Gadd looking for submissions from the bottom here. Moving his hips around, possibly looking for an armbar.
Both fighters really going for it on the ground here!
Galloway pushes down on Taylor Gadd's leg and manages to get into half guard.
Taylor Gadd moves into full guard.
Galloway stopping the sweep attempt from Taylor Gadd.
Galloway looking to pass the guard.
Galloway avoids a guillotine attempt easily.
The ref warns both fighters not to hold the cage as they work up against the meshing.
Taylor Gadd looking to sweep here. No luck so far.
Taylor Gadd looks gassed!
That's two minutes gone in the round.
Galloway sneaks a leg through and gets to half guard. That was like a knife through butter how easily he passed Taylor Gadd's guard.
The fighters are going at a pretty good pace and they're both starting to sweat now.
Galloway is looking for a kimura but he's never going to get it from there.
Taylor Gadd is looking to escape.
Galloway tries to pass the half guard into mount. Taylor Gadd knows what he's doing though and prevents the attempt.
Galloway is nestled in close to Taylor Gadd, controlling him well. He's worked in a nice elbow to the side of the head as well, for good measure.
Galloway not landing any meaningful shots this time.
The referee walks around the fighters to get a better view of the action. Galloway lands a nice short elbow.
Taylor Gadd looking to work for a kimura from the bottom.
Taylor Gadd is looking for a sweep. Galloway is wise to his cunning plan and keeps the top position.
That's three minutes gone in the round.
The referee has ruled that neither fighter is active enough on the ground and has stood them back up.
Galloway darts in and lands a nice takedown into half guard.
Galloway wants to work for an arm triangle but Taylor Gadd is really keeping half guard well and defending the submission attempt.
Taylor Gadd blocking the ground and pound attempt from Galloway.
Galloway passes the guard and advances to mount!
Galloway breaks from Taylor Gadd's wrist control and lands an elbow.
Galloway with some aggressive grappling here. He's looking for submissions here, rather than waiting for the opportunity to counter.
Galloway throws some shoulder strikes here and then postures up. Oh, he's gone for an armbar! Taylor Gadd has his hands clasped together but Galloway breaks the hold and Taylor Gadd is forced to tap! This one is aaaaaaaaaaall over! That was lightning fast by Galloway!
Ladies and gentlemen, after 4:04 of round 1, we have a winner by way of Submission (Armbar). Glenn Galloway!
|
|
|
|
|
|
|
|
|
|
|
|
|
|
|
|
|
|
|
|
|
|
|
| S |
C
A |
G |
S |
C
B |
G |
|
S |
C |
G |
|
energy
A | B |
|
hype
A | B |
|
pop
A | B |
|
mgr
A | B |
|
FIGHT
RATING
58% |
|
|
|
|
|
|
|
|
|
|
