 |
JLF 2: New Breed PBP Commentary |
Undercard bout
|
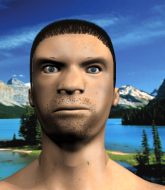
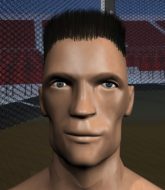
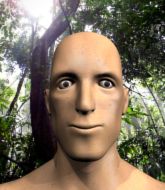
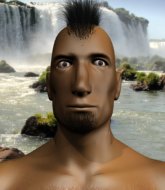
Coming up we have a featherweight MMA rules bout between Eddie Han (ranked 0 p4p, 0 weight class) and Jorge Antonio (ranked 0 p4p, 0 weight class). Antonio has chosen I'm Coming as his entrance music. Eddie Han has a significant reach advantage - let's see if he can make it count.
 |
|
 |
| 181 cm
22
150 lbs
1 - 0 - 0 |
|
170 cm
22
141 lbs
3 - 0 - 0 |
BJJ Purple Belt
Counter striker
Good chin |
|
BJJ Blue Belt
Solid Muay Thai
Very confident |
|
| |
|
Ladies and gentlemen. This fight is 3 rounds, in the featherweight division.
Introducing the fighter to my left, fighting out of the red corner.
With a record of
1 - 0 - 0, fighting out of Tokyo, Eddie Han!
And introducing the fighter to my right, fighting out of the blue corner.
With a record of
3 - 0 - 0, fighting out of Tokyo, Jorge Antonio!
The judges for this bout are Shirou Masuda, Yasuomi Hirokawa and Yukihiro Shimada.

The bell rings for round one and we are underway!
The fighters circling - Antonio throws out the jab but it was never going to land.
Antonio looks to land a left hand but Han moved out of range nicely.

Antonio drives through with a takedown into guard.

Han working for a triangle but Antonio defends it easily.
Han will need to keep those long limbs tucked in whilst he's on the ground, to prevent any submissions.
Han looking for submissions from the bottom here. Moving his hips around, possibly looking for an armbar.
Antonio wants to control from the top but Han keeps moving.
The fighters are tangled up in the ropes here. We might need a restart if the fighters can't break free themselves.
A big thud reverberates around the arena there as Antonio accidentally thumps the mat. Hopefully he's not broken his hand.
Han working for a triangle but Antonio defends it easily.
Antonio is looking to work some ground and pound but Han has wrist control.
Antonio wants to stand but Han is controlling his posture from full guard.

That's one minute gone in the round.
Han looking for a guillotine here but Antonio defends easily.
Han had isolated an arm as going for an omaplata. Antonio is defending the submission well but is in a very vulnerable position. Han Is leaning forward trying to finish the omaplata but decides to abandon it, and take Antonio's back instead.
Han looking to break Antonio's wrist control so he can sink in the choke. Antonio remaining controlled and patient though - he really has to keep calm otherwise Han will wrap this one up with the rear naked choke!
Han throwing lazy shots from the back mount that aren't doing any damage.
Antonio tries to escape the position - he's now mounted. Is that better or worse? Hard to tell!
We get told so often about how wrestlers don't like to be on their backs. Let's see if Antonio can do anything to dispel that myth.
Han is breathing heavily.
Antonio wants to use the ropes to get back to his feet here.
Han throwing sloppy strikes here. Perhaps if he tightened up his striking from such a dominant position, he'd be able to finish easier.
Antonio tries to lock up and control but Han gives him a forearm to the face and pushes him away.
Antonio really doesn't want to stay on the ground with Han. If he can't get it back to his feet, it's only a matter of time before he'll be tapping out.

That's two minutes gone in the round.
Antonio really trying hard to get back to half guard here.
Antonio throws a strike but has given up his back in the process.
Antonio is trying to break free.
Antonio controlling the position well but he knows he's in a bad position.
Han looking for the choke but no joy.
I really don't envy Antonio right now.
Han doesn't have the hooks in and Antonio manages to turn into his guard.
Antonio with a flurry of punches that miss.
Antonio is looking to work some ground and pound but Han has wrist control.
A big thud reverberates around the arena there as Antonio accidentally thumps the mat. Hopefully he's not broken his hand.
Han has thrown up a leg looking for a triangle. Antonio doesn't defend quickly enough and Han has managed to lock this one up! Can Antonio escape?! NO! He's tapping out! Damn, that was a quick submission - congrats to Han on a fantastic submission victory.
Ladies and gentlemen, after 3:04 of round 1, we have a winner by way of Submission (Triangle). Eddie Han!
|
|
|
|
|
|
|
|
|
|
|
|
|
|
|
|
|
|
|
|
|
|
|
| S |
C
A |
G |
S |
C
B |
G |
|
S |
C |
G |
|
energy
A | B |
|
hype
A | B |
|
pop
A | B |
|
mgr
A | B |
|
FIGHT
RATING
59% |
|
|
|
|
|
|
|
Undercard bout
|
|
|
|
Undercard bout
|
|
|
|
Undercard bout
|
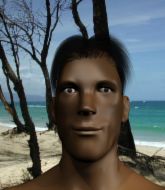
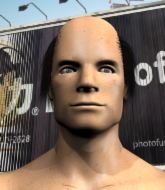
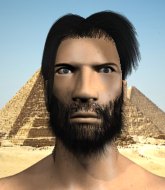
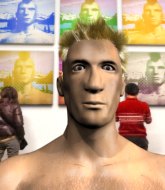
Coming up we have a light heavyweight MMA rules bout between Naozumi Akimoto (ranked 0 p4p, 0 weight class) and Brad Brown (ranked 0 p4p, 0 weight class). Akimoto comes to the ring accompanied by AudioMachine - Assassin. Brad Brown will no doubt be trying to keep this one on the feet, where he has a distinct advantage.
 |
|
 |
| 185 cm
22
205 lbs
1 - 0 - 0 |
|
185 cm
23
210 lbs
6 - 8 - 0 |
BJJ Purple Belt
Counter striker
Granite chin |
|
BJJ Blue Belt
Brawler
Granite chin |
|
| |
|
Ladies and gentlemen. This fight is 3 rounds, in the light heavyweight division.
Introducing the fighter to my left, fighting out of the red corner.
With a record of
1 - 0 - 0, fighting out of Tokyo, Naozumi Akimoto!
And introducing the fighter to my right, fighting out of the blue corner.
With a record of
6 - 8 - 0, fighting out of Tokyo, Brad Brown!
The judges for this bout are Yasuomi Hirokawa, Hirohito Nitta and Yukihiro Yamamoto.
The bell rings for round one and we are underway!
A slapping leg kick lands for Brown.
Brown scores with a punch to the gut of his opponent.
Brown looks to land a combination but Akimoto avoids it well.
Brown throws the kick towards the body but Akimoto avoids it.
Brown throws a series of punches but Akimoto moves out of range.
A clash of legs there as Akimoto blocks the low kick.
Brown misses with the combination.
A jab from Akimoto misses.
Brown swings and misses with a hook to the body.
Brown throws a wild combination but nothing lands.
Akimoto lands three nice shots there - that looked like it hurt!
Brown throws a solid leg kick but Akimoto takes the impact on his shin and smiles at Brown.
Brown dances in quickly and lands a nice inside leg kick on Akimoto. That did some damage!
We've seen a great period of action over the last minute or so - credit to both fighters for going all out!
Brown looks to land a combination. Akimoto sees it coming but can only parry a couple of the shots.

It looks like Naozumi Akimoto has been cut.
Akimoto is breathing heavily.
Brown just misses with a punch to the body.
Brown throws a head kick that misses and slips in the process. He scrambles back to his feet and the fighters circle.
That's one minute gone in the round.
Brown connects with a good right hand that stumbles Akimoto. Akimoto circles away out of range and recomposes himself.
Brown misses with a combination
and Akimoto counters with a good right hand that lands right on the jaw.
Brown throws a chopping leg kick but Akimoto manages to avoid taking any serious damage.
Akimoto throws a nice hook to the body that draws an oooh from the crowd.
Akimoto slips a straight right by Brown.
Akimoto fakes and then throws a beautiful body shot. Brown looks a bit winded and takes a step backwards to take a breath.
Brad Brown is looking to keep the fight on the feet at all costs.
Akimoto gets a takedown into half guard.
Brown is in trouble now - Akimoto has advanced to mount!
Akimoto looking for a guillotine from mount but Brown is having none of it.
The fighters are tangled up in the ropes here. We might need a restart if the fighters can't break free themselves.
Brown squirming around on the bottom, looking to escape.
That's two minutes gone in the round.
A nice elbow there by Akimoto.
Akimoto has been looking to land a fair amount of strikes on the ground. He might be looking to soften his opponent up in order to work for a submission.
Akimoto unloading with bombs!
Akimoto looking to finish Brown with some ground and pound. This is bad for Brown!

Akimoto stands up from mount. Strange move.
We've seen a great period of action over the last minute or so - credit to both fighters for going all out!
Brown misses with a telegraphed body shot
and Akimoto counters with a nice single leg takedown and he's in Brown's guard now.
Brown is looking to get back to his feet but can't, whilst Akimoto is controlling him.
Akimoto trying to control the position from guard on top but Brown is wriggling around, looking for whatever he can.
Brown is looking to stand back up but Akimoto counters by passing into half guard. Oops... bit sloppy there by Brown.
Brown is refusing to be controlled, as Akimoto sits in half guard.

That's three minutes gone in the round.
Akimoto is looking for a kimura but Brown is holding onto that half guard position, so it's hard for Akimoto to get the leverage.
Akimoto is working for a kimura but Brown is defending it quite comfortably.
The fighters are going at a pretty good pace and they're both starting to sweat now.
Brown tries to kick Akimoto off but Akimoto keeps his base steady and stays in half guard.

Neither fighter is doing enough for the referee's liking and he's decided to stand them back up.
Akimoto keeping his hands up high there, blocking the jab from Brown.
Akimoto shoots in from a long way out. He's driving through with the takedown attempt and he eventually gets it, landing in Brown's guard.
Akimoto wants to pass the guard but Brown is keeping the position.
Hammerfist, elbow! yells Akimoto's corner. There ya go! There ya go!
Brown is looking to stand up but Akimoto isn't so interested in that idea.

That's four minutes gone in the round.
Brown pushes Akimoto off and gets back to his feet.
Brown gets taken down but at least he's managed to land in guard.
Akimoto stands and steps away. Brown gets to his feet too and we're back to the striking game.
Brad Brown seems to be the more aggressive standup fighter in this bout.
Brown falls off balance throwing a combination
and Akimoto counters with a single leg into guard. Brown didn't expect that.
The crowd cheering loudly, showing their appreciation for the quality fight we're seeing here.
Brown wants to stand but Akimoto is controlling the position.
The crowd are going absolutely nuts as the round comes to an end - what a fantastic round of action!
Akimoto is trying to work a guillotine from the top, or something like that? Don't know how he thinks he's going to get a finish from there.
And thats the end of the round the fighters go back to their corners.
Naozumi Akimoto dominated that round.
The cut man is working on Naozumi Akimoto's cut.
The referee calls time. The cornermen exit stage left and we're back to business.

Brown misses with a double jab
and Akimoto counters with a takedown into full mount! That could mean trouble for Brown!
Brown tries to buck Akimoto off so he can stand up but Akimoto has got his back now - this could be big trouble! He's slapped on a rear naked choke that looks really tight! Brown falls backwards, slamming Akimoto to the mat but Akimoto holds on tight! Brown is forced to tap and this one is all over!
Ladies and gentlemen, after 0:28 of round 2, we have a winner by way of Submission (RNC). Naozumi Akimoto!
|
|
|
|
|
|
|
|
|
|
|
|
|
|
|
|
|
|
|
|
|
|
|
| S |
C
A |
G |
S |
C
B |
G |
|
S |
C |
G |
|
energy
A | B |
|
hype
A | B |
|
pop
A | B |
|
mgr
A | B |
|
FIGHT
RATING
100% |
|
|
|
|
|
|
|
Undercard bout
|
Coming up we have a heavyweight MMA rules bout between Alberto Sosa (ranked 0 p4p, 0 weight class) and Victor Gabriel Marcurius (ranked 0 p4p, 0 weight class). Marcurius has chosen Burn in Hell by Twisted Sister as his entrance music. Alberto Sosa has the better chin. Will he look to stand and bang today?
 |
|
 |
| 193 cm
19
266 lbs
0 - 2 - 0 |
|
196 cm
19
240 lbs
1 - 0 - 0 |
Dangerous GnP
Decent elbows
Good chin |
|
BJJ Blue Belt
Counter striker
Very confident |
|
| |
|
Ladies and gentlemen. This fight is 3 rounds, in the heavyweight division.
Introducing the fighter to my left, fighting out of the red corner.
With a record of
0 - 2 - 0, fighting out of Tokyo, Alberto Sosa!
And introducing the fighter to my right, fighting out of the blue corner.
With a record of
1 - 0 - 0, fighting out of Tokyo, Victor Gabriel Marcurius!
The judges for this bout are Yukihiro Shimada, Yasuomi Hirokawa and Taro Takaoka.
The bell rings for round one and we are underway!
Sosa smiles there as he lands a nice right hand right on the button.

Sosa moves into range and clinches up with Marcurius.
Marcurius has clasped his hands together around Sosa's back... aaand, he's got a takedown into side control. Nicely done.
Sosa is trying to escape and get back to his feet.
Marcurius stands up and we're back to a striking position.
Marcurius tries for a takedown but Sosa sees it coming a mile off and avoids it easily.
Marcurius closes the distance and gets a double leg, slamming Sosa to the mat! Sosa manages to get full guard.
Sosa wants to stand but Marcurius is controlling the position.
Sosa throws a couple of shots from the bottom but they don't land.
Sosa tries to strike from the bottom.
Sosa is trying to control the position but Marcurius postures up.
Sosa on his back here. We all know that wrestlers don't like being on their back so let's see if Sosa tries to get out of the position.
Marcurius thinks about going for a leg but decides against it, in order to maintain the position.
The fighters are trapped in the ropes so we're going to have a reposition here. The ref calls for a break and repositions the fighters in the center of the ring.
Marcurius forces his way into half guard.
Marcurius looks gassed!
Marcurius is looking to take a break and control but Sosa is keeping him honest, looking to work from the bottom.
That's one minute gone in the round.
Sosa is looking to regain full guard. Not this time though.
The referee decides to stand the fighters back up.
Sosa lands a jab to Marcurius's midsection.
Sosa stalks Marcurius and leaps in with a furious combination of punches. Uppercuts and crosses smash into Marcurius's face. Marcurius staggers backwards, shaken.
Marcurius walks straight into an uppercut. Luckily it didn't land flush.
Nice uppercut lands for Sosa. That snapped Marcurius's head back.
Marcurius takes a shot right to the liver - Bas would have been proud of that punch.
Marcurius circles away from the clinch attempt.
Sosa gets to the clinch - let's see what his plan is here.
Sosa wants to break the clinch but can't.
Sosa tries to break the clinch but Marcurius is controlling the position.
Marcurius can't get the takedown.
Sosa is looking to break free of the clinch but Marcurius has double underhooks.
Sosa is trying to work out of this bad position, with his back against the ropes.
Marcurius throws a knee to the head but misses.
Sosa wants to get back to striking at distance but Marcurius won't allow it.
Marcurius goes for a takedown attempt but Sosa pushes him away and we're back to fighting at a distance.
Alberto Sosa has stuffed three takedown attempts in the round now. That's going to take a lot out of Victor Gabriel Marcurius.
Sosa lands with a nice body punch.
That's two minutes gone in the round.
Sosa scores with a takedown into Marcurius's guard.
Sosa distracts Marcurius with his right hand and drops a big elbow with his other arm.
This is a great period of action - very entertaining stuff!
Sosa chips away with some ground and pound.
Sosa stopping the sweep attempt from Marcurius.
Sosa is sitting in guard, working some ground and pound.
Sosa stopping the sweep attempt from Marcurius.
Sosa has decided he wants to stand but the closed guard of Marcurius is proving hard to escape from.
Sosa landing with the ground and pound.
That's three minutes gone in the round.
The fighters are going at a pretty good pace and they're both starting to sweat now.
Marcurius looking for a guillotine here but Sosa defends easily.
Marcurius is working actively off his back, looking to secure an arm or perhaps work for a triangle.
Hammerfist, elbow! yells Sosa's corner. There ya go! There ya go!
Sosa working some strikes from top position.
Sosa knows he needs to get back to his feet asap. He's simply no match for Marcurius on the ground.
Marcurius working from the bottom, still in full guard. He's managed to get a loose triangle. Sosa doesn't seem to be doing much to defend here, obviously he feels comfortable in the position. Sosa manages to throw the legs off his shoulder and he's back into guard - no problem.
Sosa landing with the ground and pound.
That's four minutes gone in the round.
The crowd are getting on the fighters' backs, as the pace has dropped off in the last minute or so.
Sosa cracks Marcurius with a solid left hand.
Marcurius has his foot on Sosa's thigh. He's trying to push off and get in position for a triangle, I think. Sosa works his way back into a safe position though.
Sosa scoring with punches to the head and body.
Sosa postures up and scores with a shot to the body and a follow up elbow to the head.
Marcurius manages to escape and get back to his feet.
Sosa misses with a takedown
and Marcurius counters with a shoot takedown into half guard.
Sosa tries to strike from the bottom but it doesn't land.
Marcurius is trying to work for a kimura. He's got his hands clasped together - this could be trouble! No, Sosa has managed to free his arm - good work.
As the round comes to an end the crowd are showing their appreciation for a great round of action.
Sosa wants to get back to full guard.
Marcurius works his way into side control.
And thats the end of the round the fighters go back to their corners.
That was a close round but I would say that Alberto Sosa will probably get the nod.
That's time! Back to the action!
Marcurius looks for a takedown here. Will he get it? Sosa is fending him off so far but Marcurius persists. Nope, Sosa circles away and we're back to standing.
Sosa shoots in for a takedown. "Ole!" shouts Marcurius as he jumps to the side.
Sosa listening to his corner there, landing a nice uppercut.
Sosa with a poor takedown
and Marcurius counters with a takedown into full mount! That could mean trouble for Sosa!
Sosa taking shots to the head.
Sosa tries to hold on but Marcurius postures up.
Marcurius blocks Sosa's feeble attempts to strike from the bottom.
Sosa is working to get back to half guard.
Both fighters are absolutely exhausted here.
Sosa tries to lock up and control but Marcurius gives him a forearm to the face and pushes him away.
Sosa working to try and regain half guard.
That's one minute gone in the round.
Marcurius working away from the top, dropping strikes.
Sosa taking shots to the head.
Marcurius working for a submission here. He's tucked his head under his opponent's arm, looking for an arm triangle. He's hopped off into side control, looking to tighten the submission... is it going to work? He's given up a good position looking for it. Sosa looks OK. Oh, I spoke too soon, he's out! That must have been tighter than I thought! Excellent work there by Marcurius! Submission of the night perhaps?
Ladies and gentlemen, after 1:31 of round 2, we have a winner by way of Submission (Arm Triangle). Victor Gabriel Marcurius!
|
|
|
|
|
|
|
|
|
|
|
|
|
|
|
|
|
|
|
|
|
|
|
| S |
C
A |
G |
S |
C
B |
G |
|
S |
C |
G |
|
energy
A | B |
|
hype
A | B |
|
pop
A | B |
|
mgr
A | B |
|
FIGHT
RATING
100% |
|
|
|
|
|
|
|
Undercard bout
|
|
|
|
Undercard bout
|
Coming up we have a middleweight MMA rules bout between Take Kobayashi (ranked 0 p4p, 0 weight class) and Halo Shono (ranked 0 p4p, 0 weight class). Both fighters look fresh as a daisy as they make their way towards the ring.
 |
|
 |
| 182 cm
22
187 lbs
1 - 0 - 0 |
|
184 cm
20
184 lbs
1 - 1 - 0 |
BJJ Purple Belt
Counter striker
KO power |
|
BJJ Blue Belt
Brawler
Intelligent |
|
| |
|
Ladies and gentlemen. This fight is 3 rounds, in the middleweight division.
Introducing the fighter to my left, fighting out of the red corner.
With a record of
1 - 0 - 0, fighting out of Tokyo, Take Kobayashi!
And introducing the fighter to my right, fighting out of the blue corner.
With a record of
1 - 1 - 0, fighting out of Tokyo, Halo Shono!
The judges for this bout are Tatsuya Matsuyama, Shigeki Sano and Hirohito Nitta.
The bell rings for round one and we are underway!
Kobayashi throws a head kick that misses and slips in the process. He scrambles back to his feet and the fighters circle.
Shono takes the fight into the clinch.
Shono has Kobayashi pushed against the ropes.
Kobayashi tries for a takedown but Shono manages to get underhooks.
Both fighters working to control the clinch.
Kobayashi jumps guard but his hands slip and he falls flat on his back. Well, he's made himself look a right mug there, as Shono walks away with a smile on his face. Kobayashi gets slowly back to his feet and shakes his head.
Shono tries to clinch but Kobayashi is having none of it.
Kobayashi fails with a takedown attempt.
That's three failed takedown attempts in the round for Take Kobayashi. That's going to take a lot out of him.
Kobayashi shoots for a takedown but Shono saw that one coming a mile off and avoided it easily.
Kobayashi has Shono up against the ropes in a clinch.
Shono using the Thai clinch to land knees to the body.

Shono breaks the clinch.
Kobayashi lands a nice hook to Shono's body. Shono takes it in his stride and looks to land his own strikes.
Shono rushes forward with a series of wild hooks but Kobayashi moves out of range and avoids them all easily.
Shono tries to clinch but Kobayashi is having none of it.
Kobayashi tries to clinch but Shono is having none of it.
That's one minute gone in the round.
Shono tries to clinch
and Shono takes a counter punch right on the button for his troubles.
Shono avoids a low kick by using good footwork.
Shono tries to shoot in for a takedown. He's got hold of a leg but Kobayashi swivels and escapes.
Shono wants to clinch.
Shono darts in and lands a nice takedown into half guard.
Kobayashi gets full guard.
Kobayashi throwing his legs up looking for a triangle.
Kobayashi wants to sweep but no luck.
That's two minutes gone in the round.
Shono trying to control but Kobayashi is working from the bottom.
Shono really doesn't want to stay on the ground with Kobayashi. If he can't get it back to his feet, it's only a matter of time before he'll be tapping out.
Kobayashi is active off his back here, looking for submissions.
Kobayashi is breathing heavily.
That's three minutes gone in the round.
Shono controls the pace of the fight for a moment.
Kobayashi looking to sweep using the butterfly guard but Shono puts pay to that idea as he passes nicely into half guard.
Kobayashi makes his way to full guard. A much better position for Kobayashi.
Kobayashi trying to keep a closed guard but Shono is proving a slippery customer.
The fighters are trapped in the ropes so we're going to have a reposition here. The ref calls for a break and repositions the fighters in the center of the ring.
Kobayashi keeping moving, preventing Shono from controlling successfully.
That's four minutes gone in the round.
The crowd are getting on the fighters' backs, as the pace has dropped off in the last minute or so.
Kobayashi looking for a guillotine here but Shono defends easily.
Kobayashi is looking to sweep but instead, Shono has passed into half guard.
And thats the end of the round the fighters go back to their corners.
That was a close round but I would say that Take Kobayashi will probably get the nod.
The minute break is over - no more time for sponges and pep talks - back to the action!
Kobayashi circles away from the clinch attempt
and Kobayashi counters with a takedown into side control.
The fighters are tangled up in the ropes here. We might need a restart if the fighters can't break free themselves.
You can see the frustration on Shono's face, being in this tough position on the bottom.
Kobayashi lands a knee to the body and follows it up with some ground and pound to the head. That will wear Shono down.
Kobayashi fails to land a wild elbow strike.
Shono is positioning himself to get back to half guard.
Shono is breathing heavily.
Shono on the wrong end of some ground and pound.
That's one minute gone in the round.
Kobayashi wants to lay and pray for a moment but Shono keeps working.
Kobayashi content to control the pace. The referee will try and keep them active though.
Shono can't do much from the bottom here.
That's two minutes gone in the round.
The crowd are getting on the fighters' backs, as the pace has dropped off in the last minute or so.
Kobayashi is working for what looks like an arm triangle here. Shono is trying to escape and Kobayashi transitions quickly into an armbar! He's slapped it on tight and Shono is forced to tap! Nice work there by Kobayashi! Very nice indeed!
Ladies and gentlemen, after 2:28 of round 2, we have a winner by way of Submission (Armbar). Take Kobayashi!
|
|
|
|
|
|
|
|
|
|
|
|
|
|
|
|
|
|
|
|
|
|
|
| S |
C
A |
G |
S |
C
B |
G |
|
S |
C |
G |
|
energy
A | B |
|
hype
A | B |
|
pop
A | B |
|
mgr
A | B |
|
FIGHT
RATING
38% |
|
|
|
|
|
|
|
Undercard bout
|
|
|
|
Co-main event
|
Coming up we have a heavyweight MMA rules bout between Antonio Rodrigo Nogueira (ranked 0 p4p, 0 weight class) and John Johnson (ranked 0 p4p, 0 weight class). These two fighters really are very evenly matched on the feet - it will be fascinating to see who can assert themselves in that aspect of the fight.
 |
|
 |
| 225 cm
22
240 lbs
1 - 0 - 0 |
|
225 cm
18
270 lbs
0 - 1 - 0 |
BJJ Blue Belt
Brawler
Cuts easily |
|
Decent wrestler
Brawler
Prefers standup |
|
| |
|
Ladies and gentlemen. This fight is 3 rounds, in the heavyweight division.
Introducing the fighter to my left, fighting out of the red corner.
With a record of
1 - 0 - 0, fighting out of Tokyo, Antonio Rodrigo Nogueira!
And introducing the fighter to my right, fighting out of the blue corner.
With a record of
0 - 1 - 0, fighting out of Tokyo, John Johnson!
The judges for this bout are Shigeki Sano, Yasuomi Hirokawa and Shirou Masuda.
The bell rings for round one and we are underway!
Rodrigo Nogueira tries to clinch up.
Rodrigo Nogueira scores with a leg kick.
Johnson on the wrong end of a kick to the body.
Johnson showing good head movement there, avoiding the strikes from Rodrigo Nogueira.
Johnson takes a head kick and keeps coming.
Johnson looks to throw the jab but Rodrigo Nogueira is out of range.
Rodrigo Nogueira lands with a kick to the ribs.
Johnson takes a head kick and shrugs it off.
Wooooo! Give it up for these two warriors! They are putting on a show!
Rodrigo Nogueira dodges the punch combination from Johnson.
Rodrigo Nogueira fakes the leg kick and cracks Johnson in the body.
Johnson looks gassed!
Rodrigo Nogueira thows a body kick. Johnson tries to catch it but that hurt him.
John Johnson seems to be the more aggressive standup fighter in this bout.
Johnson rushes forward with a series of wild hooks but Rodrigo Nogueira moves out of range and avoids them all easily.
Johnson shakes his hands off, looking to compose himself, but takes a jab to the jaw whilst he does it.
Johnson looks up at the clock. Bad move! Rodrigo Nogueira lands a right hand from hell, dropping Johnson. Rodrigo Nogueira pounces and finishes the fight with a flurry of punches and elbows.
Ladies and gentlemen, after 0:41 of round 1, we have a winner by way of TKO (Strikes). Antonio Rodrigo Nogueira!
|
|
|
|
|
|
|
|
|
|
|
|
|
|
|
|
|
|
|
|
|
|
|
| S |
C
A |
G |
S |
C
B |
G |
|
S |
C |
G |
|
energy
A | B |
|
hype
A | B |
|
pop
A | B |
|
mgr
A | B |
|
FIGHT
RATING
100% |
|
|
|
|
|
|
|
Main event
|
|
|
|
|
|
|
