 |
FEVER 2 PBP Commentary |
Undercard bout
|
|
|
|
Undercard bout
|
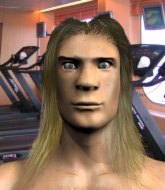
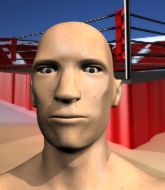
Coming up we have a heavyweight MMA rules bout between Heinrich Wolfe (ranked 0 p4p, 0 weight class) and Lo Aria (ranked 0 p4p, 0 weight class). Heinrich Wolfe has the edge in experience - let's see if he can make that count tonight.
 |
|
 |
| 195 cm
22
229 lbs
1 - 2 - 0 |
|
210 cm
18
220 lbs
0 - 1 - 0 |
BJJ Purple Belt
Basic striking
Intelligent |
|
BJJ White Belt
Good kicks
Solid chin |
|
| |
|
Ladies and gentlemen. This fight is 3 rounds, in the heavyweight division.
Introducing the fighter to my left, fighting out of the red corner.
With a record of
1 - 2 - 0, fighting out of Tokyo, Heinrich Wolfe!
And introducing the fighter to my right, fighting out of the blue corner.
With a record of
0 - 1 - 0, fighting out of Tokyo, Lo Aria!
The judges for this bout are Ren Mimura, Yasuomi Hirokawa and Yukihiro Yamamoto.

The bell rings for round one and we are underway!
Wolfe fails with a rather predictable takedown attempt.
Wolfe shoots in for a takedown. "I don't think so" says Aria as he avoids it easily.
Wolfe misses with a takedown attempt. He shot from a bit too far out.
That's three failed takedown attempts in the round for Heinrich Wolfe. That's going to take a lot out of him.
Wolfe shoots in but Aria avoids the takedown attempt easily.
Wolfe tries for a takedown but Aria sees it coming a mile off and avoids it easily.
Aria stuffs the takedown.
Aria throws a head kick that misses.
Wolfe blocks a head kick by Aria.
Wolfe misses with a takedown attempt. He shot from a bit too far out.
Wolfe shoots in but no luck this time.
Aria shoots in but no luck this time.
Lo Aria seems to be the more aggressive standup fighter in this bout.
Aria throws a head kick but Wolfe moves out of range.
Aria looks gassed!
Wolfe has a takedown stuffed.
Wolfe fails miserably with a takedown attempt.
Aria stuffs the takedown.

Aria takes the fight into the clinch.
Aria wants to break free but Wolfe has control.

That's one minute gone in the round.
Aria looking to throw knees to the head but Wolfe is blocking nicely.
Aria tries to break the clinch but Wolfe is controlling the position.
Aria wants to break the clinch but can't.
Aria wants to strike at distance but he can't break free of the clinch.
Aria can't break the clinch.

Aria escapes the clinch and we're back to striking.
Aria keeps the fight standing with a nice sprawl.

Wolfe feints and as Aria raises his hands in defense, Wolfe changes levels and drives through with a takedown into guard.
Wolfe advances to half guard.

Wolfe looking for a kimura but he'll have to free his other leg if he wants to finish that. Perhaps he's just using it as a distraction technique.
The fighters are pressed up against the cage, both looking to find a bit of space to work.
Aria preventing any damage for now, controlling his opponent's head.

That's two minutes gone in the round.
Aria wants to get back to his feet.
Aria tries to get to full guard but Wolfe has control of the leg.
Wolfe wants to pass to mount but Aria is defending the position.
Wolfe is looking for a kimura. It's going to be difficult to finish that from half guard though and Aria defends it well.
Wolfe prevents Aria from improving his position.
Wolfe stops Aria from getting back to his feet.

That's three minutes gone in the round.
Wolfe trying to control the action but Aria is working from the bottom.

The referee decides to stand the fighters back up.
Wolfe shoots in from a long way out. He's driving through with the takedown attempt and he eventually gets it, landing in Aria's guard.
Wolfe missing there with some ground and pound from the guard.
Wolfe looking to pass the guard.
Wolfe stops Aria from standing up.
Wolfe wants to control from the top but Aria keeps moving.
Aria really doesn't want to stay on the ground with Wolfe. If he can't get it back to his feet, it's only a matter of time before he'll be tapping out.
The fighters are starting to perspire pretty heavily.
Aria trying to keep a closed guard but Wolfe is proving a slippery customer.
Wolfe is looking to work some ground and pound but Aria has wrist control.
The ref warns both fighters not to hold the cage as they work up against the meshing.

That's four minutes gone in the round.
A lull in the action here being met with boos from the crowd.
Aria is looking to get back to his feet but can't, whilst Wolfe is controlling him.
Well, the referee has seen enough. Neither fighter is active enough on the ground so he's stood them back up.
Wolfe shoots and misses
and Aria counters with a nice single leg takedown and he's in Wolfe's guard now.
Wolfe is working an open guard here, looking to improve his position. No doubt that will leave him open to counters but at least he's being more offensive.
Wolfe manages to sweep nicely, so he's now on top. Aria manages to get himself to full guard.
Wolfe trying to control the position from guard on top but Aria is wriggling around, looking for whatever he can.
Aria keeping full guard, as Wolfe tries to pass.
And thats the end of the round the fighters go back to their corners.
A close round but Lo Aria will probably get the nod.
The referee calls time. The cornermen exit stage left and we're back to business.

Wolfe shoots in but doesn't get the takedown
and Aria counters with a nice double leg into guard.
Wolfe keeping moving, preventing Aria from controlling successfully.
Wolfe is trying to control the position from the bottom.
Wolfe looking for submissions off his back, moving his hips, looking for an opening.
Wolfe might be looking to lock onto one of his opponent's long limbs for a submission, whilst we're on the ground.
Wolfe is looking for a triangle but Aria pushes his legs off easily.
The crowd are loving this. Great action here.
Wolfe has managed to work for a loose triangle. I think Aria should be able to defend this one pretty easily though. Oh, Wolfe has tightened it up now! Aria should have reacted faster there - he's in big trouble and yes, he's tapped out! This one is all over!
Ladies and gentlemen, after 0:58 of round 2, we have a winner by way of Submission (Triangle). Heinrich Wolfe!
|
|
|
|
|
|
|
|
|
|
|
|
|
|
|
|
|
|
|
|
|
|
|
| S |
C
A |
G |
S |
C
B |
G |
|
S |
C |
G |
|
energy
A | B |
|
hype
A | B |
|
pop
A | B |
|
mgr
A | B |
|
FIGHT
RATING
94% |
|
|
|
|
|
|
|
Undercard bout
|
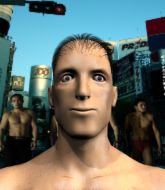
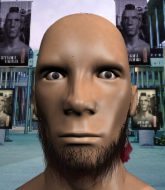
Coming up we have a heavyweight MMA rules bout between Victor Karmin (ranked 0 p4p, 0 weight class) and MuayThaiAndBoxing Trainer (ranked 0 p4p, 0 weight class). Karmin's ring entrance music is that housewives' favourite, Eyes of the World. The atmosphere really building for this one as we go over to our ring announcer for the fighter introductions!
 |
|
 |
| 190 cm
22
225 lbs
0 - 1 - 0 |
|
185 cm
22
220 lbs
0 - 2 - 0 |
BJJ Blue Belt
Brawler
Granite chin |
|
BJJ White Belt
Good kicks
Very confident |
|
| |
|
Ladies and gentlemen. This fight is 3 rounds, in the heavyweight division.
Introducing the fighter to my left, fighting out of the red corner.
With a record of
0 - 1 - 0, fighting out of Tokyo, Victor Karmin!
And introducing the fighter to my right, fighting out of the blue corner.
With a record of
0 - 2 - 0, fighting out of Tokyo, MuayThaiAndBoxing Trainer!
The judges for this bout are Kenichi Hosakawa, Yasuomi Hirokawa and Shigeki Sano.
The bell rings for round one and we are underway!
Trainer is looking to clinch.
Karmin tries to clinch there but Trainer circles away.
Trainer tries to clinch
and Karmin counters with a nice shoot takedown that brings the fighters to the ground.
Trainer looks gassed!
Karmin is in close to Trainer's body, working some short punches and elbows.
Karmin wants to control from the top but Trainer keeps moving.
Karmin landing with the ground and pound.
Karmin advances position into side control!
Karmin is looking to take a break and control but Trainer is keeping him honest, looking to work from the bottom.

Karmin decides to stand back up.
Karmin clinches up with Trainer and pushes him back against the cage.
The crowd cheering loudly, showing their appreciation for the quality fight we're seeing here.
Trainer breaks the clinch and we return to the middle of the mat.
Karmin closes the distance and clinches.
A nice right hand lands inside from Karmin.
Trainer escapes the clinch and we're back to striking.
That's one minute gone in the round.
Karmin misses with a few strikes there.
MuayThaiAndBoxing Trainer seems to be the more aggressive standup fighter in this bout.
Karmin clinches.
Karmin throws a vicious knee straight up the middle but Trainer blocks it with crossed arms.
Karmin breaks the clinch.
Karmin moves into the clinch successfully.
Karmin turns his hips and lands a very nice judo throw into side control!
Trainer really doesn't want to stay on the ground with Karmin. If he can't get it back to his feet, it's only a matter of time before he'll be tapping out.
Karmin happy to just control the position for now.
Karmin has hold of Trainer's arm. He's looking for a kimura. Trainer seems comfortable defending it but Karmin has shifted his position slighty and is cranking on the arm! Trainer is real pain and he's forced to tap out! Trainer is disgusted with himself for not defending it better but Karmin couldn't care less - he's delighted!
Ladies and gentlemen, after 1:25 of round 1, we have a winner by way of Submission (Kimura). Victor Karmin!
|
|
|
|
|
|
|
|
|
|
|
|
|
|
|
|
|
|
|
|
|
|
|
| S |
C
A |
G |
S |
C
B |
G |
|
S |
C |
G |
|
energy
A | B |
|
hype
A | B |
|
pop
A | B |
|
mgr
A | B |
|
FIGHT
RATING
86% |
|
|
|
|
|
|
|
Undercard bout
|
Coming up we have a middleweight MMA rules bout between Jun Sugai (ranked 0 p4p, 0 weight class) and Bay Mai (ranked 0 p4p, 0 weight class). Sugai's ring entrance music is that housewives' favourite, 3 am. Over to our ring announcer for the fighter introductions!
 |
|
 |
| 185 cm
20
183 lbs
0 - 0 - 0 |
|
178 cm
18
175 lbs
0 - 1 - 0 |
BJJ Blue Belt
Counter striker
Big heart |
|
BJJ Blue Belt
Counter striker
Likes ground |
|
| |
|
Ladies and gentlemen. This fight is 3 rounds, in the middleweight division.
Introducing the fighter to my left, fighting out of the red corner.
With a record of
0 - 0 - 0, fighting out of Tokyo, Jun Sugai!
And introducing the fighter to my right, fighting out of the blue corner.
With a record of
0 - 1 - 0, fighting out of Tokyo, Bay Mai!
The judges for this bout are Yukihiro Yamamoto, Taro Takaoka and Shirou Masuda.
The bell rings for round one and we are underway!
Sugai stuffs the takedown attempt from Mai. Mai gets slowly back to his feet.
Mai fails to land the takedown.
Mai is looking to take this fight into the clinch.
Mai darts in and lands a nice takedown into half guard.
Sugai is refusing to be controlled, as Mai sits in half guard.
Sugai looking for submissions from an awkward position here.
Mai tries to stand but his hand is stuck under Sugai.
That's one minute gone in the round.
Mai wants to work for an arm triangle but Sugai is really keeping half guard well and defending the submission attempt.
Mai wants to stand up but Sugai has a hold of him and won't allow it.
Mai wants to pass to mount but Sugai is defending the position.
The fighters are pressed up against the cage, both looking to find a bit of space to work.
Mai seems very keen to just sit and control from half guard but Sugai does not like that idea so much and is remaining active off his back.
Sugai trying to hold on to Mai's head to control him but Mai postures up.
It looks like we're going to have a standup here. Neither fight is doing enough on the ground.
Mai throws a combination but it was largely blocked by Sugai.
Sugai scores a trip takedown into side control. Nice.
That's two minutes gone in the round.
Mai gives up the full mount - oops, sloppy defensive grappling there!
Mai tries to control the position but Sugai now has his back.
The ref warns both fighters not to hold the cage as they work up against the meshing.
Mai wants to get back to his feet.
Mai looks gassed!
Sugai trying desperately to keep hold of the dominant position.
Sugai patiently working for the choke. Which fighter will keep their nerve here?
Mai looking to control the position.
Sugai looking for the choke but no joy.
Mai trying to control but not successfully.
That's three minutes gone in the round.
Mai controlling the position well but he knows he's in a bad position.
Mai fending off the submission attempt from Sugai.
Mai manages to reverse the position and now he's in Sugai's guard. Nice work there by Mai.
Mai seems content to control from guard here. He's going to have to remain active though if he doesn't want to get stood back up.
The fighters are starting to get a bit slippery now, which will make submissions a bit more difficult.
Mai stands up from Sugai's guard - Mai perhaps looking for a knockout.
That's four minutes gone in the round.
Sugai tries for a takedown but Mai circles away easily
and Mai counters with a shoot takedown into half guard.
Sugai is looking to get back to full guard here but Mai has managed to pass to side control instead.
Sugai tries to get back to half guard but can't.
Sugai wants to hold on but Mai pushes him away.
Sugai is trying to escape the mount.
Sugai is working hard here to advance position.
Sugai tries to hold on but Mai pushes him away.
Mai tries to control but Sugai wriggling away.
And thats the end of the round the fighters go back to their corners.
Bay Mai dominated that round.
Well, the break between rounds is over. Let's get back to the scrappin!
Sugai gets his takedown attempt stuffed easily
so Mai counters with a double leg into guard. Good agility.
Mai passes easily into side control. Nice work.
Mai wants to lay and pray for a moment but Sugai keeps working.
Mai creates some space and throws a big elbow, but Sugai sees it coming and moves his head just enough to avoid the strike.
Sugai struggling a bit here.
Sugai is trying to get back to half guard.
Bay Mai has got the better of the ground game so far.
Both fighters are absolutely exhausted here.
Mai decides to stand up, so the ref orders Sugai to his feet.
Sugai shoots and misses
and Mai counters with a kick to the head that grazes his opponent. Sugai is lucky that one didn't land flush.
Mai scores with a three punch combo!
That's one minute gone in the round.
Mai tries to bum rush Sugai with a series of wild strikes but Sugai uses good footwork to avoid the assault.
Sugai shoots in but doesn't get the takedown
and Mai counters with a big head kick but Sugai shrugs it off.
That's three failed takedown attempts in the round for Jun Sugai. That's going to take a lot out of him.
Sugai gets his takedown attempt stuffed easily
and Mai counters with a leg kick that reverborates around the arena.
Mai scores with a punch to the head.
Mai throws a monster uppercut resembling something out of street fighter but it doesn't land.
Sugai scores with a takedown into Mai's guard.
Sugai forces his way into half guard.
That's two minutes gone in the round.
Mai is not content to let Sugai control the position.
Sugai is trying to work for a kimura. He's got his hands clasped together - this could be trouble! No, Mai has managed to free his arm - good work.
Mai trying to hold on to Sugai's head to control him but Sugai postures up.
Mai is in trouble now - Sugai has advanced to mount!
Mai tries to lock up and control but Sugai gives him a forearm to the face and pushes him away.
Sugai working for a submission but Mai is keeping him at bay.
Mai tries to lock up and control but Sugai gives him a forearm to the face and pushes him away.
That's three minutes gone in the round.
Mai has given up his back.
Mai showing good submission defense here.
Mai is trying to stand back up.
Sugai tries to keep control of the position but Mai is staying busy.
Mai showing good submission defense here.
Mai rolls and manages to get back to half guard. Nicely done.
That's four minutes gone in the round.
Sugai wants to control but Mai is keeping him busy.
Sugai is trying to work for a kimura but Mai is defending well.
Sugai prevents Mai from standing back up.
Mai has no desire to be mounted, so is trying to control. Sugai is working away from the top position though.
The referee decides to stand the fighters back up.
Sugai darts in and lands a nice takedown into half guard.
Sugai is looking for a kimura. It's going to be difficult to finish that from half guard though and Mai defends it well.
The crowd applaud the fighters efforts here as the round comes to an end.
Mai trying to control here.
And thats the end of the round the fighters go back to their corners.
A close second round but Bay Mai will probably get the nod - 10:9.
That's the end of the interval. I'm sure that seemed a lot quicker than a minute for our two fighters! Back to the action. This is the final round!

Sugai doesn't succeed with the takedown
and Mai counters with a nice body kick.
Mai throws a right and a left that Sugai avoids nicely.
Mai shoots in and bounces Sugai off the cage to secure the takedown into guard.
Mai trying to control but Sugai is working from the bottom.
Mai trying to land body shots but he keeps hitting the mat.
Both fighters are breathing heavily.
Mai pressing down on his opponent's thigh, looking to pass guard. Sugai is keeping the position for now.
Mai looking to sit in guard and control but Sugai gets the butterfly guard and sweeps. He's now in the guard on the top.
Mai wriggles free and stands up.
That's one minute gone in the round.
Mai looks for a takedown. He's got it. We're now in half guard.
Sugai regains full guard. Nicely done.
Sugai keeping moving, preventing Mai from controlling successfully.
Sugai controls Mai momentarily but Mai frees himself.
Sugai is active off his back here, looking for submissions.
Sugai looking to control.
That's two minutes gone in the round.
Mai scores with a decent looking elbow strike.
Mai avoids a guillotine attempt easily.
Mai controls the pace of the fight for a moment.
Mai gets to his feet - Sugai follows without any prompting.
Mai throws a nice head kick!
Sugai fails with the takedown
and Mai counters with a three punch combo that has Sugai backing up. Sugai nods at Mai to acknowledge the strikes.
That's three minutes gone in the round.
Sugai tries for a takedown but Mai circles away easily
and Mai cracks him with a counter punch right on the button.
That's three failed takedown attempts in the round for Jun Sugai. That's going to take a lot out of him.
Sugai gets his takedown attempt stuffed easily
and Mai decides to take the opportunity to score a takedown. He's landed in Sugai's guard.
Sugai keeping moving, preventing Mai from controlling successfully.
Sugai manages to sweep nicely, so he's now on top. Mai manages to get himself to full guard.
Sugai drops back for a leg! It's a sloppy attempt though and Sugai jumps back into guard quickly, to retain the dominant position.
Mai looking to sweep here. No luck so far.
Mai keeping moving, preventing Sugai from controlling successfully.
That's four minutes gone in the round.
Sugai advances to half guard.
Mai tries to roll over but Sugai keeps him under control.
Sugai is working for a submission of some sort.
Mai is trying to stand back up but Sugai is controlling him
Mai moves his hips nicely and gets into full guard.
Sugai won't allow Mai to get back to his feet.
The crowd applaud the fighters efforts here as the round comes to an end.
Mai throwing strikes off his back to little effect.
Mai scrambles and gets back to his feet.
Jun Sugai has stepped it up - he knows he needs a finish here!
Sugai looking to land some kicks to the body here.
And that's the end of the fight!
Bay Mai comfortably won the final round on my scorecard.
Well Mai has outworked and out performed his opponent in all aspects of the game today. He was simply too good and the decision should be no more than a formality. Over to the ring announcer for the scorecards.
Ladies and gentlemen, after 3 rounds of action, we go to the scorecards for a decision.
Judge Yukihiro Yamamoto scores the fight 28:30
Judge Taro Takaoka scores the fight 27:30
Judge Shirou Masuda scores the fight 27:30
In favor of your winner, by unanimous decision... Bay Mai!
|
|
|
|
|
|
|
|
|
|
|
|
|
|
|
|
|
|
|
|
|
|
|
| S |
C
A |
G |
S |
C
B |
G |
|
S |
C |
G |
|
energy
A | B |
|
hype
A | B |
|
pop
A | B |
|
mgr
A | B |
|
FIGHT
RATING
53% |
|
|
|
|
|
|
|
Undercard bout
|
|
|
|
Undercard bout
|
|
|
|
Co-main event
|
Coming up we have a heavyweight MMA rules bout between BJJAndWrestling Trainer (ranked 0 p4p, 0 weight class) and Kenjiro Maeda (ranked 0 p4p, 0 weight class). Kenjiro Maeda will no doubt be trying to keep this one on the feet, where he has a distinct advantage.
 |
|
 |
| 185 cm
22
220 lbs
0 - 1 - 0 |
|
186 cm
20
265 lbs
1 - 2 - 0 |
BJJ Purple Belt
Brawler
KO power |
|
BJJ White Belt
Counter striker
Tends to cut |
|
| |
|
Ladies and gentlemen. This fight is 3 rounds, in the heavyweight division.
Introducing the fighter to my left, fighting out of the red corner.
With a record of
0 - 1 - 0, fighting out of Tokyo, BJJAndWrestling Trainer!
And introducing the fighter to my right, fighting out of the blue corner.
With a record of
1 - 2 - 0, fighting out of Tokyo, Kenjiro Maeda!
The judges for this bout are Hirohito Nitta, Yuuki Gou and Shigeki Fujiwara.
The bell rings for round one and we are underway!
Trainer will have to do better than that with his takedown attempts.
Trainer misses with a takedown attempt - Maeda sprawls well and throws a nice strike on the way out which just misses.
Trainer gets the takedown into side control.
Trainer landing with strikes to the head and body from side control.
Maeda gives up the full mount - oops, sloppy defensive grappling there!
Trainer with the ground and pound from mount.
Trainer landing punches.
Trainer lands a big shot there that rocks Maeda but he's holding on and managing to survive for now.
Maeda really doesn't want to stay on the ground with Trainer. If he can't get it back to his feet, it's only a matter of time before he'll be tapping out.
Trainer scores with a couple of good head shots there.
Trainer is in the full mount, landing strikes.
We're hearing some news coming in from back stage. It's official - Maeda has eaten all the pies!
Maeda trying desperately to get to his feet.
Trainer landing shots from mount.
Trainer is still in mount, landing shots to his trapped opponent. Maeda can't stay in a position like this for much longer.
Maeda squirming around on the bottom, looking to escape.
The ref warns both fighters not to hold the cage as they work up against the meshing.
Maeda looks gassed!
Trainer looking to finish Maeda with some ground and pound. This is bad for Maeda!
That's one minute gone in the round.
Trainer scoring with some good ground and pound from mount here. Will he manage to finish Maeda?
Trainer lands with some strikes.
Trainer working away from the top, dropping strikes.
Trainer putting on the heat here with some good ground and pound!
Trainer with good strikes from the mount here!
Trainer has been looking to land a fair amount of strikes on the ground. He might be looking to soften his opponent up in order to work for a submission.
Trainer scoring with strikes but Maeda is staying in there.
Maeda is writhing around trying to get back to his feet.
Trainer lands a heavy elbow.
The crowd growing excited in anticipation of a finish here! Right on cue, Trainer cracks his opponent with a massive right hand that draws loud cheers!
Trainer unloading with bombs!
Trainer fakes a shot to the body and cracks his opponent in the head. Nice ground and pound there!
Trainer scoring with strikes but Maeda is staying in there.
Trainer putting on the heat here with some good ground and pound!
Maeda is not a happy chappy
he wants out of there.
Maeda can't escape the position.
Trainer won't let Maeda get back to his feet... He wants to keep the fight where it is for now.
Maeda working to try and regain half guard.
That's two minutes gone in the round.
Trainer landing punches.
Trainer goes for an armbar but he's fallen flat on his backside there and now Maeda is on top in guard.
Maeda tries to free his leg and advance position but Trainer is retaining full guard.
Maeda stopping the sweep attempt from Trainer.
Trainer looking for submissions from the bottom here. Moving his hips around, possibly looking for an armbar.
Trainer looking to hit a scissor sweep but Maeda is one step ahead there.
Trainer has a loose triangle. He'll be looking to tighten that up but Maeda can see exactly what he's planning and manages to posture up and free himself.
This is a great period of action - very entertaining stuff!
Trainer is working the butterfly guard. He manages to land a nice scissor sweep and is now in half guard on the top. Nice move.
That's three minutes gone in the round.
Trainer wants to pass the guard but Maeda is defending well.
Trainer takes advantage of the dominant position to land a couple of big hammer fists.
Trainer working over Maeda with some ground and pound. Maeda looks like he wants out of this position, which is understandable.
Maeda has hold of Trainer's hands but Trainer slips his arm to the side and lands an elbow.
Trainer works his way into side control.
Maeda is working to avoid the ground and pound but Trainer connects with a decent elbow.
Trainer lands some shots froms side control.
Trainer working the body and head with strikes.
Trainer lands a decent elbow from side control.
Trainer scores with a couple of short elbows.
Sloppy strikes there by Trainer.
That's four minutes gone in the round.
Maeda avoids any damage from the ground and pound of Trainer.
Trainer is chipping away with strikes.
Maeda is trying to escape and get back to his feet.
Maeda is trying to control Trainer's posture but Trainer avoids it.
Trainer scores with a couple of nice shots to the head there. The referee takes a look at Maeda to see if he's OK.
Trainer tries to advance to mount but Maeda denies him.
The referee decides to stand the fighters back up.
Trainer shoots in and drives through. Maeda sprawls well.
That's three failed takedown attempts in the round for BJJAndWrestling Trainer. That's going to take a lot out of him.
A left and a right from Maeda both land. Nice combination.

It looks like BJJAndWrestling Trainer has been cut.
As the round comes to an end the crowd are showing their appreciation for a great round of action.
Maeda Rushes Trainer and starts throwing punches like they are going out of style! Trainer is up against the cage and has nowhere to go. Maeda Piles on the pressure and Trainer crumples to the floor! This one is all over!
Ladies and gentlemen, after 4:52 of round 1, we have a winner by way of TKO (Strikes). Kenjiro Maeda!
|
|
|
|
|
|
|
|
|
|
|
|
|
|
|
|
|
|
|
|
|
|
|
| S |
C
A |
G |
S |
C
B |
G |
|
S |
C |
G |
|
energy
A | B |
|
hype
A | B |
|
pop
A | B |
|
mgr
A | B |
|
FIGHT
RATING
58% |
|
|
|
|
|
|
|
Main event
|
|
|
|
|
|
|
